Creating New Invoices
This topic describes how to create a new invoice. The New Invoice screen may have different role-related fields based on the login credentials and user role.
Complete the following steps to create new invoices:
L og in to the ONE system.
Click Menus/Favs > Financials > New Invoice.
The included page could not be found.
The New Invoice screen appears.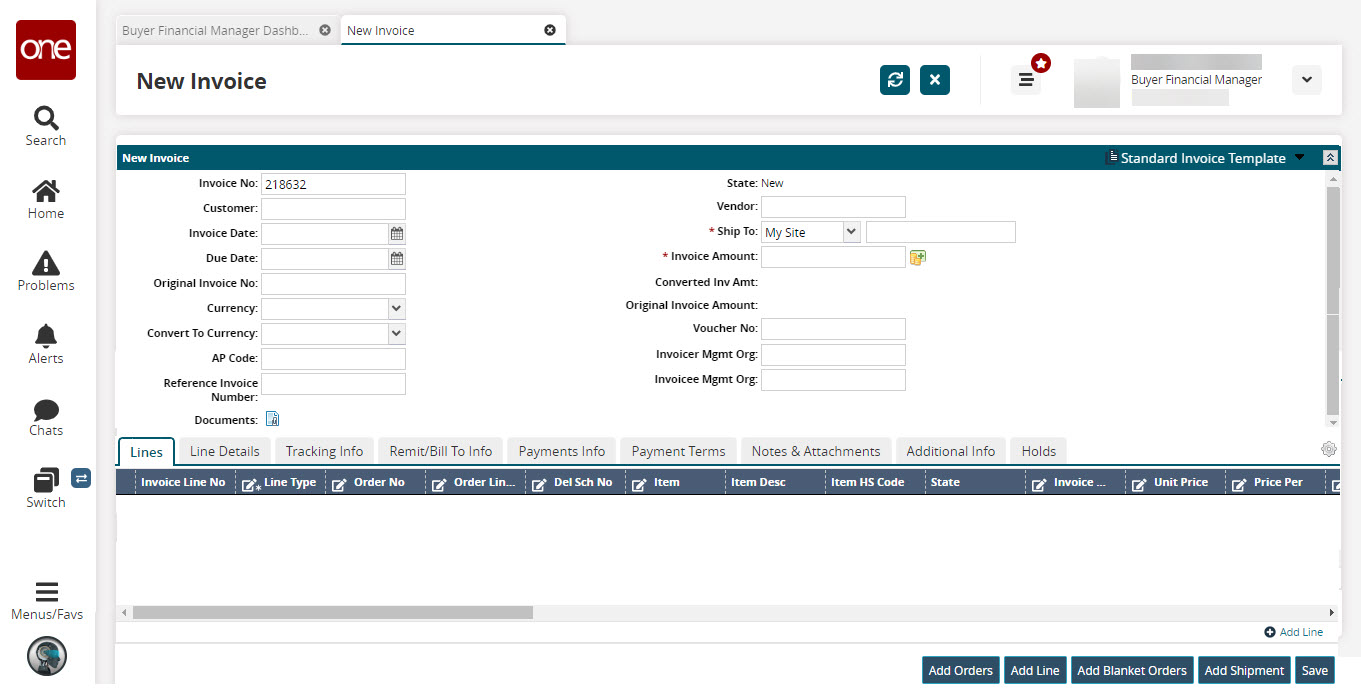
Fill out the following fields. Fields with an asterisk ( * ) are required.
Field
Description
* Invoice No
Type an invoice number.
* Invoice Date
Click the Calendar icon to specify the invoicing date.
Due Date
Click the Calendar icon to specify the invoice due date.
* Currency
Select the base currency for the new invoice.
Convert to Currency
Select a currency to convert the invoice amount.
AP Code
Enter the code for the specific payment terms, if applicable.
Reference Invoice Number
Enter a reference invoice number.
State
This field auto-populates the current state of the invoice.
Vendor
Enter the first few letters of the vendor name and select from the available options.
* Ship To
Select an option from the dropdown menu:
My Site: Select an existing site saved in the system.
Address: Allows users to enter new addresses in the text box.
Ext Ship To Site Name
This field appears when Address is selected in the Ship To field. Enter a reference name for the entered address.
* Invoice Amount
Enter the total invoice amount or click the + icon to calculate the amount based on the specified information.
Converted Inv Amount
This field auto-populates the converted invoice amount where applicable.
Original Invoice Amount
This field auto-populates the original invoice amount where applicable.
Voucher No
This field auto-populates a voucher number.
To add a line, click the Add Line button at the bottom of the screen.
The Add Line popup window displays.Please note that after one line has been added to the invoice, an Add Line link displays at the bottom of the Line tab.
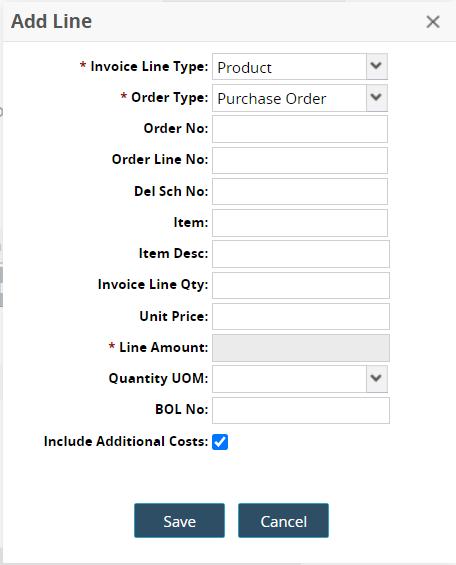
Fill out the following fields. Fields with an asterisk ( * ) are required.
Field
Description
* Invoice Line Type
Select the invoice line type from the dropdown menu.
* Order Type
Select the order type from the dropdown menu.
Order No
Enter the order number
Order Line No
Enter the order line number.
Del Sch No
Enter the delivery schedule number.
Item
Enter the item's name.
Item Desc
Enter the item description.
Item HS Code
The value is auto-populated based on the item, the Ship To country, and the Ship From country.
Invoice Line Qty
Enter the quantity of the invoice line.
Unit Price
Enter the price per unit.
* Line Amount
Enter the line amount.
Quantity UOM
Enter the quantity of the selected unit of measure.
BOL No
Enter the Bill of Lading (BOL) number.
Include Additional Costs
Check the box to include additional costs with this line item.
Click the Save button.
The line item table on the Lines tab updates.Users can add more information to the invoice using the following tabs; all fields on the tabs are optional and may vary based on the invoice details.
• Line Details
• Tracking Info
• Remit To/Bill To Info (The Bill To Address field on this tab cannot be edited. It is auto-populated from the address defined for the invoicee management organization. If the Bill To address is not specified for the invoicee management organization, the field is populated from the order. If an order is not linked to the invoice, the Bill To Address field is left blank.)
• Payment Info
• Payment Terms
• Notes & Attachments
• Additional Info
• HoldsClick the Save button.
Adding Blanket Lines to an Invoice
To add a blanket order as a line item to the invoice, click the Add Blanket Orders button at the bottom of the screen.
The Add Blanket Lines popup window displays.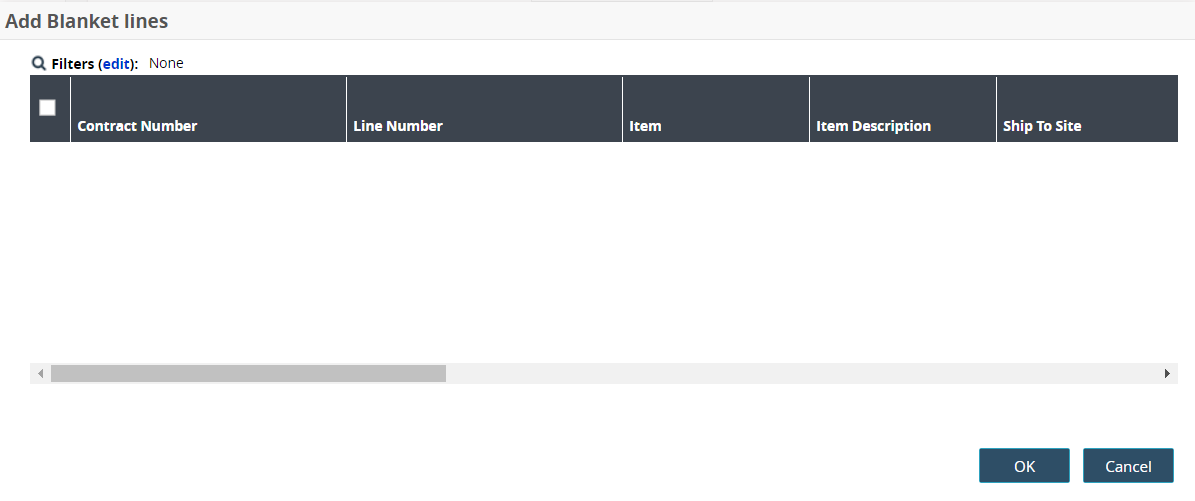
Click the Filters (edit) link to search for blanket orders.
Check the box to select a blanket order(s).
Click the OK button.
The invoice line tab updates.To add a shipment to this invoice as a line item, click the Add Shipment button at the bottom of the screen.
The Add Shipment Lines popup window displays.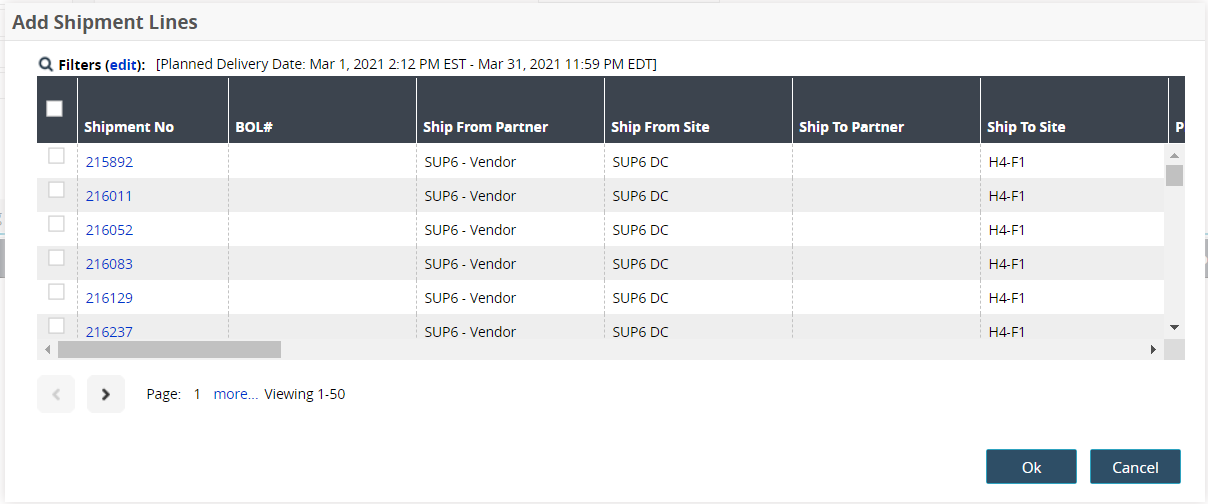
Click the checkbox to select a shipment(s).
Click the OK button.
The line items table updates on the Lines tab.