Creating Putaway Lists
Complete the following steps to create a putaway list:
L og in to the ONE system.
Click Menus/Favs > Warehouse Mgmt >Putaway List. In the NEO UI, users can click on the Menus/Favs icon on the left sidebar and type in the name of the screen in the menu search bar. For more information, see "Using the Menu Search Bar."
The Putaway List screen appears.In the Explorer pane on the left, select the site where the putaway list will be created.
The Putaway List report for the selected site appears to the right of the explorer pane.Click the Create Putaway List button.
The Create Putaway List screen appears.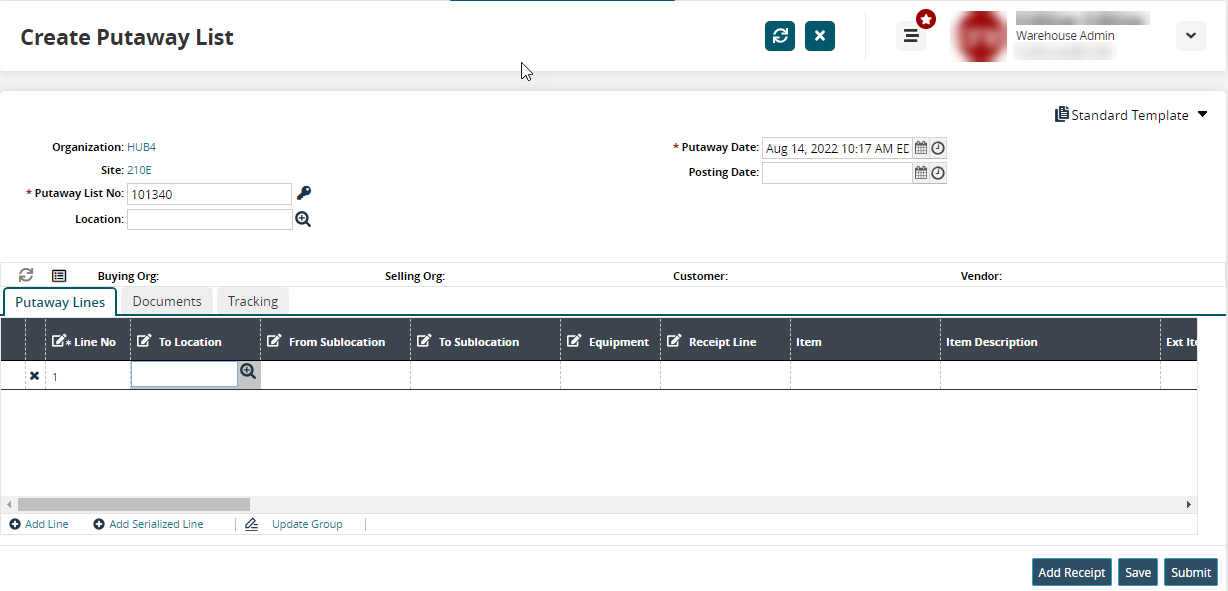
The * Putaway List No field is auto-populated. Click the key icon to generate a new putaway list number. Fields with an asterisk ( * ) are required.
In the Location field, select a location for the new putaway list using the picker tool.
The * Putaway List Date field is auto-populated with the current date and time. Click the calendar and clock icons to select another date and time.
Use the calendar and clock icons to select the date and time for the Posting Date.
Adding Putaway Lines
You can add putaway lines and serialized lines to the putaway list.
Complete the following steps to create a putaway list:
Click Add Line or Add Serialized Line to add lines to the putaway list.
Fill out the following fields. Fields with an asterisk ( * ) are required.
Note
The table below describes only those fields that can be updated by the user. All other fields are auto-populated by the system.
Field
Description
*Line No
Line numbers are auto-generated but can be edited. Enter a unique line number.
To Location
Start typing the location name or use the picker tool to select one. If blank, the system displays an alert and also displays the total number of lines with empty location to warn the user.
From Sublocation
Start typing the origin sublocation or use the picker tool to select one.
To Sublocation
Start typing the destination sublocation or use the picker tool to select one.
Equipment
Start typing the equipment name or use the picker tool to select one.
Receipt Line
Start typing the receipt line number or use the picker tool to select one.
Qty
Enter the quantity and select UOM from the dropdown list.
Reason Code
Start typing the reason code or use the picker tool to select one.
External Doc Number
Enter an external documentation number.
Off Network Ref No
Enter the reference number for the external system.
Adding Receipts
Complete the following steps to add receipts to the putaway list:
Click the Add Receipt button.
The Add Receipt List pop-up window appears.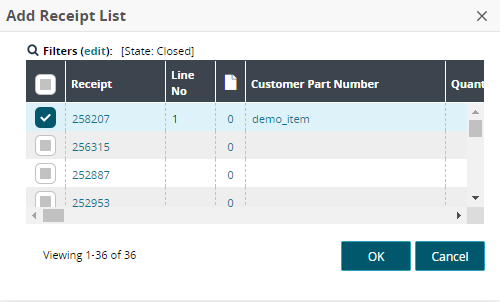
Select one or more receipts to add, and click OK.
Click Save to save changes, or click Submit to submit.
If there are any empty locations in putaway lines, the system displays a warning message, as shown below. If there are no errors, a success message appears.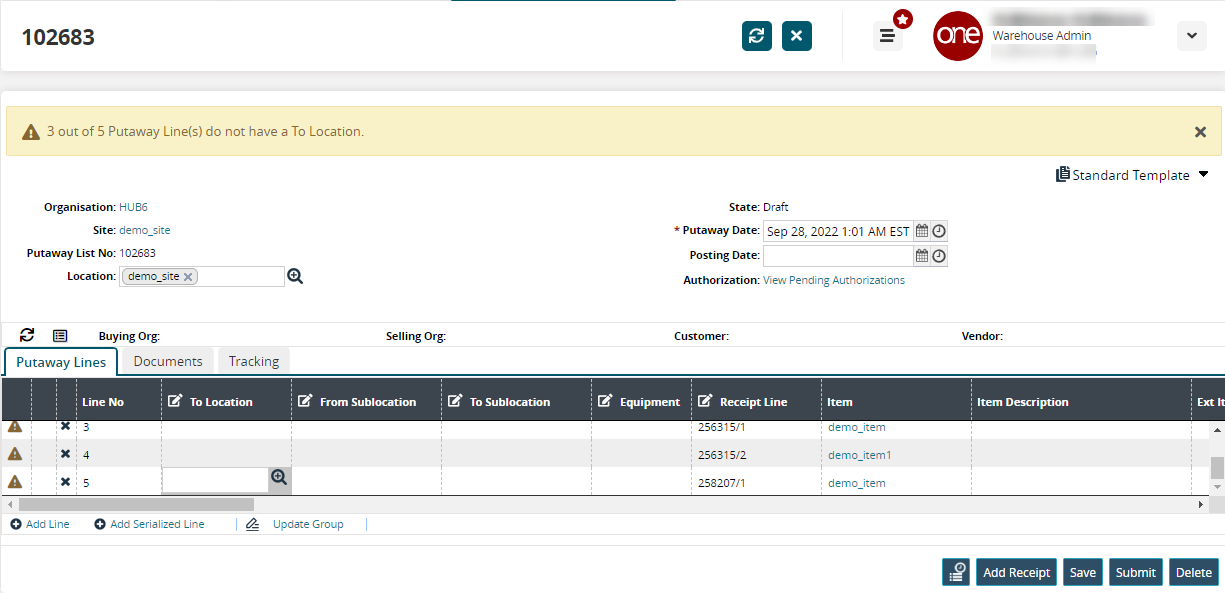
Click Submit to submit the receipt or Save to save the changes without submitting it.
A success message appears.
Users can close or cancel the putaway lists if submitted during the creation as well as delete and update the putaway lists if saved during the creation.