Creating Users
Admins can create users in the system.
Complete the following steps to create individual users:
L og in to the ONE system.
Click Menus/Favs > Administration > User > Search User.
In the NEO UI, users can click on the Menus/Favs icon on the left sidebar and type in the name of the screen in the menu search bar. For more information, see "Using the Menu Search Bar."
The Search User screen opens.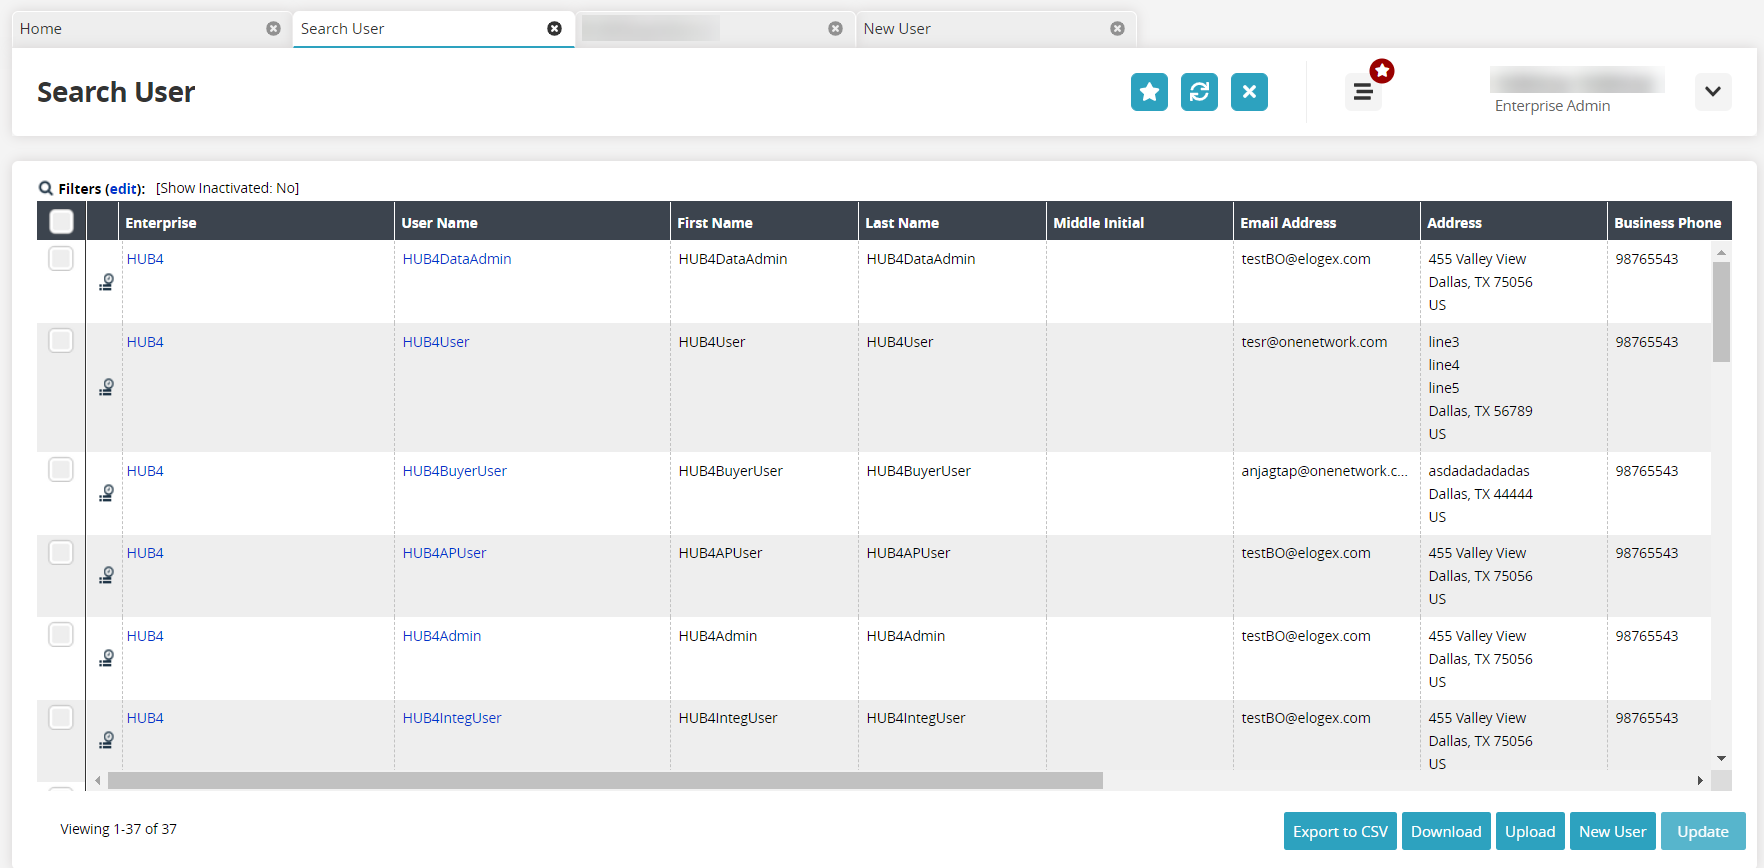
Click the New User button in the bottom right corner.
The New User screen opens.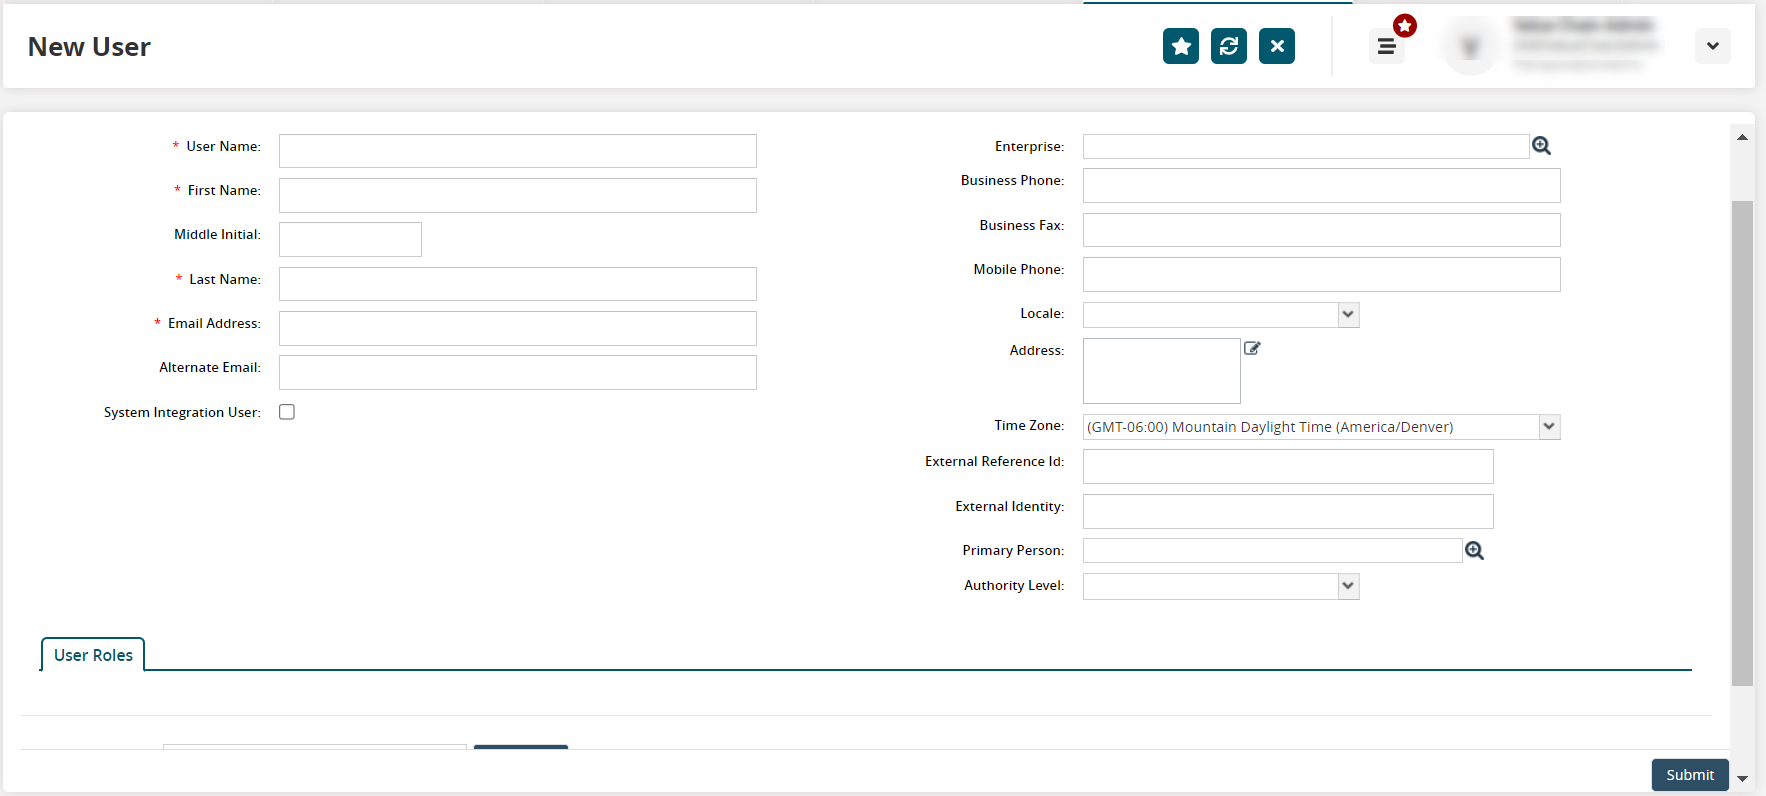
Fill out the following fields. Fields with an asterisk ( * ) are required.
Field
Description
* User Name
Type in the user name for the new user.
* First Name
Type in the user's first name.
Middle Initial
Type in the user's middle initial.
* Last Name
Type in the user's last name.
* Email Address
Type in the user's email address.
Alternate Email
Type in an alternate email.
System Integration User
Check the box if this user has system integration access.
Enterprise
This field is auto-populated based on the administrator's login credentials. This field may be required based on the role entering the user.
Business Phone
Type in the user's business phone number. This field may be required based on the role entering the user.
Business Fax
Type in the user's business fax number.
Mobile Phone
Type in the user's mobile phone number.
Locale
Select the locale for the user from the dropdown menu.
Address
Click the pencil/edit icon.
An address popup displays.Please note that the fields in the address popup may change based on the country selected in the first field described below.
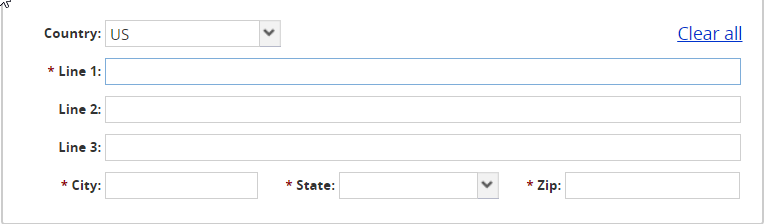
Enter address information in the fields. Fields with an asterisk ( * ) are required.
Field
Description
Country
Select a country code from the dropdown list. The fields described below are based on the US selected in the Country field.
* Line 1
Enter address information.
Line 2
Enter additional address information as necessary.
Line 3
Enter additional address information as necessary.
* City
Enter the city.
* State
Select the state from the dropdown list.
* Zip
Enter the postal or ZIP code.
Click outside the popup to close it.
Time Zone
Select the time zone for the user's location from the dropdown menu.
External Reference ID
Type in the external reference identification.
External Identity
Type in the external identity value.
Authority Level
Select the authority level from the dropdown menu.
Click the Select Roles button in the Roles tab.
The Role popup window opens.Select one or more roles.
Click the OK button.
The selected role(s) appears in the Roles table.Use the calendar and clock tools to select the Effective Start date and the Effective End date.
In the Default Dashboard column, click the picker tool icon.
A popup displays.Select a dashboard that displays as the user's home screen (dashboard).
Click the OK button.
The popup window closes.Click the Submit button.
Tip
You can bulk upload user details by uploading a CSV file. To bulk upload user details, click the Upload button. See the "Uploading Files" section in the Online Help for more information.