Dock Door Group Policies
Dock door group policies allow organizations to set different operating rules by a logical warehouse that shares the same physical location address. Setting dock door group policies are typically performed by transportation manager roles.
Complete the following steps to set dock door group policies:
L og in to the ONE system.
Select Menu/Favs > Scheduling > Scheduling Policies.
In the NEO UI, users can click on the Menus/Favs icon on the left sidebar and type in the name of the screen in the menu search bar. For more information, see "Using the Menu Search Bar."
The Scheduling Policies screen displays.
Select a dock door group level in the hierarchy.
The dock door group settings appear. By default, the Basic Policies tab is selected.
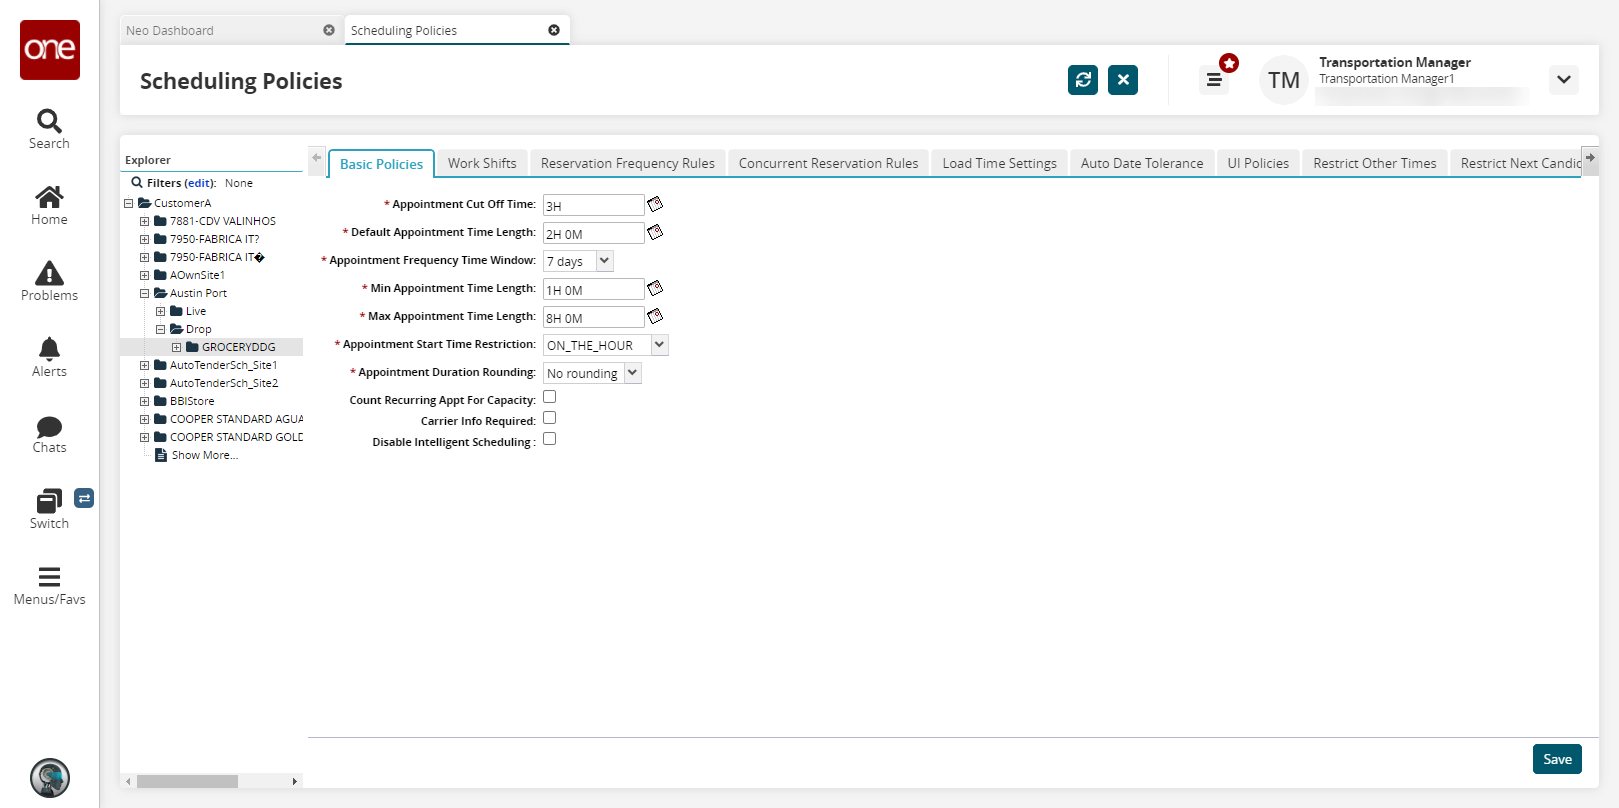
Basic Policies Tab
Fill out the following fields. Fields with an asterisk ( * ) are required.
Field
Description
* Appointment Cut-Off Time
Select an appointment cut-off duration in Days, Hours, and Minutes. Appointments can be made online up to 8.5 hours before the target delivery date and time .
* Default Appointment Time Length
Select a default appointment time length in Days, Hours, and Minutes. This is the default length of the appointment if the load time setting does not apply.
* Appointment Frequency Time Window
Select a minimum number of days between appointments from the drop-down list. The available options range from 1 day to 7 days.
* Min Appointment Time Length
Select a duration for the minimum appointment time in Days, Hours, and Minutes. The length of appointments cannot be less than the specified minimum time regardless of the calculated time.
* Max Appointment Time Length
Select a duration for the maximum appointment time in Days, Hours, and Minutes. The length of appointments cannot exceed the specified maximum time regardless of the calculated time.
* Appointment Start Time Restriction
Select a start time option in the drop-down menu. Appointments may only start on the hour, every 30 minutes, every 15 minutes, or they may have no restriction.
* Appointment Duration Rounding
Select an appointment duration rounding option in the drop-down menu. The available options are No rounding, 5, 10, or 15.
Count Recurring Appt For Capacity
Select this checkbox to count recurring appointments for capacity.
Carrier Info Required
Select this checkbox to require that partners enter a carrier name and contact number on the appointment.
Disable Intelligent Scheduling
Select this checkbox to disable intelligent scheduling.
Click the Save button.
A success message displays.
Work Shifts Tab
Multiple shifts can be defined for a single dock door group with overlapping start and end effective dates. After work shifts are defined, appointments can only be scheduled within the defined time windows that are covered both by the shift and the shipping or receiving hours. Work shifts have the following characteristics:
Work shifts are set up for a week.
Weekly work shift settings have effective time periods.
Work shifts are associated with a specific day of the week and can span into other days.
Work shifts may exceed the shipping or receiving hours.
Work shifts within a weekly setting cannot overlap.
A shipment or order is considered within tolerance as long as it is shipped or received during a shift which is considered to be part of a day that is within tolerance. For example, calendar A is set up to have zero time tolerance. Shipment 123 has a target delivery date of 8/2/04 (Monday). Calendar A has a shift defined from 8:00 PM Monday to 1:00 AM on Tuesday that is associated with Monday. Shipment 123 can be scheduled as late as 1:00 AM on Tuesday and be considered within tolerance. However, if the shipment is scheduled for 1:01 AM on Tuesday, it will be considered out of tolerance.
An appointment will count against the capacity of the day that contains the shift during which the shipment or delivery occurred. For example, calendar A has a shift from 11:00 PM on Monday to 8:00 AM on Tuesday. This shift is associated with Tuesday. All items shipped or received before 11:00 PM on Monday will count towards Monday's capacity. All items shipped or received at or after 11:00 PM on Monday will count towards Tuesday's capacity. If an appointment spans a shift change, the work shift rules apply to the shift in which the appointment begins.
Users can also save work shift templates. When creating a work shift on the Dock Door Scheduling Policies UI, users can click the Save as Template button to save the existing work shift as a template to be used again in the future. This improves the maintenance and administration of work shifts by allowing users to create new work shifts from existing templates.
Complete the following steps to define work shifts:
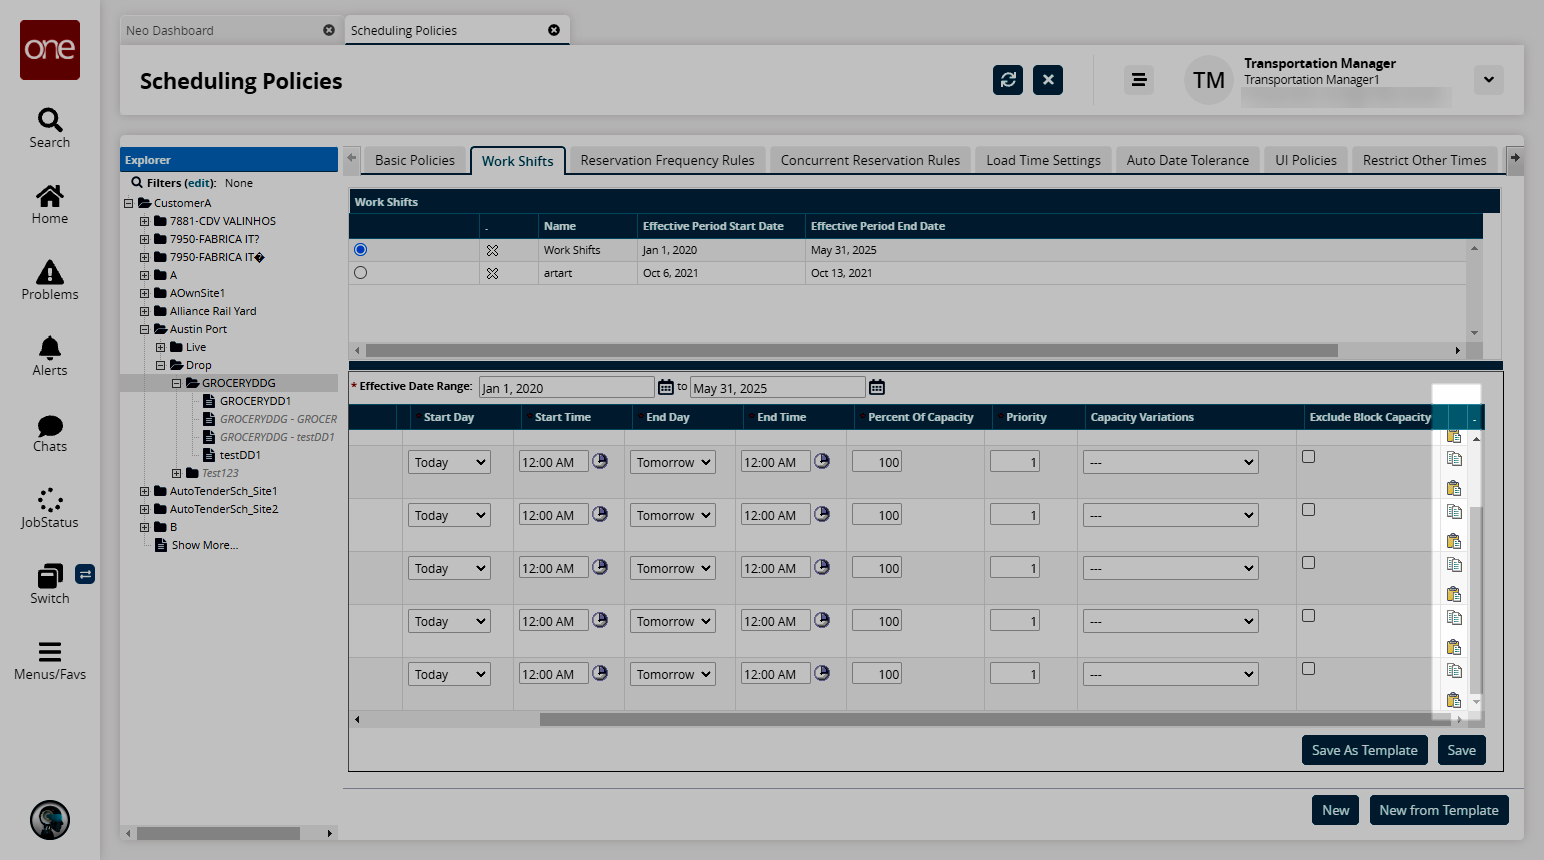
Click the Work Shifts tab.
The Work Shifts form displays.
Click the New button to add a new work shift.
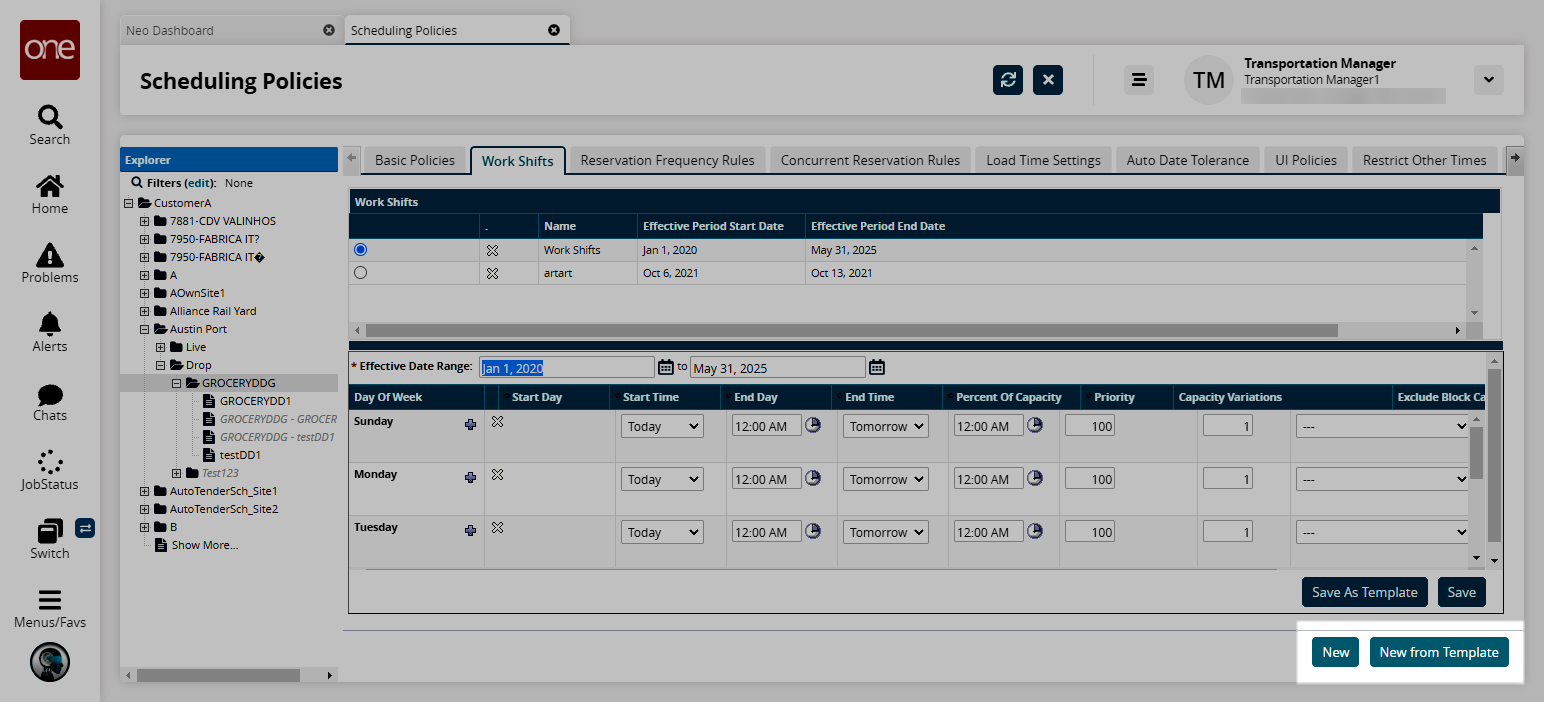
The work shifts form displays.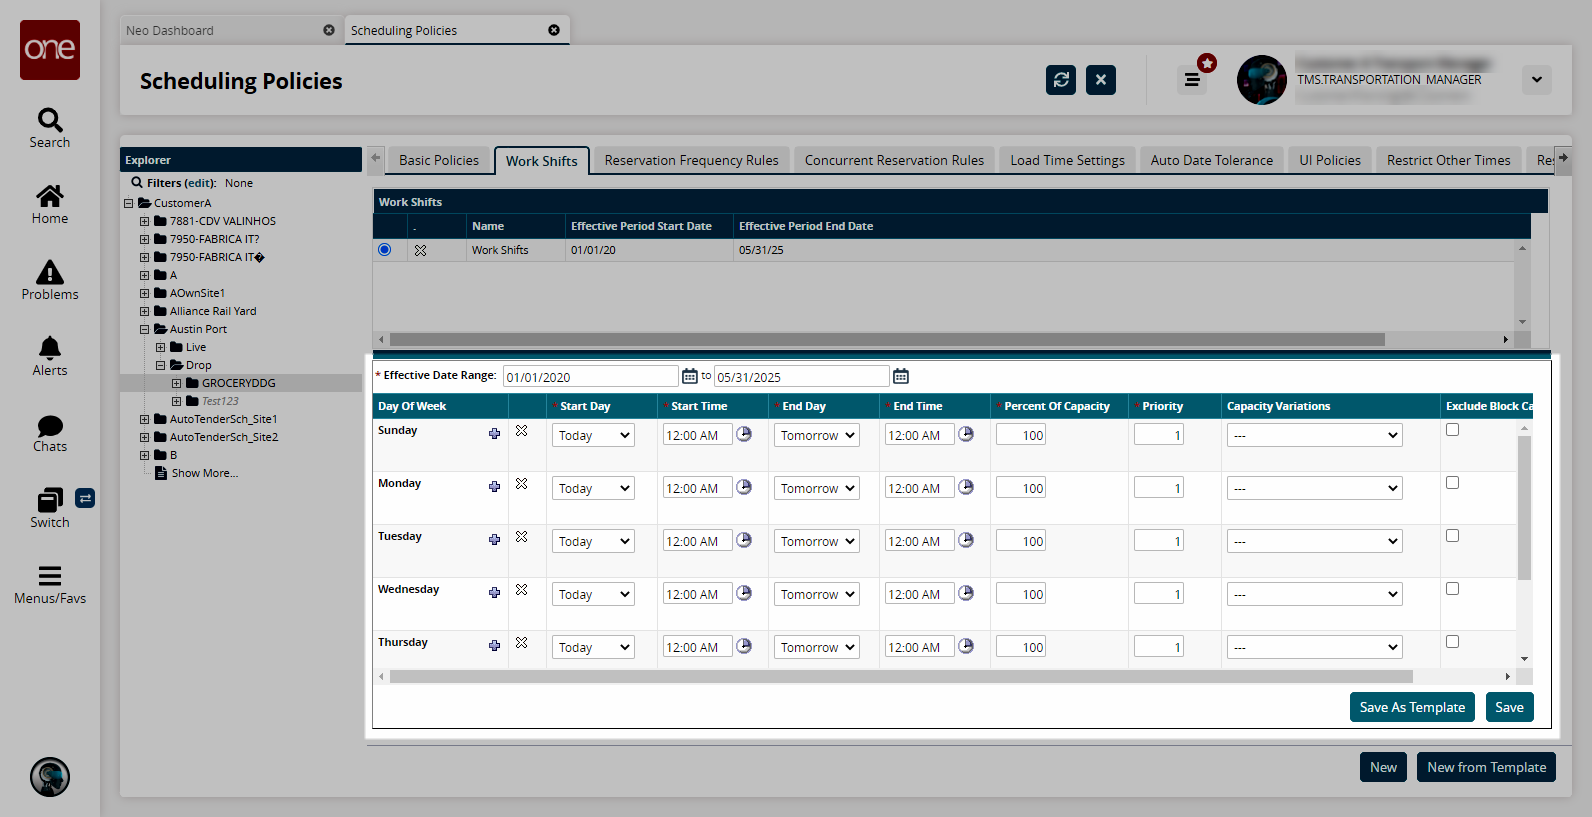
Fill out the following fields. Fields with an asterisk ( * ) are required.
Field
Description
* Effective Date Range
Select a start and end date using the calendar icons.
* Start Day
Select Today or Ye sterday from the drop-down list to specify when the work shift begins.
* Start Time
Click the clock icon to select a start time.
* End Day
Select Today or Tomorrow from the drop-down list to specify when the work shift ends.
* End Time
Click the clock icon to select an end time.
* Percent of Capacity
Enter a capacity value. Entering "50" means 50% capacity.
You can allocate a percentage of the available daily shipping or receiving capacity to a shift (date pattern) along with a sequence (priority) number. Shipment planning considers these capacity percentages for load distribution. For days with only one shift, capacity is assumed to be 100 percent.
* Priority
Enter a priority value. For example, a day with three shifts (date patterns) will have priorities of 1, 2, and 3.
The priority number determines the order in which the shifts will be filled with appointments when applying scheduling sequences. When the Appointment Scheduling engine searches for time slots, slots during the shift assigned priority 1 will be selected over slots during the shift with priorities 2 and 3. Similarly, slots with priority 2 will be selected over slots with priority 3.
Capacity Variations
Select a capacity variation from the drop-down menu.
Exclude Block Capacity
Select this checkbox to exclude block capacity.
Tip
You can quickly copy and paste a date pattern to another row using the Copy and Paste buttons on the right side of each row.
To add an additional row to a day of the week, click the Add Pattern button (blue plus sign).
Another date pattern row displays for the selected day of the week.To delete a date pattern, click the delete row icon (white X).
When the schedule is set up as desired, click the Save as Template button.
A popup displays.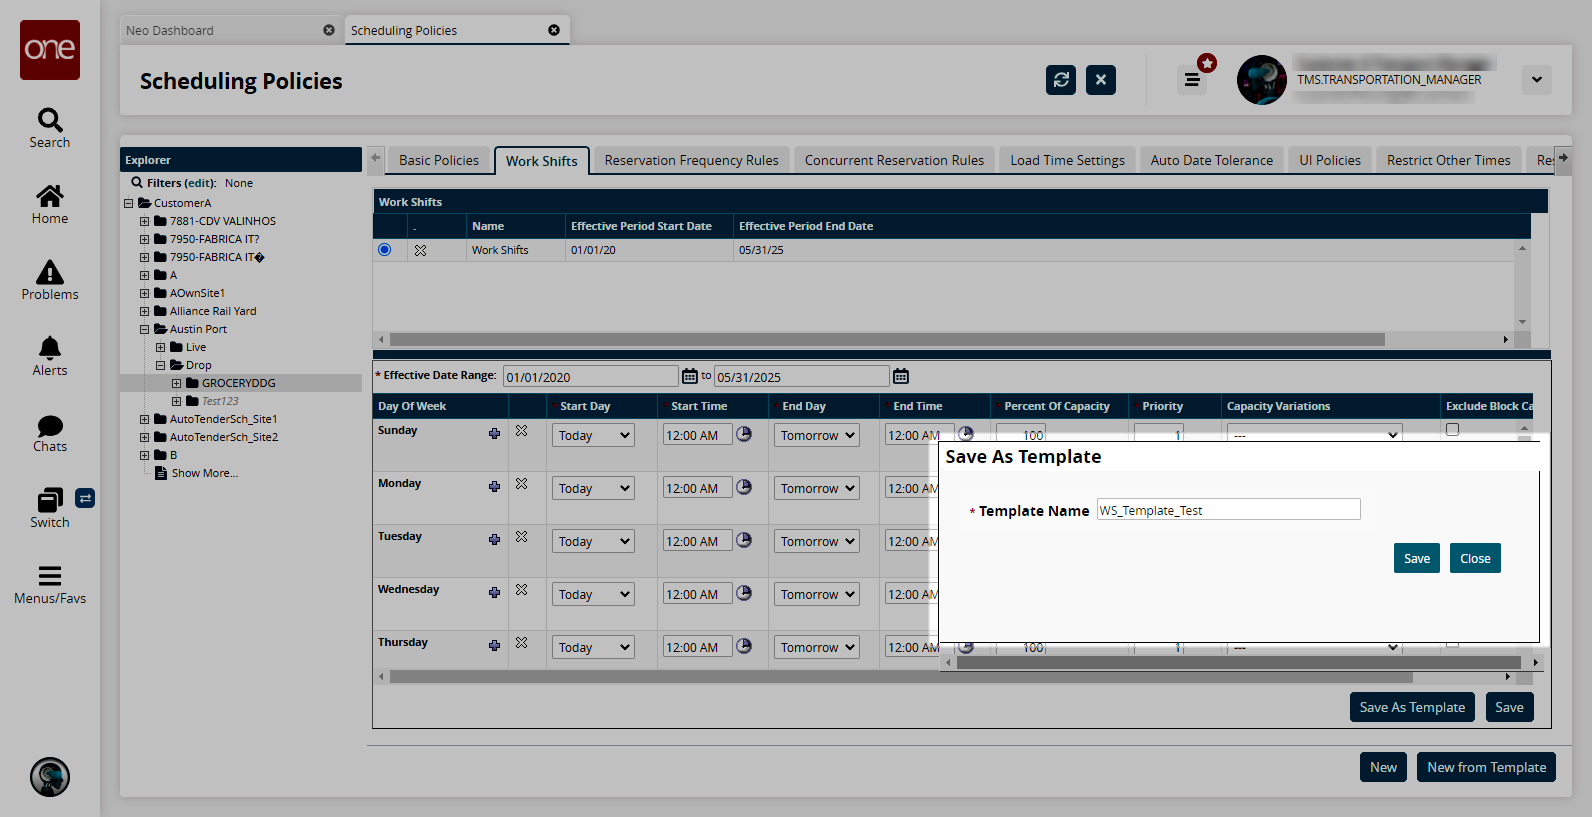
Enter a * Template Name.
Click the Save button.
A success message displays.
Complete the following steps to create a work shift schedule from a work shift template:
Click the New from Template button.
The lower pane updates.Select your desired work shift template from the Select Template dropdown menu.
The lower pane updates and loads the template.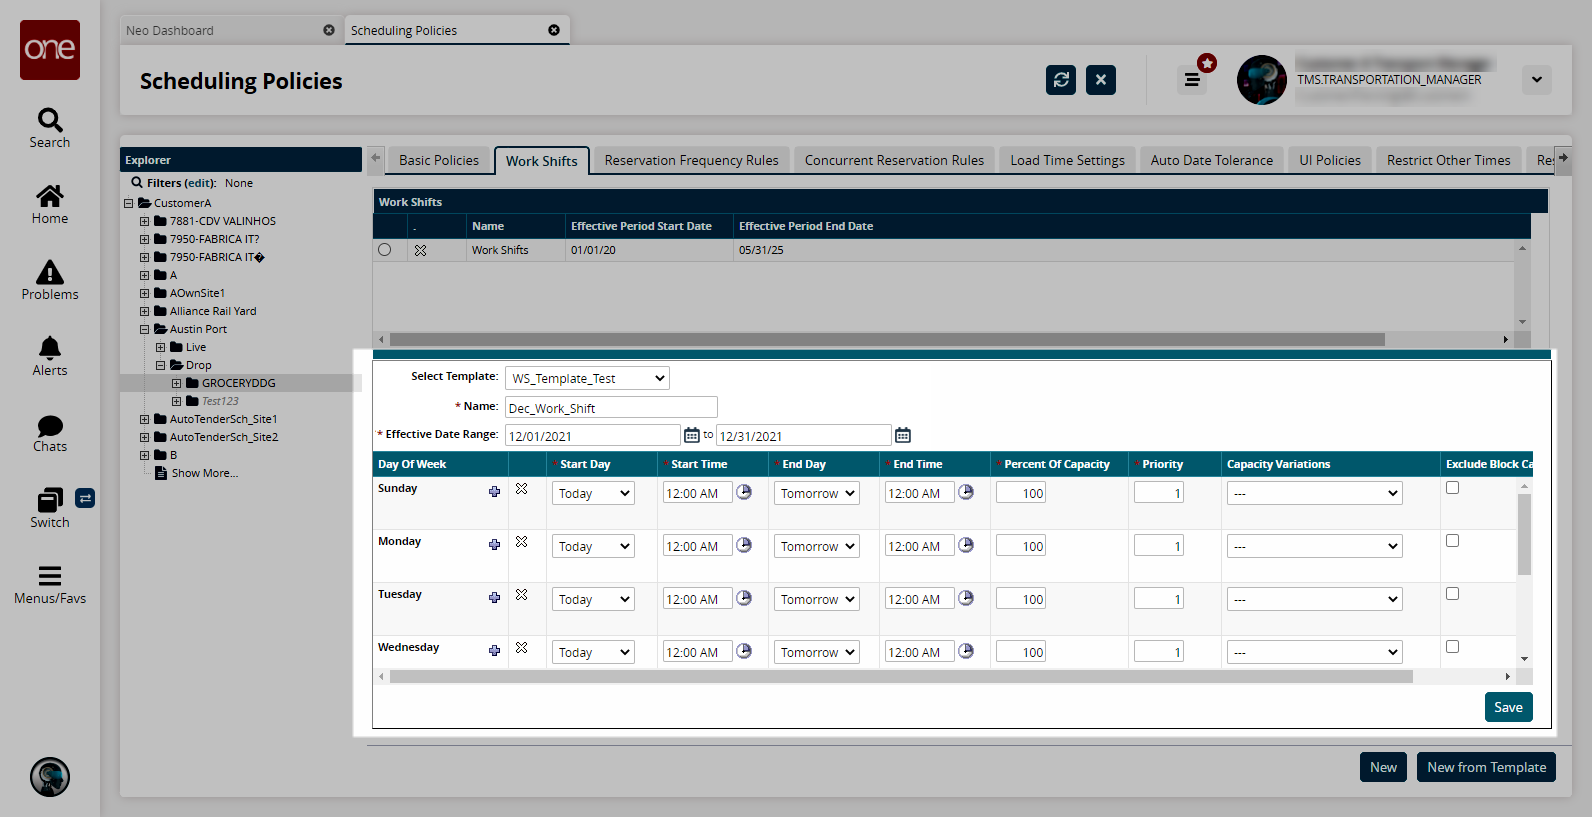
Enter a * Name and an * Effective Date Range.
Modify the work shift schedule as desired.
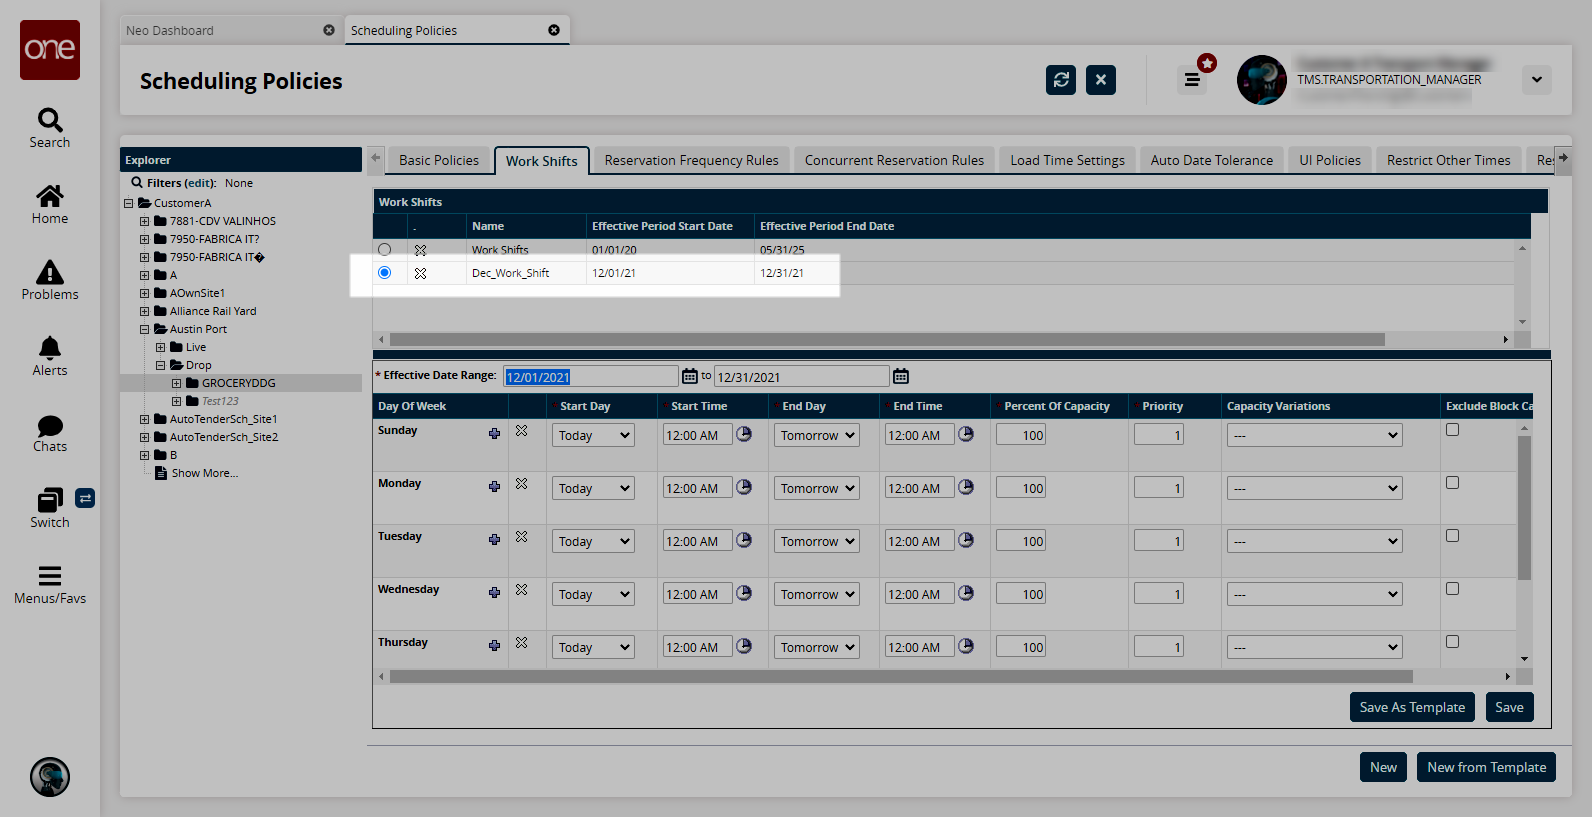
Click the Save button.
The new work shift schedule displays in the upper pane.
Reservation Frequency Rules Tab
The Reservation Frequency Rule prevents a single partner or partner profile from booking all available capacity during a specified date range. It also allows for limiting the number of shipments of a particular load type or appointment code during a specified date range. The reservation frequency limiting rule is selected from one of the following conditions:
A partner, partner profile, appointment code, or load type cannot have more than a specified number of appointments starting within a given time frame.
A partner, partner profile, appointment code, or load type cannot have more than a specified number of appointments starting within a work shift.
A required elapsed time between appointments by the same partner, partner profile, appointment code, or load type is applicable (elapsed time is measured from the end time of the appointment to the start of the next appointment).
The appointment frequency limiting rule can be specified for shipping, receiving, or both, and it has an effective date range.
Complete the following steps to set a reservation frequency rule:
Click the Reservation Frequency Rules tab.
The Reservation Frequency Rules form displays.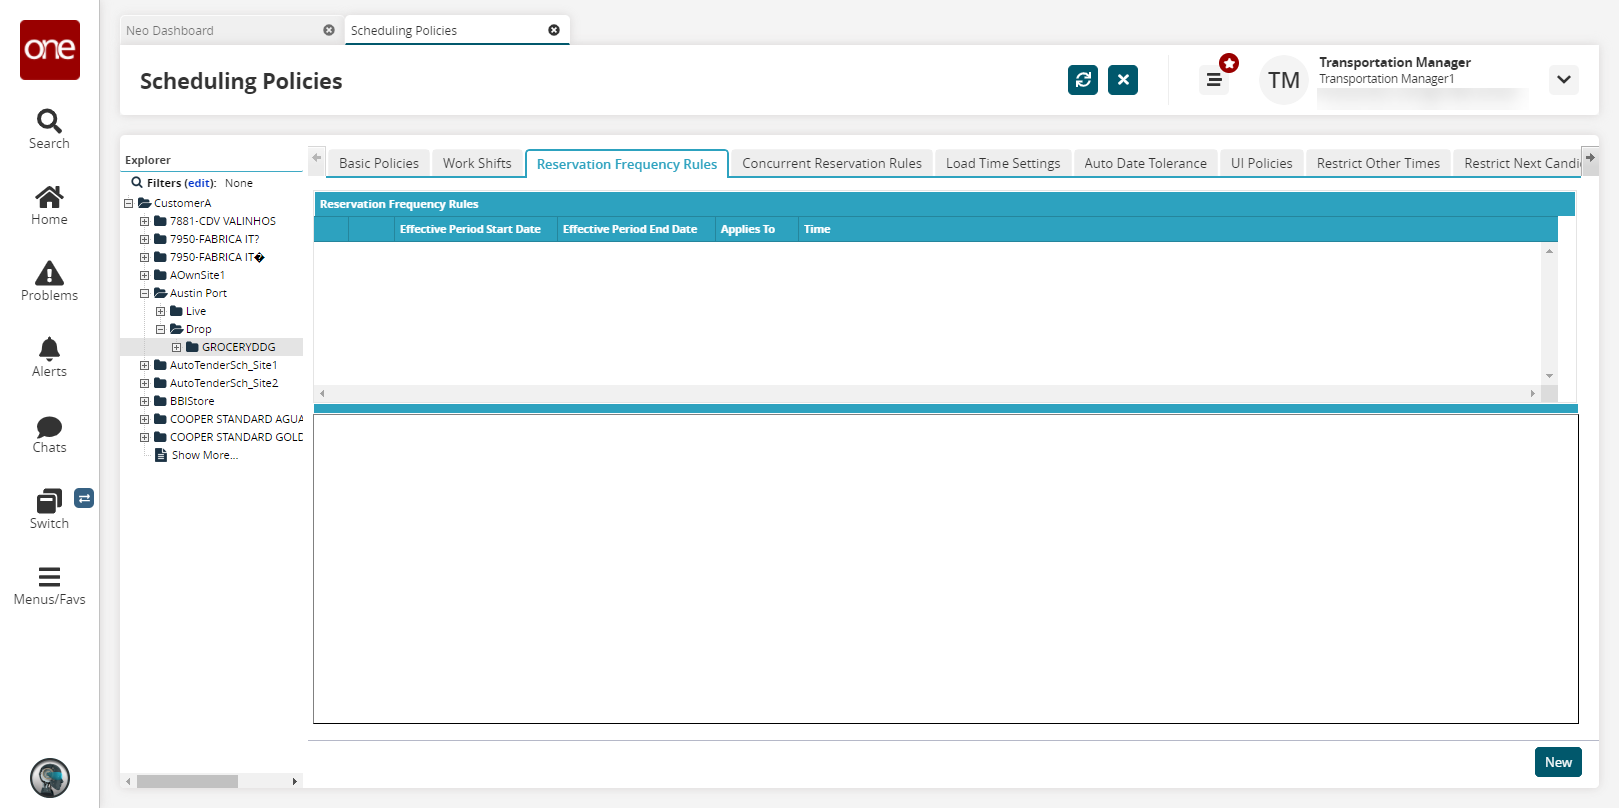
Click the New button.
The reservation frequency rule form displays.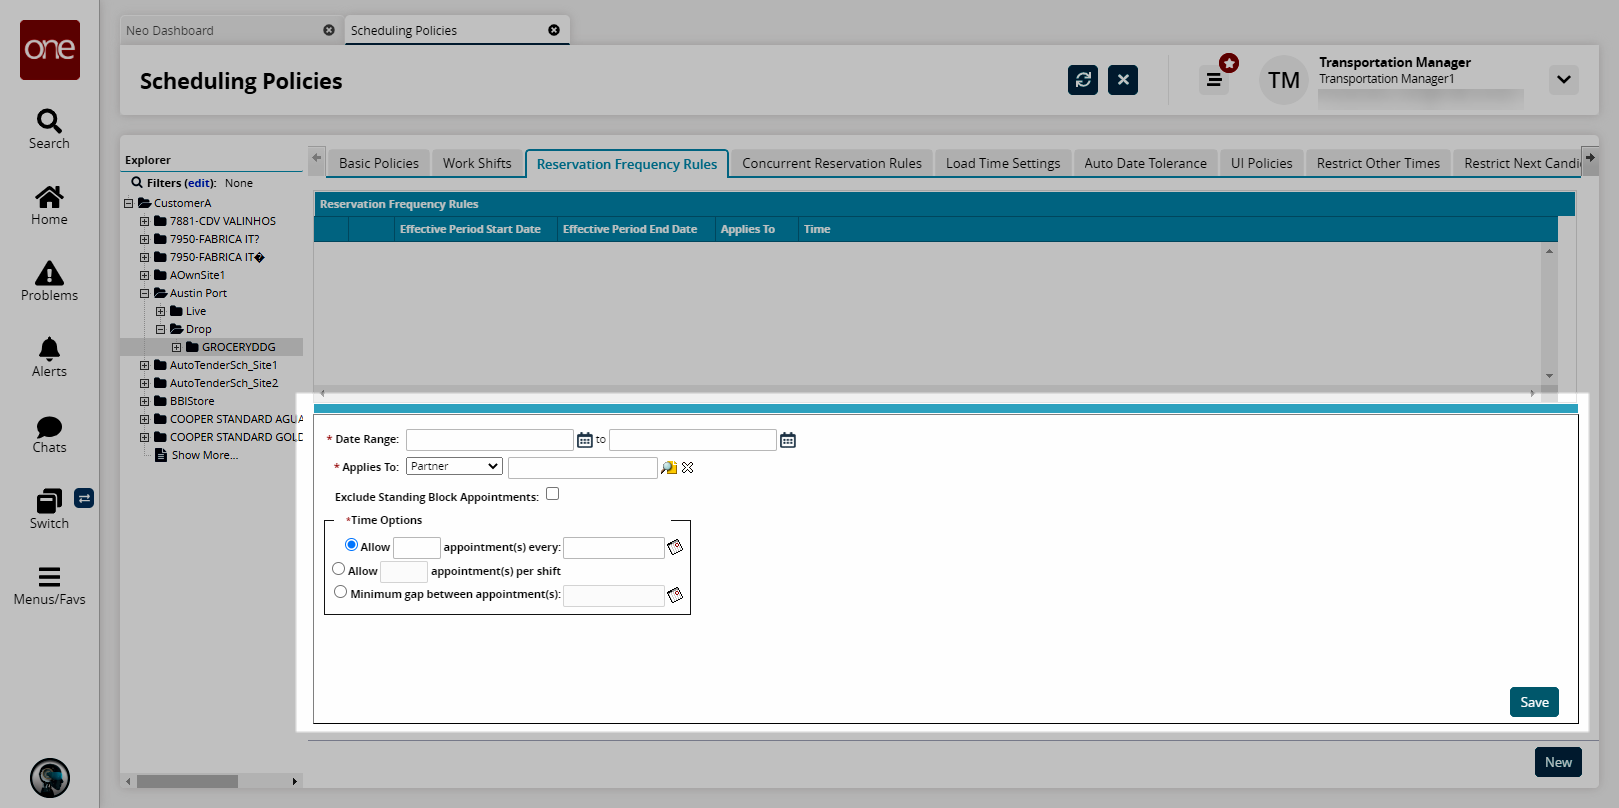
Fill out the following fields. Fields with an asterisk ( * ) are required.
Field
Description
* Date Range
Select a date range using the calendar icons.
* Applies To
In the drop-down list, select the relevant option:
Partner: select a partner using the search functionality.
Partner Profile: select a partner profile using the search functionality.
Load Type: select a load type from the drop-down list.
Org Code: select a n organization code using the search functionality.
Exclude Standing Block Appointments
Select this checkbox to exclude standing block appointments.
* Time Options
Select a time option for appointments. Note that o nly one rule can be in effect at any time.
Allow <X> appointment(s) every <duration>: Specify the number of appointments <X> and the <duration> using the calendar icon.
Allow <X> appointment(s) per shift: Specify the number of appointments <X> per shift.
Minimum gap between appointments: Specify the minimum length of time between appointments using the calendar icon.
Click the Save button.
The new reservation frequency rule displays in the Reservation Frequency Rules list.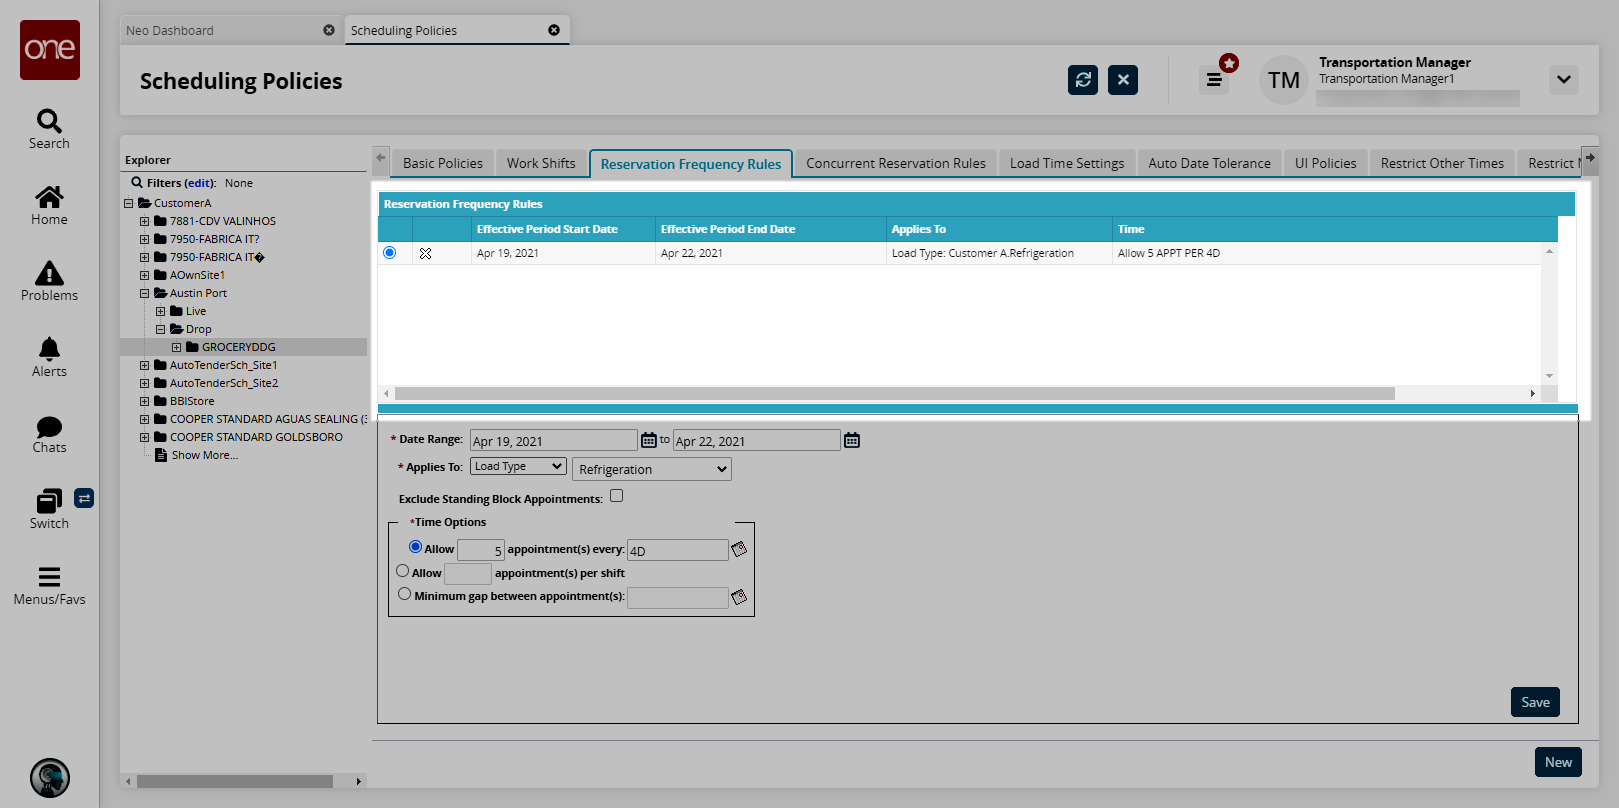
Concurrent Reservation Rules
The Concurrent Reservation Rules define the number of concurrent appointments for a dock door group during a specified date range. This concurrency rule can be configured in terms of Load Types. For example, if a hub has a Palletized load appointment from 9-10 AM and another from 9–11 AM, and the Palletized concurrency maximum is set to 2, then the next possible Palletized load appointment will be at 10 AM. Note that the current Reservation Frequency Rules still cover the scenarios where the user wants to constrain the total number of reservations in a given shift, and the Concurrent Reservation Rules will constrain the reservations at the same time within that shift.
Complete the following steps to set concurrent reservation rules:
Click the Concurrent Reservation Rules tab.
The Concurrent Reservation Rules form displays.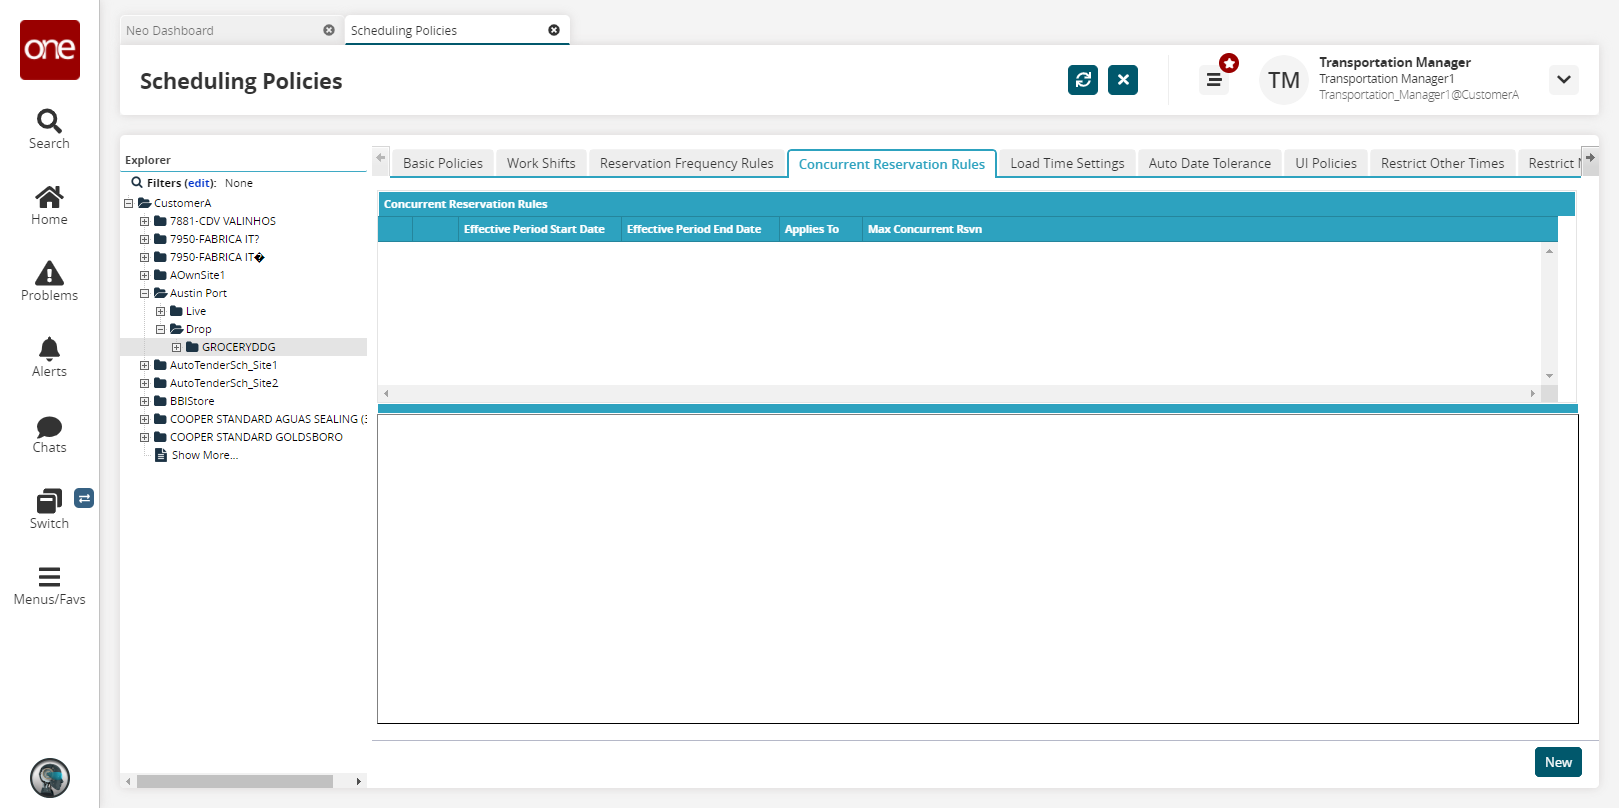
To add a new concurrent reservation rule, click the New button.
The concurrent reservation rules form displays.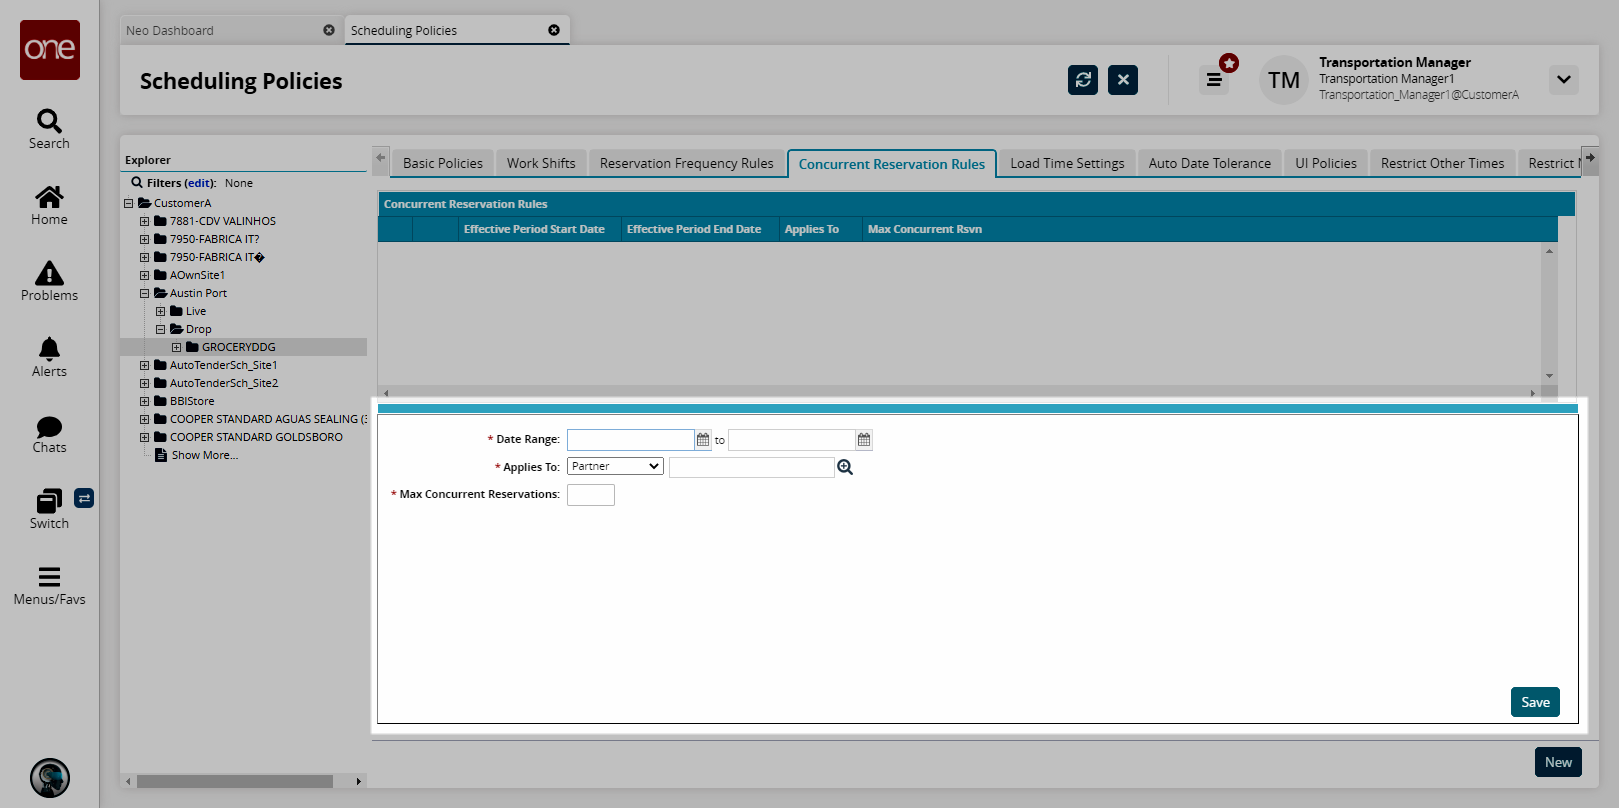
Select a Date Range using the calendar icons.
In the Applies To drop-down list, select the relevant option:
Partner: select a partner using the search functionality.
Partner Profile: select a partner profile using the search functionality.
Load Type: select a load type from the drop-down list.
Org Code: select an organization code using the search functionality.
In the Max Concurrent Reservations field, enter the maximum number of concurrent reservations allowed for this dock door group.
Click the Save button.
The new concurrent reservation rule displays in the Concurrent Reservation Rules list.
Load Time Settings
Load time settings specify appointment length calculations by vendor given that load characteristics vary and affect loading and unloading time. The default setting for receiving and shipping is applicable unless you specify a load time setting for the partner or partner profile.
Complete the following steps to configure load time settings:
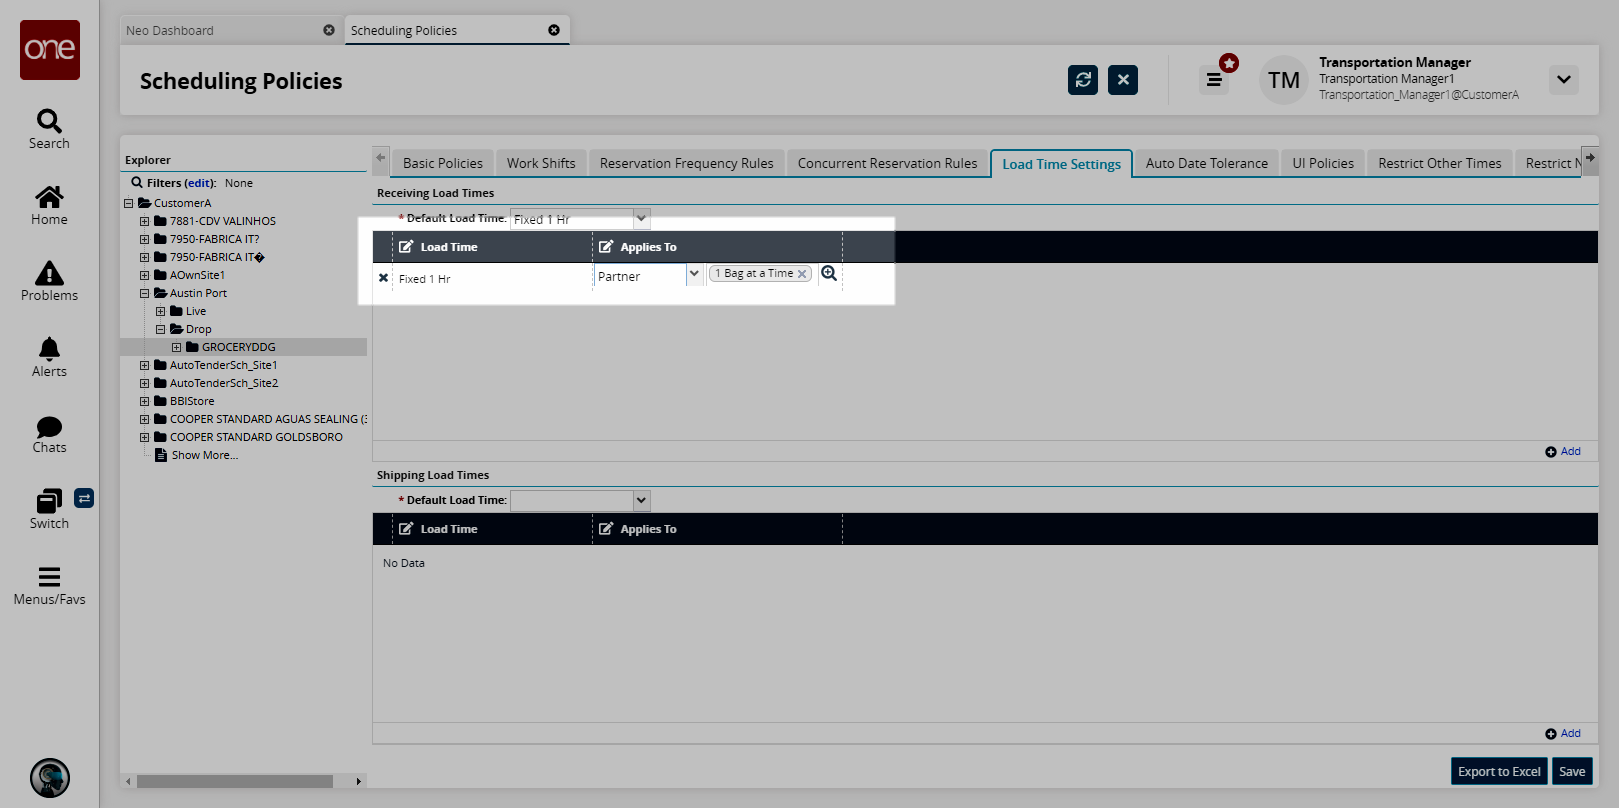
Click the Load Time Settings tab.
The Load Time Settings form displays, showing sections for Receiving and Shipping.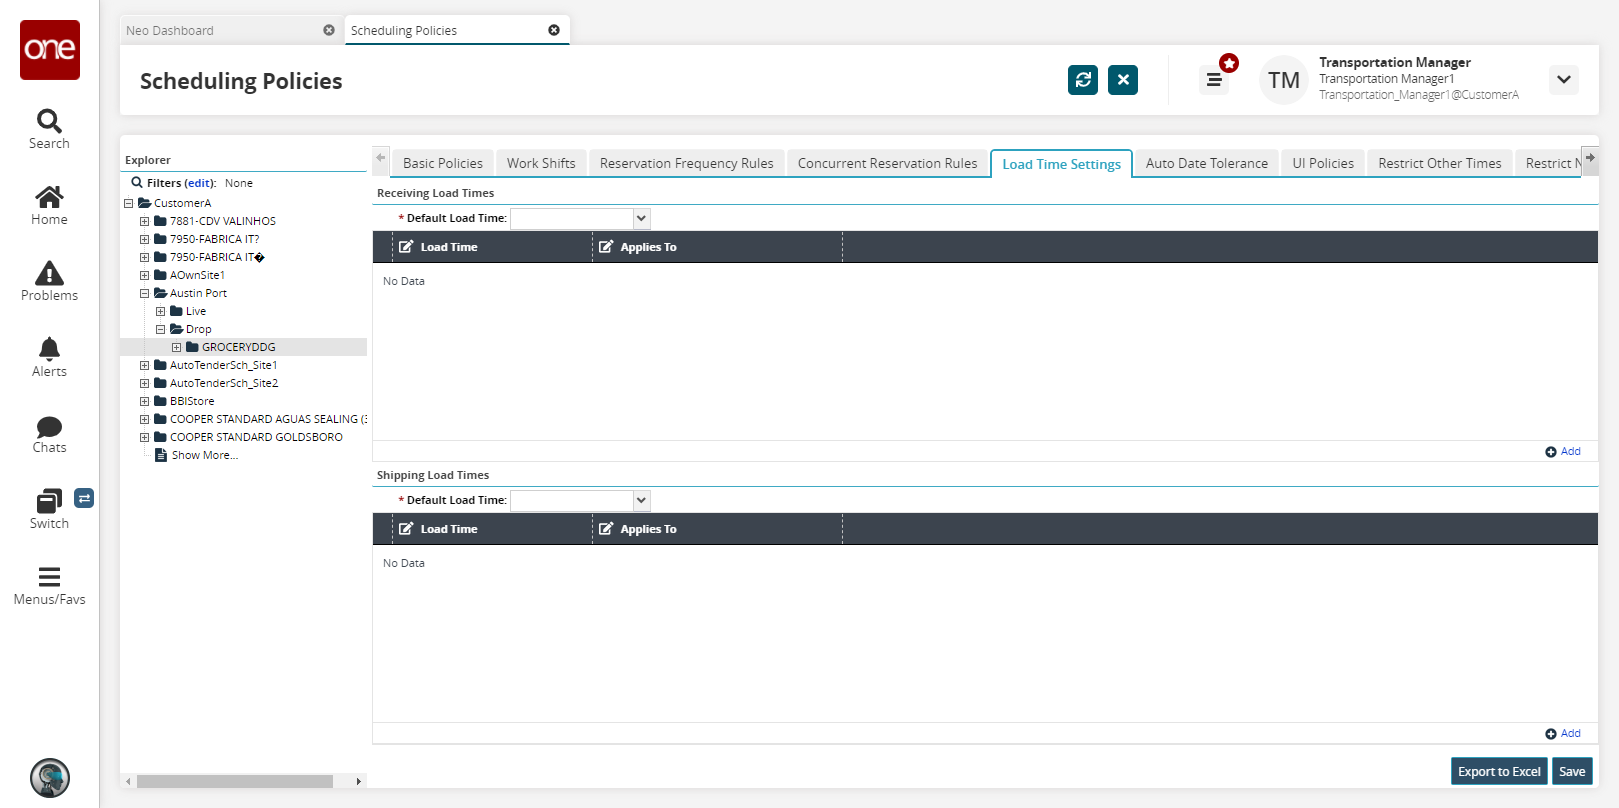
Note
The Load Time Settings for the Dock Door Group (Receiving and Shipping) are sorted alphabetically.
In the Receiving Load Times section, select a Default Load Time from the drop-down list.

To add a new load time setting, click the Add link.
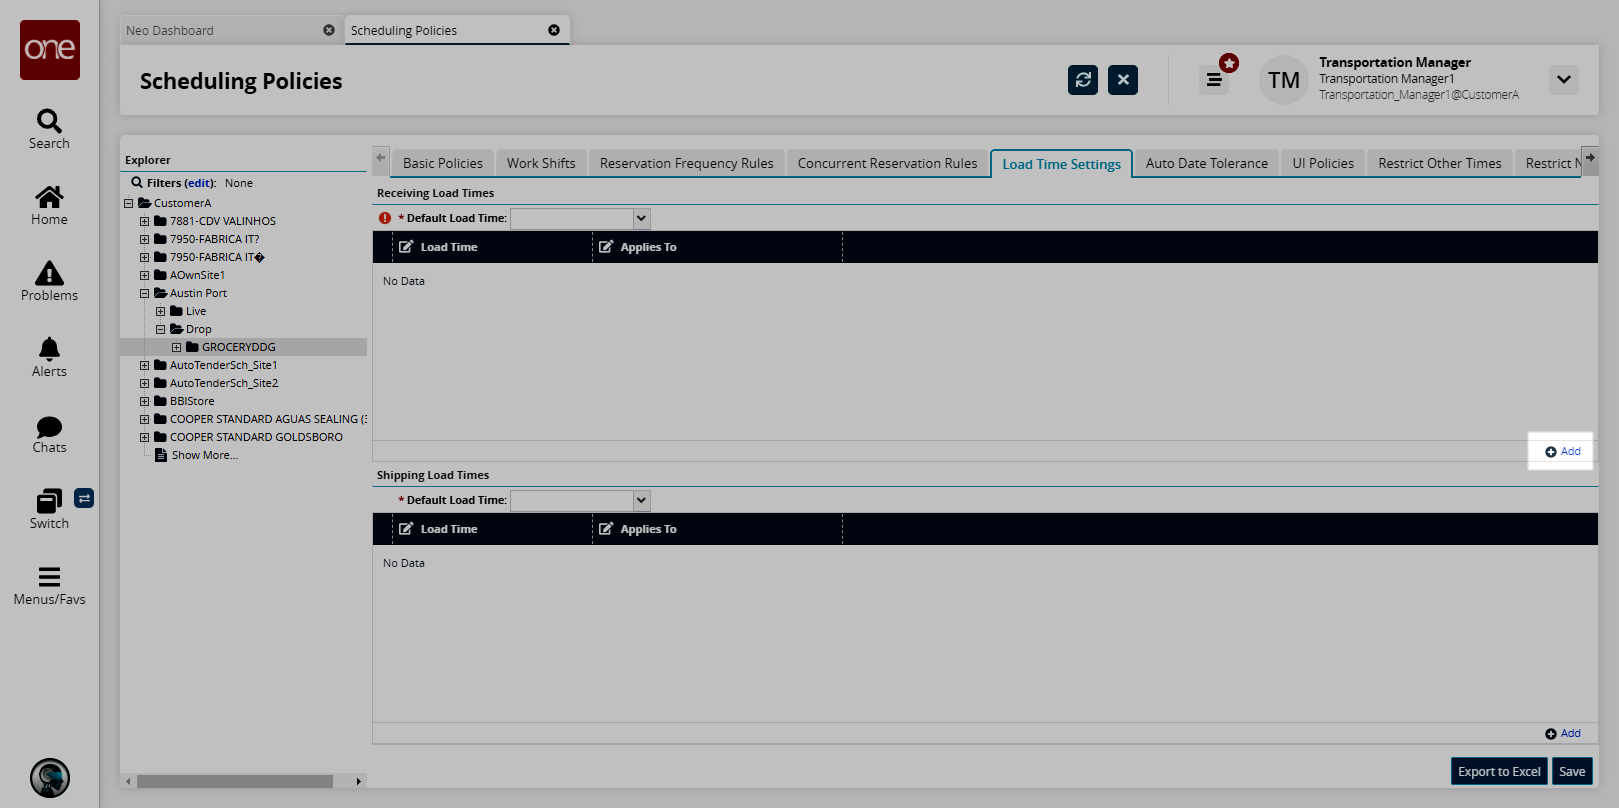
A new load time row displays.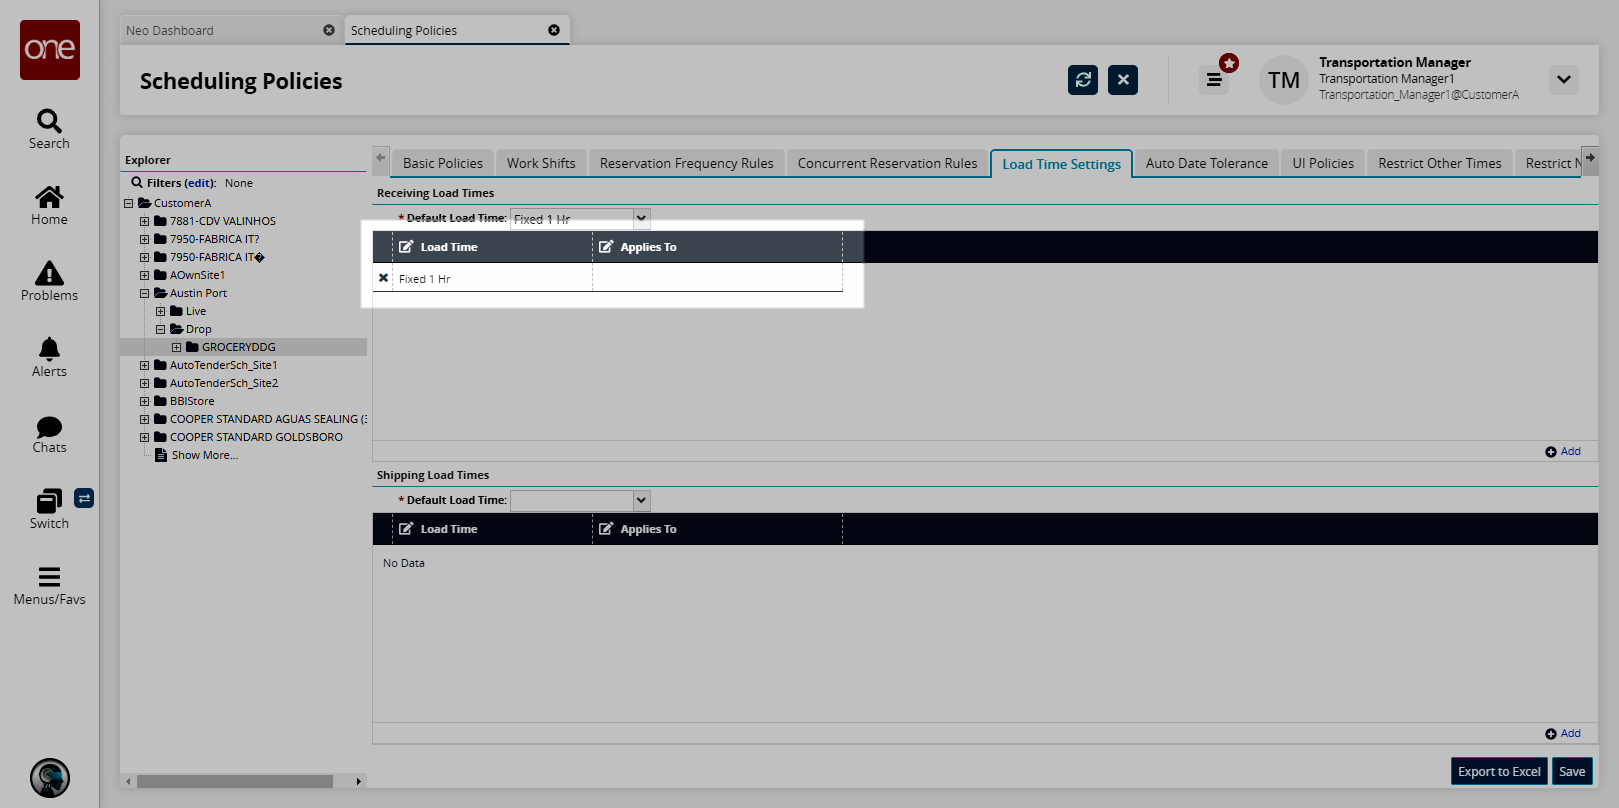
In the Load Time field, click a load time option, for example, Fixed 30 Minutes, Fixed 1 Hr 15 Min, Fixed 2 Hr, or Variable Slipsheet. Fixed times are available only in the increments in the list. Variable appointment times are calculated by the Appointment Scheduling Engine based on load type, number of pieces, pieces UOM, and number of time units per distinct piece UOM. If the calculated time exceeds the specified maximum appointment time length, then the maximum appointment length is used.
In the Applies To field, click an option to which the load time setting applies.
To add another load time setting, repeat the previous steps for each new row.
Repeat the above steps for the Shipping Load Time section.

Click the Export to CSV button to export the report to a CSV file.
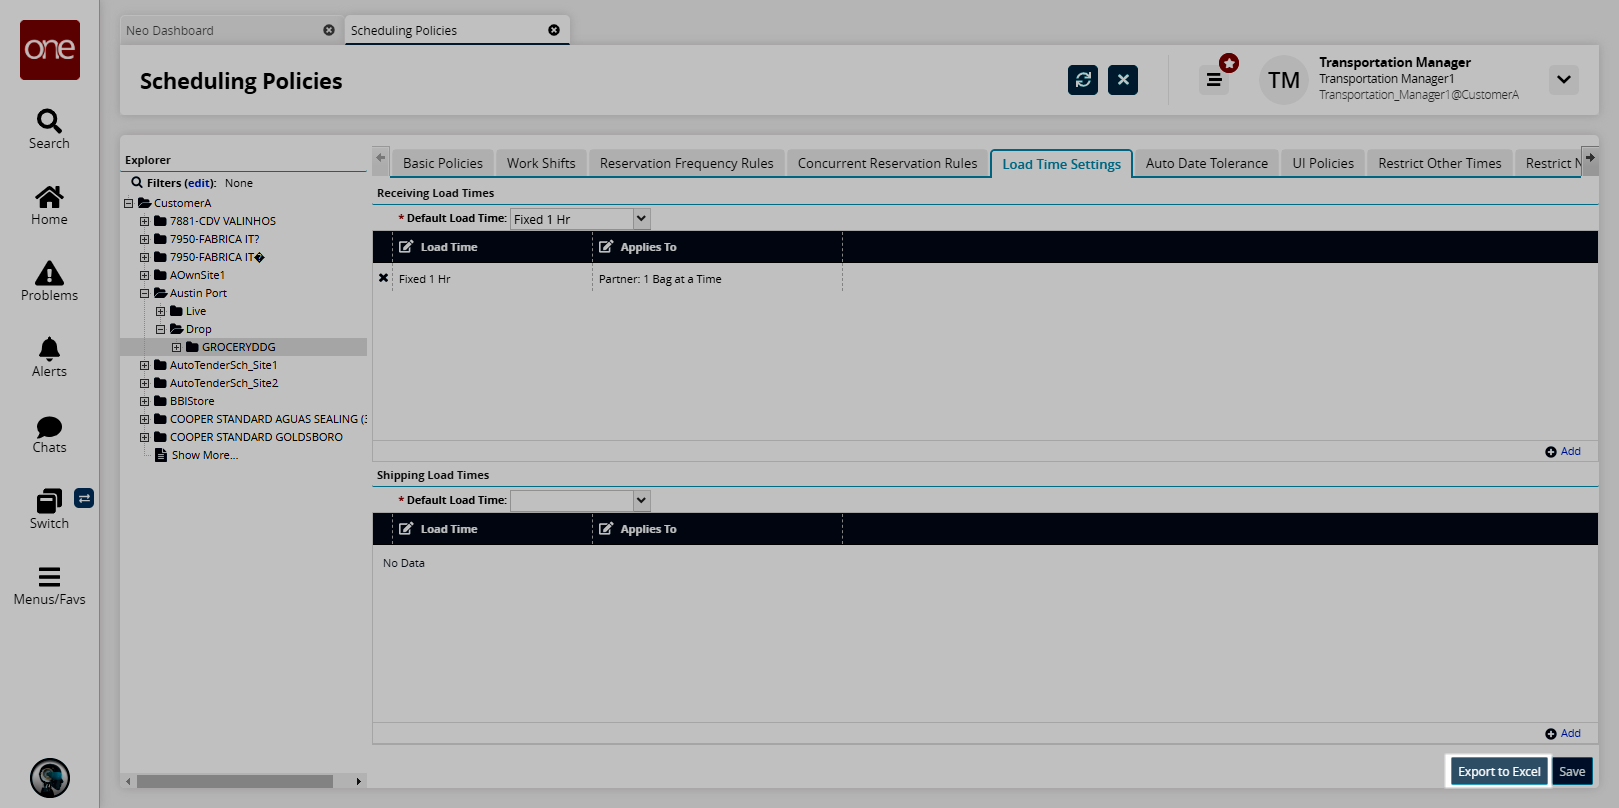
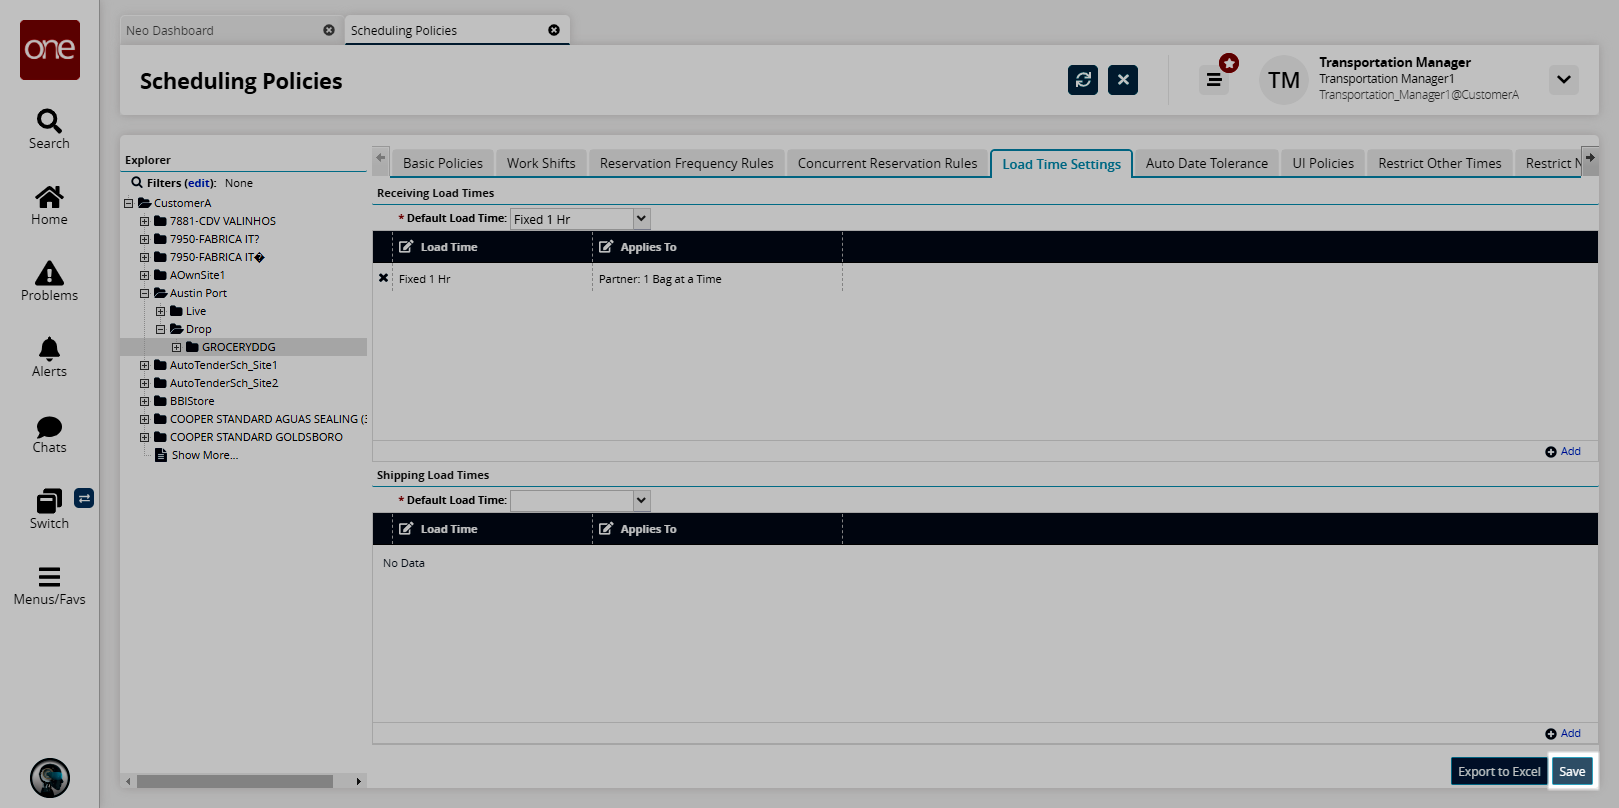
To save load time settings for both Receiving and Shipping, click the Save button.
Auto Date Tolerance Tab
The auto date tolerance setting allows for the creation of an appointment by a partner on a date other than the target delivery date. Variance can be a different value prior to or after the target delivery date, expressed in either business days or calendar days.
The Appointment Scheduling engine searches for available times on the target date and time specified in the shipment for pickup or delivery. If a target date is not provided on the shipment, then the date and time for the pickup or delivery, based on the start time of the range, will be used.
The Appointment Scheduling engine looks for the three available time windows. If the live receiving or shipping capacity for that day has already been met, or no valid appointment times are available, the Appointment Scheduling engine uses the calendar tolerance setting to determine what day to search next. The Appointment Scheduling engine looks for availability first on the previous day then the next day, provided that the time tolerance for auto-scheduling contains a minus and a plus setting.
The Appointment Scheduling engine always tries to schedule the appointment closest to the target date.
Complete the following steps to configure auto date tolerance:
Click the Auto Date Tolerance tab.
The Auto Date Tolerance form displays. The Auto Date Tolerance form has sections for Receiving and Shipping.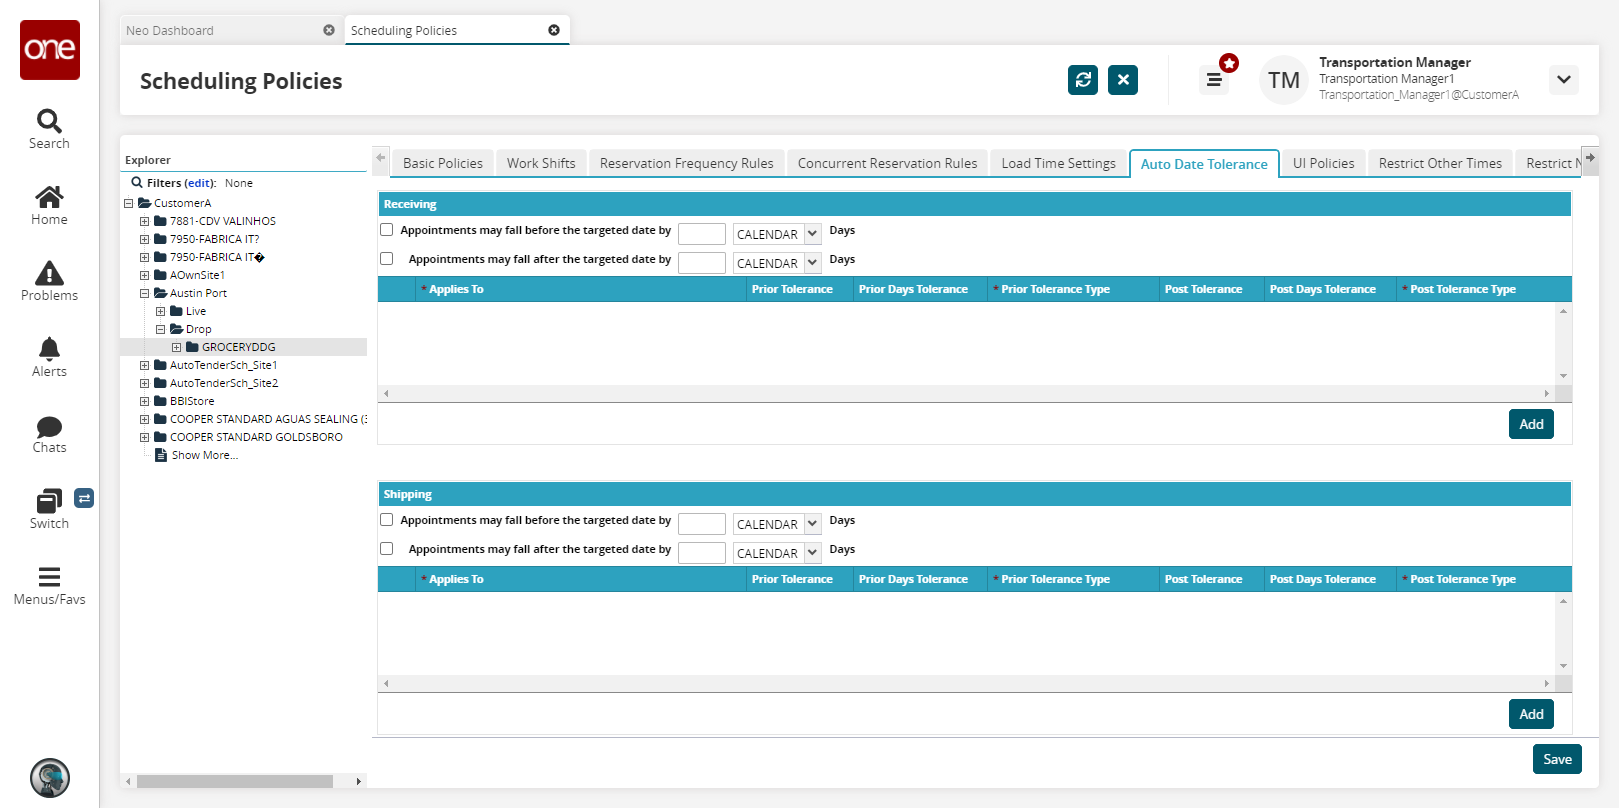
Fill out the following fields. Fields with an asterisk ( * ) are required.
Field
Description
Appointments may fall before the targeted date by
Select this checkbox, enter a value, and then select either Business or Calendar from the Days drop-down menu. Note that both of these fields appear in both the Receiving and Shipping sections.
Appointments may fall after the targeted date by
Click the Add button in the Receiving section to specify to which partner or partner profile the auto date tolerance option applies.
A new setting row displays below the Applies To column.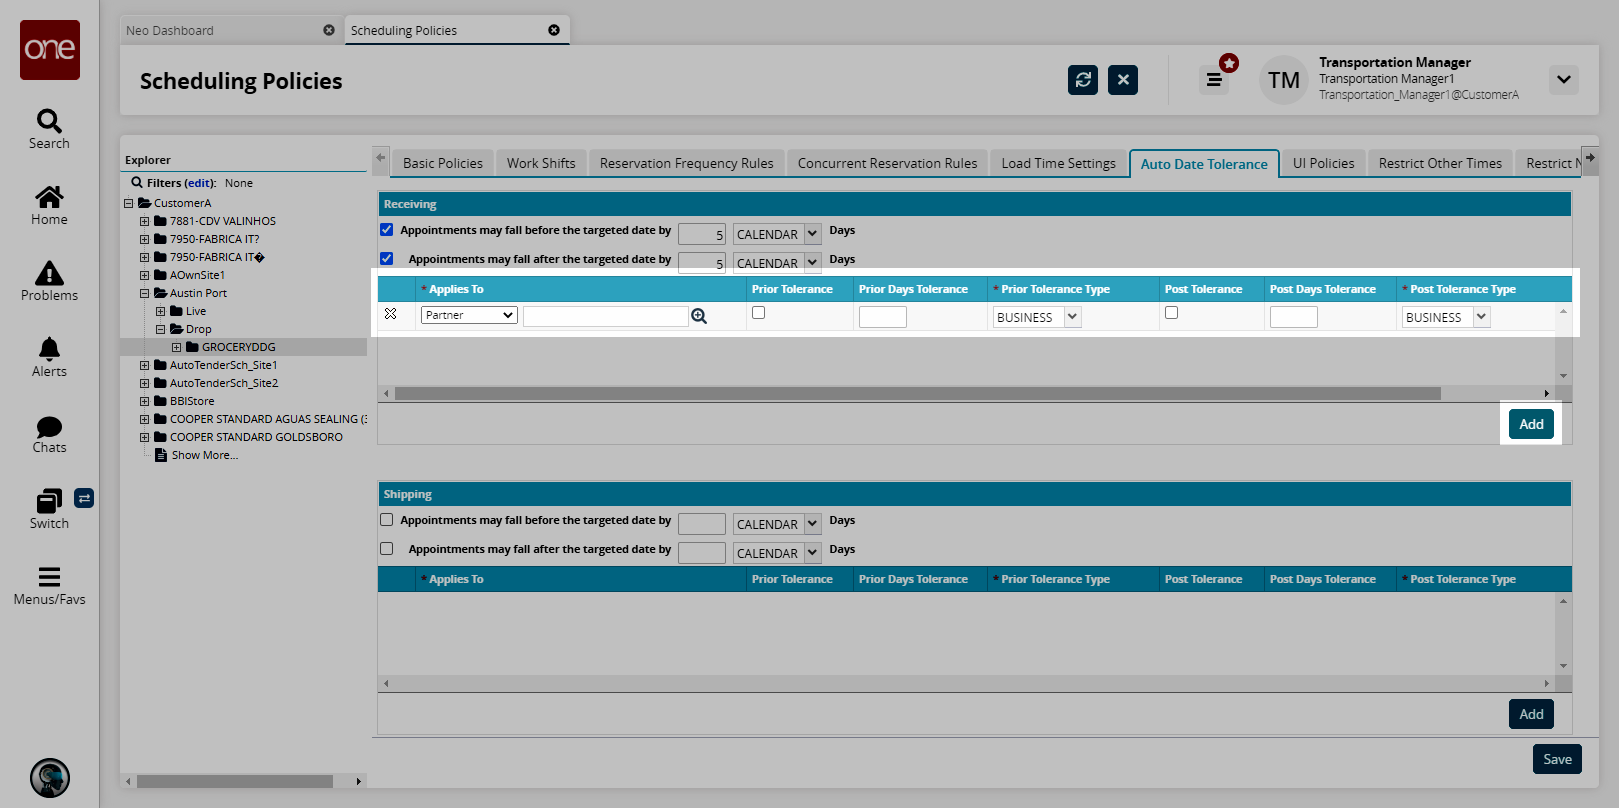
Fill out the following fields. Fields with an asterisk ( * ) are required.
Field
Description
* Applies To
In the Appli es To list, select an option to which the dock door setting applies.
For Partner, select a partner.
For Partner Profile, select a partner profile.
Prior Tolerance
Select this checkbox if prior tolerance is allowed for this partner or partner profile.
Prior Days Tolerance
Enter a value for the prior day's tolerance.
* Prior Tolerance Type
Select either Business or Calendar from the Days drop-down menu.
Post Tolerance
Select this checkbox if post tolerance is allowed for this partner or partner profile.
Post Days Tolerance
Enter a value for the post-days tolerance.
* Post Tolerance Type
Select either Business or Calendar from the Days drop-down menu.
Repeat the previous steps for the Shipping section.
Click the Save button.
A success message displays.
UI Policies Tab
Complete the following steps to configure UI policies:
Click the UI Policies tab.
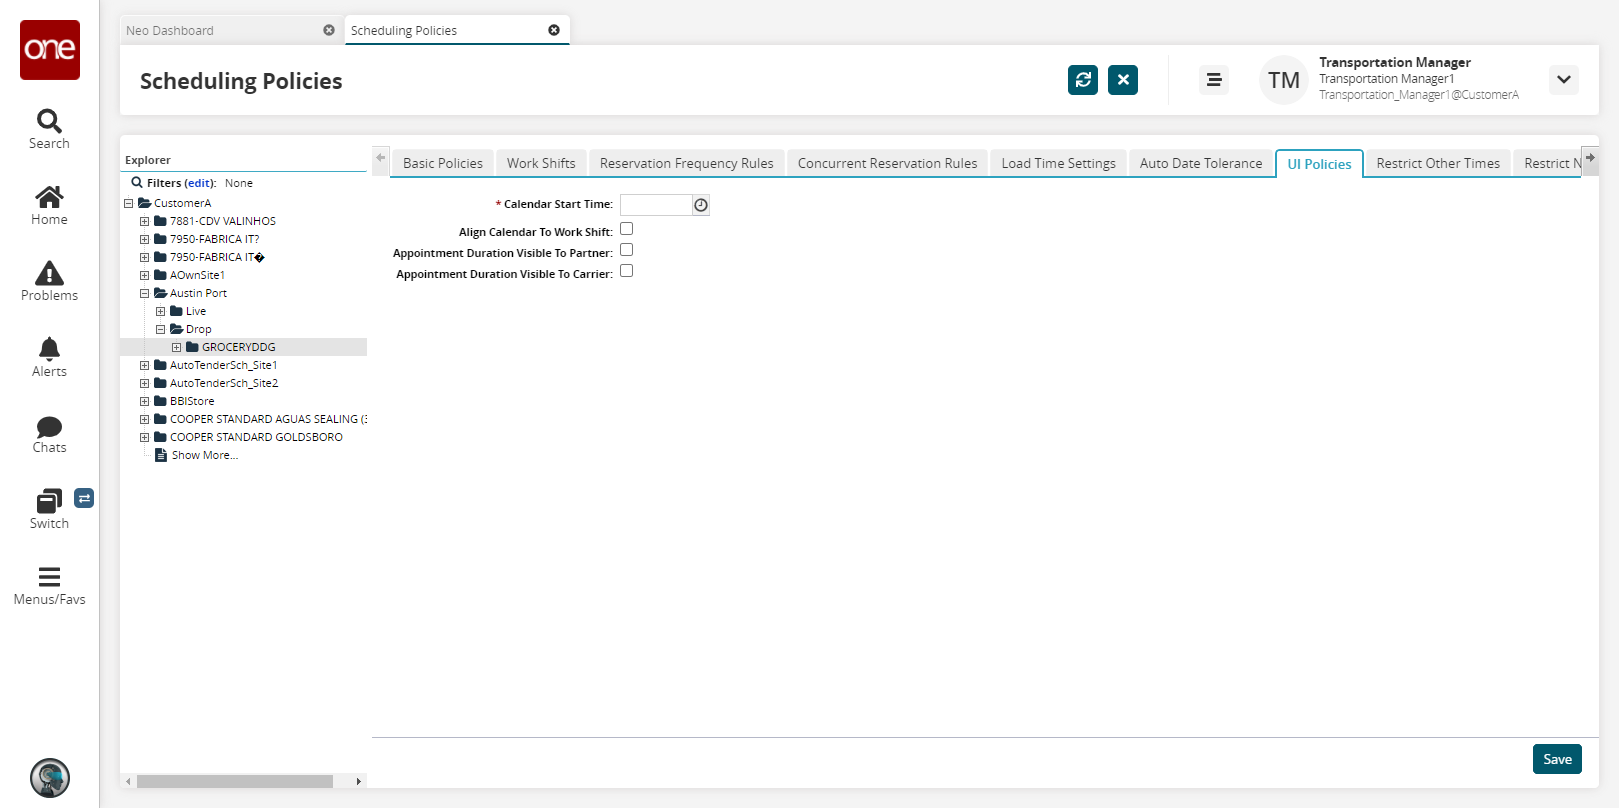
The UI Policies form displays.
Fill out the following fields. Fields with an asterisk ( * ) are required.
Field
Description
* Calendar Start Time
The Calendar Start Time policy determines the start time on the calendar tile for one or more dock door groups. C lick the clock icon and select a time from the list.
Align Calendar to Work Shift
If this checkbox is selected, the Calendar Start Time will slide forward to accommodate the work hours for a given day. This is useful when viewing the Calendar for days whose Work Shifts start the previous day.
Appointment Duration Visible to Partner
Select this checkbox to allow a partner to see the length of an appointment.
Appointment Duration Visible to Carrier
Select this checkbox to allow a carrier to see the length of an appointment.
Click Save.
A success message displays.
Restrict Other Times Tab
Partners (vendors or carriers) specified in the Restricted Partner list are not permitted to create an appointment at a different time other than the three suggested auto-generated reservations. The Other Scheduled Time option will not appear on the Appointment Times tab when scheduling appointments.
Complete the following steps to configure time restrictions:
Click the Restrict Other Times tab.
The Restrict Other Times form displays.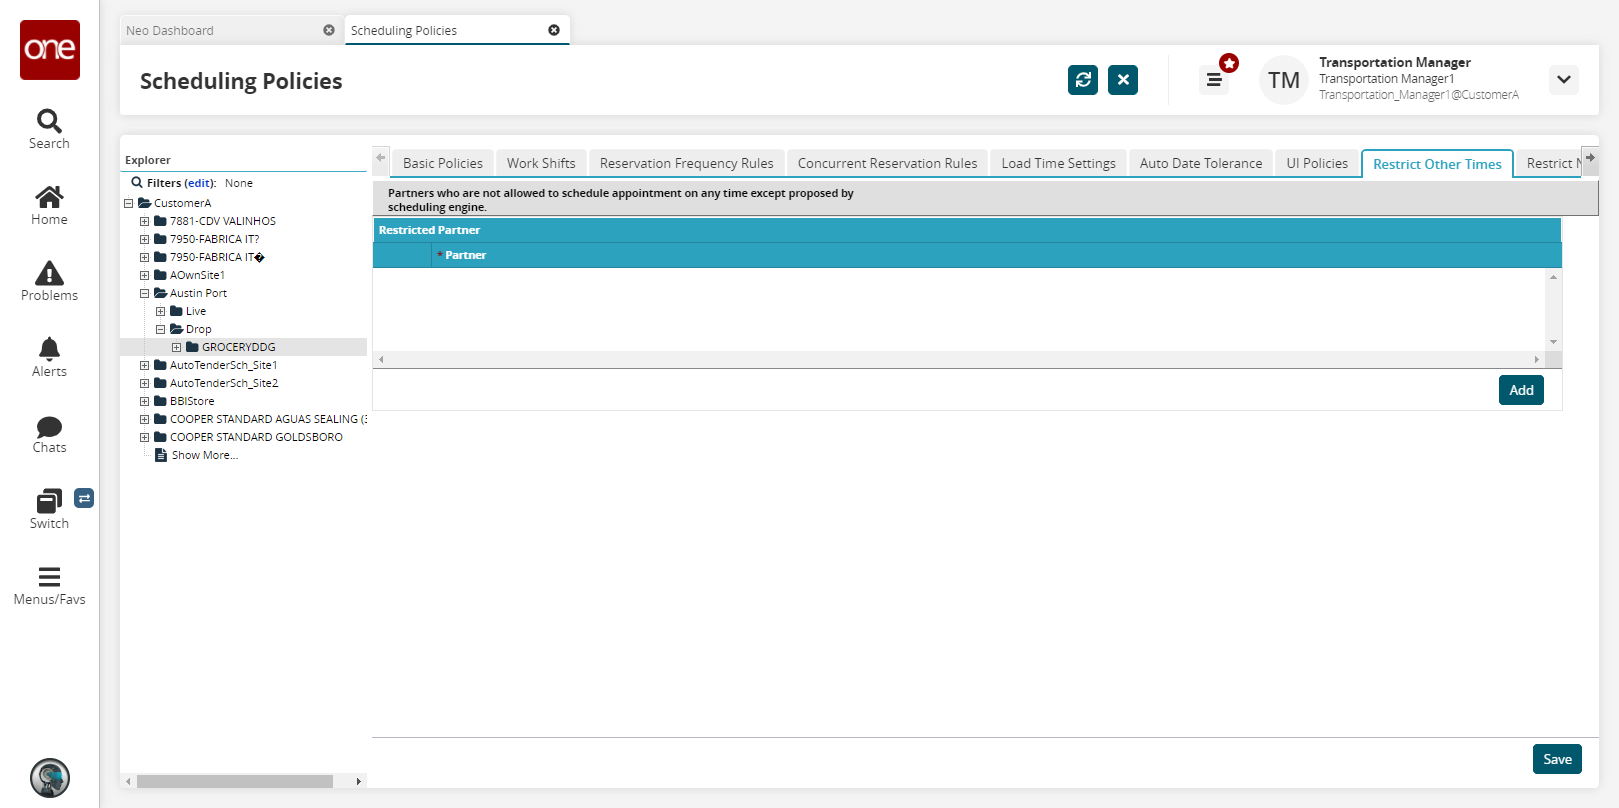
To add a partner, click the Add button.
A new partner row displays.
Select a partner.
Click Save.
A success message displays.
Restrict Next Candidates Tab
Partners (vendors or carriers) specified in the Restrict Next Candidates list are not permitted to use the restricted partners' facility to get the next candidates apart from those provided by the scheduling engine.
Complete the following steps to restrict the next candidates:
Click the Restrict Next Candidates tab.
The Restrict Next Candidates form displays.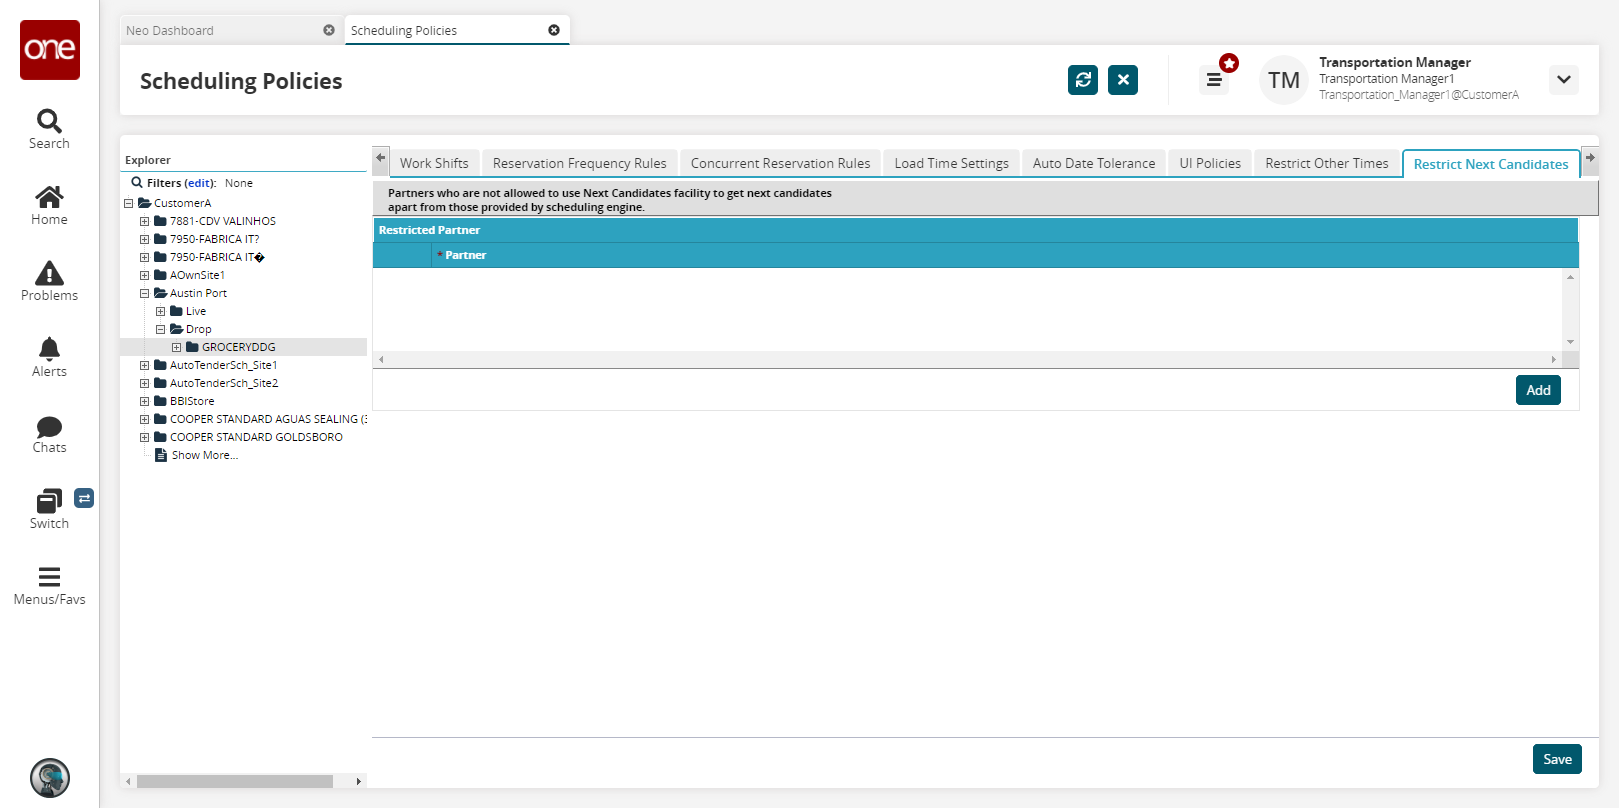
To add a partner, click the Add button.
A new partner row displays.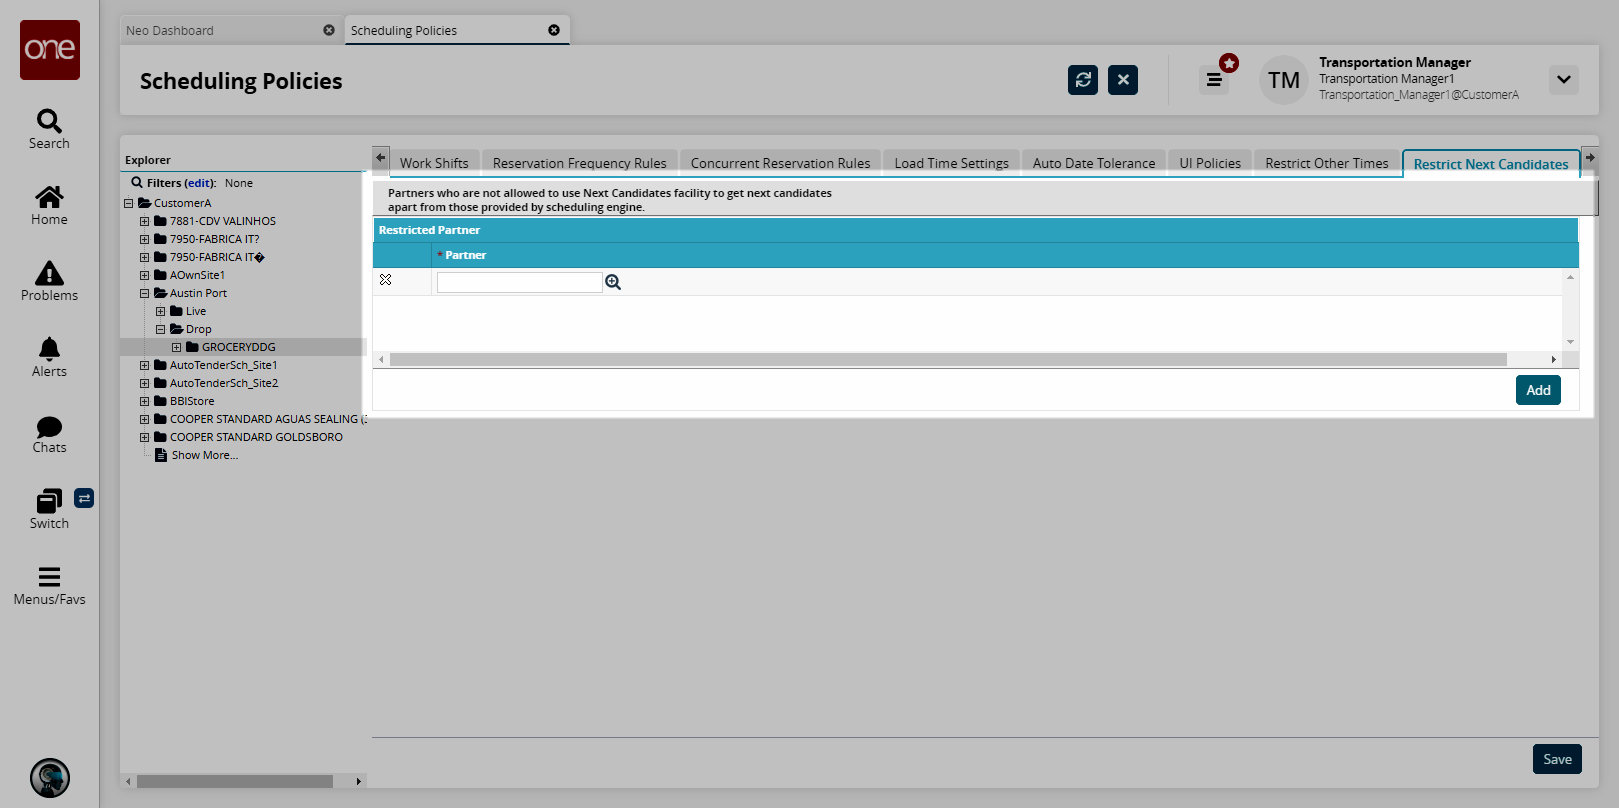
Select a partner.
Click Save.
A success message displays.
Restrict Target Date Tab
Partners or a combination of selected partners can be restricted before the target date during pick up or delivery.
Complete the following steps to configure the Restrict Target Date policy:
Click the Restrict Target Date tab.
The Restrict Target Date form displays.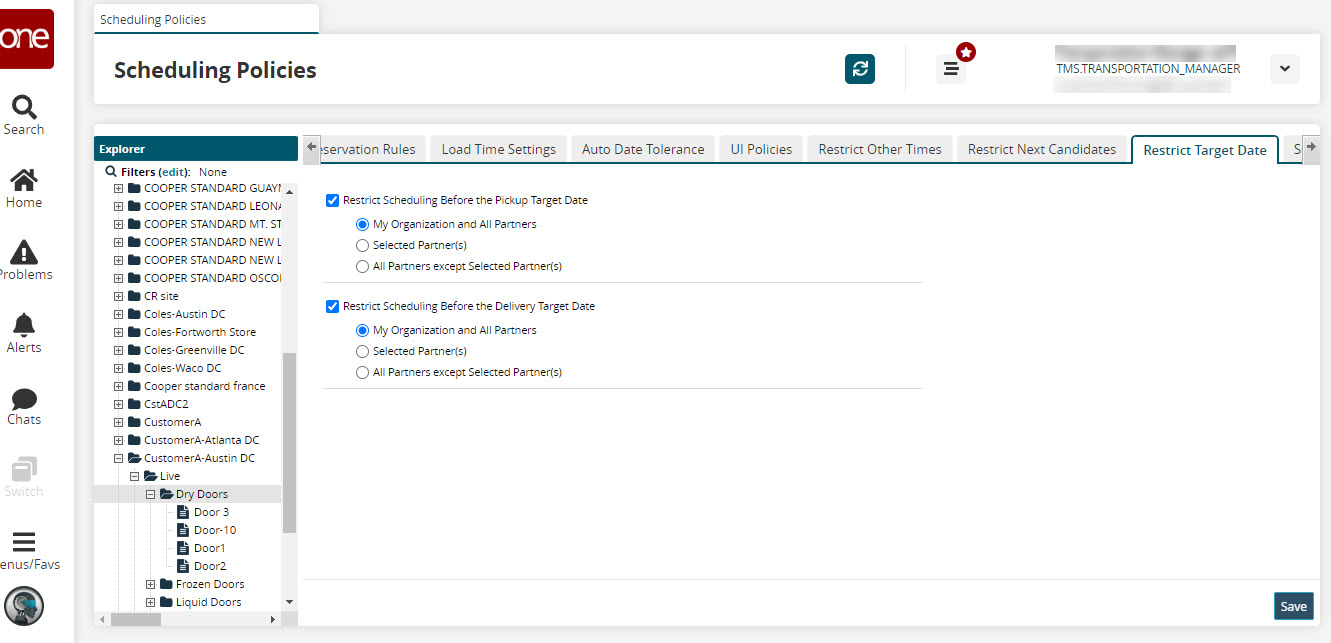
Fill out the following fields.
Field
Description
Restrict Scheduling Before the Pickup Target Date
Select this checkbox to restrict scheduling before the pickup target date. The available configuration options are:
My Organization and All Partners: By default, this option is selected. This selection restricts scheduling before the pickup target date for the Organization and all partners.
Selected Partners: Select this option to restrict the scheduling to specific partners only. Use the picker tool to select one or more partners.
All Partners except Selected Partners: Select this option to exclude specific partners from the scheduling restrictions. Use the picker tool to select one or more partners.
Restrict Scheduling Before the Delivery Target Date
Select this checkbox to restrict scheduling before the delivery target date. The available configuration options are:
My Organization and All Partners: By default, this option is selected. This selection restricts scheduling before the delivery target date for the Organization and all partners.
Selected Partners: Select this option to restrict the scheduling to specific partners only. Use the picker tool to select one or more partners.
All Partners except Selected Partners: Select this option to exclude specific partners from the scheduling restrictions. Use the picker tool to select one or more partners.
Note
The user can upload the Restrict Target Date policy by navigating to Tools > Upload > Scheduling Policies > Dock Door Group Policies > Restrict Target Date.
Click Save.
A success message displays.
Scheduling Sequence Tab
A group of dock doors with a distinct scheduling preference has a sequence number. The sequence number indicates the order in which groups of doors will be filled when scheduling appointments.
Complete the following steps to schedule a sequence:
Click the Scheduling Sequence tab.
The Scheduling Sequence form displays.
To add a scheduling sequence, click New.
The scheduling sequence form displays.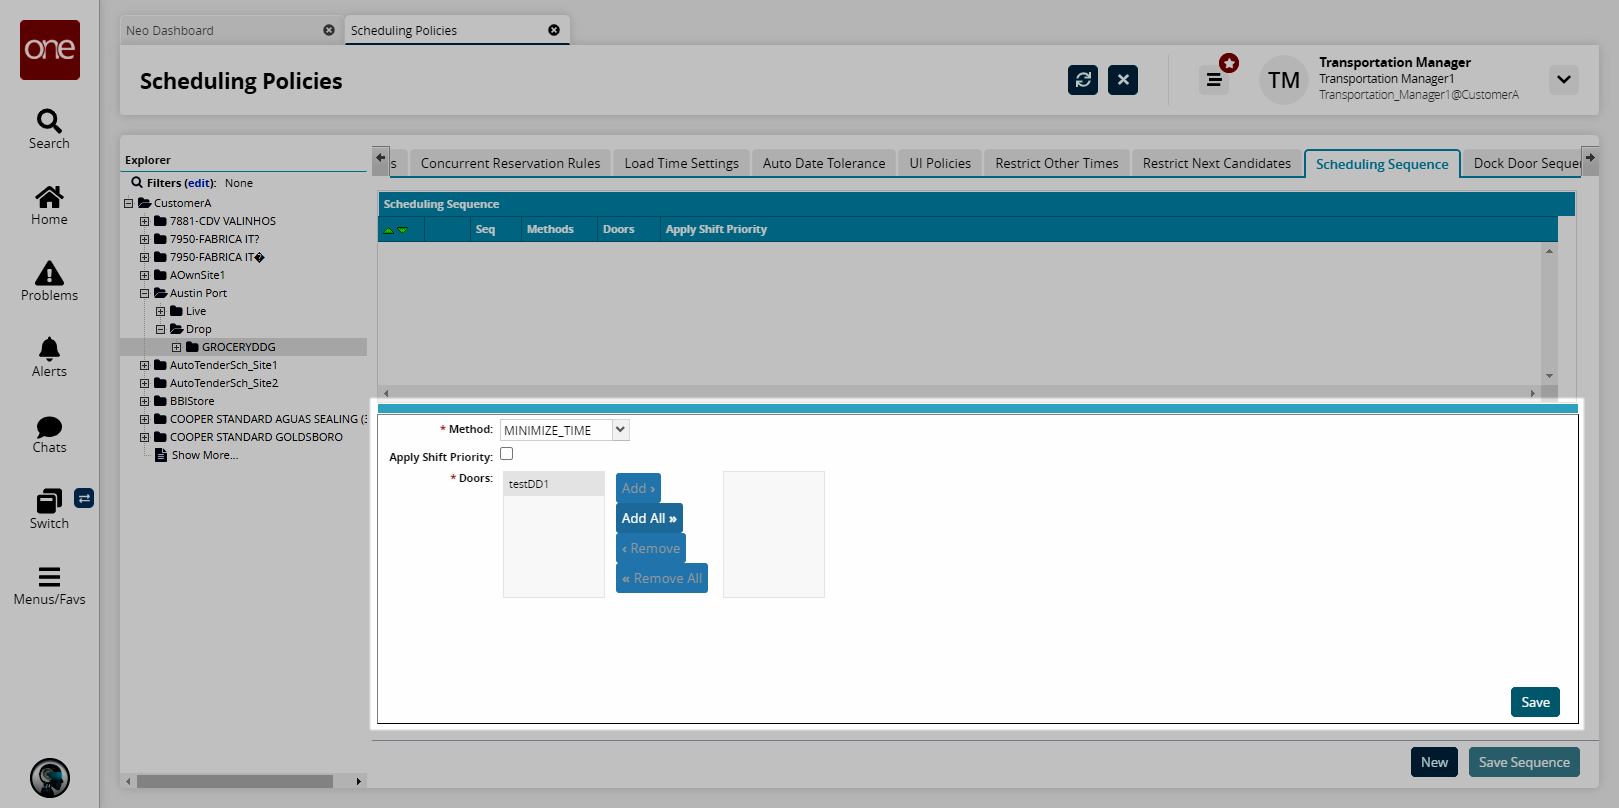
From the Method drop-down menu, select either Minimize Time or Minimize Door.
Minimize Time: The Appointment Scheduling engine will schedule multiple dock doors to use the least amount of time.
Minimize Door: The Appointment Scheduling engine will schedule multiple appointments for a single dock door before scheduling another door.
Select the Apply Shift Priority checkbox to apply shift priority to the scheduling sequence. When selected, the Appointment Scheduling engine considers the shift priority that was assigned on the Work Shifts form when determining the scheduling sequence. Otherwise, appointments start at the beginning of the day.
In the Doors field, select the doors affected by the scheduling sequence. Click one or more doors in the left-hand doors list, and then click Add. The selected doors for this scheduling sequence move to the right-hand doors list.
Add All selects all doors in the doors list. All doors move to the right-hand list.
Remove removes all selected doors from the right-hand list.
Remove All removes all doors from the right-hand list. All doors move to the left-hand list.
Click Save.
The new sequence displays in the Scheduling Sequence table.To add another scheduling sequence, repeat the previous steps.
To change the sequence of multiple schedules, select a schedule, and then click the up or down arrows to move the schedule up or down in sequence.
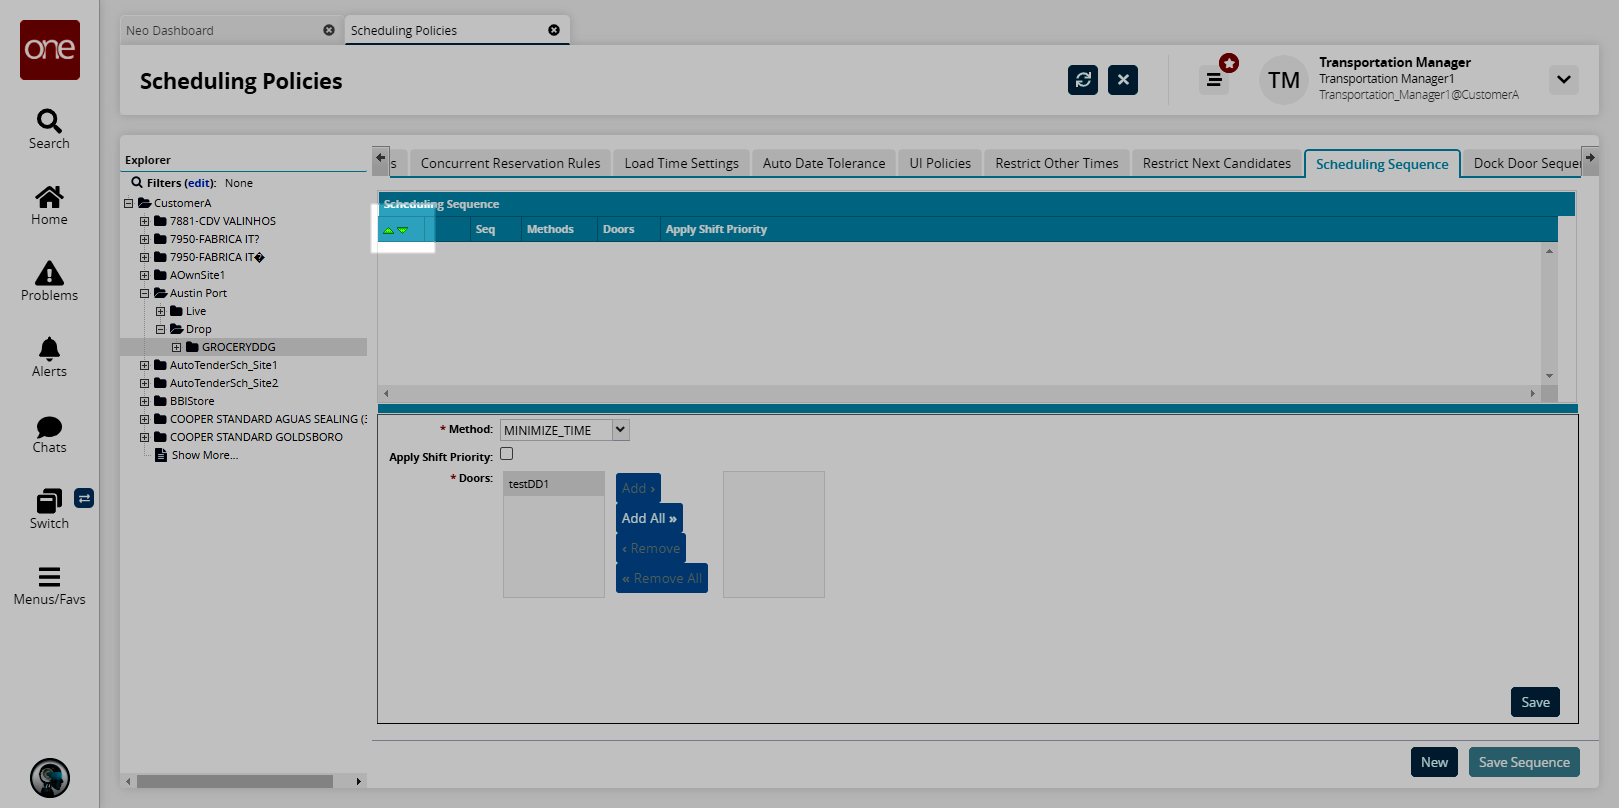
After all changes have been made, click Save Sequence.
Dock Door Sequence Tab
The Dock Door Sequence tab functions identically to th e Scheduling Sequence tab.
Preferred Times Tab
Preferred times build upon the concept of standing appointments. The preferred time is a soft reservation that is applied if available and applicable for a partner, partner profile, appointment code, or load type. If a shipment matches one of these attributes, the Appointment Scheduling engine will try to locate a door that has these times available.
A preferred time does not represent a reserved time slot.
Complete the following steps to set preferred times:
Click the Preferred Times tab.
The Preferred Times form displays.
Click New.
The preferred times form displays.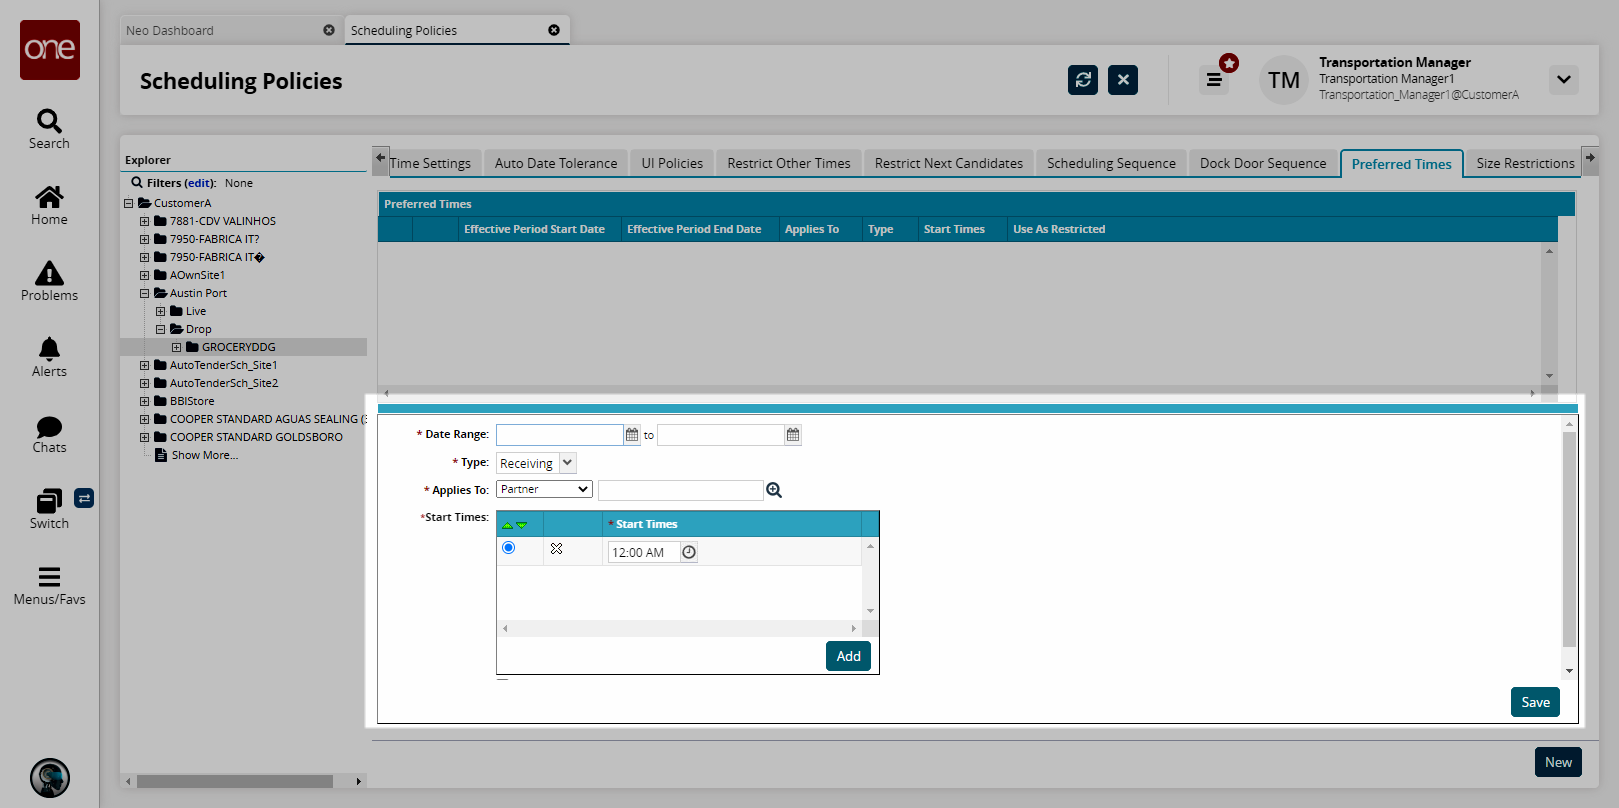
Fill out the following fields. Fields with an asterisk ( * ) are required.
Field
Description
* Date Range
Select a date range using the calendar icons.
* Type
Select a type of preferred time from the drop-down menu. The available options are::
Ship ping: Shipments going from the dock door group.
Receiving: Shipments coming into the dock door group.
Both: A combination of the Shipping and Receiving options.
* Applies To
In the Applies To drop-down list, select the relevant option:
Partner: select a partner using the search functionality.
Partner Profile: select a partner profile using the search functionality.
Load Type: select a load type from the drop-down list.
Org Code: select an organization code using the search functionality.
* Start Times
Click the clock icon in the Start Times column and select a time.
Click Add to add another start time.
To change the sequence of multiple preferred times, select a row, and then click the up or down arrows to move the row up or down in sequence.
Use As Restricted
Select this checkbox to restrict appointment candidates to only the times defined on the Preferred Times tab. If this check box is not selected, other appointment candidates can be displayed.
To delete a preferred times row, click the delete row icon.
After all changes have been made, click Save.
A summary of the new preferred times setting displays in the Preferred Times table.
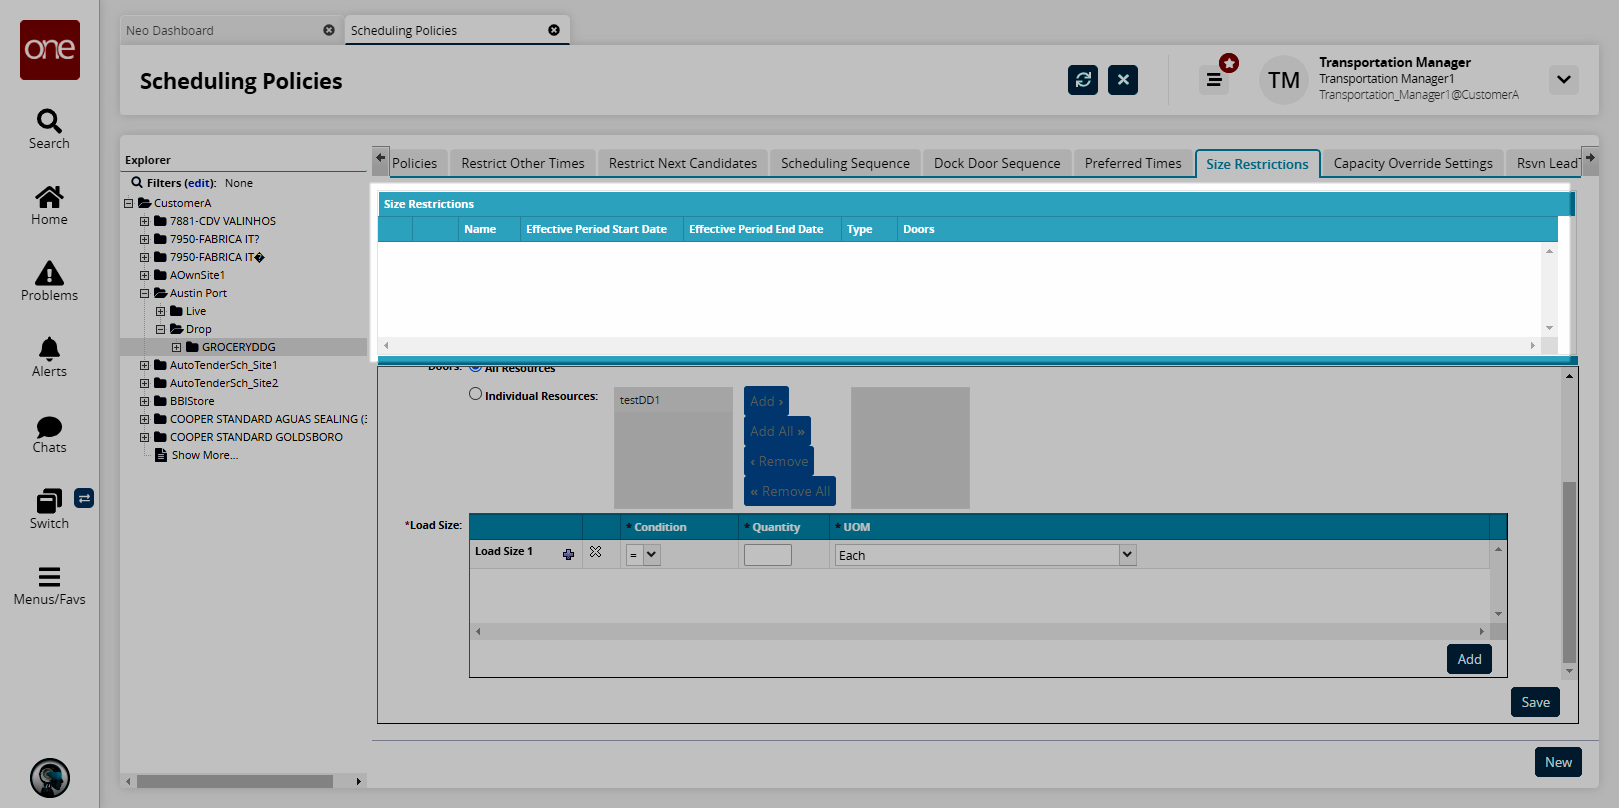
Size Restrictions Tab
The Size Restriction policy does not allow a shipment with certain characteristics to be scheduled during a specified time frame.
When enabled, the shipment size rule will not schedule shipments greater than or less than a certain size between specified times of the day, or not within a set amount of hours before the end of a work shift. Shipment size is expressed by one or more quantities and pieces, UOM, and rule operators (AND/OR). The shipment size rule can be applied to specific doors or to the entire calendar. In case the appointment is associated with multiple shipments, combine the quantities for the pieces UOM to calculate the total shipment size.
Complete the following steps to set size restrictions:
Click the Size Restrictions tab.
The Size Restrictions form displays.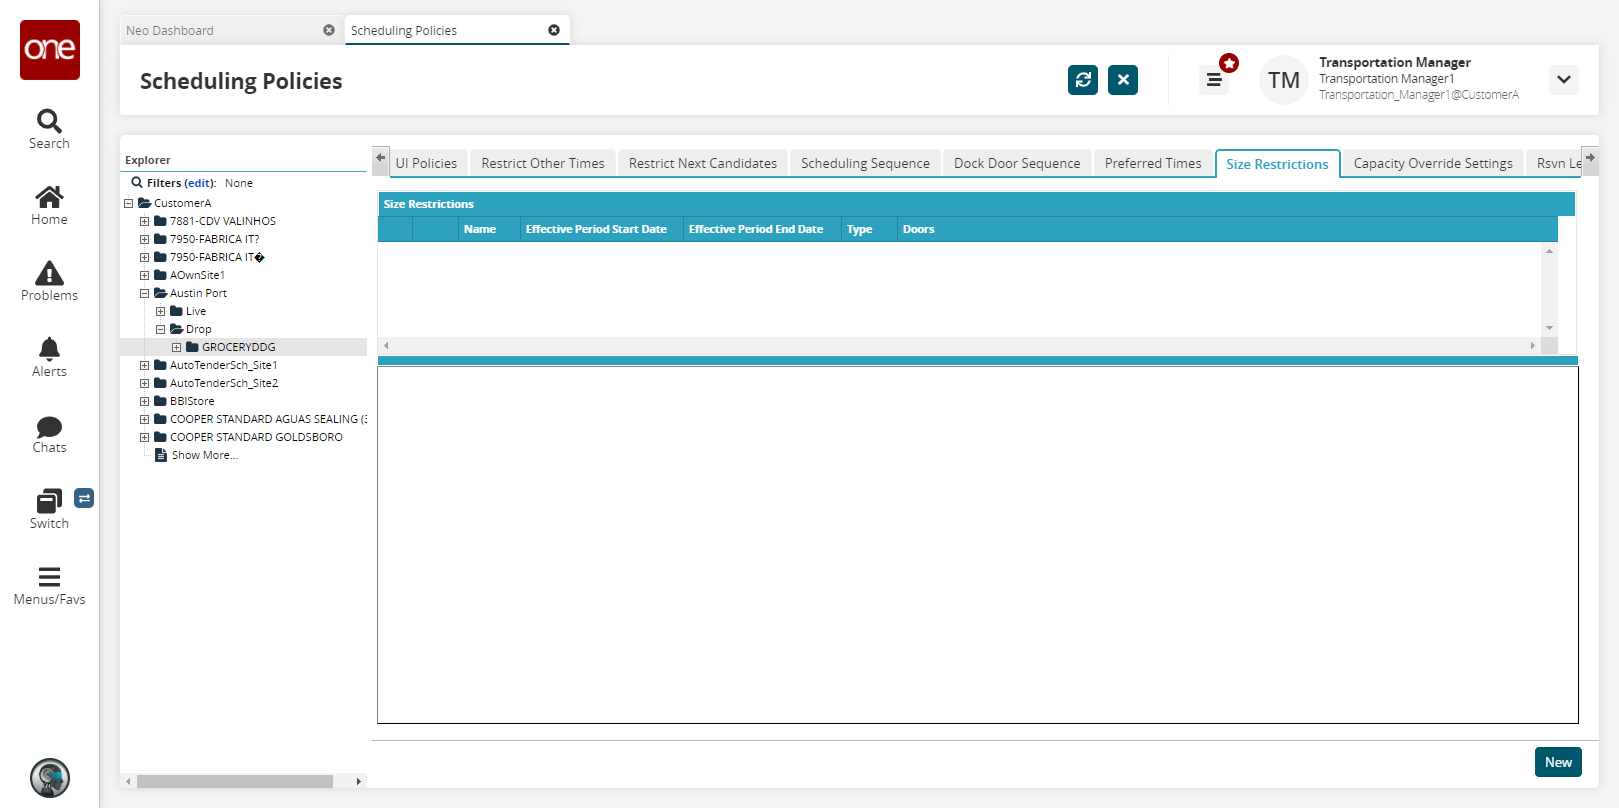
Click New.
The Size Restriction form displays.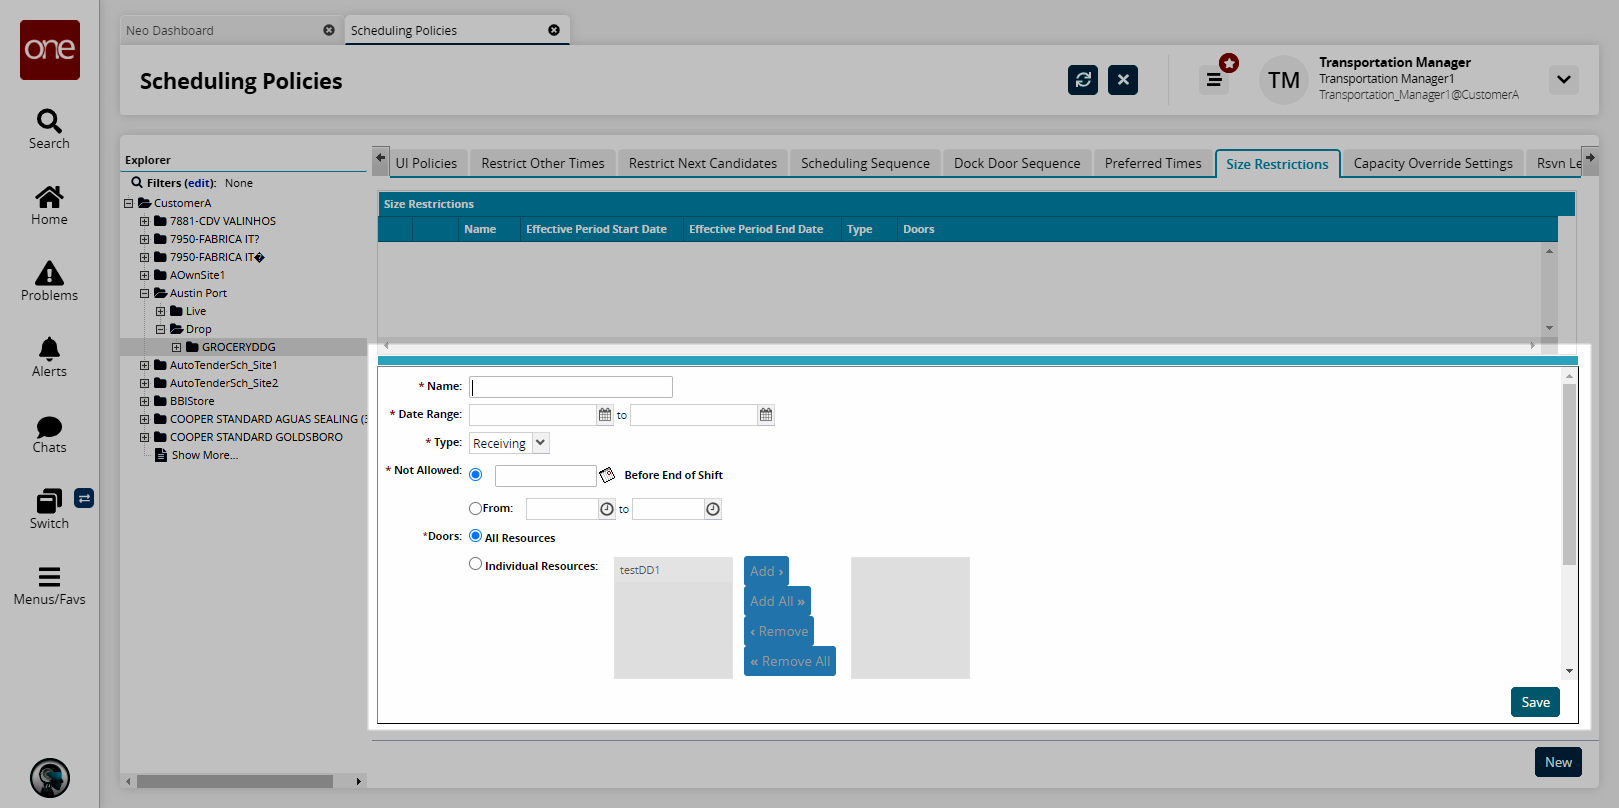
Fill out the following fields. Fields with an asterisk ( * ) are required.
Field
Description
* Name
Enter a name for this size restriction.
* Date Range
Enter a date range using the calendar icons.
* Type
Select a type of size restriction from the drop-down menu. The available options are::
Shipping: Shipments going from the dock door group.
Receiving: Shipments coming into the dock door group.
Both: A combination of the Shipping and Receiving options.
* Not Allowed
Select a Not Allowed option for the time range of the size restriction.
Duration Before End of Shift: Using the Duration button, select a duration before the end of the shift that the Not Allowed size restriction is valid. Type values for Hours and Minutes, and then click OK.
From Time Range: To specify a Not Allowed Start Time, click the time button to display the time list, and then click a time from the list. Repeat this step for End Time.
* Doors
Select the doors that are affected by the size restriction.
Select All Resource if the size restriction affects all doors in the dock door group.
Select Individual Resources if the size restriction affects one or more doors in the dock door group.
Click one or more doors in the left-hand list, and then click Add. The selected doors for this block move to the right-hand list.
Click Add All to select all doors in the doors list. All doors move to the right-hand list.
Click Remove to remove all selected doors from the right-hand list.
Click Remove All to remove all doors from the right-hand list. All doors move to the left-hand list.
In the Load Size table, for Load Size 1, click the Condition list and then select a condition: equal (=), greater than (>), or less than (<).
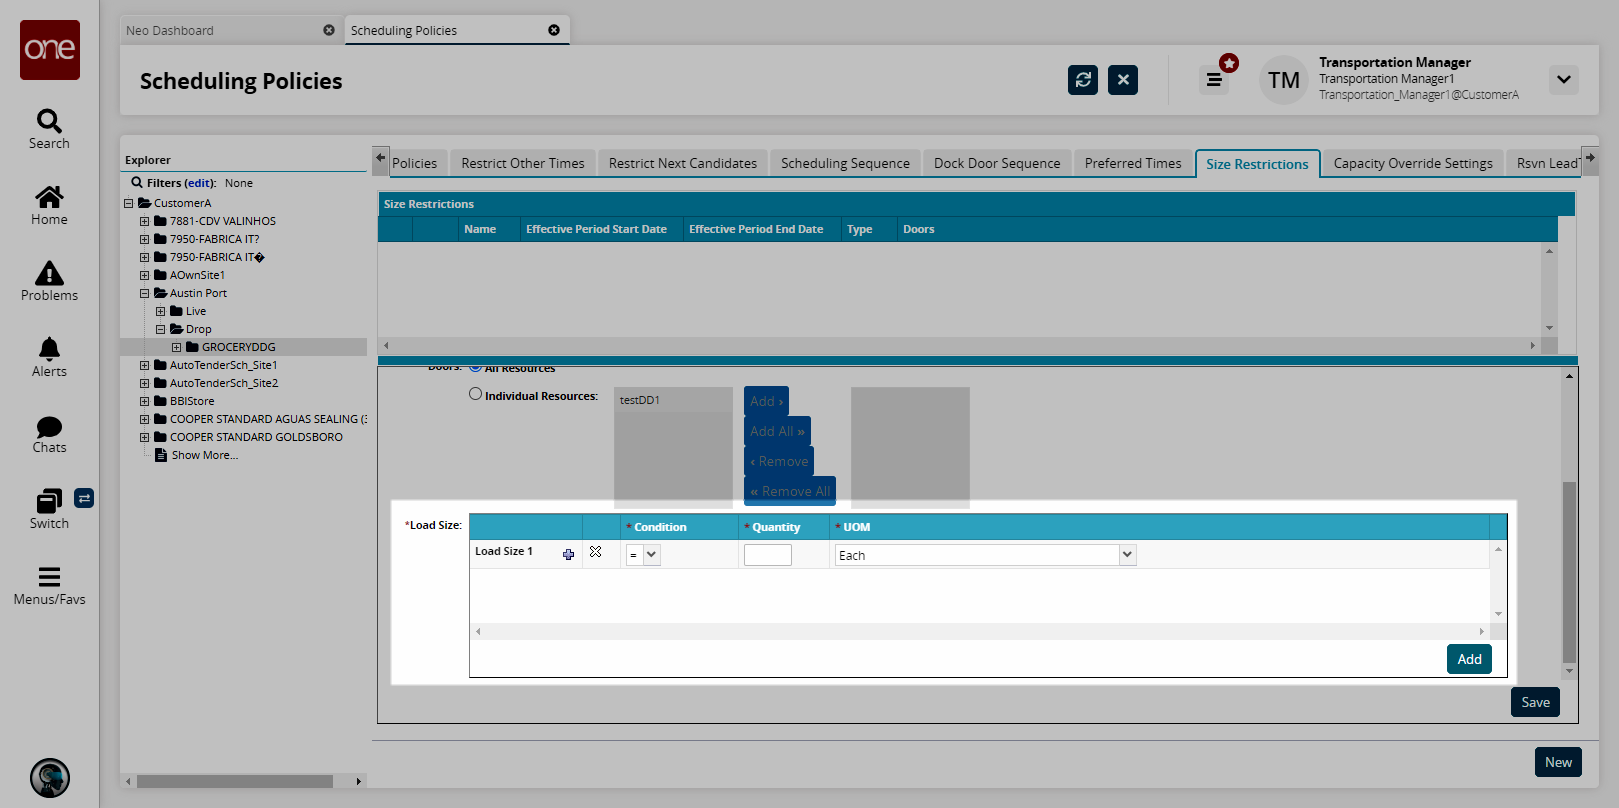
In the Quantity box, type a quantity for this load size rule.
Click the UOM list, and then select a unit of measure option.
To add another rule, click Add.
To delete a rule, click the delete row icon.
Click Save.
The Size Restrictions table shows the new size restriction.
Capacity Override Settings Tab
Complete the following steps to set capacity overrides:
Click the Capacity Override Settings tab.
The Capacity Override Settings form displays.
Click New.
The bottom pane displays.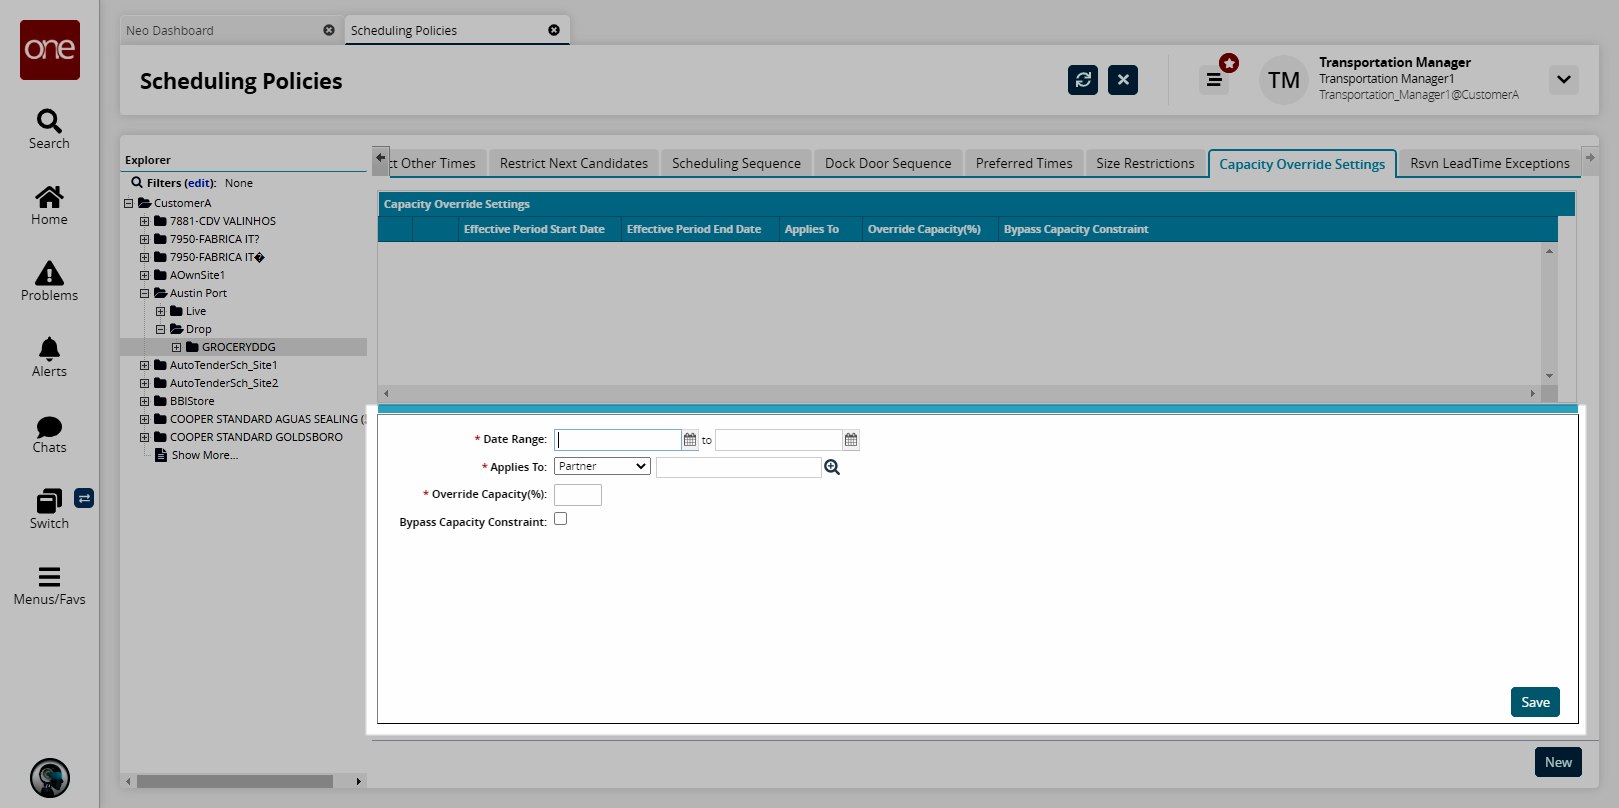
Fill out the following fields. Fields with an asterisk ( * ) are required.
Field
Description
* Date Range
Enter a date range using the calendar icons.
* Applies To
In the Applies To drop-down list, select the relevant option:
Partner: select a partner using the search functionality.
Partner Profile: select a partner profile using the search functionality.
Load Type: select a load type from the drop-down list.
Org Code: select an organization code using the search functionality.
* Override Capacity(%)
Enter a percentage value.
Bypass Capacity Constraint
Select this checkbox to bypass capacity constraints.
If selected, the Override Capacity constraints configured for the associated Dock Door Group are ignored for that carrier partner. The Dock Door Group is considered to have unlimited capacity at both the daily and work-shift levels.
If not selected , the Override Capacity constraints configured for the associated Dock Door Group are applied to that carrier partner.
Click Save.
The Capacity Override Settings table shows the new setting.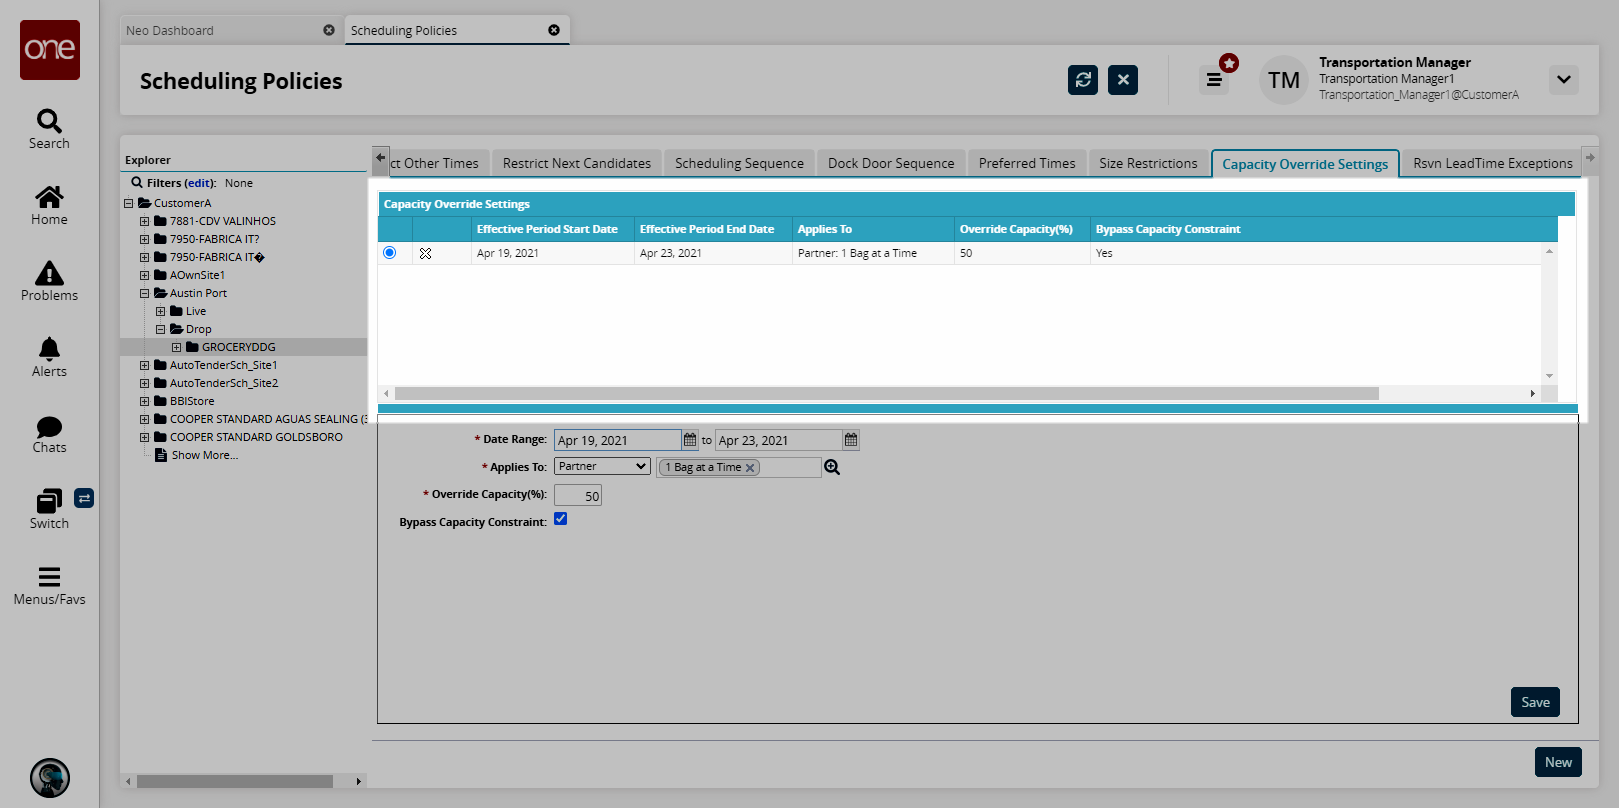
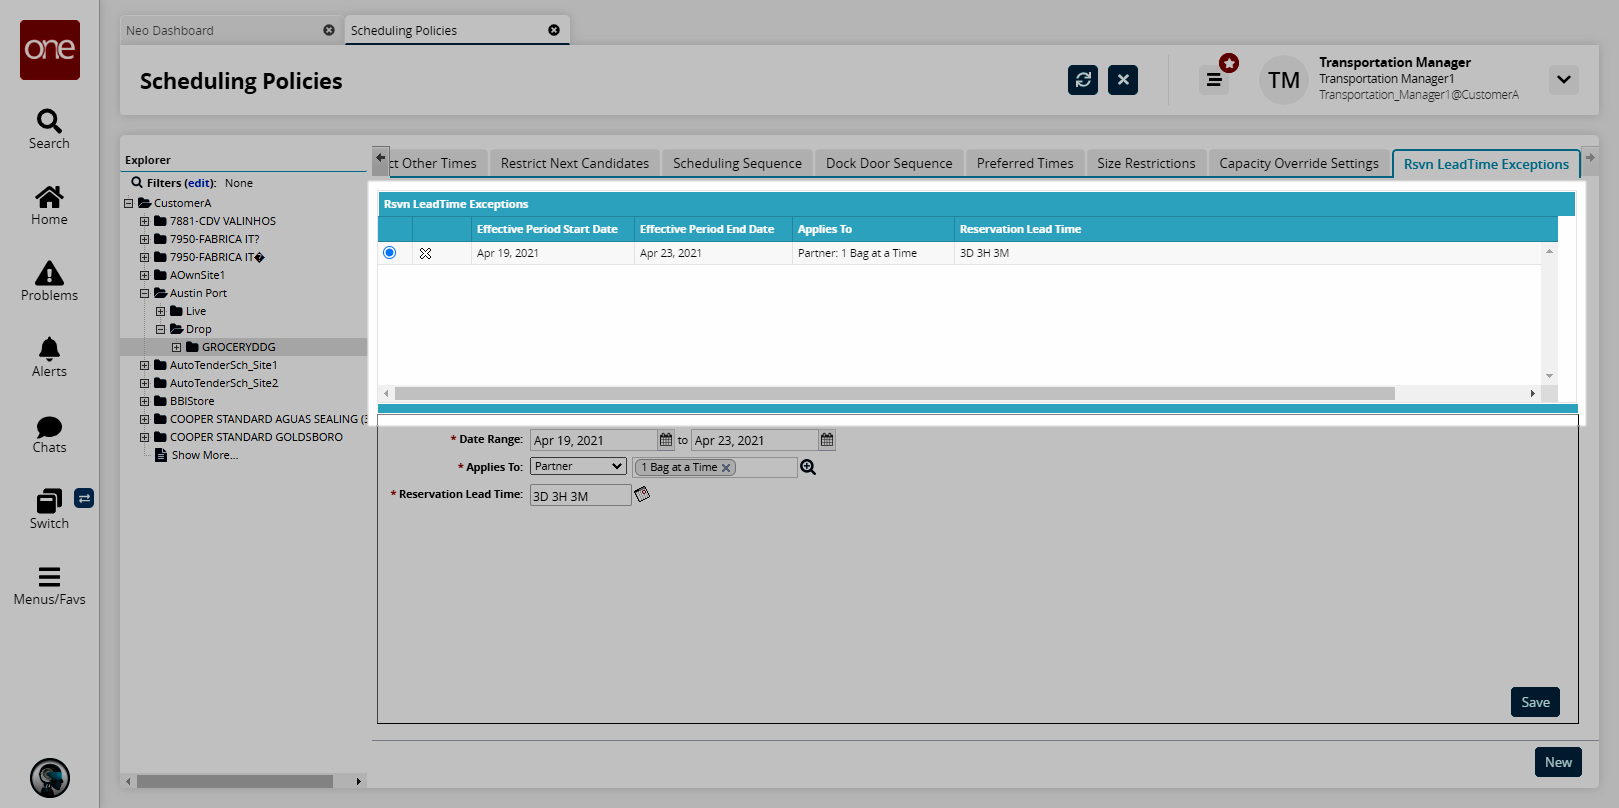
Reservation Lead Time Exceptions Tab
Complete the following steps to configure reservation lead time exceptions:
Click the Rsvn Lead Time Exceptions tab.
The Rsvn Lead Time Exceptions form displays.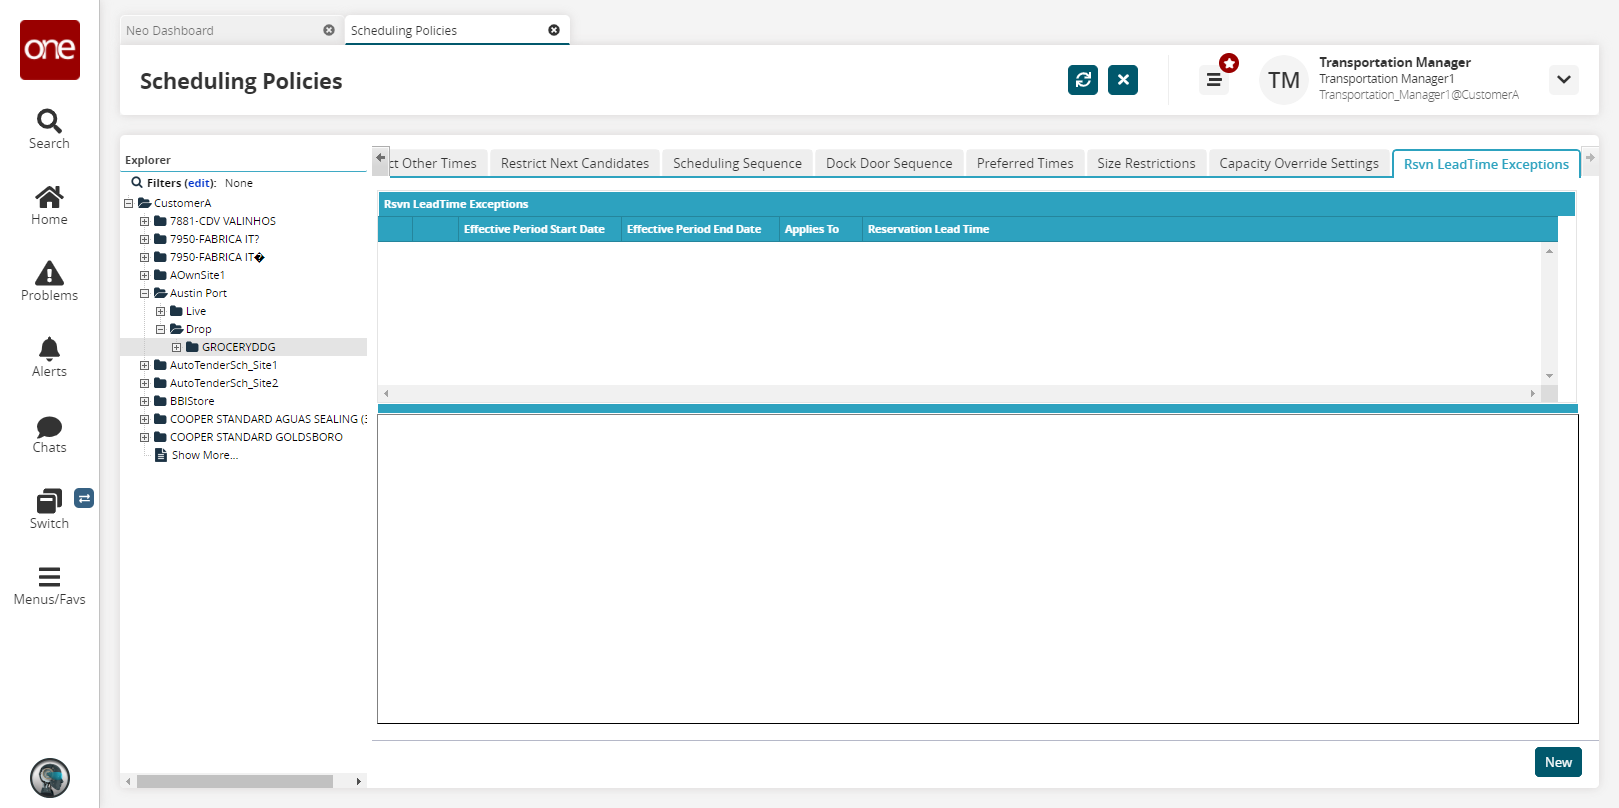
Click New.
The reservation lead time exceptions form displays.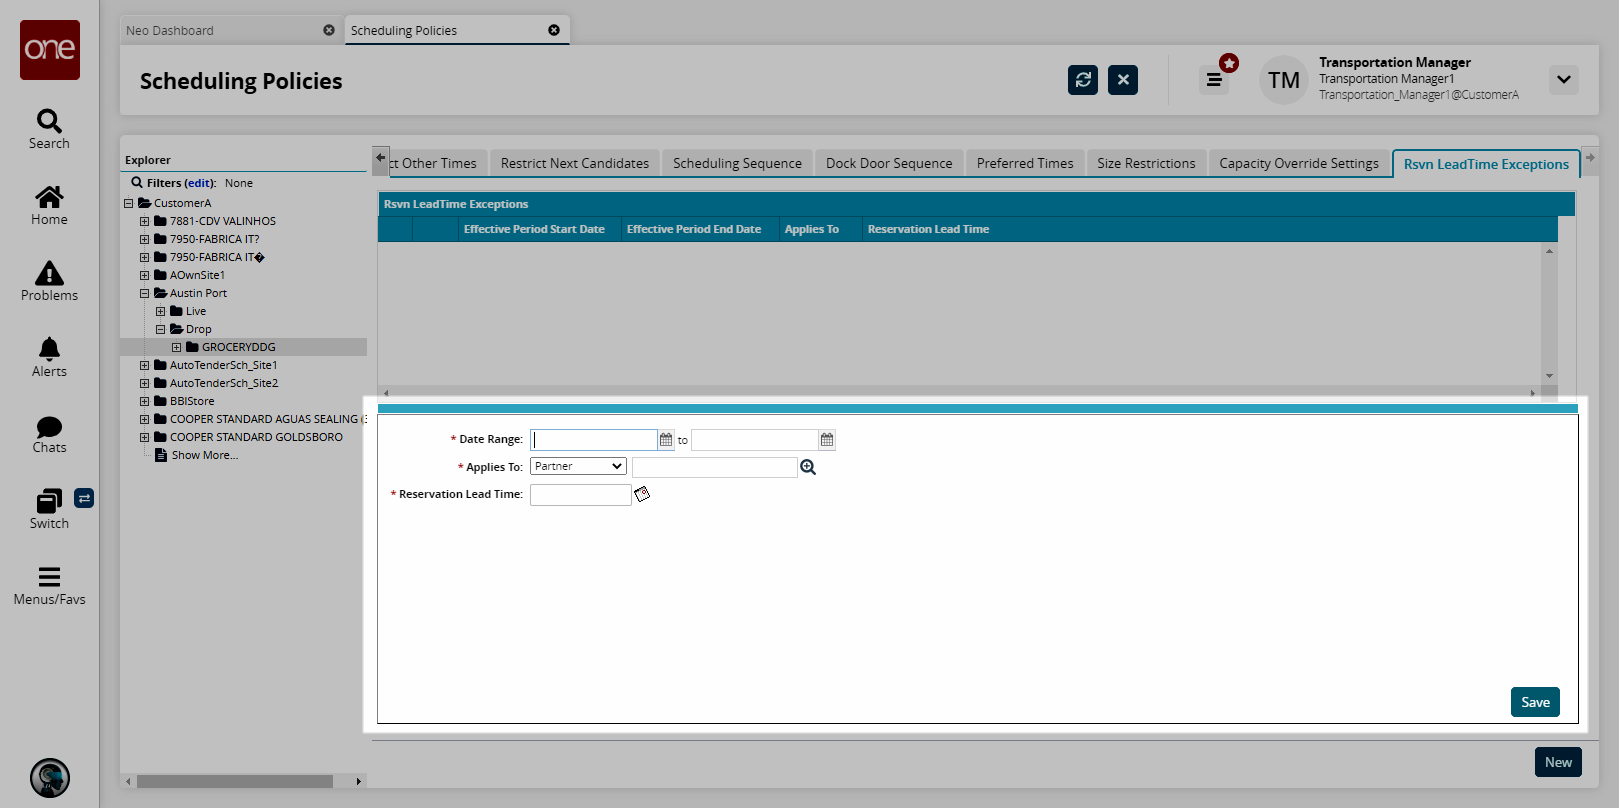
Fill out the following fields. Fields with an asterisk ( * ) are required.
Field
Description
* Date Range
Enter a date range using the calendar icons.
* Applies To
In the Applies To drop-down list, select the relevant option:
Partner: select a partner using the search functionality.
Partner Profile: select a partner profile using the search functionality.
Load Type: select a load type from the drop-down list.
Org Code: select an organization code using the search functionality.
* Reservation Lead Time
Enter a reservation lead time in Days, Hours, and Minutes using the calendar icon.
Click Save.
The Reservation Lead Time Exceptions table shows the new setting.