Editing Settings in the NEO UI
Users can customize many interface settings in the NEO environment.
Complete the following steps to change user settings:
L og in to the ONE system.
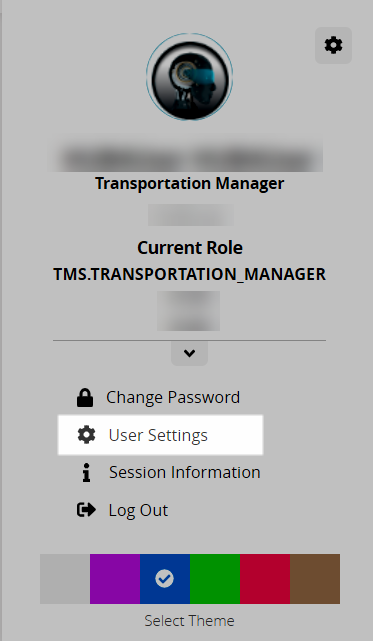
Click the dropdown arrow
 in the top right of the NEO UI dashboard next to the user name and role.
The User Profile menu displays.
Click User Settings.
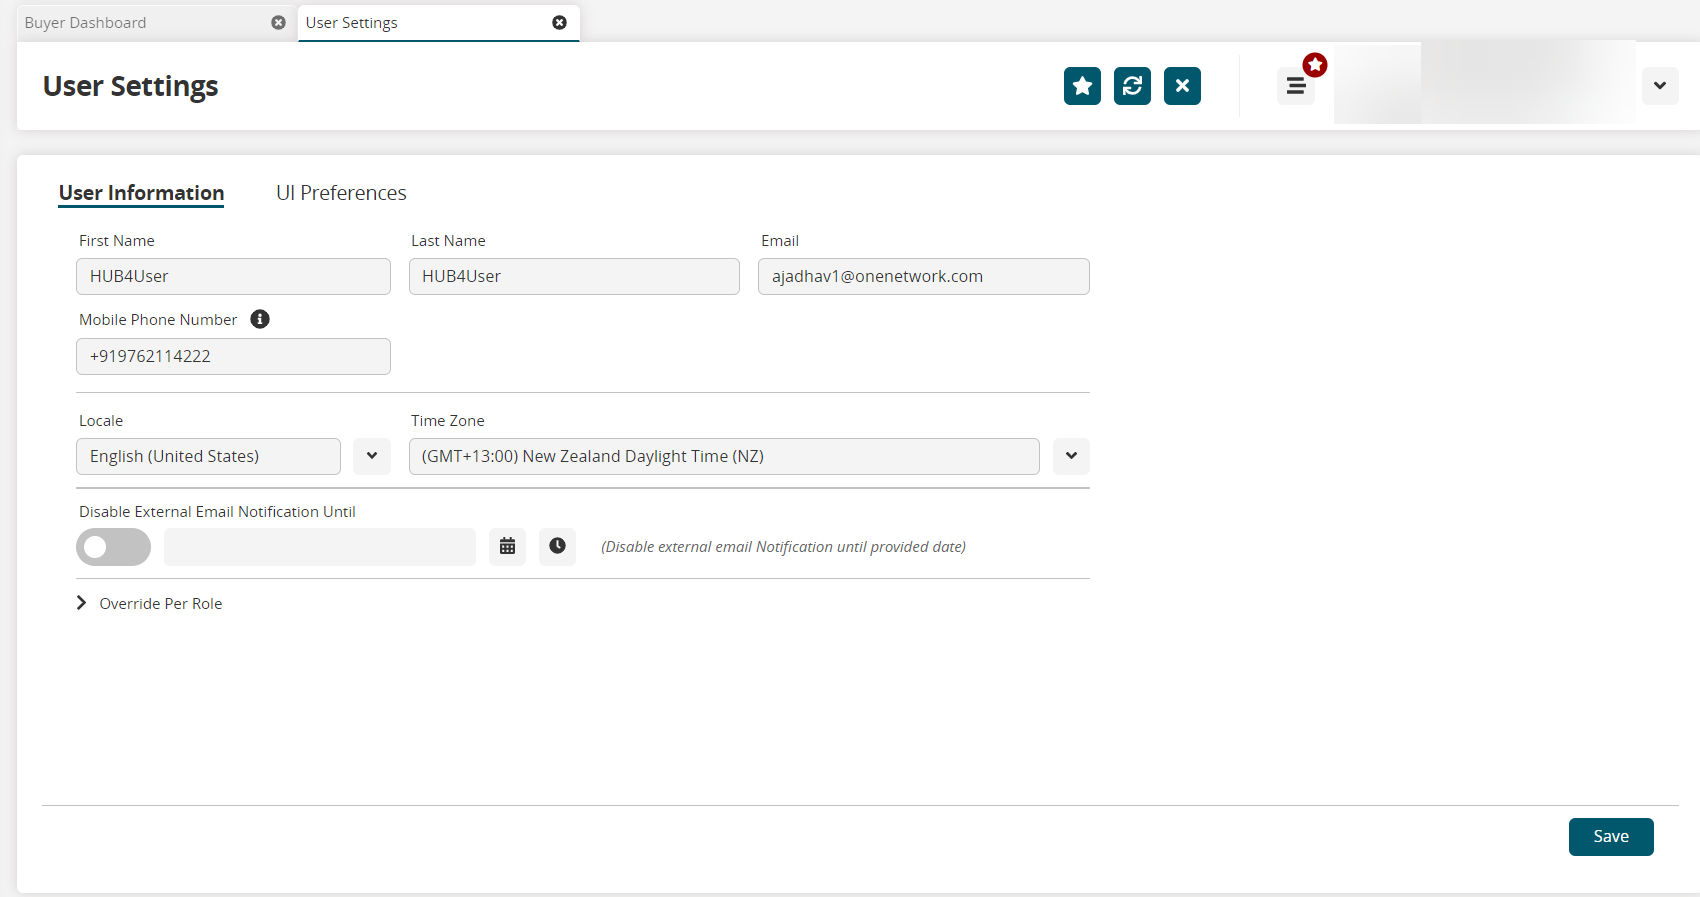
The User Settings screen opens.
Edit First Name, Last Name, Email, and Mobile Phone Number as desired.
In the Locale field, select an option from the dropdown list of languages.
In the Time Zone field, select your time zone from the dropdown menu.
Toggle the Disable External Email Notification to stop notifications for a specified period, and click the calendar and clock icons to select the expiration date for disabled notifications.
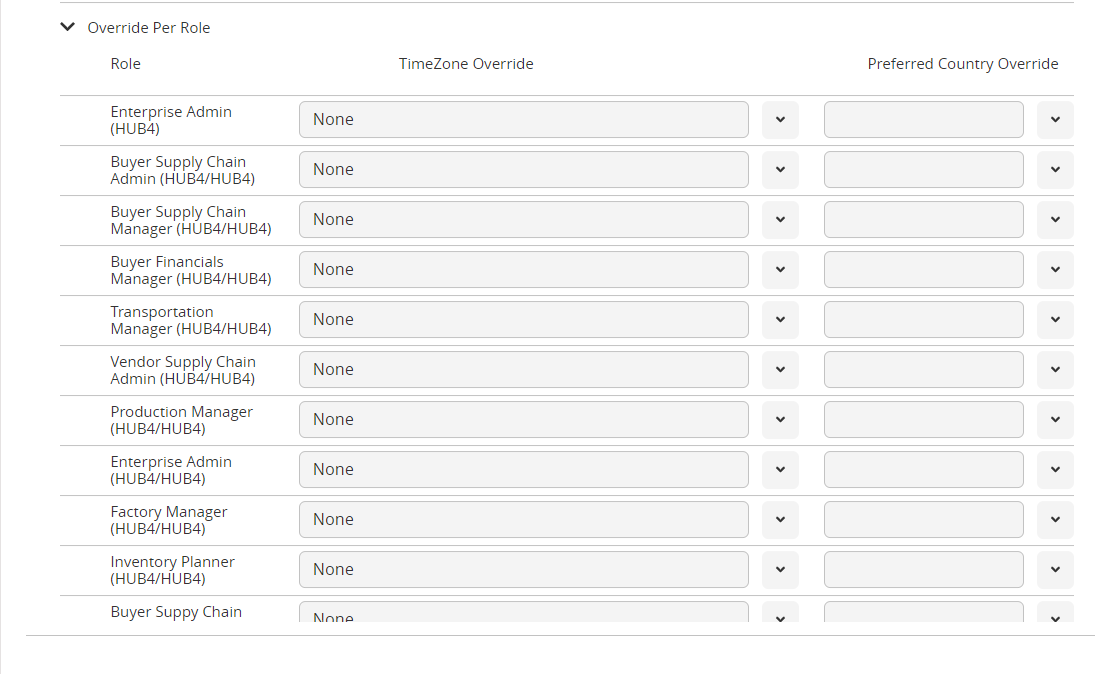
Click the arrow next to Override Per Role to select the TimeZone Override and Preferred Country Override for each role.
The list of roles appears.
Select the Time Zone Override from the dropdown menu for each role if that role performs in a different time zone.
Select the Preferred Country Override from the dropdown menu for each role if that role performs in a different country.
Click the Save button.
A Confirm Changes dialog box displays.Click Yes.
The page refreshes.Click the UI Preferences at the top of the screen.
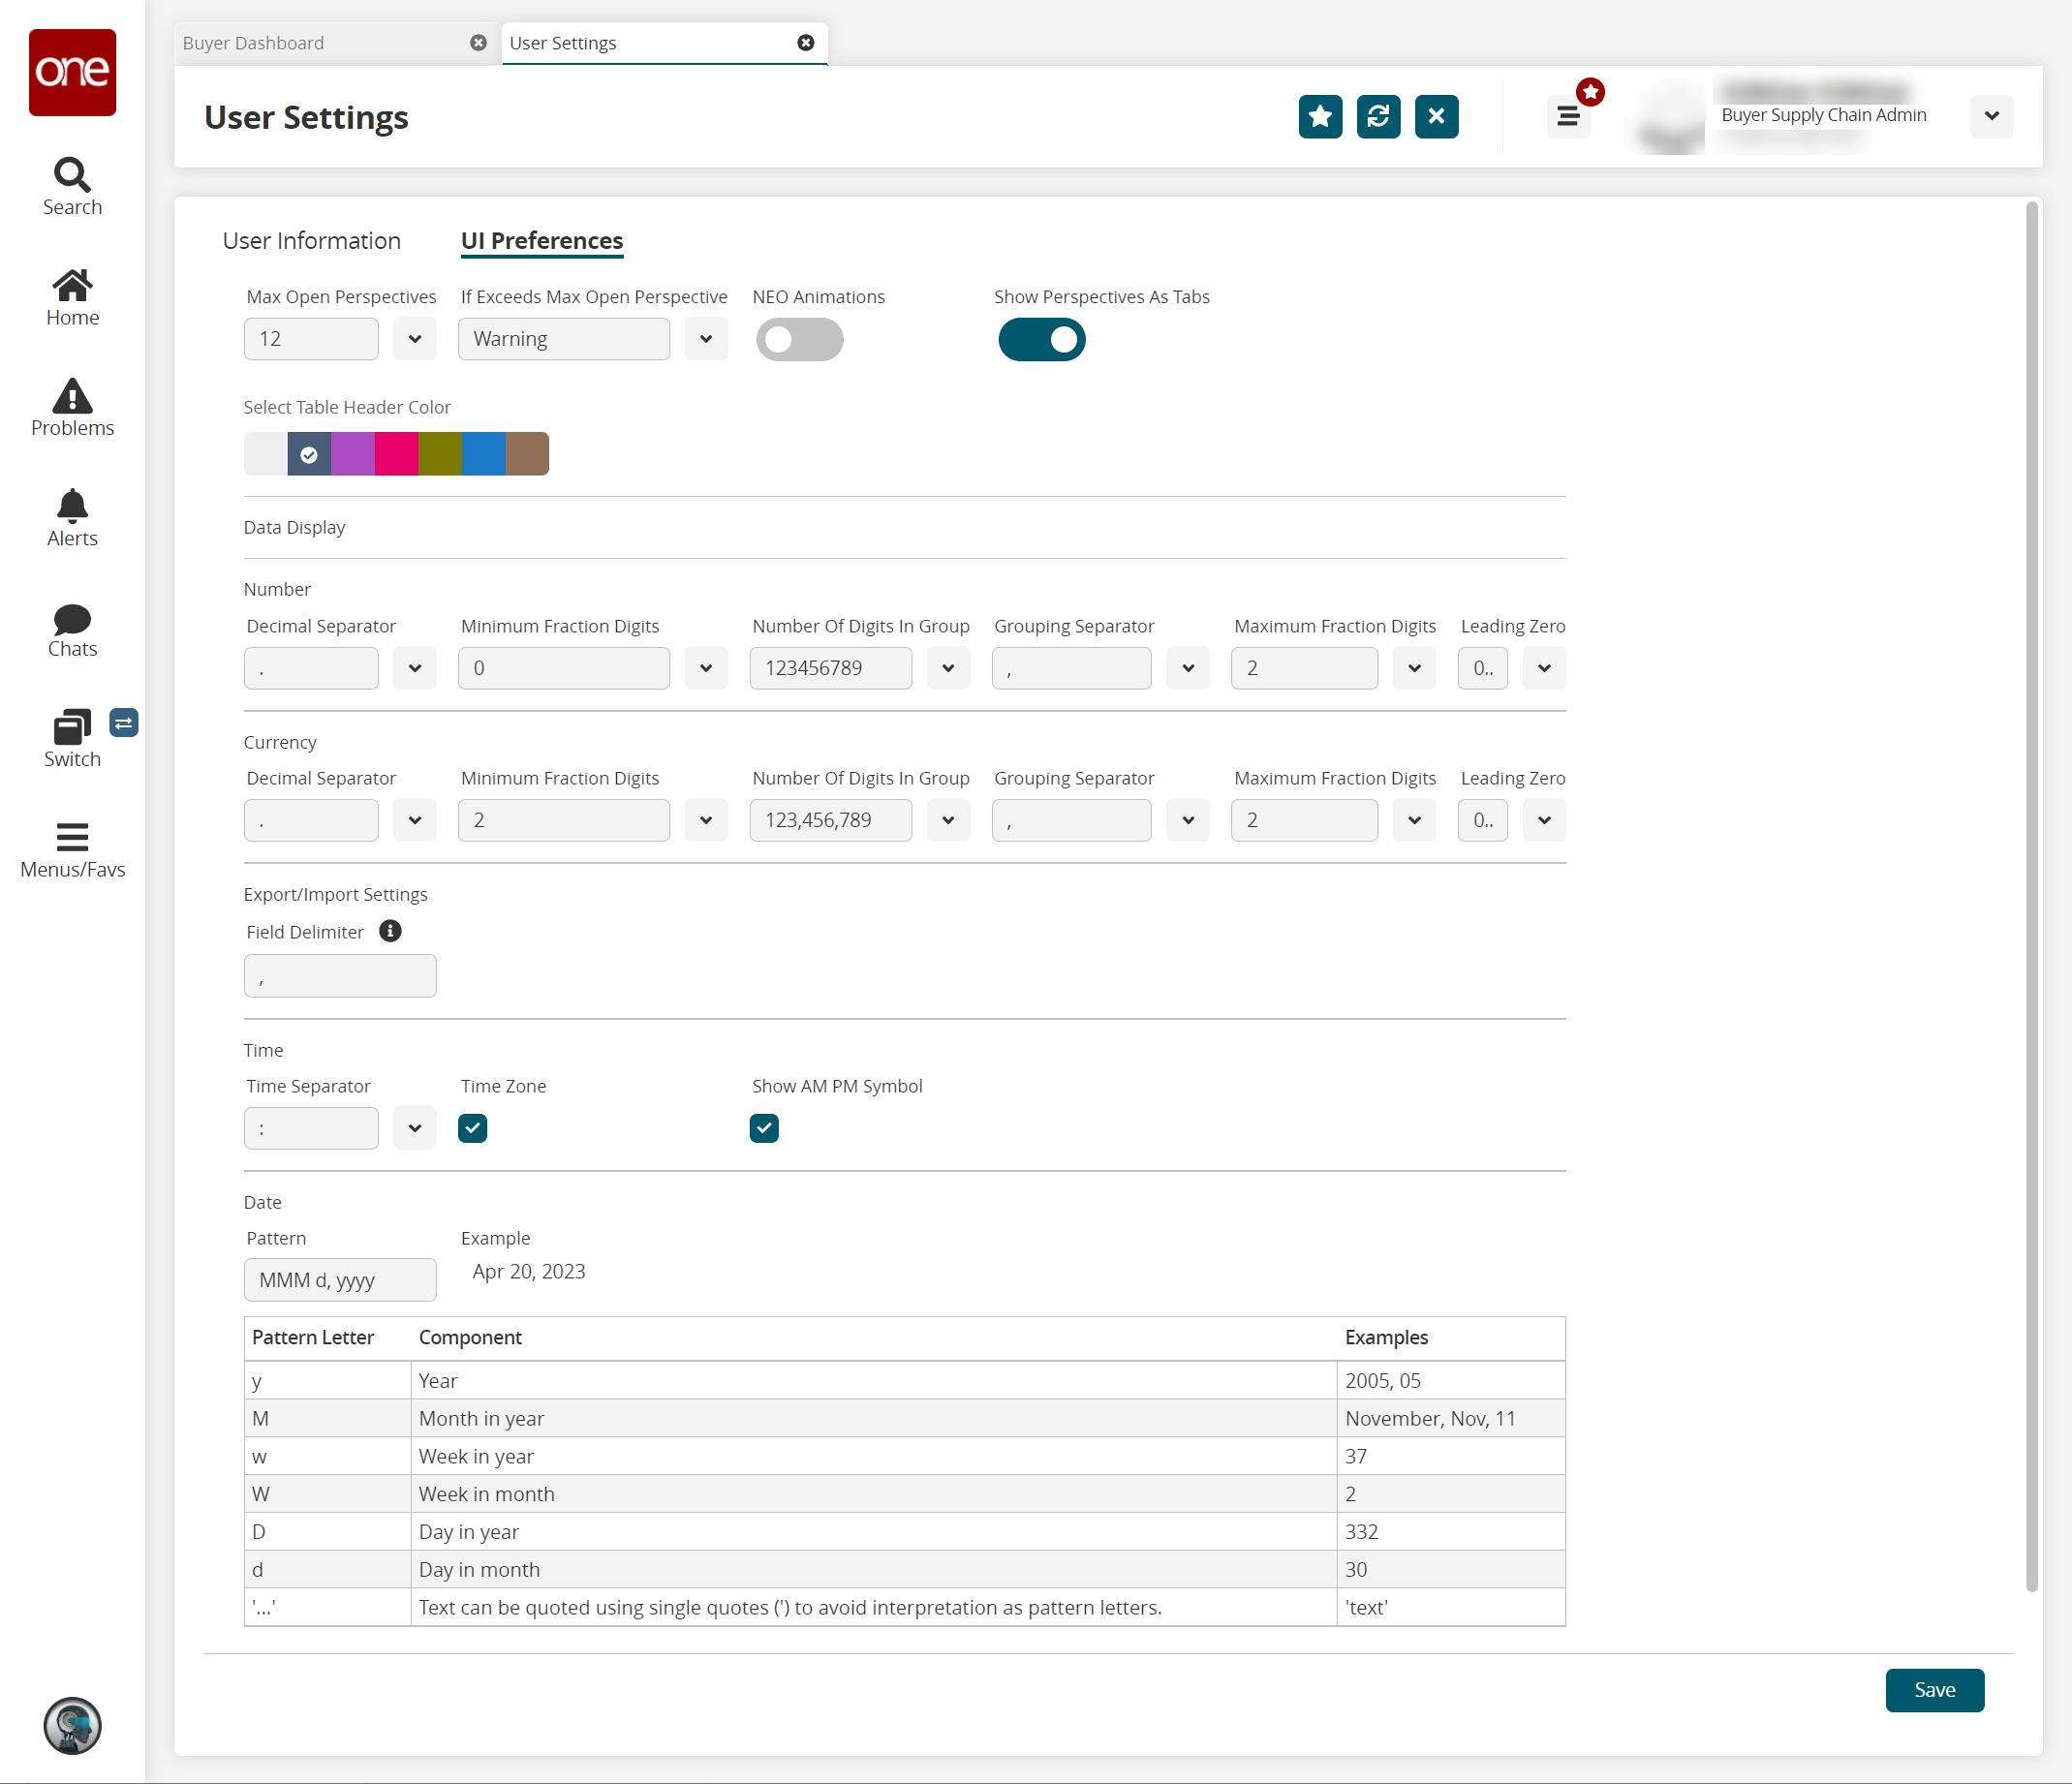
The UI Preferences tab displays. See the table below for a list of the preferences and their descriptions.
Field
Description
Max Open Perspectives
Select the maximum number of open perspectives displayed in NEO from the dropdown menu.
If Exceeds Max Open Perspectives
Select the action NEO performs when the user exceeds the maximum number of open perspectives.
NEO Animation
Toggle on/off animated transitions for the perspective.
Show Perspectives As Tabs
Toggle on/off how perspectives display in the UI. Setting this to ON will show all open perspectives as tabs at the top of the NEO screen. Tabs are disabled by default.
Select Table Header Color
Click a color block to select the color for table headers and timeline views throughout the ONE system.
Number Settings
Select the following for preferences for how numbers display in the UI.
Decimal Separator
Select the decimal separator from the dropdown menu.
Minimum Fraction Digits
Select the minimum number (0-9) of digits as fractions from the dropdown menu.
Number of Digits in Group
Select the grouping of digits between separators from the dropdown menu.
Grouping Separation
Select the separation punctuation (comma or period) from the dropdown menu.
Maximum Fraction Digits
Select the maximum number (0-9) of digits as fractions from the dropdown menu.
Leading Zero
Select to display or not display a leading zero in numbers from the dropdown menu.
Currency Settings
Select the following for preferences for how currency displays in the UI.
Decimal Separator
Select the decimal separator from the dropdown menu.
Minimum Fraction Digits
Select the minimum number (0-9) of digits in factions for currency from the dropdown menu.
Number of Digits in Group
Select the grouping of digits between separators from the dropdown menu.
Grouping Separator
Select the separator punctuation (comma or period) from the dropdown menu.
Maximum Fraction Digits
Select the maximum number (0-9) of digits as fractions for currency from the dropdown menu.
Leading Zero
Select to display or not display a leading zero in currency from the dropdown menu.
Export/Import Settings
Select the following for preferences on import and export settings.
Field Delimiter
Enter a character to be used as a delimiter for CSV files. The default value is a comma (,). Users often change this field value to a semicolon (;), if preferred.
Time Settings
Select the following preferences for how time will display.
Time Separator
Select the time separator from the dropdown menu.
Time Zone
Check the box to display the time zone.
Show AM PM Symbol
Check the box to display the AM PM symbol.
Date Settings
Use the table provided on the screen to format how you want the date displayed.
Pattern
Enter the pattern letters from the table to configure the date display.
Click Save.
A Confirm Changes dialog box displays.Click Yes.
The page refreshes.