GLG: Creating Receivables Invoices
Complete the following steps to create an invoice:
L og in to the ONE system.
Click Menus/Favs > Financials > Receivables > New Invoice.
The New Invoice screen displays.
In the NEO UI, users can click on the Menus/Favs icon on the left sidebar and type in the name of the screen in the menu search bar. For more information, see "Using the Menu Search Bar."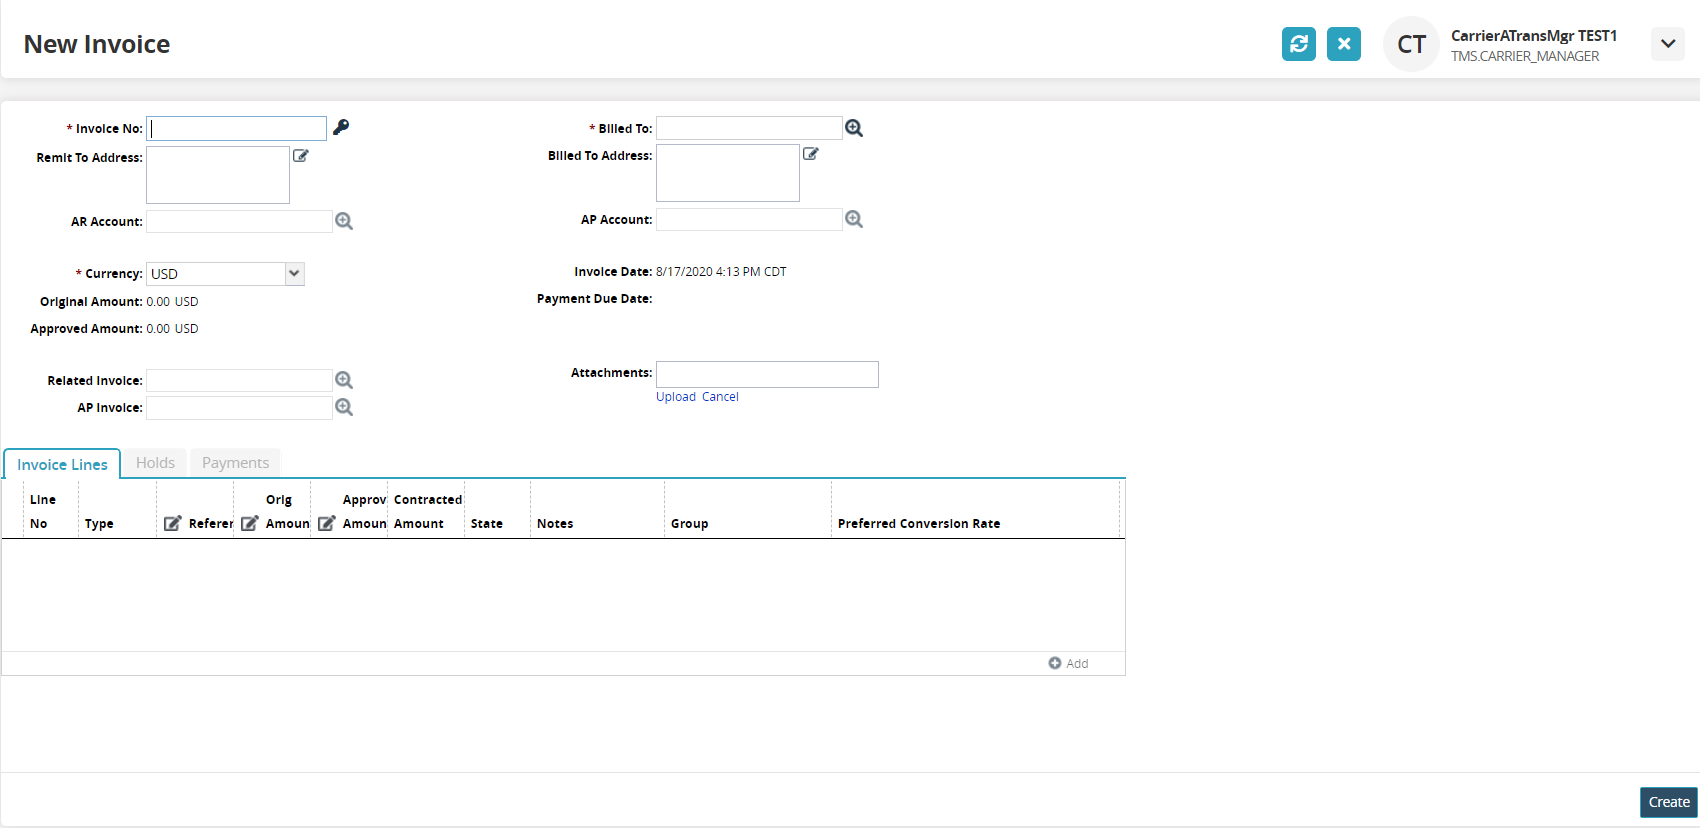
Enter values for fields described in the table below. Fields with an asterisk ( * ) are required.
Field
Description
* Invoice No
Click on the key icon to generate an invoice number automatically.
* Billed To
Click on the picker tool to choose the Bill To organization.
Remit To Address
Use the pencil icon to fill in address fields for the Remit To address.
Bill To Address
Use the pencil icon to fill in address fields for the Bill To address.
AR Account
Use the picker tool to choose an accounts receivable account.
AP Account
Use the picker tool to choose an accounts payable account.
* Currency
Choose the country currency from the drop-down menu.
Invoice Date
The creation date and time is autogenerated when the invoice is created.
Original Amount
The original amount value is populated from the Invoice Lines.
Payment Due Date
The payment due date is populated automatically.
Approved Amount
The approved amount value is populated from the Invoice Lines.
Related Invoice
Use the picker tool to select a related invoice.
Attachments
Click on the Upload link to upload attachments for the invoice.
AP Invoice
Use the picker tools to select an accounts payable invoice related to this invoice.
Click the Add link for Invoice Lines.
The New Invoice Line popup window displays.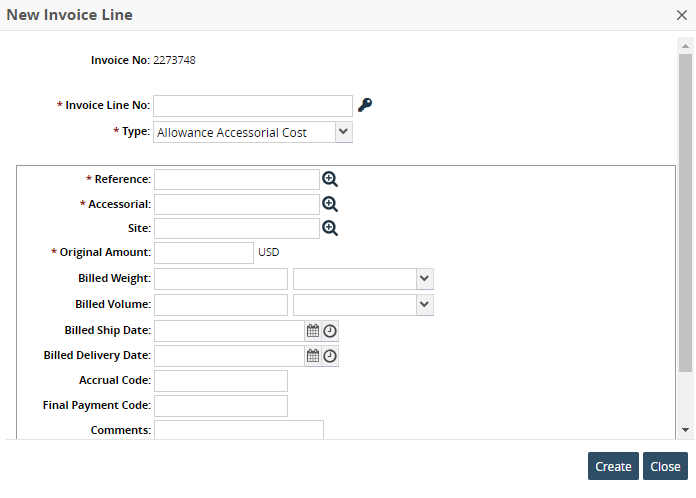
Click the key icon to generate an invoice number for the * Invoice Line No field.
Select a type of invoice line from the dropdown menu * Type field.
Complete the remaining fields for the new invoice line. Fields with an asterisk ( * ) are required.
The fields in the box below the Type field are all dependent on what type of invoice line is selected.
Click the Create button.
The New Invoice Line popup closes, and the Invoice Line tab populates.Enter the Orig Amount.
Enter the Approved Amount.
Click the View/Add Notes link to add notes to the invoice line.
Click the Create button.
A green success bar displays.