GLG: Creating a Role
Complete the following steps to add a role:
Log in to the ONE Network.
Click Menus/Favs > Administration > Roles.
The Roles screen displays.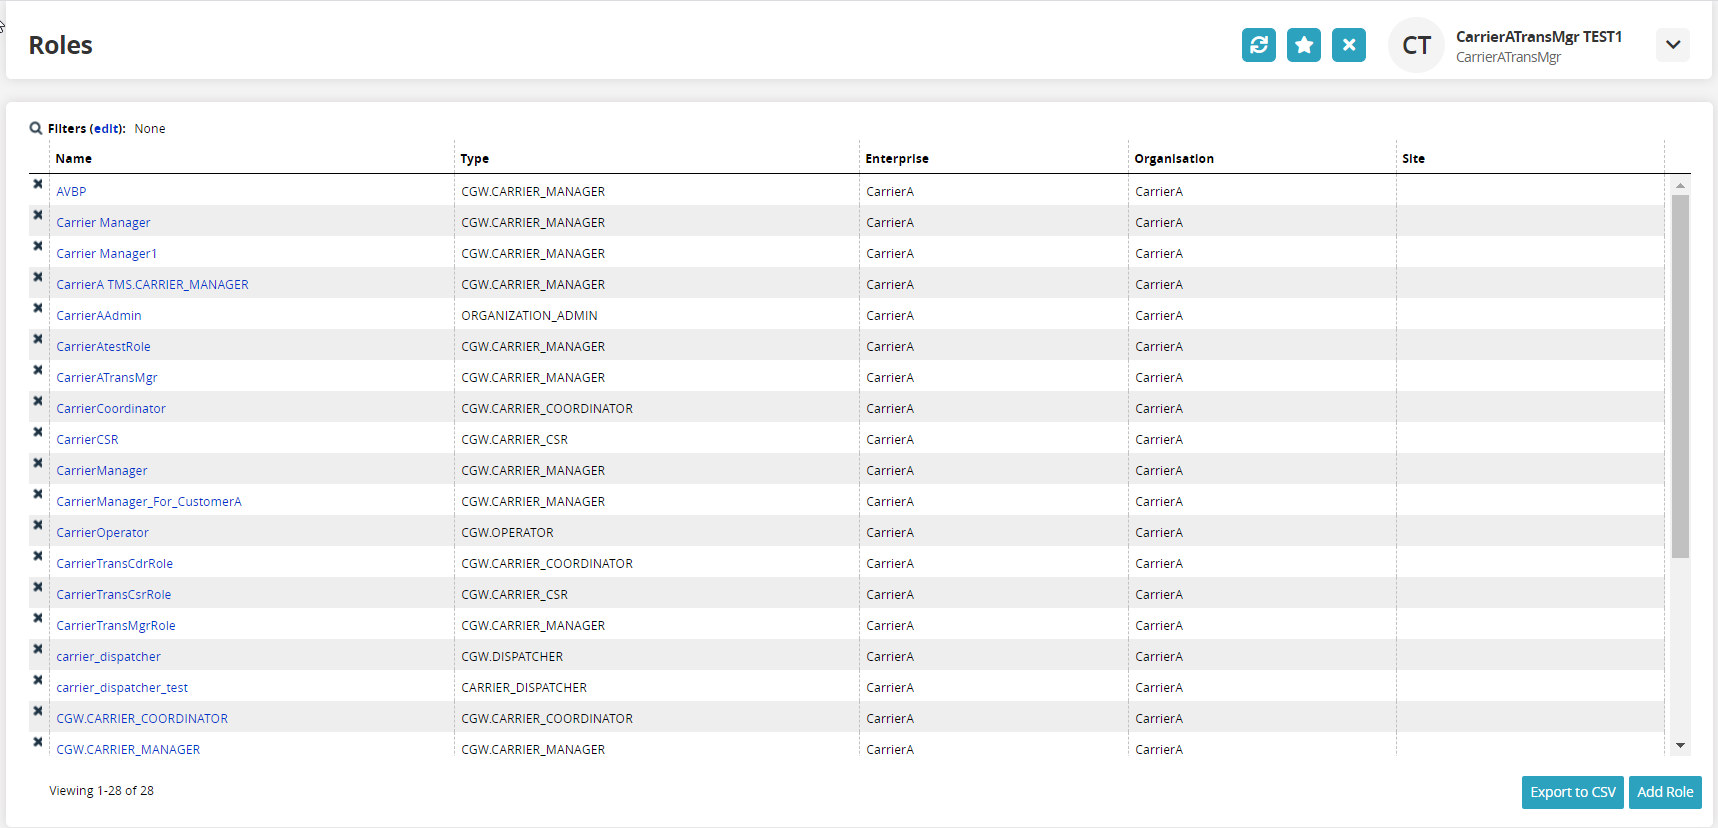
Click the Add Role button.
The Add Role screen displays.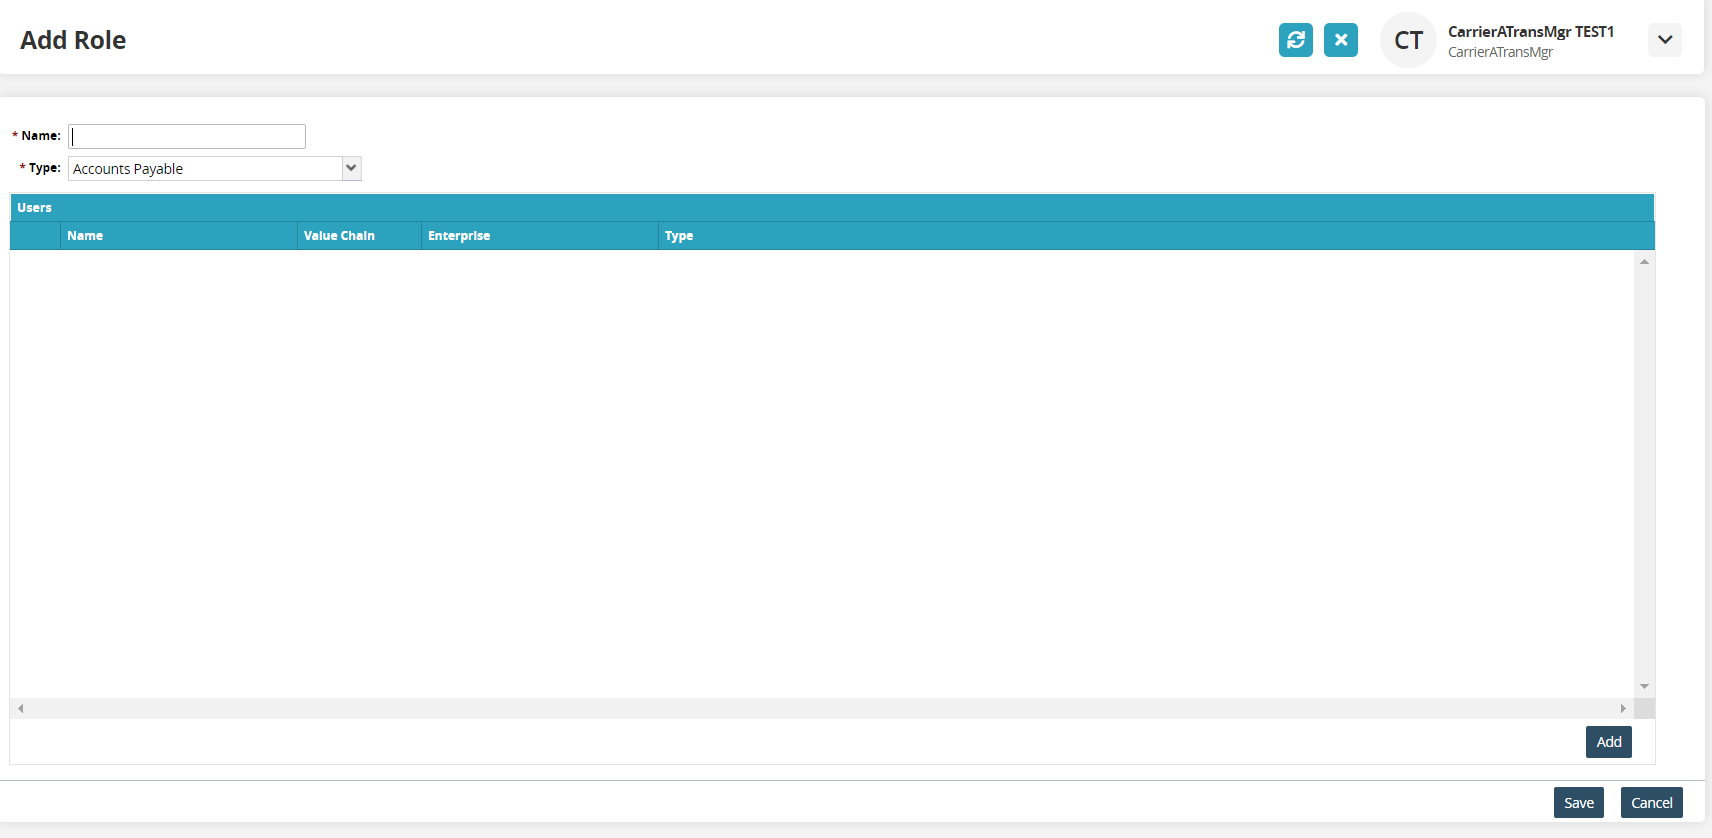
Complete the fields. Fields marked with an asterisk ( * ) are required.
* Name - enter the name for the new role. This will be the name of the role that will be added to a user.
* Type Name - select from a role type from the drop-down list.
Admin users have several roles to choose from when creating a new role.
Carrier Transportation Manager - The Manager role is designed to perform administrative functions for the carrier company. This user can manage users (view/add/delete), view/create roles, view/create regions and lanes, manage Geo permissions, set up auto-accept for tendering, view/accept/reject tenders, view shipments, view/add tracking events, view/schedule/reschedule/cancel appointments, view claims, create/view invoices, and view all available carrier reports.
Carrier Transportation Coordinator - The Coordinator role can view/accept/reject tenders, view/add tracking events, view shipments, view selected reports, and schedule/reschedule/cancel appointments.
Carrier Transportation CSR (Customer Service Representative) - The CSR role supports customers as a view-only user with rights to view selected reports and view shipments in selected states.
Carrier Transportation Operator - The Operator role is designed to equip operators or drivers who are required to provide shipment status updates via the ONE Network mobile app. A user with the Operator role may only access shipments that are dispatched to that user within that carrier company. This user can provide status updates on dispatched loads, enable GPS tracking, and provide Proof of Delivery (POD).
Click the Add button.
The Select Users popup window displays.
Select users who can perform this role.
Click the OK button.
The users are added to the Add Role screen.Click the Save button.
A green success bar displays, and tabs with defining properties displays.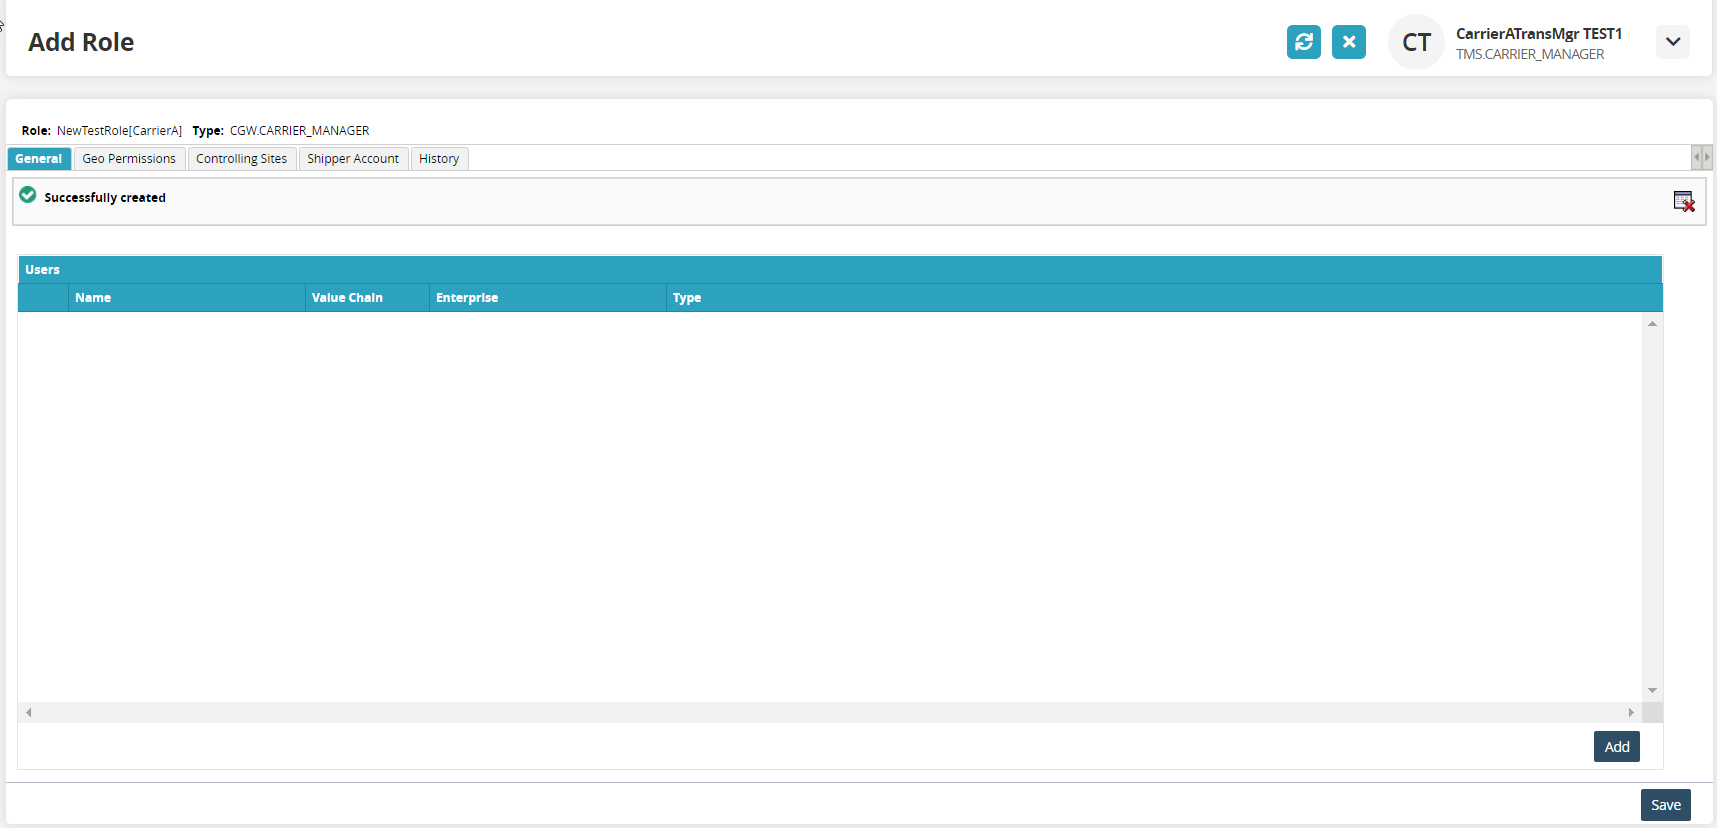
Different client user/roles may have different permissions and may or may not be able to perform all functions.
Click a tab for the definitions and properties.
General - add users by clicking the Add button, selecting users, and clicking the OK button.
Geo Permissions - add lanes by clicking the Add button, selecting lanes, and clicking the OK button.
Controlling Sites - click the Add Controlling Sites button, select sites, and click the OK button.
Shipper Accounts - select shipper accounts and click the Save button
History - view an audit trail of changes to this role.
Click the Save button.
The definitions for the role are saved.