Header Tab
On the Header tab, users provide some basic information required to create a new shipment.
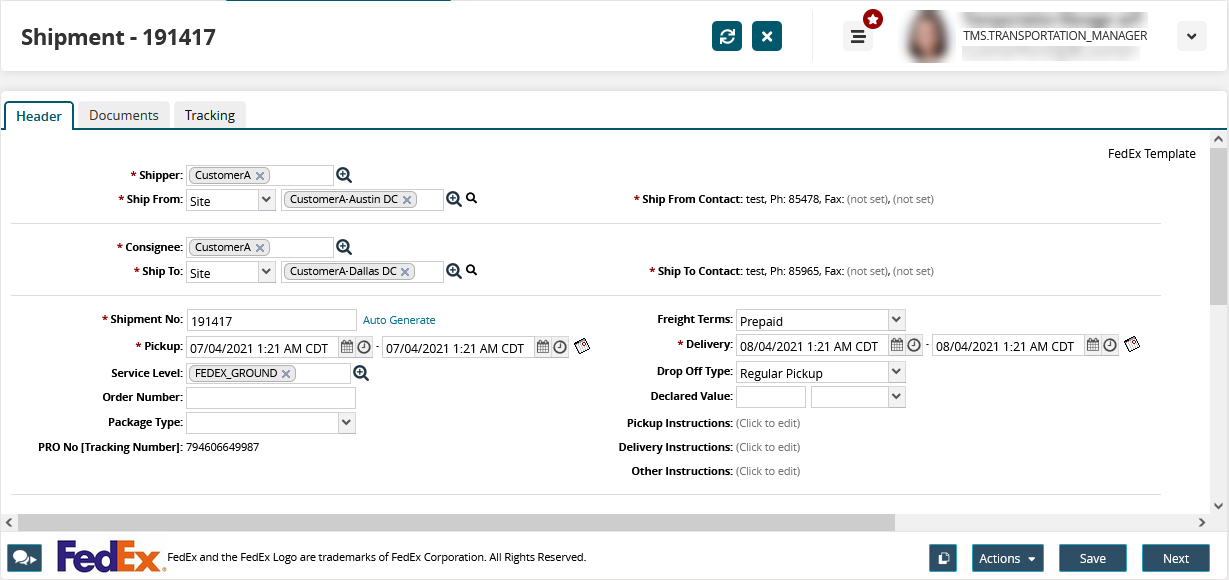
Fill out the following fields. Fields with an asterisk ( * ) are required.
|
Field |
Description |
|
* Shipper |
Type the shipper name or click the picker tool to select one. |
|
* Ship From |
Select a Site, Address, or Location as the shipment origin from the dropdown list. Type the name and address or use the picker tool to select one. |
|
* Ship From Contact |
Enter the name and contact information for the shipper point of contact. You must enter the contact name and phone number. You can provide additional information like Fax and Email. |
|
* Consignee |
Type the consignee name or click the picker tool to select one. |
|
* Ship To |
Select a Site, Address, or Location as the shipment destination from the dropdown list. Type the name and address or use the picker tool to select one. |
|
* Ship To Contact |
Enter the name and contact information for the shipper point of contact. You must enter the contact name and phone number. You can provide additional information like Fax and Email. |
|
* Shipment Number |
Type a shipment number or click Auto Generate to generate a shipment number. |
|
* Pickup |
Use the calendar tool to select the pickup date range. |
|
Service Level |
Type the service level name or use the picker tool to select one. |
|
Order Number |
Type the associated order number, if applicable. |
|
Package Type |
Select a package type from the dropdown list. |
|
PRO No (Tracking Number) |
This field is auto-populated after the shipment is created. |
|
Freight Terms |
Select freight terms from the dropdown list. Available options are Prepaid and Collect. |
|
* Delivery |
Use the calendar tool to select the delivery date range. |
|
Drop Off Type |
Select shipment drop off type from the dropdown list. Available options are Regular Pickup and Request Courier. |
|
Declared Value |
Enter the declared value of the goods shipped and select the desired currency from the dropdown list. |
|
Pickup Instructions |
Enter additional instructions for pickup, delivery, or anything else. |
|
Delivery Instructions |
|
|
Other Instructions |
Adding Shipment Lines
Complete the following steps to add a shipment line:
Under Shipment Lines, click Add Line to add a new shipment line.

Fill out the following fields. Fields with an asterisk ( * ) are required.
Field
Description
* Line No
This field is auto-populated by the system. You can edit the system-generated line number if required.
Content
Type the line content. Select the appropriate option from auto-complete.
Description
Type a brief description of the line contents.
* Wt
Type the shipment line weight and select a unit of measurement from the dropdown list.
Hazardous
Click the field to display the Hazardous popup. Select the Hazardous checkbox and enter the following details and click Save:
Contact Info: Enter the name and phone number of a point of contact.
Number: Type the hazardous material number or use the picker tool to select one.
PSN: Type the proper shipping name for the hazardous material or use the picker tool to select one.
Class: Type the hazardous material class or use the picker tool to select one.
Hazmat Packaging Group: Type the applicable hazmat packing group or use the picker tool to select one.
LxWxH
Enter length, width, and height measurements and select a unit of measurement from the dropdown list.
Vol
Enter the line volume and select a unit of measurement from the dropdown list.
Declared Value
Enter the declared value of the shipment line and select a currency from the dropdown list.
Package Type
Select a package type from the dropdown list.
Cost Codes
Type the applicable cost codes.
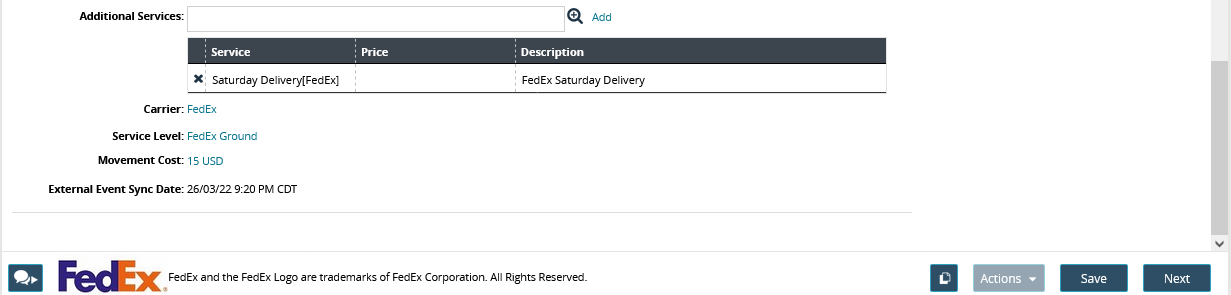
In the Additional Services field, type the additional services as desired or use the picker tool to select an option.
Click Add to add the selected service.
Click Save to save the shipment.
Click Next to go to the Documents tab.