Inventory Burn-Out Date for Buffer Supersession
The Inventory Burn-Out Date field on the Buffer Details UI displays the projected date a superseded inventory will equal zero for a buffer. The Buffer Inventory Burn Off report lists items that are being replaced, the burn-out date of those items, and the supersession date of those items. Both of these features are available for Replenishment Planner roles. These address the following scenario.
A client is buying item A from a supplier, but they find another supplier that sells a similar item B for a lower price and wants to buy B instead. In this case, we would say A is being superseded by B, or B is superseding A. The supersession date is the date when the client stops selling A and starts selling B.
The burn-out date calculation begins at the item substitution start date and ends at the item substitution end date. If the start date is not specified or is before the current date, the value is calculated from the beginning of the planning horizon. If the end date is not specified, the value is calculated to the end of the planning horizon.
To determine the supply available for the burn-out date calculation, the system considers the total firm supply. That is all supply data measures that have a state of or after New. This includes purchase orders, deployment orders, production orders, shipments, and in-transit movements. To determine the demand for the burn-out date calculation, the system considers the total independent production demand plus the firm-dependent demand. Firm-dependent demand includes sales orders, forecasts, and production orders in all states, shipments, and deployment orders that have a state of or after New.
The Inventory Burn Out Date field helps the client minimize leftover item A inventory by determining the date when all item A inventory will be sold off. Clients can schedule the supersession date and the inventory burn-out date as closely as possible to minimize monetary losses from unused inventory.
Assumptions
The user has run the Replenishment engine and is deploying the base item inventory throughout the network. At buffers where inventory and demand exist for the base item and the replacing item, the system will preferentially deploy the base item inventory to address the demand for either the base item or the replacing item.
The Replenishment engine will properly net procurement requirements for the replacement item based on the primary deployment of the base item inventory in the network.
Complete the following steps to view when an item inventory reaches zero:
Log in to the ONE system as a Replenishment Planner role.
Click Menus/Favs > Analysis > Replenishment Analysis Projected Inventory View.
In the NEO UI, users can click on the Menus/Favs icon on the left sidebar and type in the name of the screen in the menu search bar. For more information, see "Using the Menu Search Bar."
The Replenishment Analysis Projected Inventory View screen appears.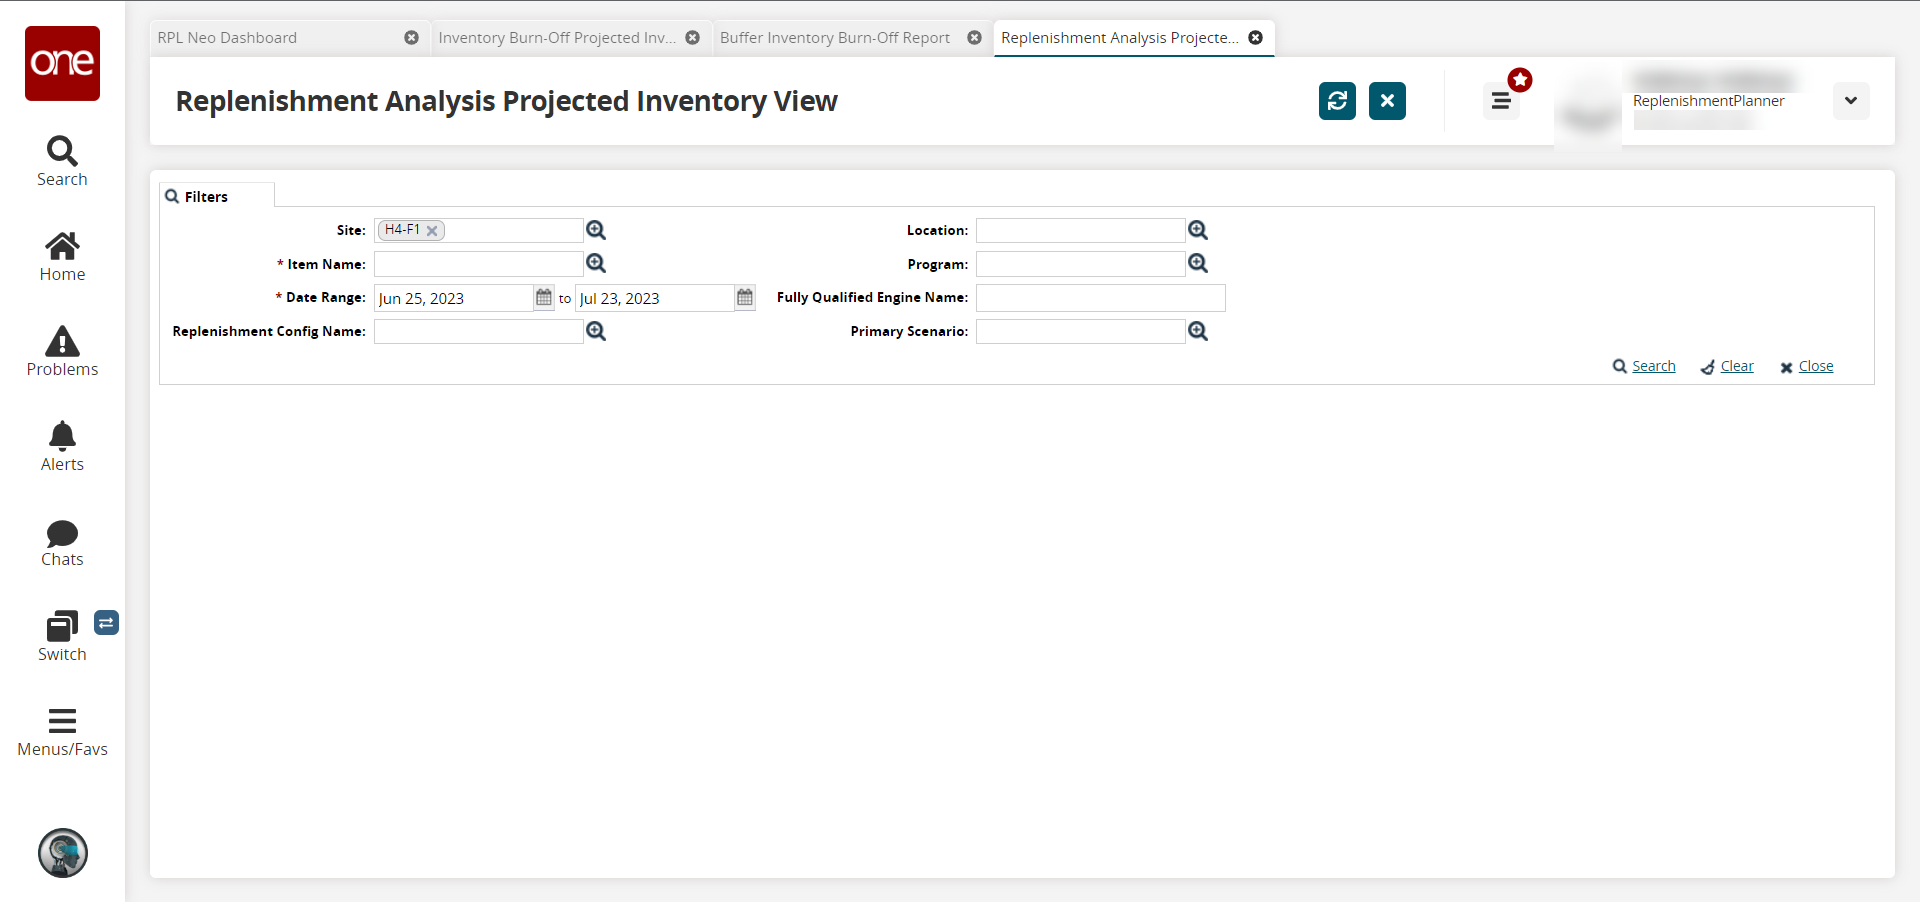
Use the picker tool to select an * Item. Fields with an asterisk ( * ) are required.
Use the calendar tool to select the * Date Range.
Enter the other fields to find the given item.
For this example, we select a Site of "rplcmpadc5n," an Item of "rplCmpAItem1," and a Fully Qualified Engine Name of " RPL_AdvReplenishmentEngine_AREngineConfig."Click the Search link.
The search results appear.Note that the engine parameter UpdateBufferProjectedStockout must be set to true for this workflow to function as expected.
Please contact your ONE representative to enable this option.
Notice that the Projected Inventory will become negative.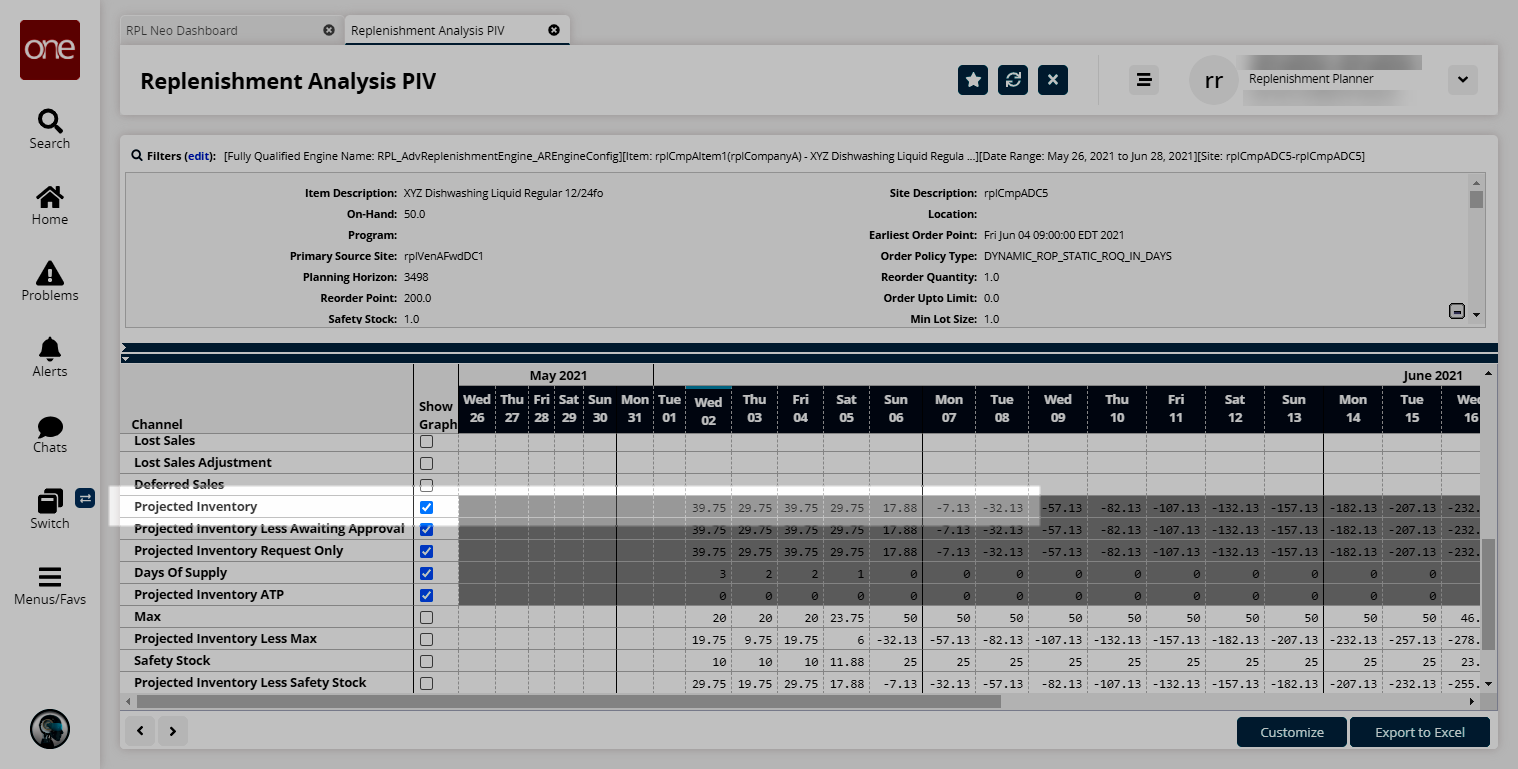
Create an item substitution. For more information , see the "Creating an Item Substitution" section in the Online Help.
In this example, we are using the rplCmpAItem1 base item.
Run the Advanced Replenishment engine for the base item. For more information, see the "Replenishment Engines" section of the Online Help.
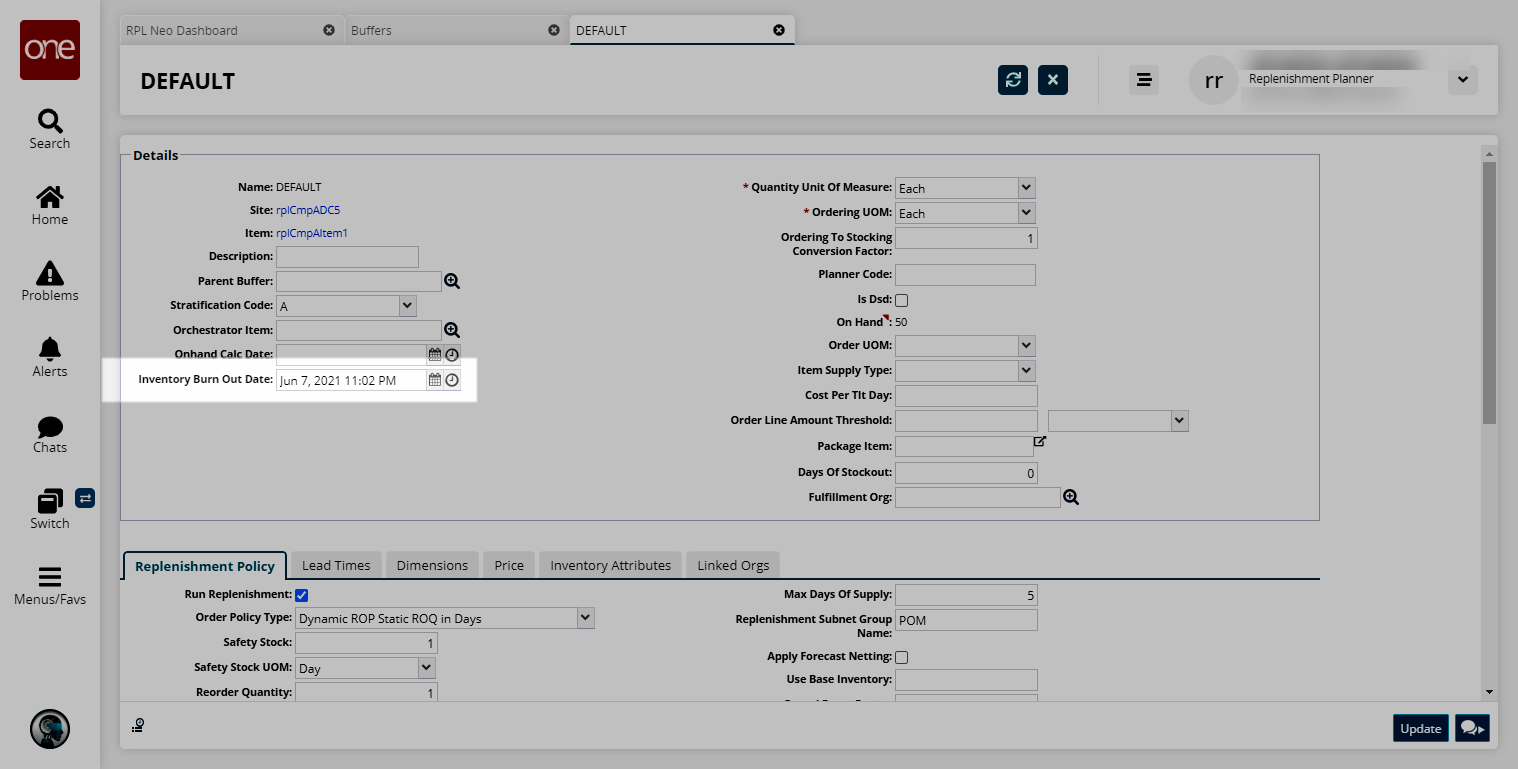
Open the Buffer Details UI to confirm the Inventory Burn Out Date field now matches the date seen in the Projected Inventory row of the Replenishment Analysis PIV screen. For more information, see the "Updating Buffers" section of the Online Help.
Complete the following steps to view the Buffer Inventory Burn-Off Report:
Log in to the ONE system as a Replenishment Planner role.
Click Menus/Favs > Buffer > Buffer Inventory Burn-Off Report.
In the NEO UI, users can click on the Menus/Favs icon on the left sidebar and type in the name of the screen in the menu search bar. For more information, see "Using the Menu Search Bar."
The Buffer Inventory Burn-Off Report screen appears with the filter fields displayed. If the filter fields are not displayed, click the Filters (edit) link to display them.
In the * Item Enterprise field, click the picker tool icon to select the enterprise. This field is required.
Fill out the remaining fields as desired.
Click the Search link.
The Buffer Inventory Burn-Off Report displays according to the filter criteria.Click the Export to CSV button to export the report to a CSV file.