Messages Tab
The Messages tab is available after the shipment is created.
Users can track messages for shipments, including FedEx, DHL, and UPS shipments, on the Messages tab on shipment detail pages.
Complete the following steps to view the messages for a shipment:
L og in to the ONE system.
Navigate to the desired parcel shipment. See the "Searching Shipments" and "Global Search" sections in the current release of Online Help for information on finding a shipment.
The shipment detail screen appears. A sample FedEx parcel shipment is shown below.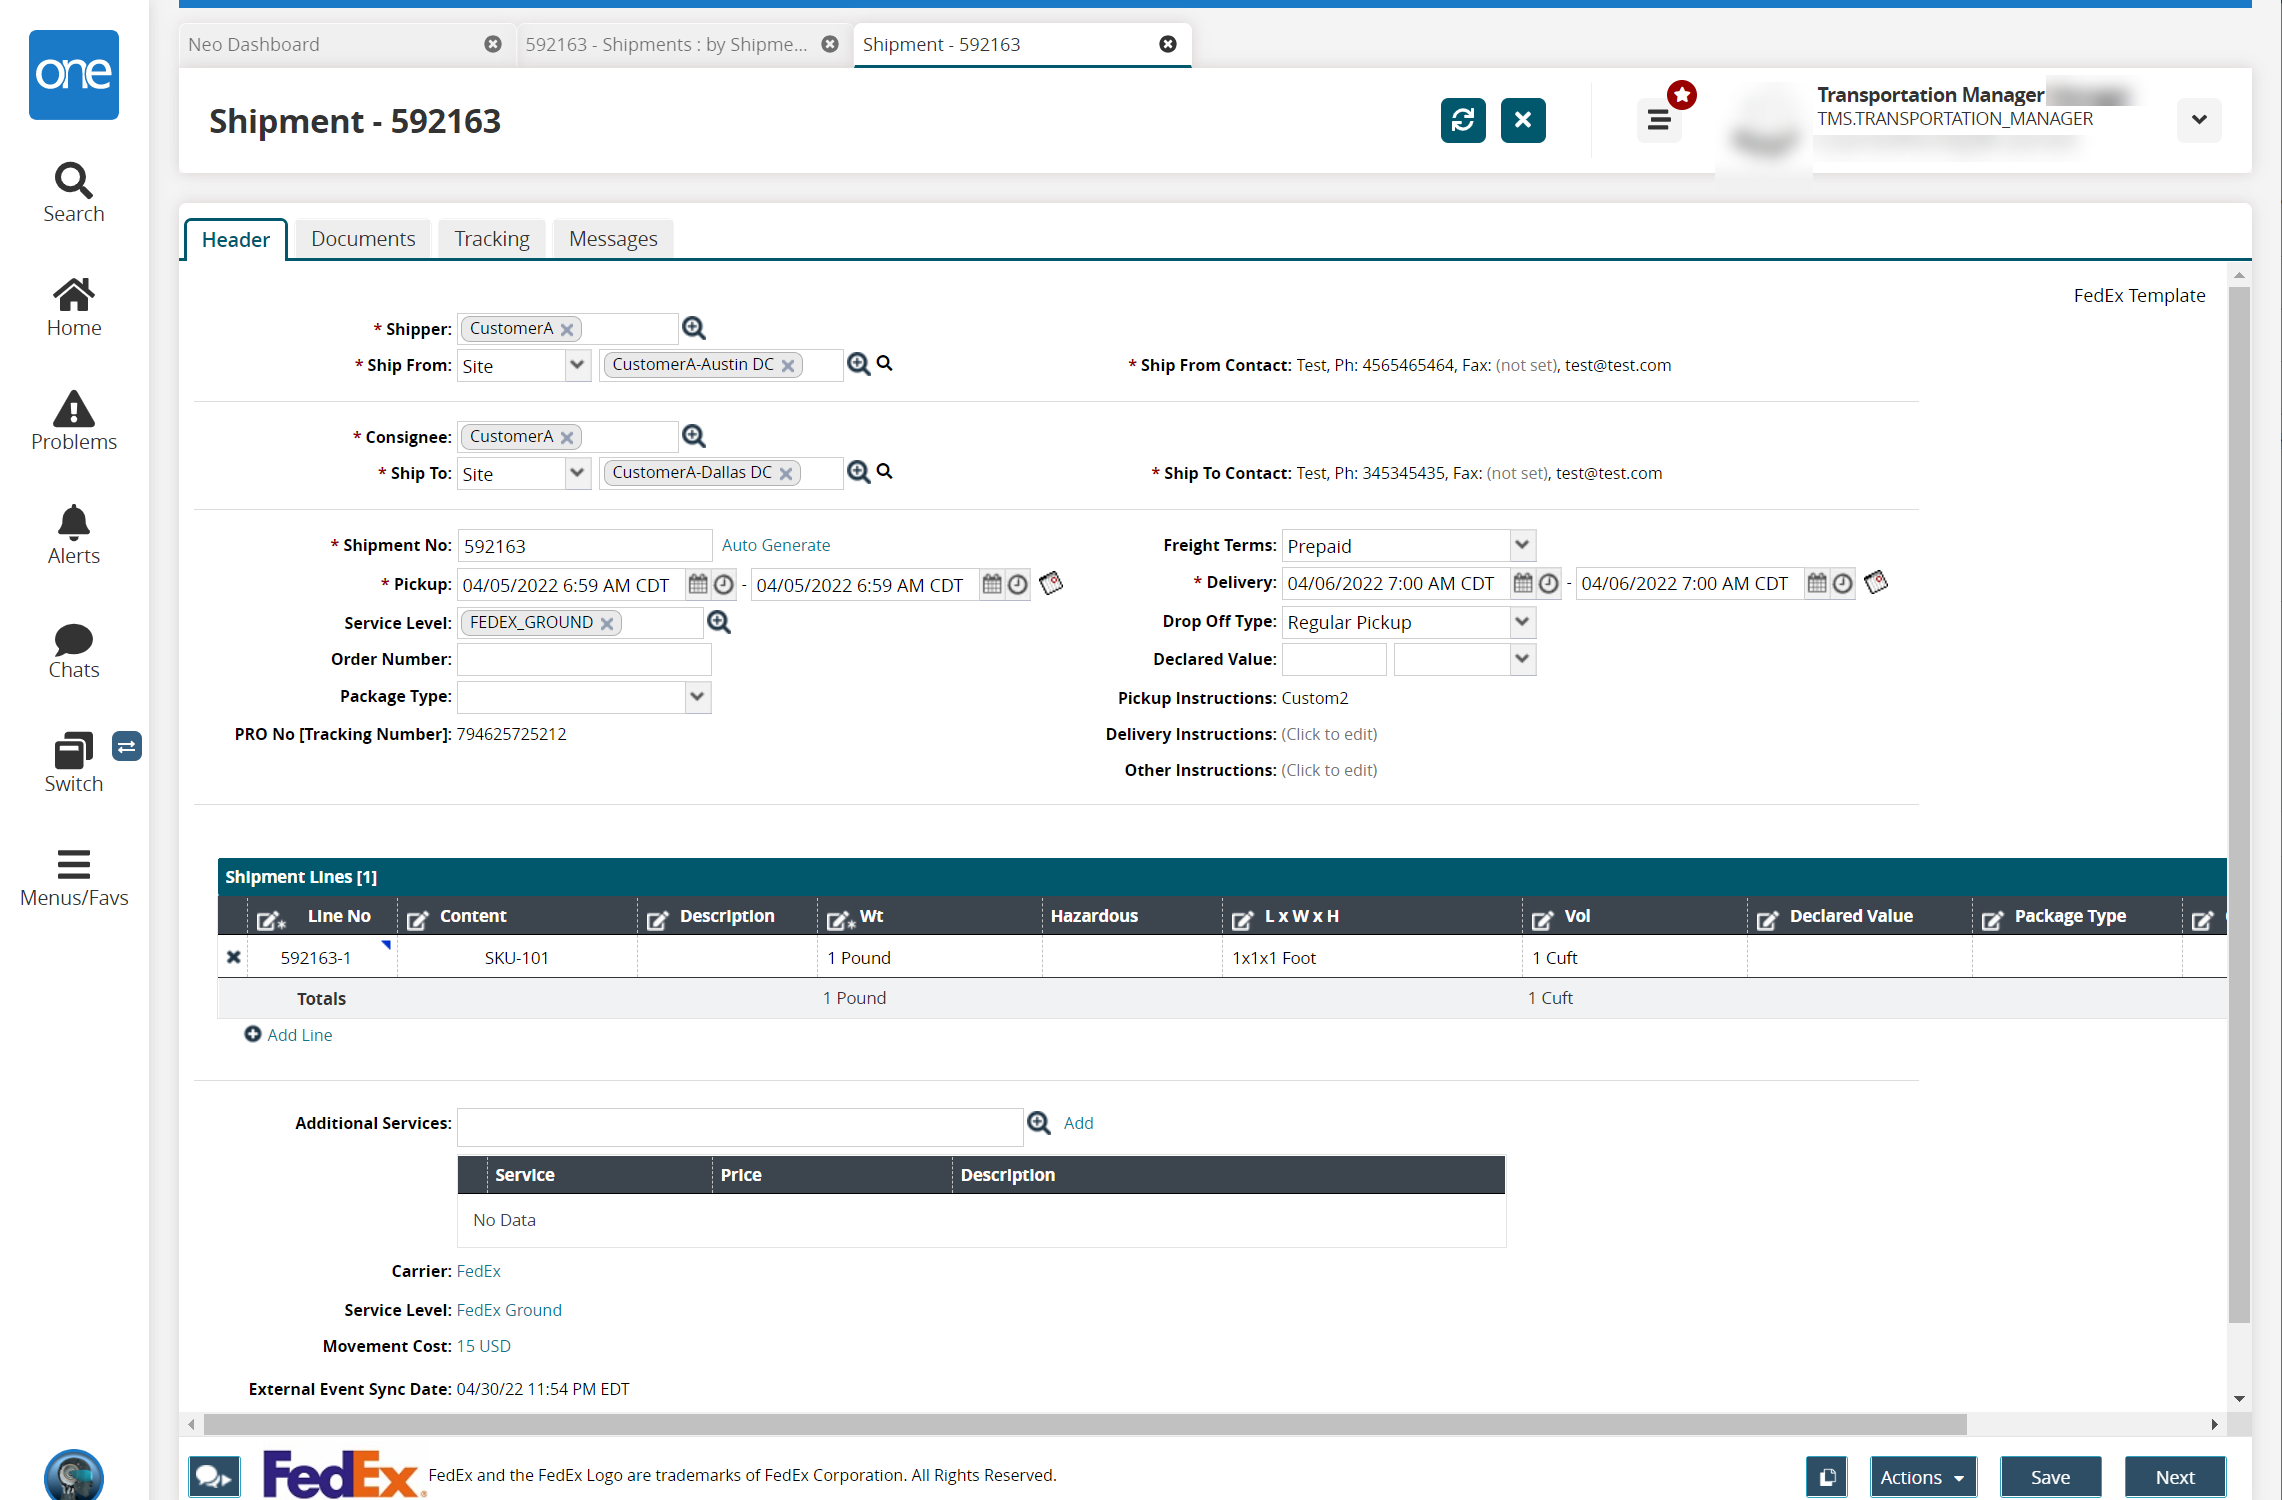
Click the Messages tab.
The Message Queue Summary displays a list of the requests and responses for the shipment.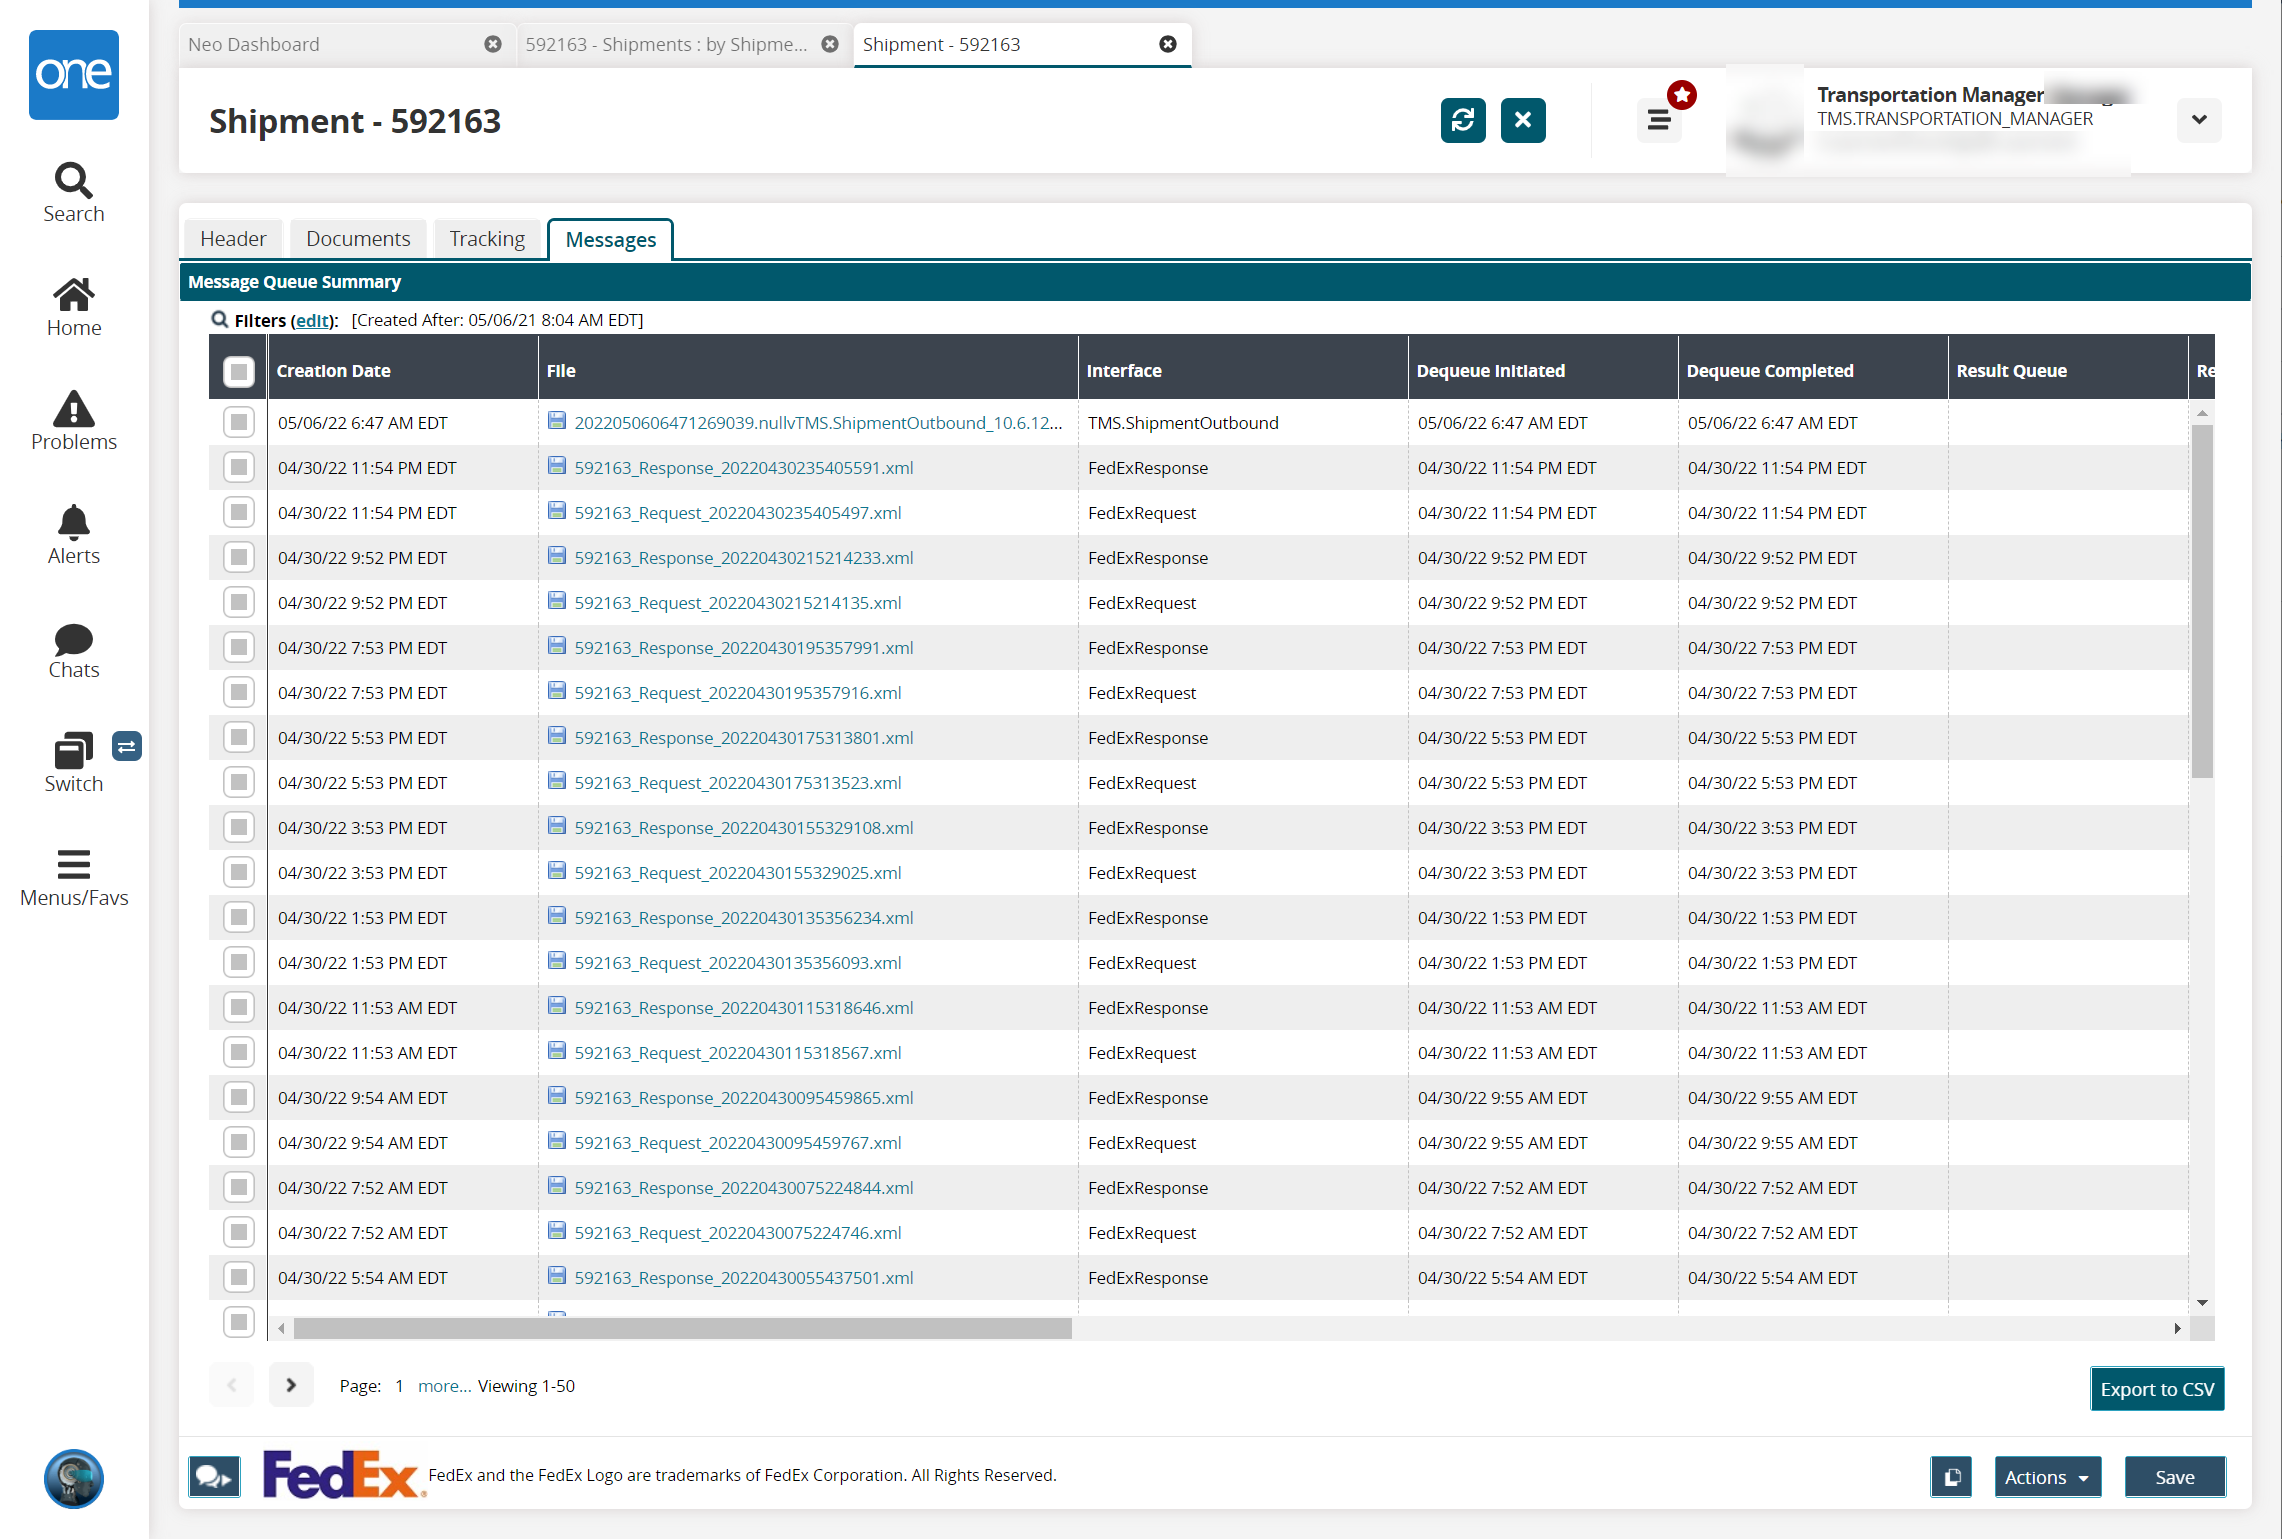
Click the Filters (edit) link to display the filter fields.
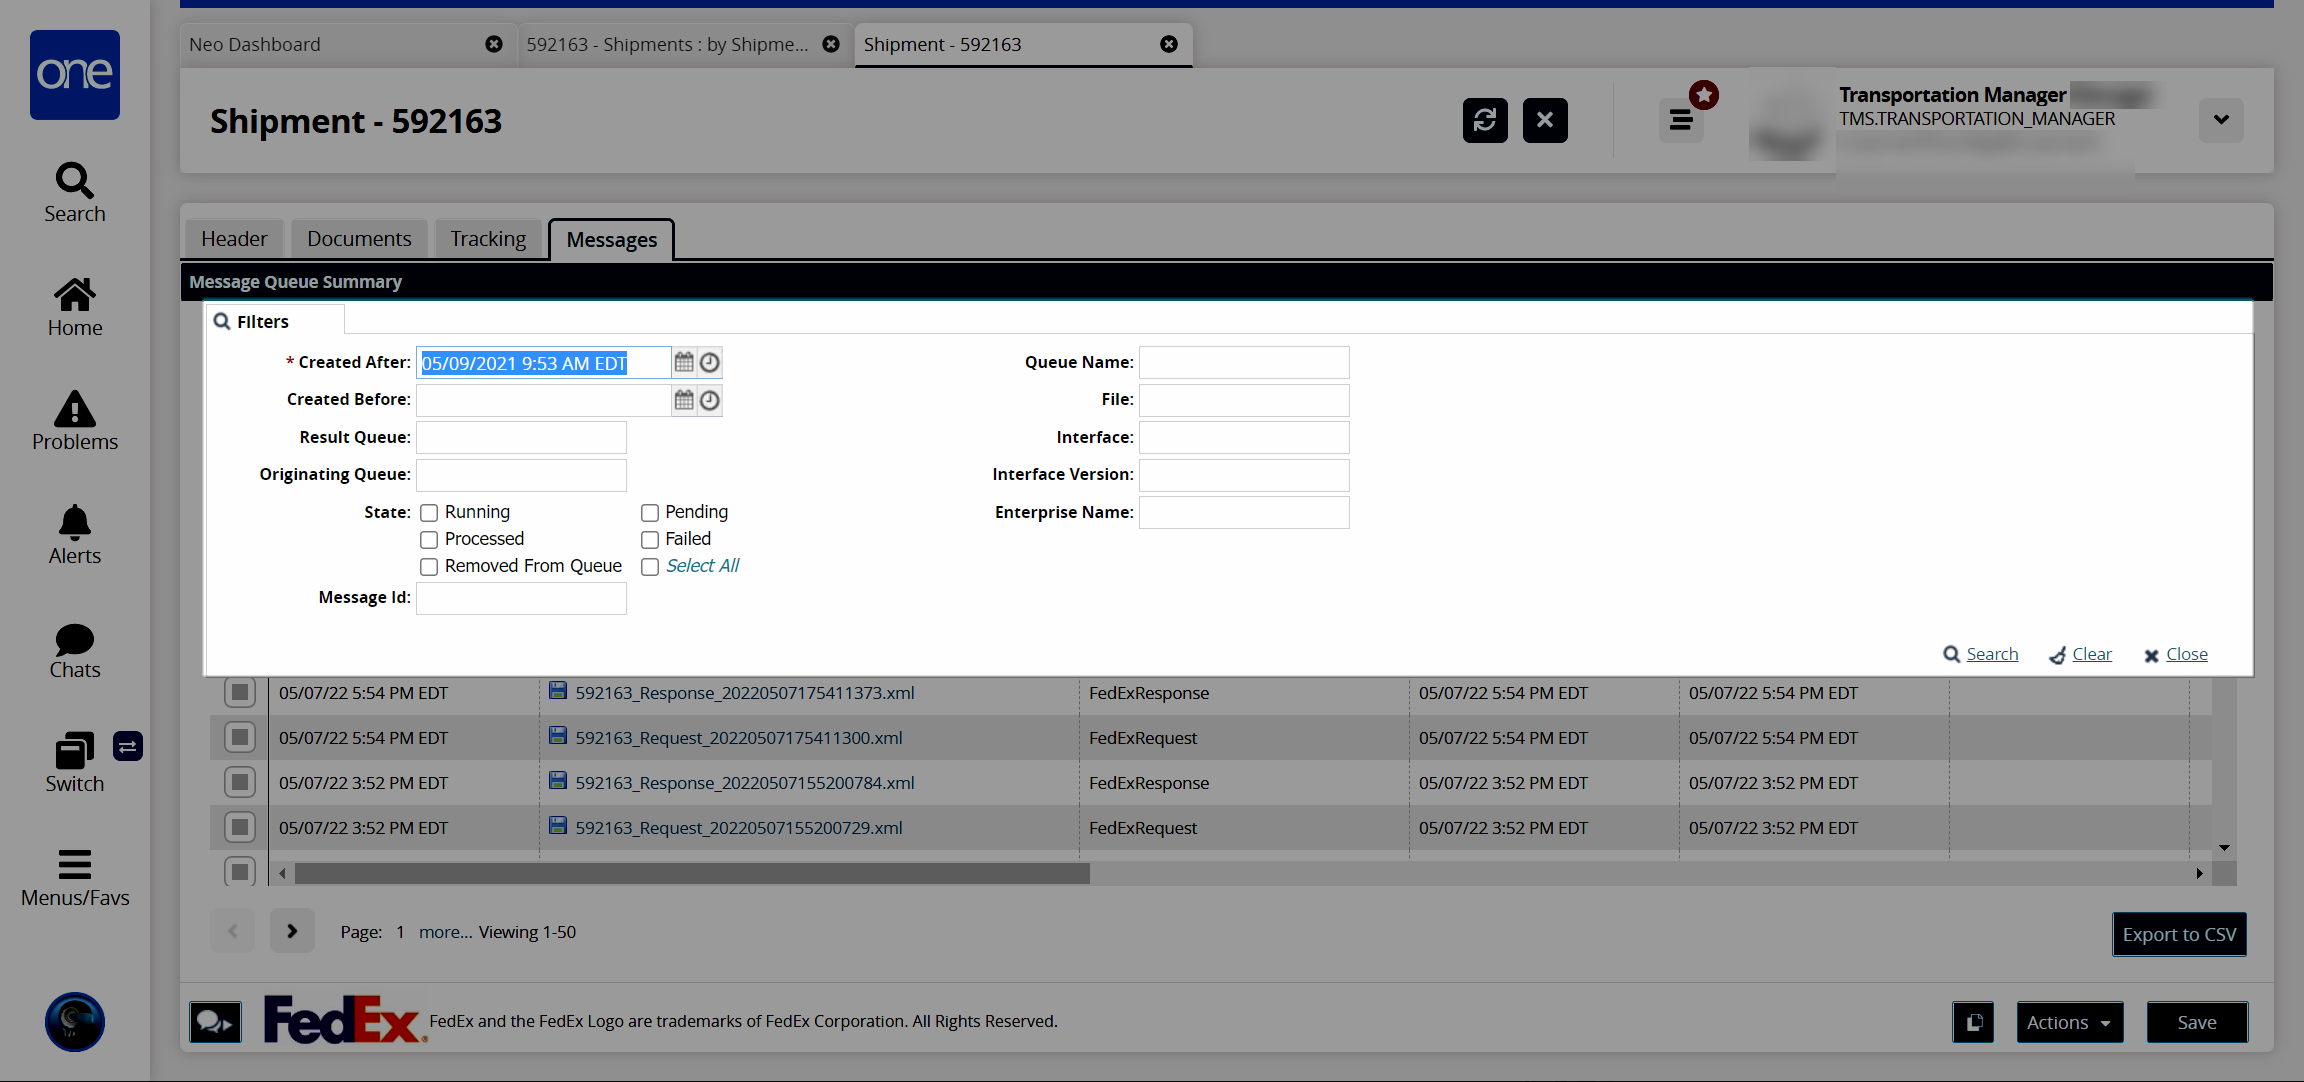
Enter values for fields described in the table below. Fields with an asterisk ( * ) are required.
Field
Description
* Created After
Click the calendar and clock icons to select the beginning date of the requests and responses you want to view.
Created Before
Click the calendar and clock icons to select the end date of the requests and responses you want to view.
Result Queue
Enter the result queue.
Originating Queue
Enter the originating queue.
State
Click the checkboxes for the states of the requests and responses you want to view.
Message ID
Enter the message ID number for a request or response.
Queue Name
Enter the queue name.
File
Enter the file name for a request or response.
Interface
Enter the interface for the requests and responses you want to view.
Interface Version
Enter the interface version.
Enterprise
Enter the enterprise name for the requests and responses you want to view and select from the results that appear below the field.
Click the Export to CSV button to export the report to a CSV file.
Though the Actions, Copy, and Save buttons display as active on this screen, they are not applicable on the Messages tab.
In the File column, click a link to preview the message.
Click the Export to CSV button to export the report in a CSV format to your computer.
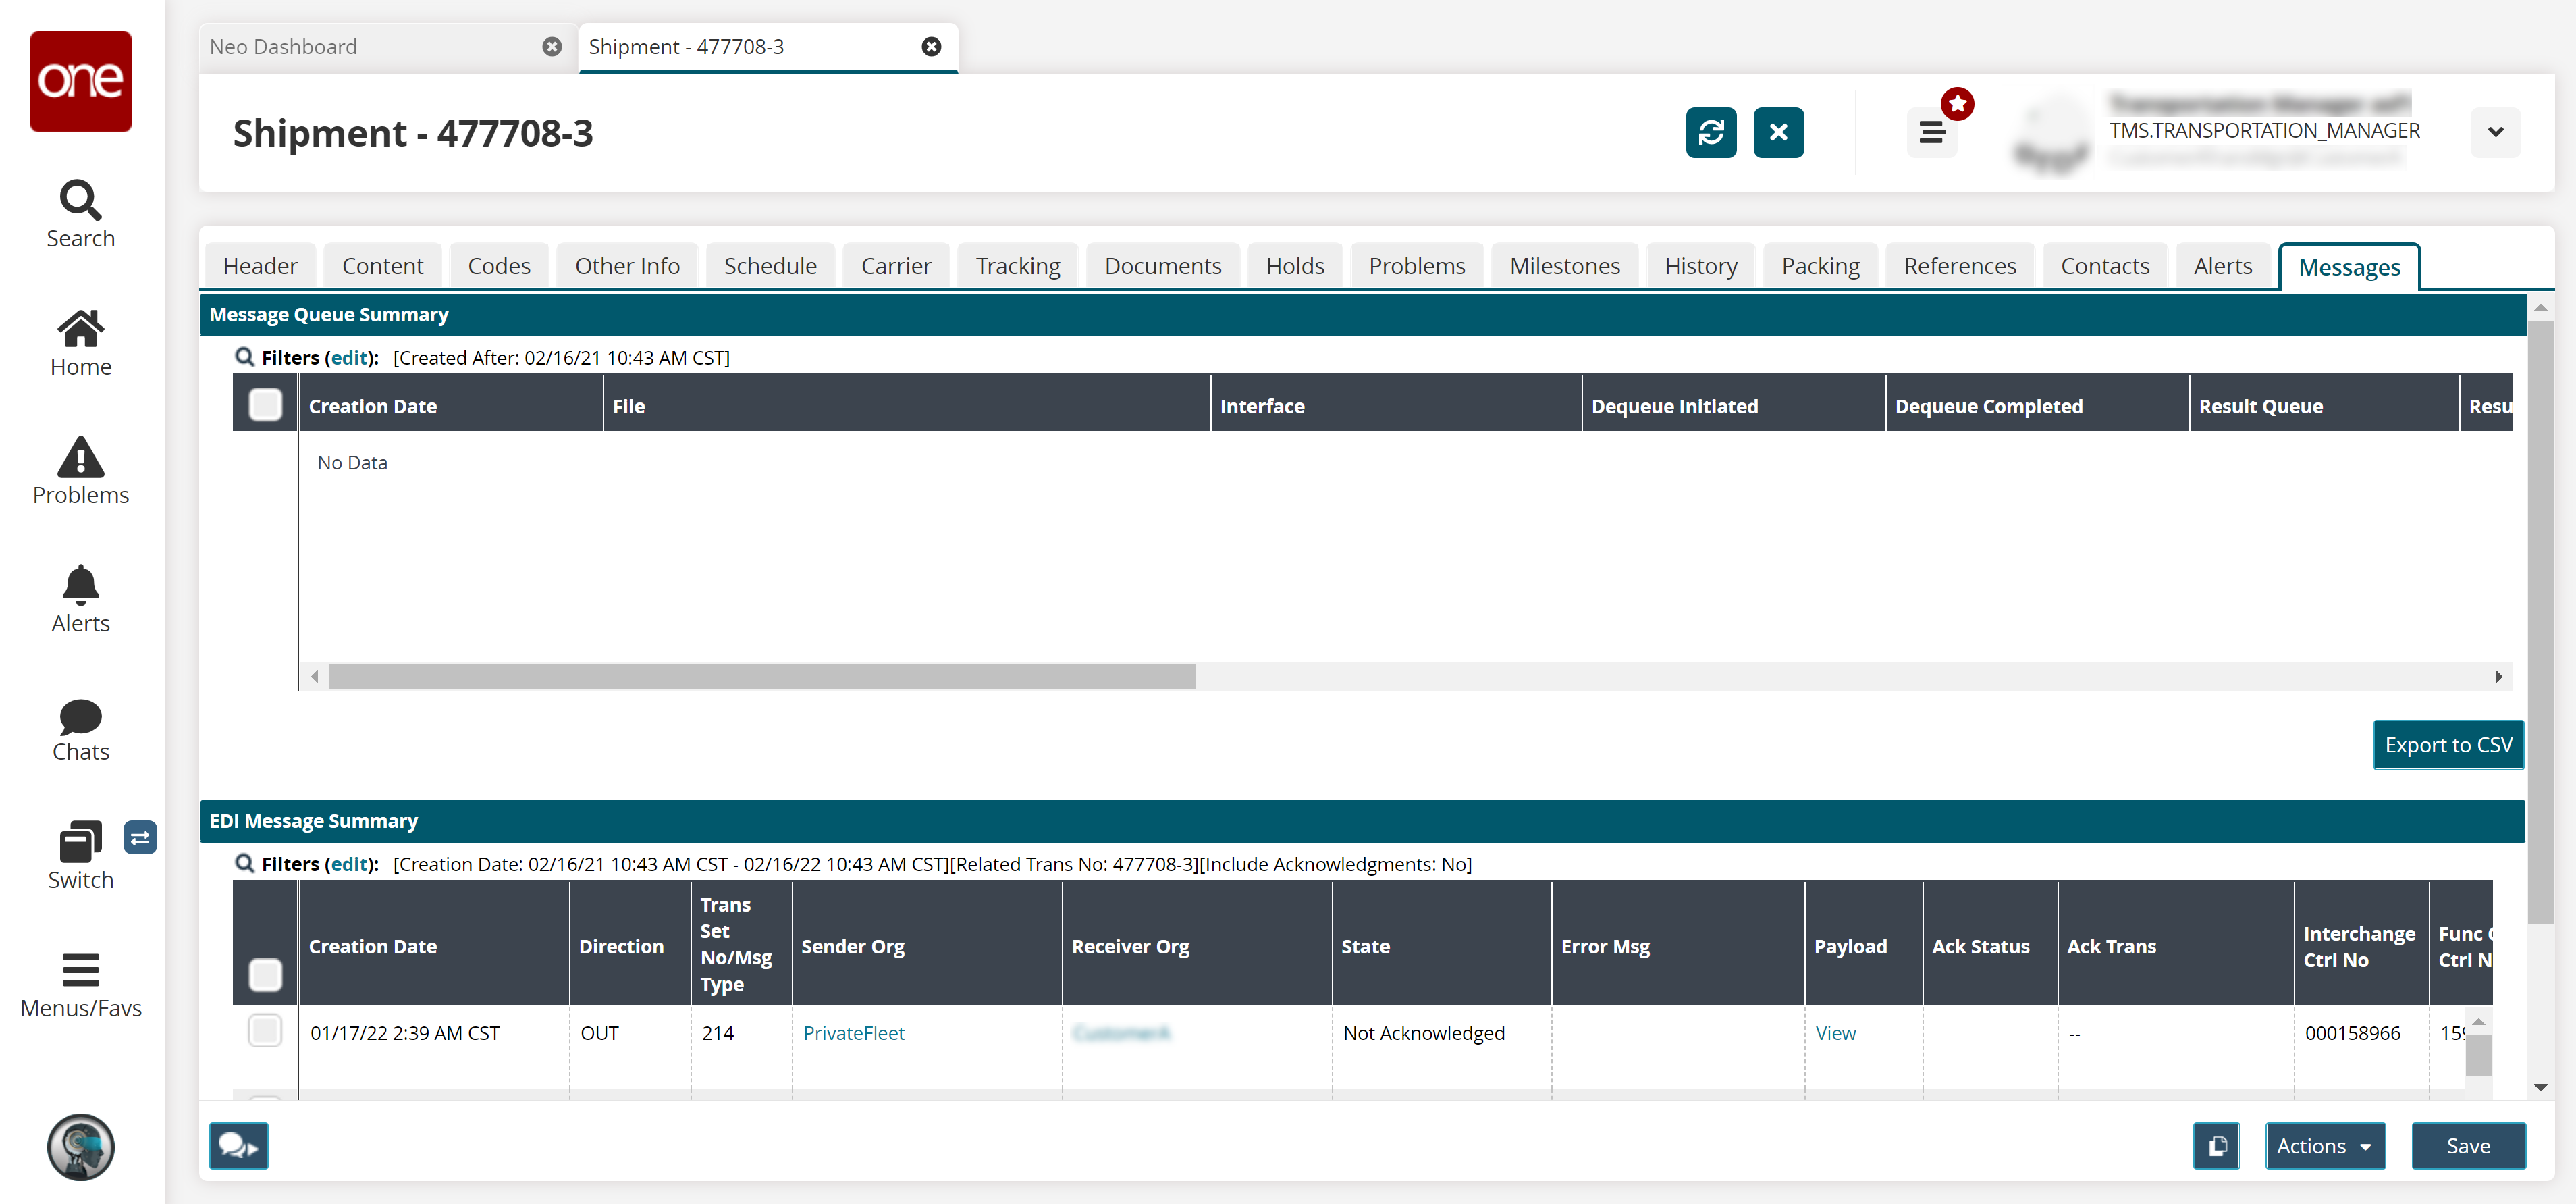
Scroll down, if necessary, to view the EDI Messages Summary section.
Click the Filters (edit) link to display the filter fields.
The Filters header display.
Enter values for fields described in the table below. Fields with an asterisk ( * ) are required.
Field
Description
* Creation Date
Click the calendar and clock icons to enter the beginning and end dates for the date and time the EDI message was created.
State
Check the box for the EDI state.
Related Trans No
Enter the related transaction number.
Trans Set No/Msg Type
Enter the setting number or the message type.
Interchange Ctrl No
Enter the interchange control number.
Transaction Ctrl No
Enter the transaction control number.
Functional Group Ctrl No
Enter the functional group control number.
Include Acknowledgments
Check the box to include EDI acknowledgment messages in the search results.
Click the Add Filter link to add filter fields and enter values.
Click the Search link.
The search results display.Click the Export to CSV button to export the report to a CSV file.
To re-queue the EDI message, select the desired record(s), and click the Re-Queue button.
The selected records display with Submit and Cancel buttons.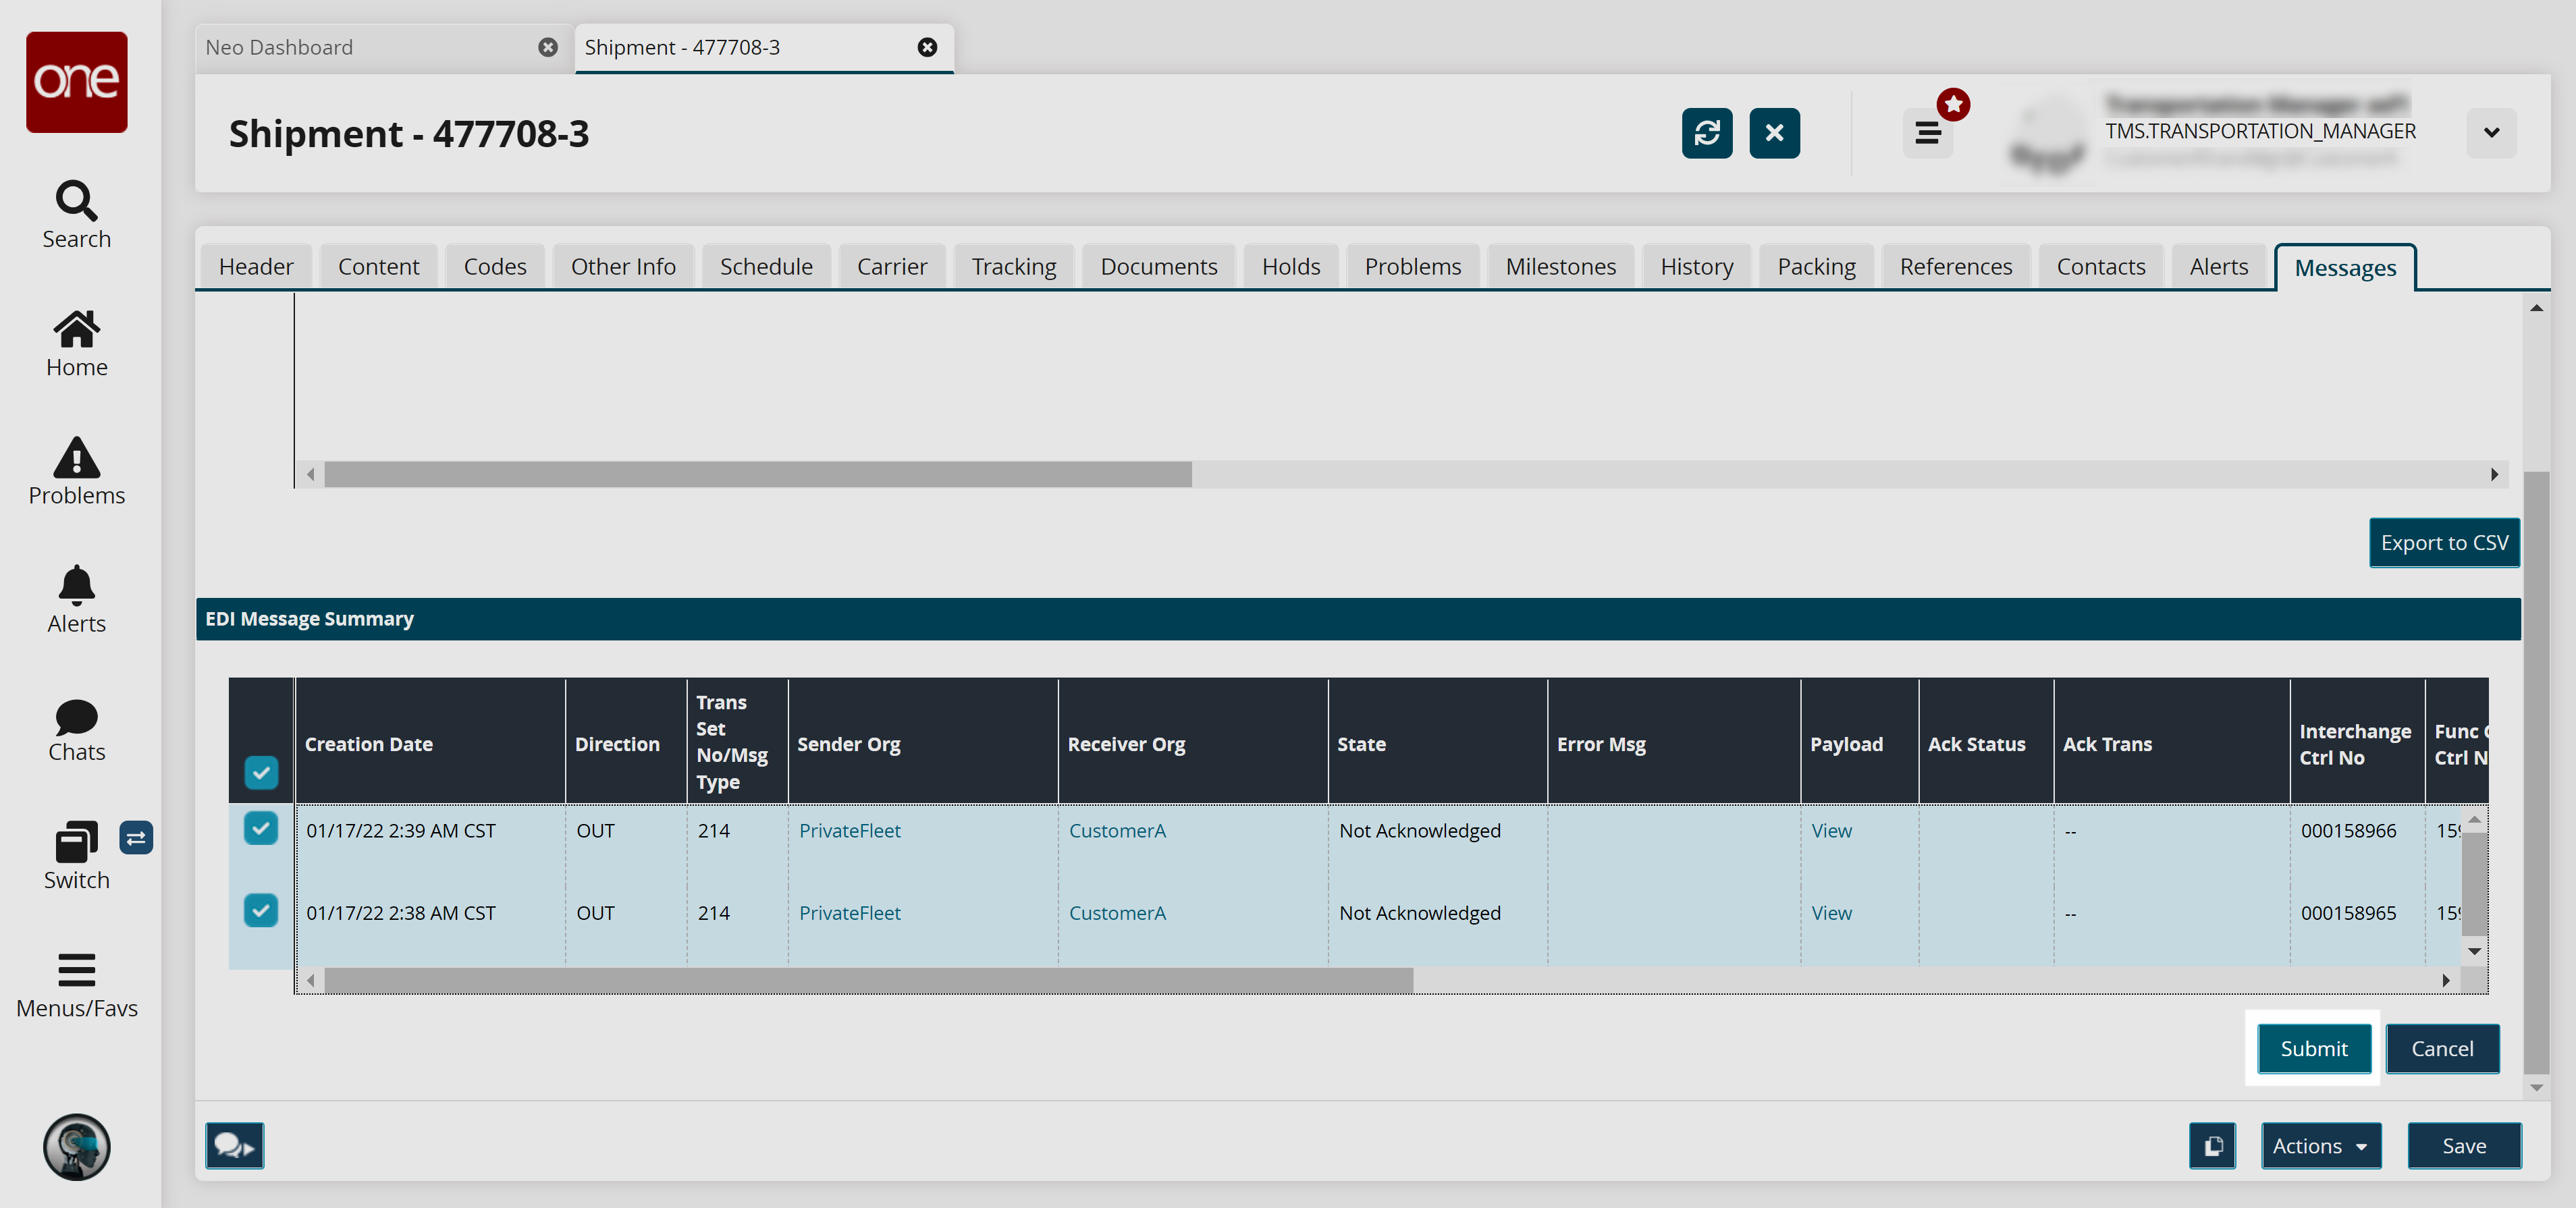
Click the Submit button.
A success message appears.