Multi-Buffer BOM Hierarchy TLV
Production Managers can view the calculated demand and supply of the raw materials on the Multi-Buffer Bill of Materials (BOM) Hierarchy TLV for weekly and monthly periods.
Complete the following steps to view the Multi-Buffer BOM Hierarchy TLV:
Log in to the One system.
Click Menus/Favs > Production Planning > Timeline Views > Weekly > Multi-Buffer BOM Hierarchy TLV .
In the NEO UI, users can click on the Menus/Favs icon on the left sidebar and type in the name of the screen in the menu search bar. For more information, see "Using the Menu Search Bar."
The Multi-Buffer BOM Hierarchy TLV screen appears.
Note
The Multi-Buffer BOM Hierarchy TLV is also available for the Monthly option at Menu/Favs > Production Planning > Timeline Views > Monthly > Multi Buffer BOM Hierarchy TLV .

In the BOM Item Enterprise field, enter the BOM Item Enterprise to filter the data.
In the * Item Name field, enter the item name. Fields with an asterisk ( * ) are required.
In the * Site Name field, enter the site name.
In the Scenario Name field, enter a scenario name if desired.
Click the Search link.
The multi-buffer BOM hierarchy details for the weekly period appear in a table.

Click the Customize button to customize the data measure details.
The Customization Level pop-up appears.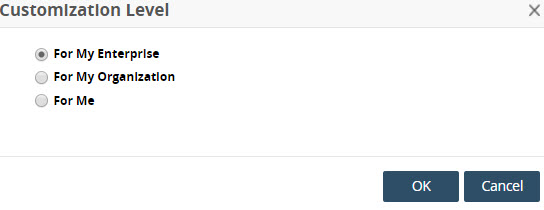
Select the Customization level.
Click the OK button.
The Currently Visible data measure and Add Data Measure icons appear.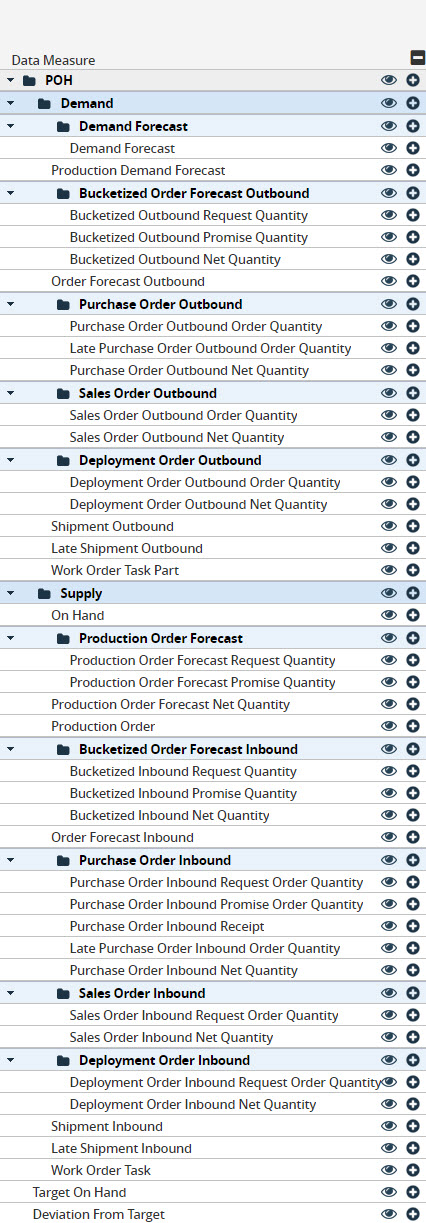
Click the icons to customize the view.
Click the Finish Customizing button.
The data results screen appears again.Click the Export to Excel button to export the data into a spreadsheet.