Order Brokering Workbench
Complete the following steps to access the Order Brokering Workbench:
Log in to the ONE system in a Vendor role.
Click Menus/Favs > Order Mgmt > Workbenches > Order Brokering Workbench.
The Order Brokering Workbench opens with the filter options displayed. If the filter options are not visible, click the icon at the top right corner of the workbench to display the filters at any time.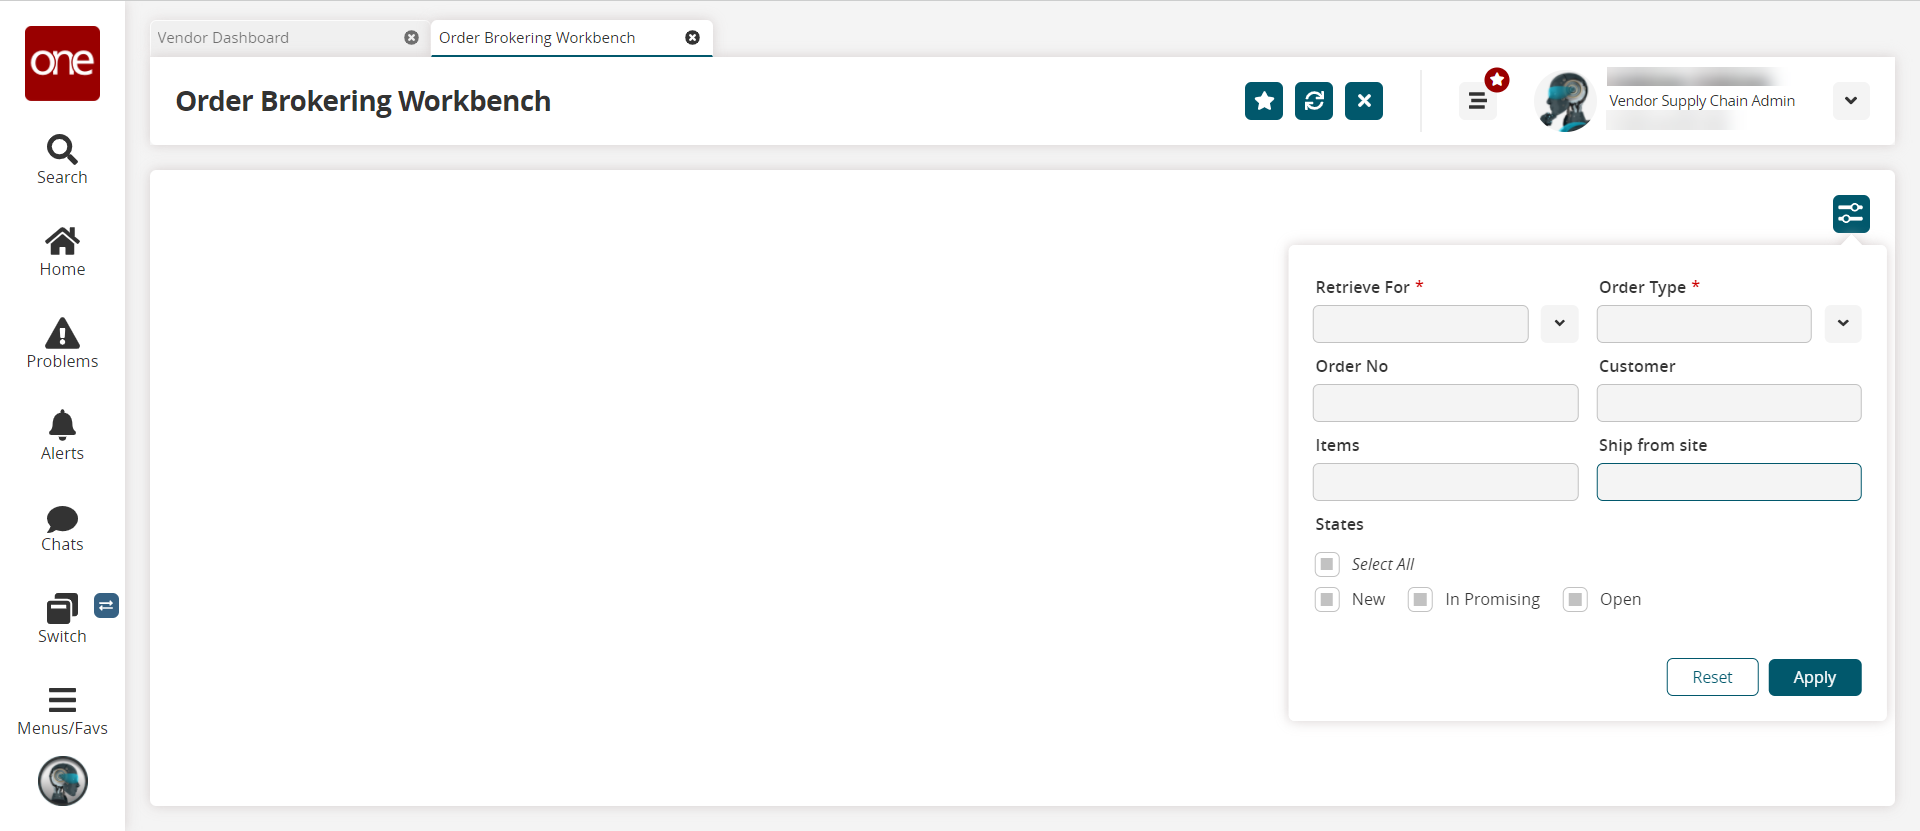
Fill out the following fields. Fields with an asterisk ( * ) are required.
Field
Description
* Retrieve For
From the dropdown list, select the time period for which you want to retrieve orders.
Order No
Enter the order number. Begin typing and select the items from the matching results below the field.
Items
Enter the items you want to view on the workbench. Begin typing and select the items from the matching results below the field.
States
Click the checkboxes for the states of the orders you want to view in the workbench.
* Order Type
From the dropdown list, select the order type you want to view in the workbench.
Customer
Enter the customer. Begin typing and select the items from the matching results below the field.
Ship From Site
Enter the Ship From Site. Begin typing and select the items from the matching results below the field.
Click Apply.
The Order Brokering Workbench displays orders that match the selected criteria.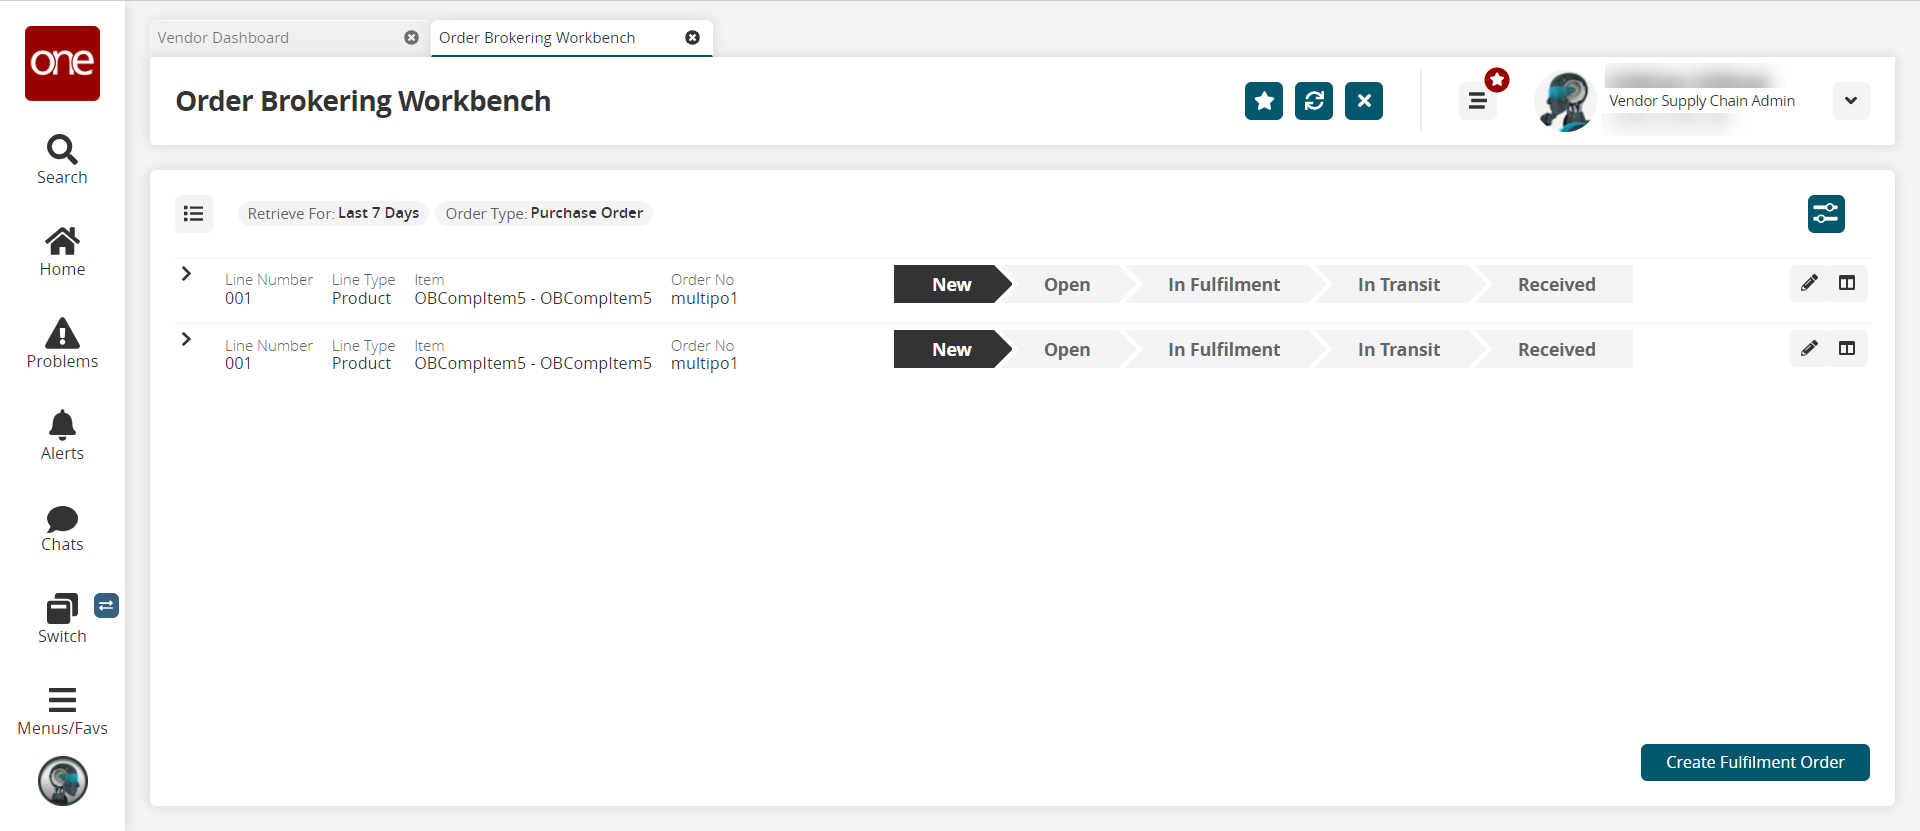
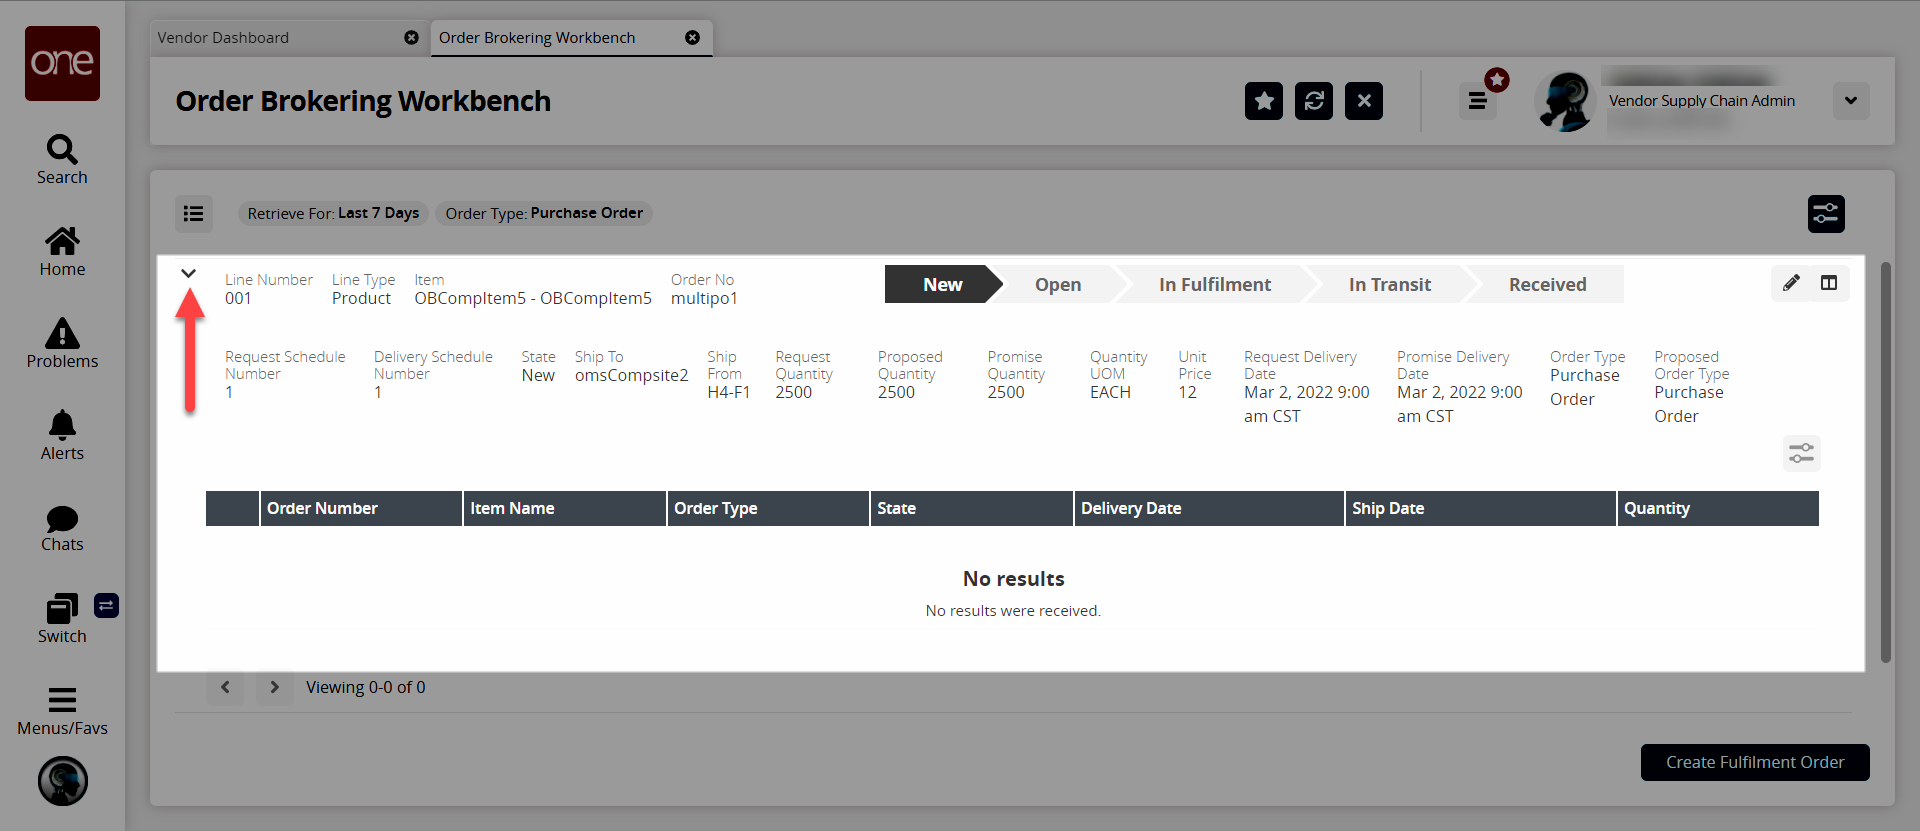
Click the arrow on the left to expand information about a line.
Click the Create Fulfillment Order button to create fulfillment orders.
A green success message appears, and the new fulfillment orders are displayed below the order line.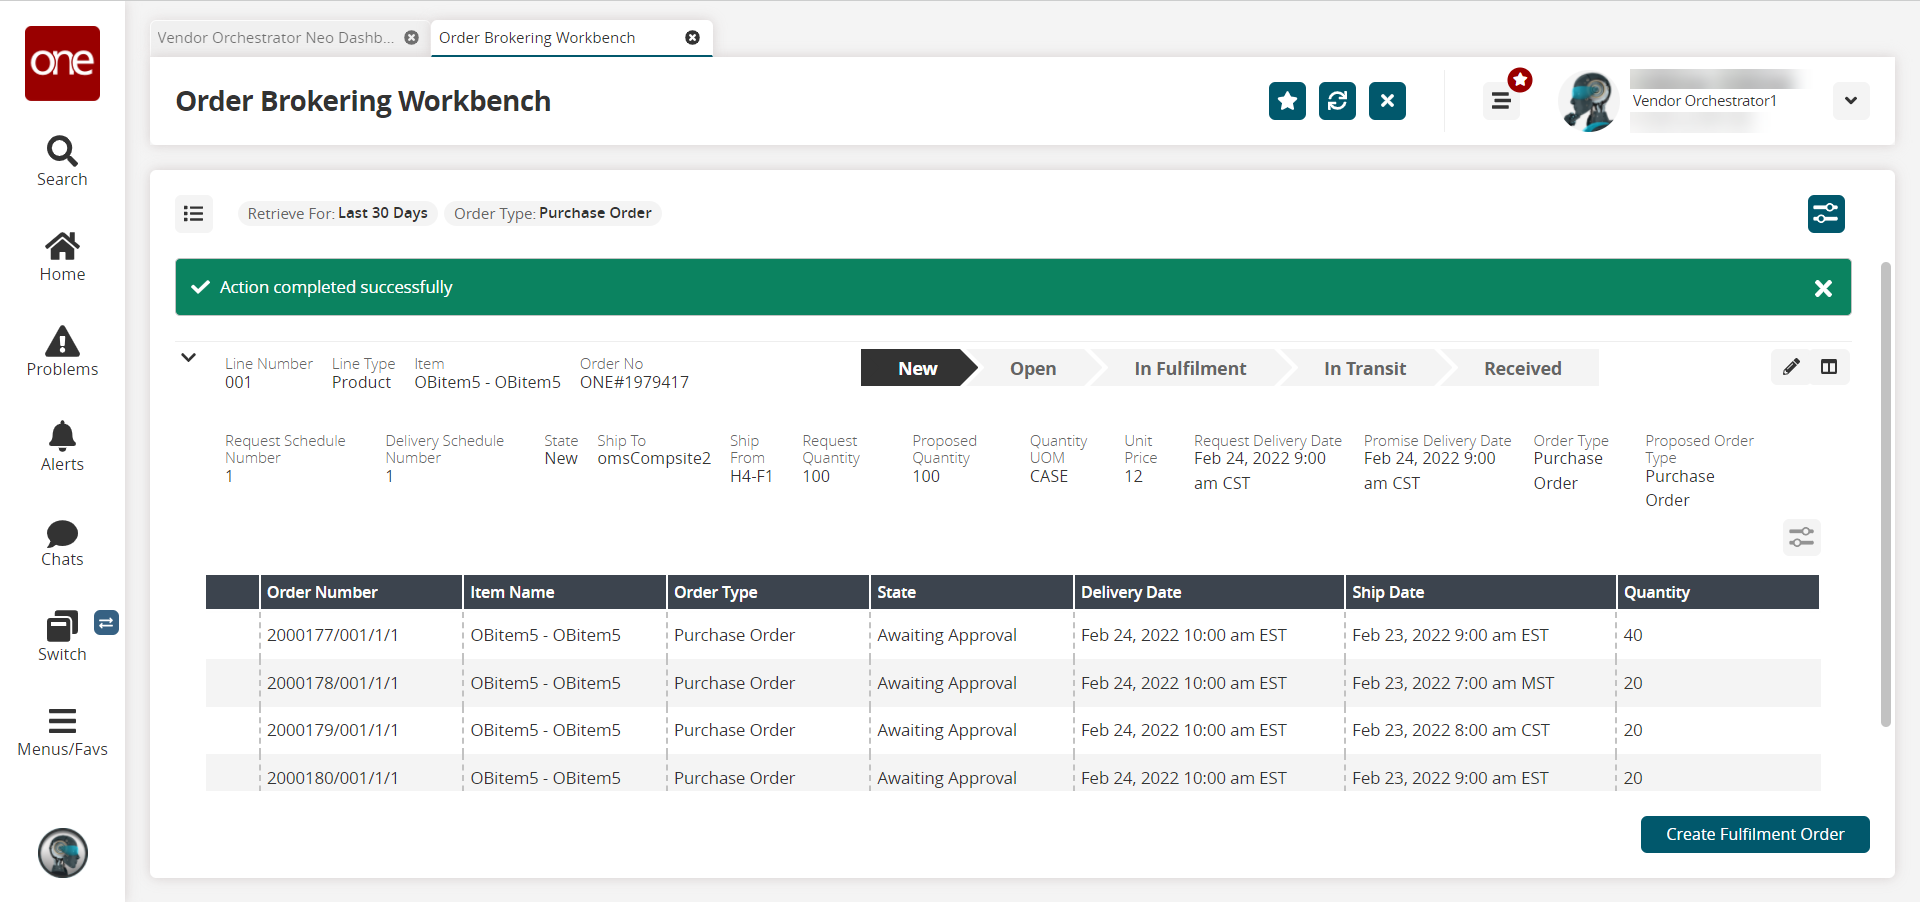
Click the pencil icon to edit the schedule for a line.
The schedule slideout appears.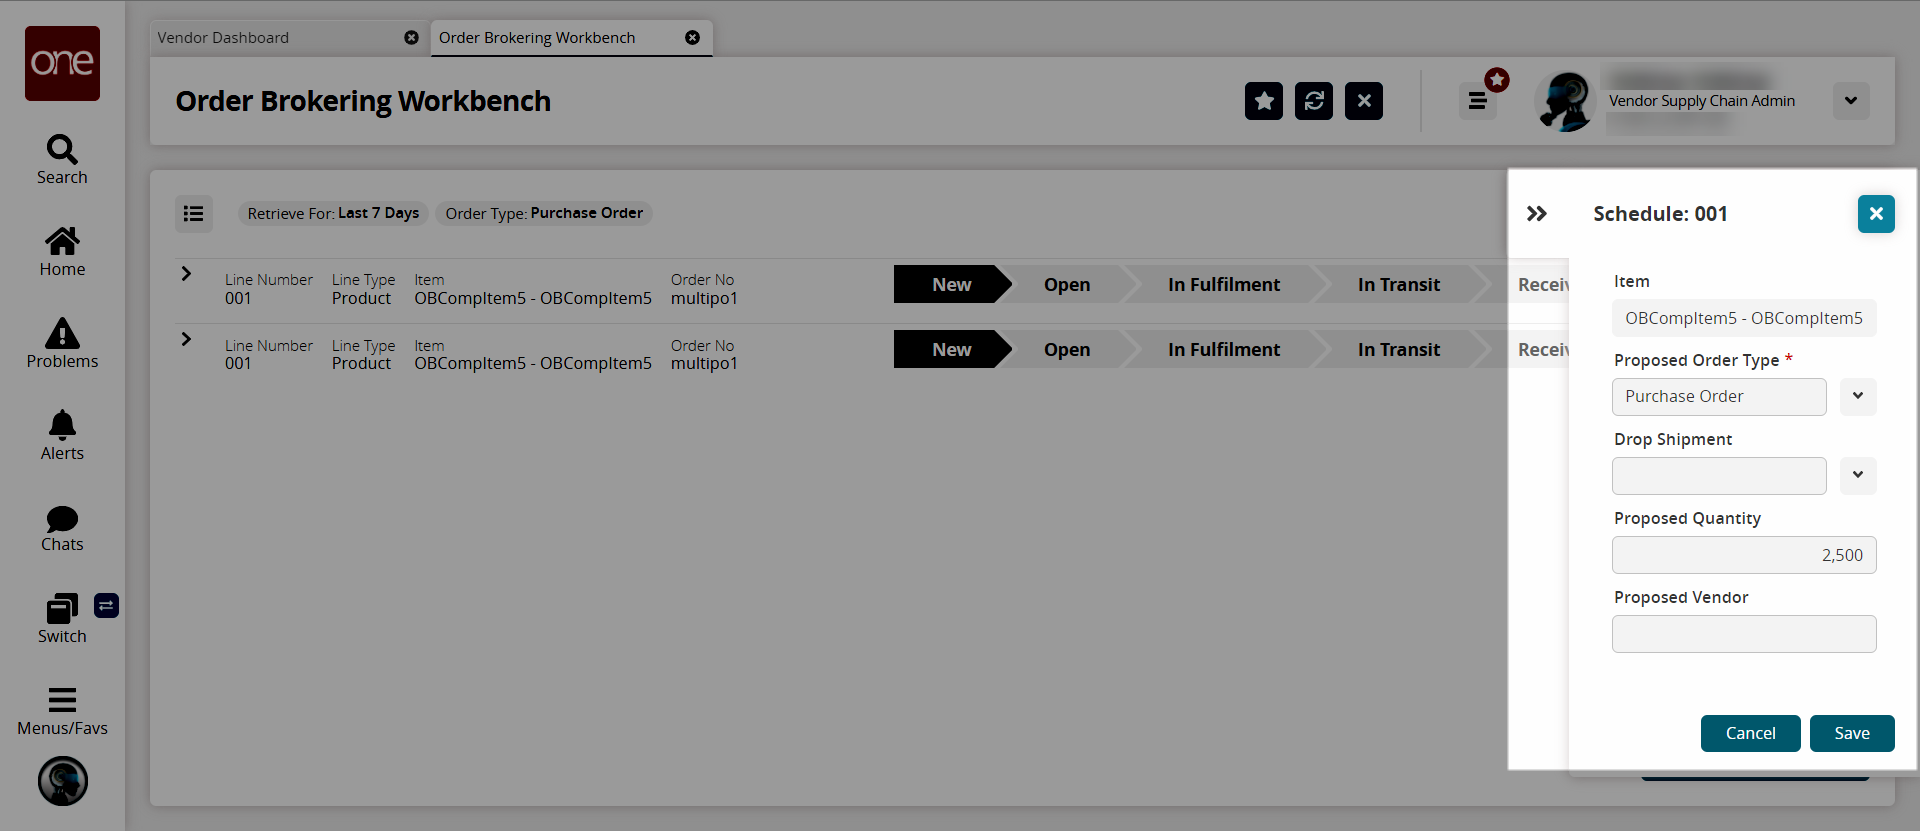
On the schedule slideout, fill out the following fields to edit the schedule if desired. Fields with an asterisk ( * ) are required.
Field
Description
Item
This field is automatically populated.
* Proposed Order Type
Select the proposed order type from the dropdown list.
Drop Shipment
Select YES or NO to determine if this order should be marked as a drop shipment.
Proposed Quantity
Enter the proposed quantity change.
Proposed Vendor
Enter the proposed vendor change.
Click the Save button to save changes to the schedule.
The slideout closes.Click the
 icon to open the popup window to manually create orders for the schedule.
The Create Manual Orders for the Schedule popup window displays.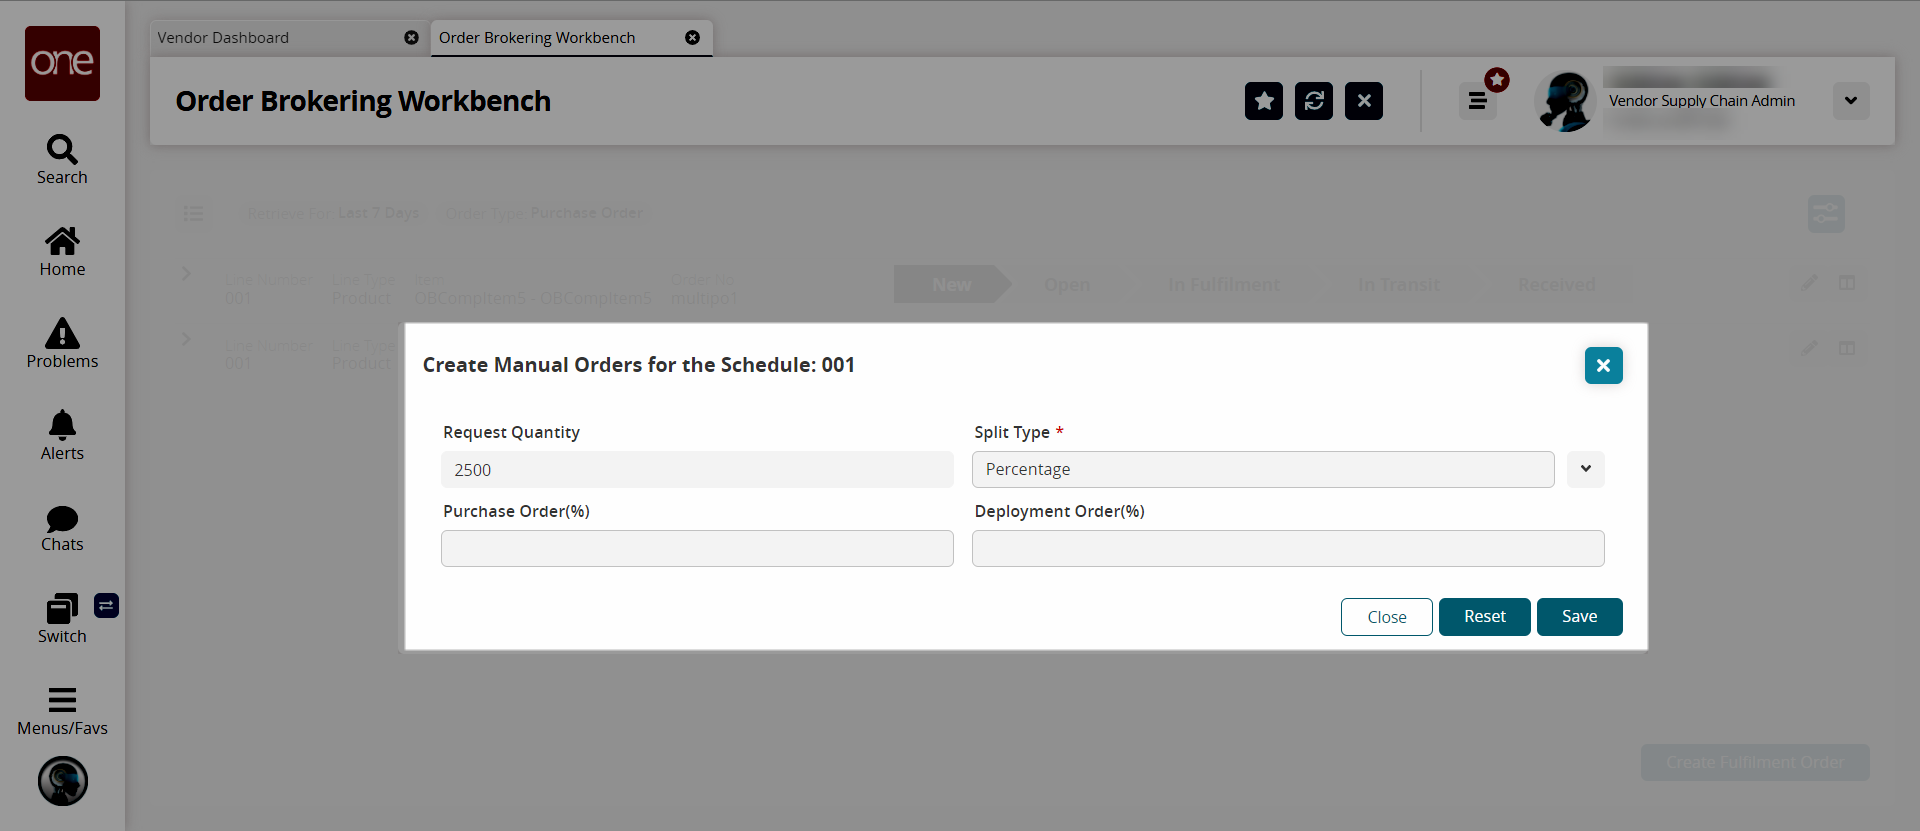
Fill out the following fields. Fields with an asterisk ( * ) are required.
Field
Description
Request Quantity
This field is populated automatically.
* Split Type
Select the split type from the dropdown list. The options are percentage and absolute. The selection determines the labels for the remaining two fields.
Purchase Order (%) or PO Qty
Enter the purchase order percentage or quantity.
Deployment Order (%) or DO Qty
Enter the deployment order percentage or quantity.
When the Purchase Order (%) or PO Qty and the Deployment Order (%) or DO Qty fields are completed, the Purchase Order and Deployment Order sections display.
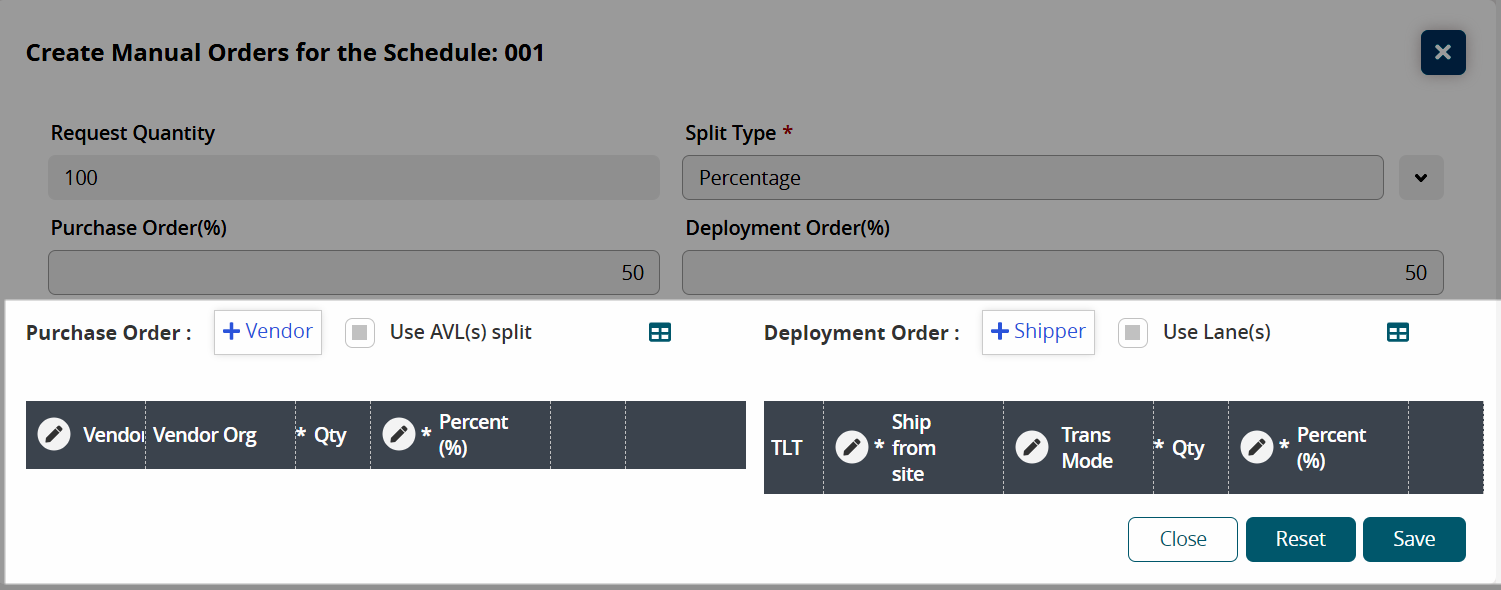
In the Purchase Order section, click +Vendor to add a vendor manually. Alternatively, click the Use AVL(s) split checkbox to auto-populate the section with vendors from the Approved Vendor List(s) (AVLs).
A new row appears in the Purchase Order section grid. If you click the Use AVL(s) split and/or Use Lane(s) checkboxes, the new row appears with the vendors auto-populated. Otherwise, the new row is blank.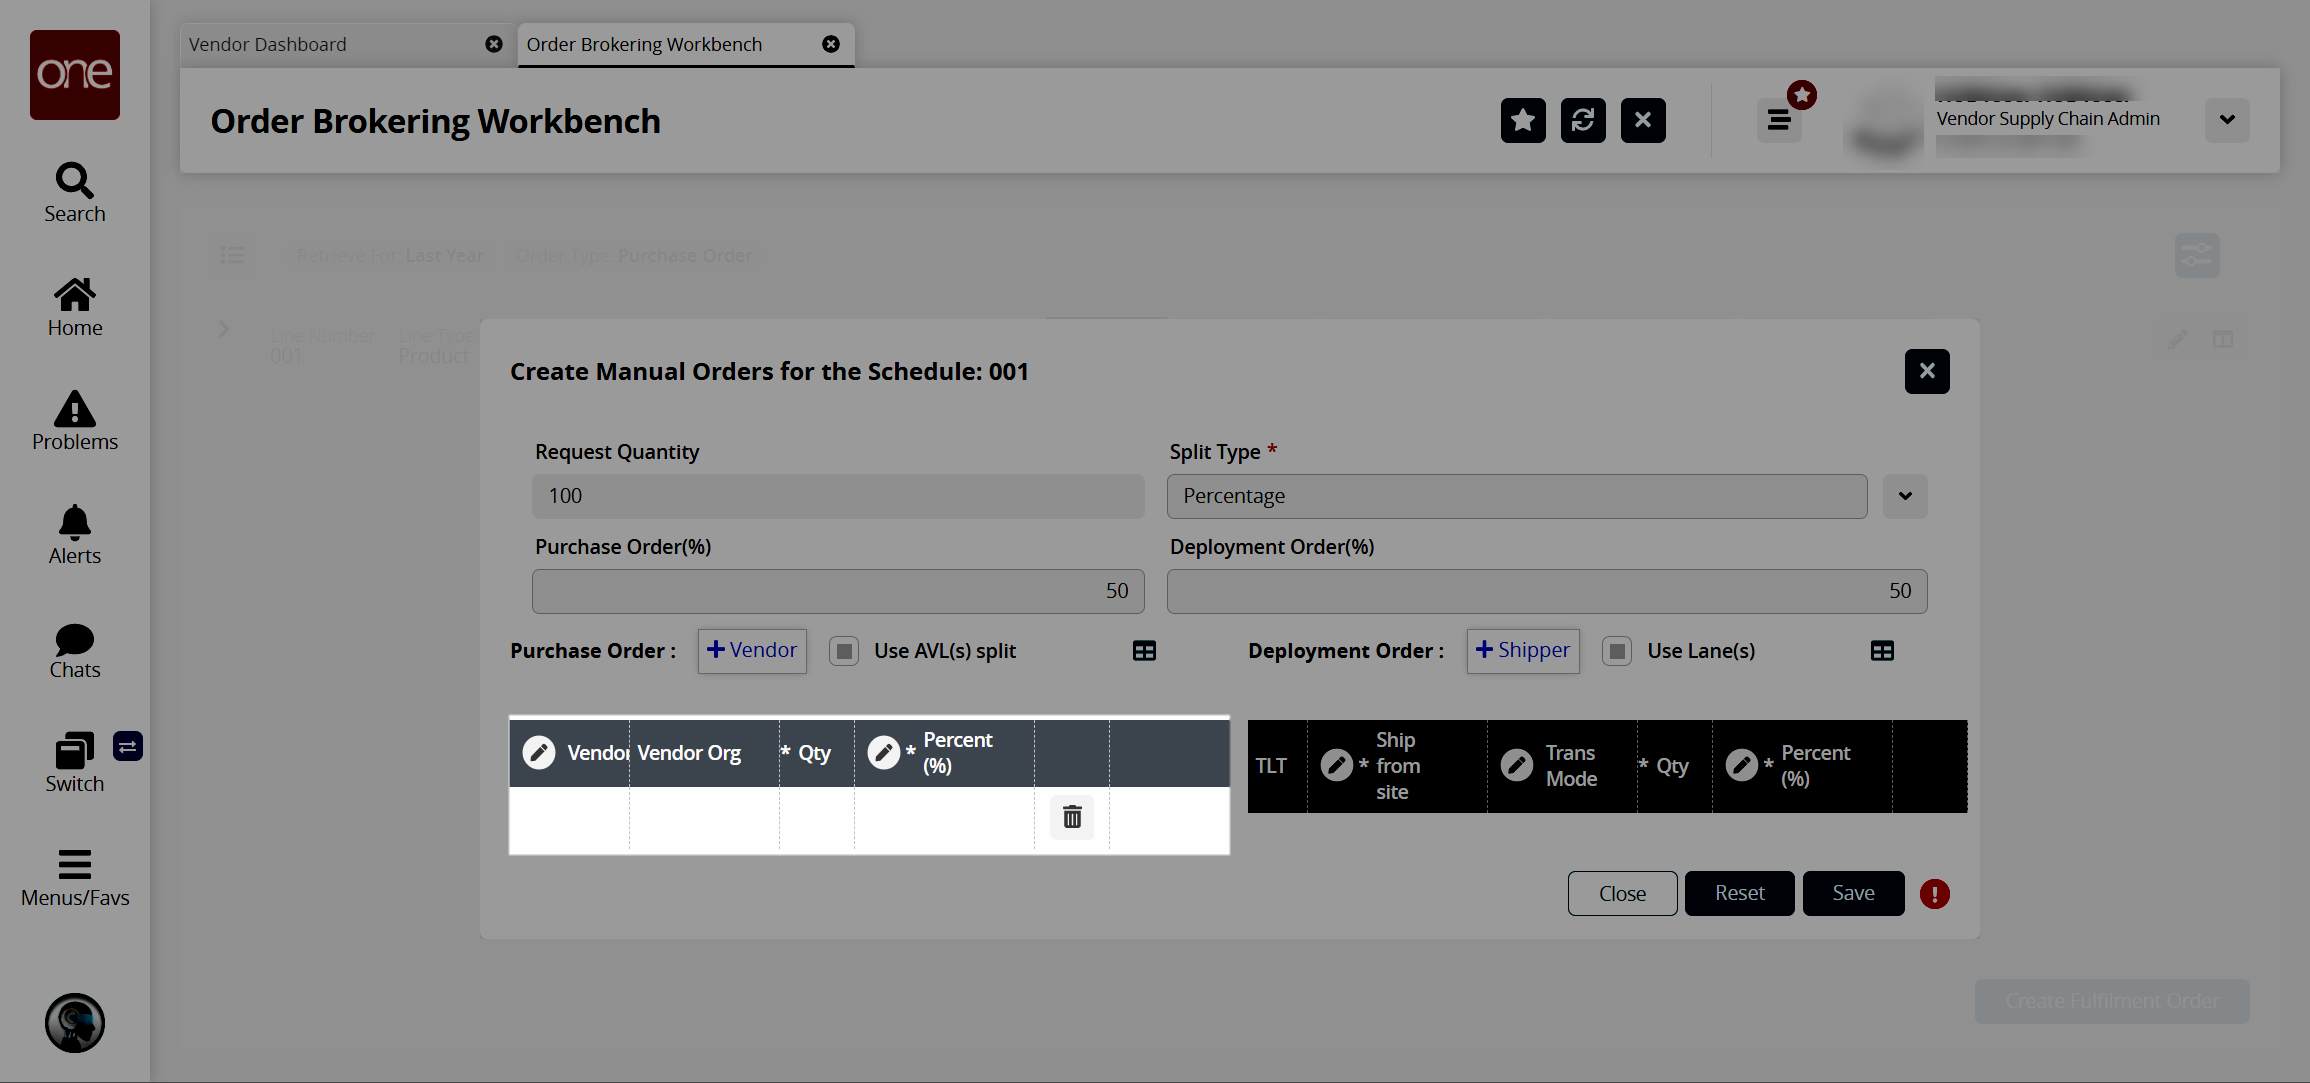
Click in the cell for each column to fill in the following fields. Fields with an asterisk ( * ) are required.
Field
Description
Vendor
Begin typing the vendor name and select from the results that appear below the field.
Vendor Org
This field is populated based on the vendor selected.
* Qty
Enter a quantity.
* Percent (%)
Enter a percent.
In the Deployment Order section, click +Shipper. Alternatively, click the Use Lane(s) checkbox to auto-populate the section with active sites/buffers.
A new row appears in the Deployment Order section grid. If you click the Use Lane(s) checkbox, the new row appears with the sites auto-populated. Otherwise, the new row is blank.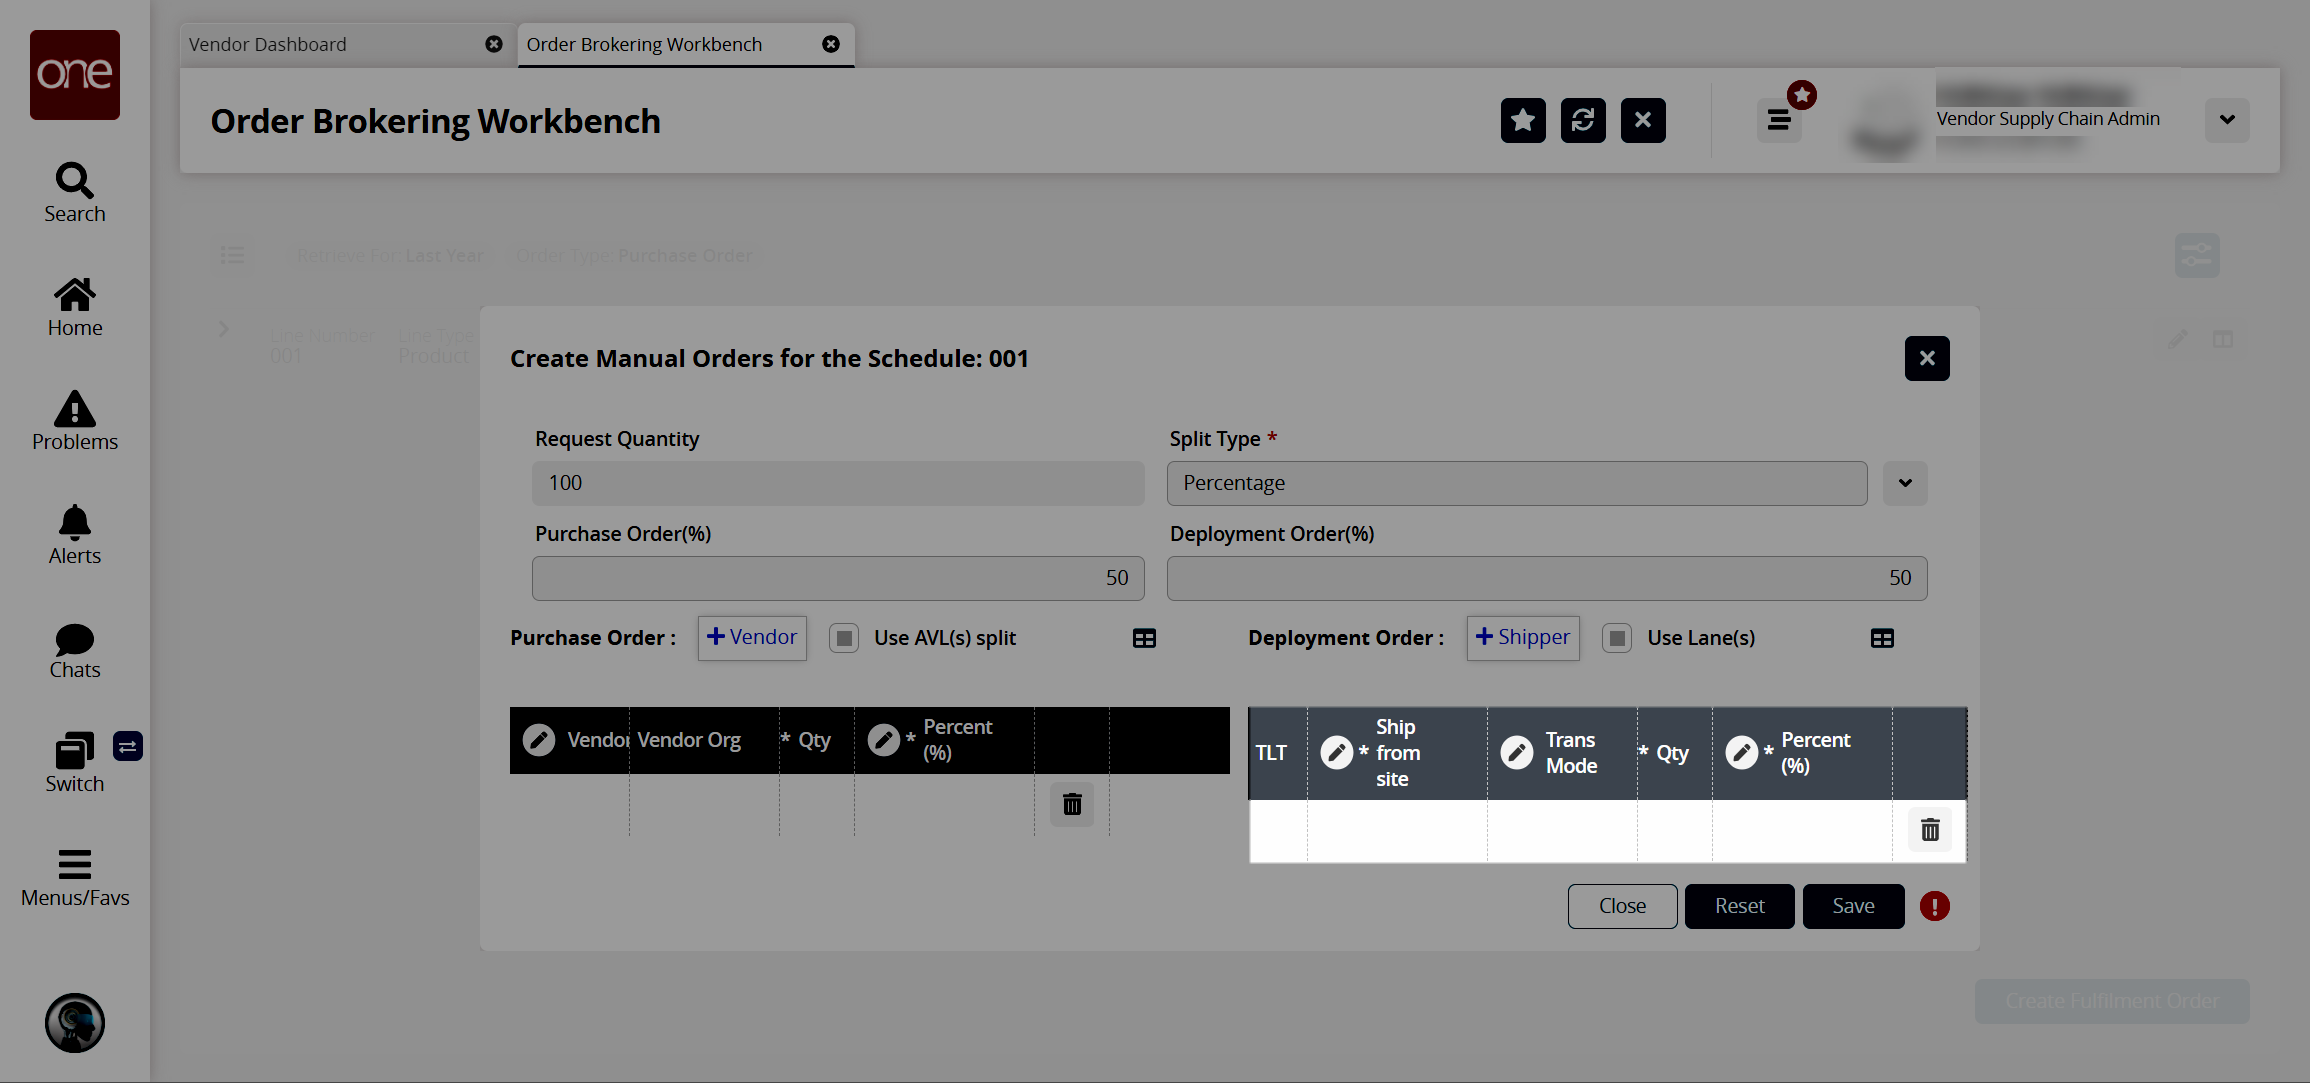
Click in the cell for each column to fill in the following fields. Fields with an asterisk ( * ) are required.
Field
Description
* Ship from site
Begin typing the Ship From site and select from the results that appear below the field.
Trans Mode
Begin typing the transportation mode and select from the results that appear below the field.
* Qty
Enter a quantity.
* Percent (%)
Enter a percent.
Add additional vendors and shippers as desired.
Click the trash icon to remove a vendor or shipper.
Click the Save button to save your changes and return to the Order Brokering Workbench.
Click the
 icon in the top left corner to view the searchable slideout.
The searchable slideout opens.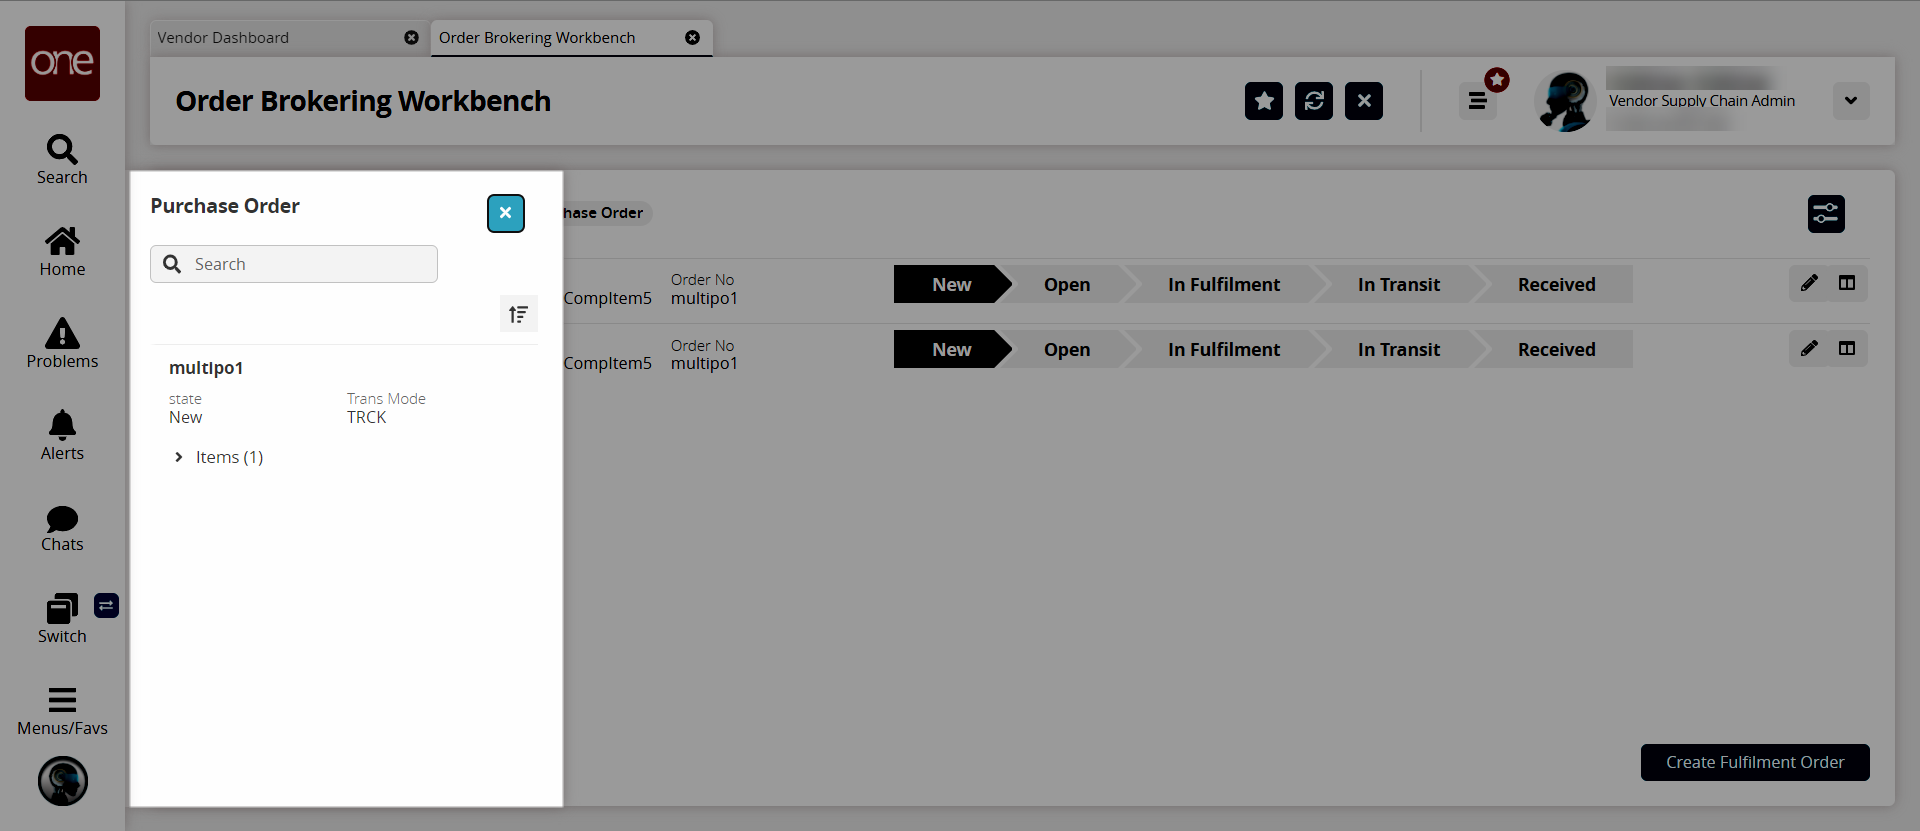
In the Search field, enter a value to find a specific order in the workbench.
In the results on the slideout, click the order number.
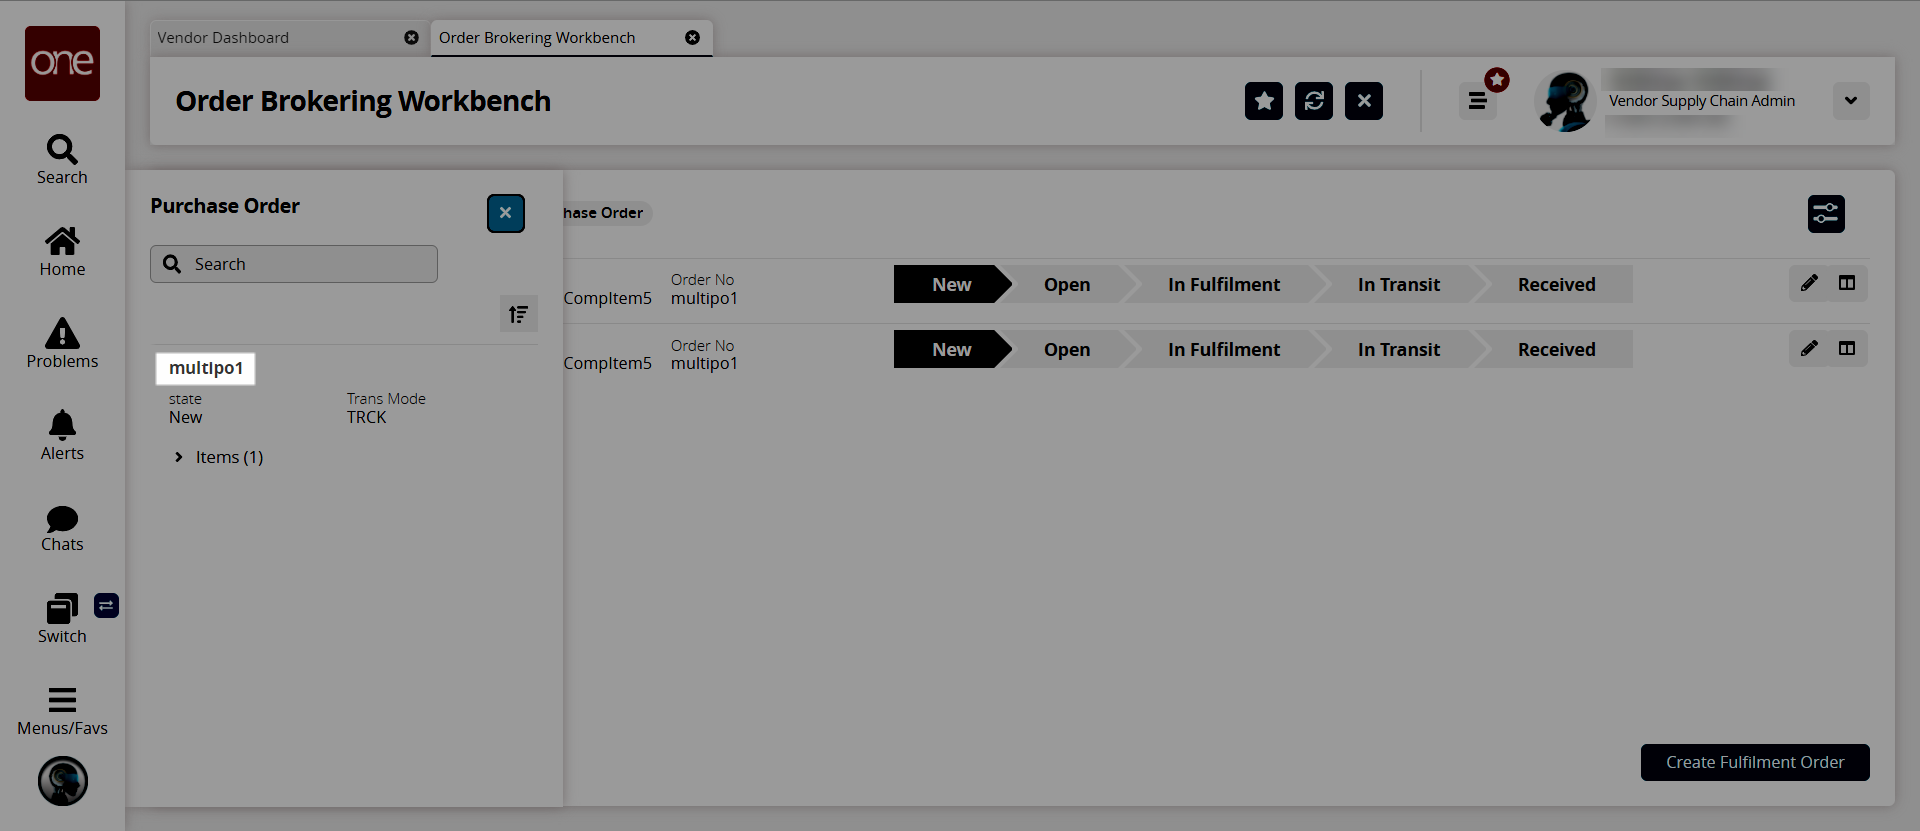
The selected order displays in the Order Brokering Workbench.