Searching SNOP Data Measures
Complete the following steps to view the Search SNOP Data Measure Report screen:
L og in to the ONE system.
Click Menus/Favs > Demand Planning > Forecast Review > Search SNOP Data Measure Report.
The Search SNOP Data Measure Report screen displays.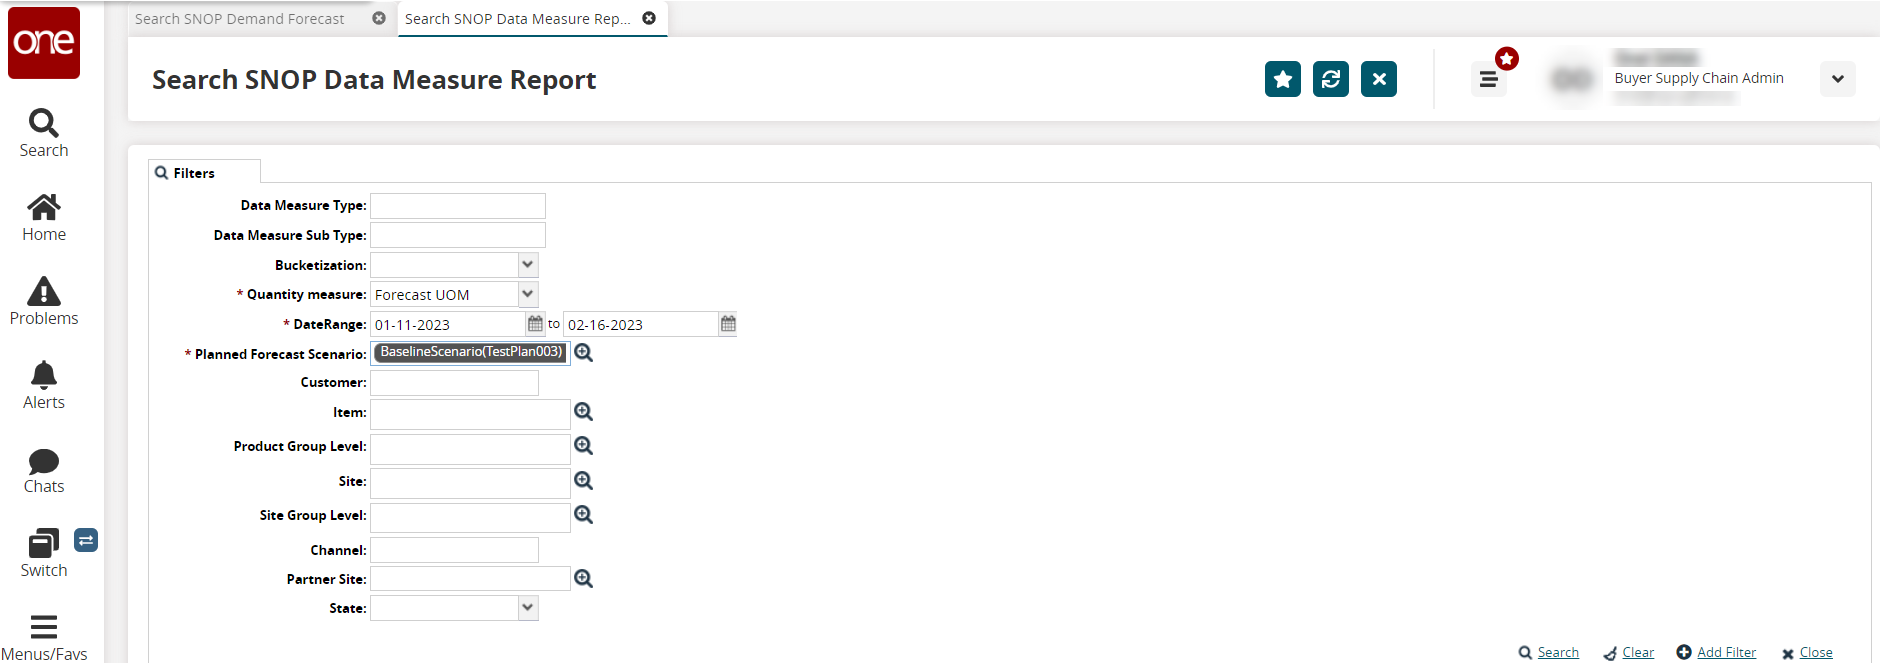
Fill out the following fields. Fields with an asterisk ( * ) are required.
Field
Description
Data Measure Type
Enter the data measure type.
Data Measure Sub Type
Enter the data measure subtype.
Bucketization
Select the time bucket from the dropdown list.
* Quantity Measure
Select the measurement from the dropdown list.
* Date Range
Use the calendar tools to select a beginning and ending date for the forecast.
* Planned Forecast Scenario
Enter or use the picker tool to select the planned forecast.
Customer
Enter the customer's name.
Item
Enter or use the picker tool to select the item.
Product Group Level
Enter or use the picker tool to select the product group level.
Site
Enter or use the picker tool to select the site.
Site Group Level
Enter or use the picker tool to select the site group level.
Channel
Enter the channel.
Partner Site
Enter or use the picker tool to select the partner site.
State
Select the state from the dropdown list.
Click the Search link.
The search results display.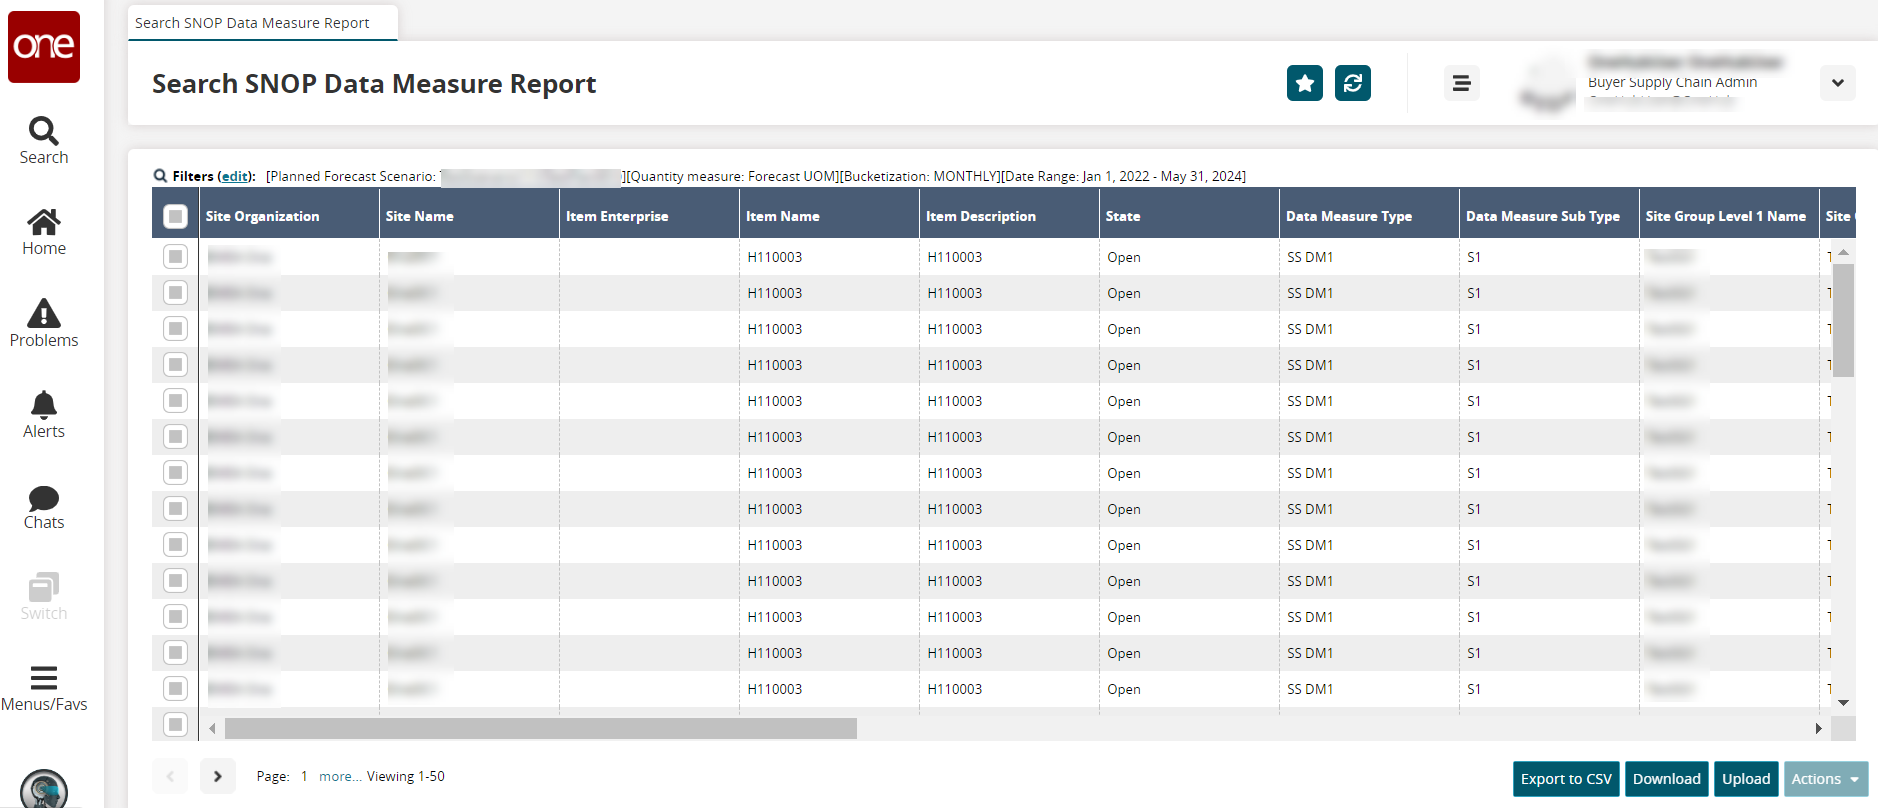
Click the Export to CSV button to export the report to a CSV file.
Click the Download button to download a file to your computer.
Click the Upload button to upload a file to the ONE system for batch uploads. Please see the "Uploading Files" section in the Online Help for more information.
Select a data measure row by checking the box for it.
Click Actions > Update.
The Update popup displays. Fields with an edit icon (pencil) are updatable.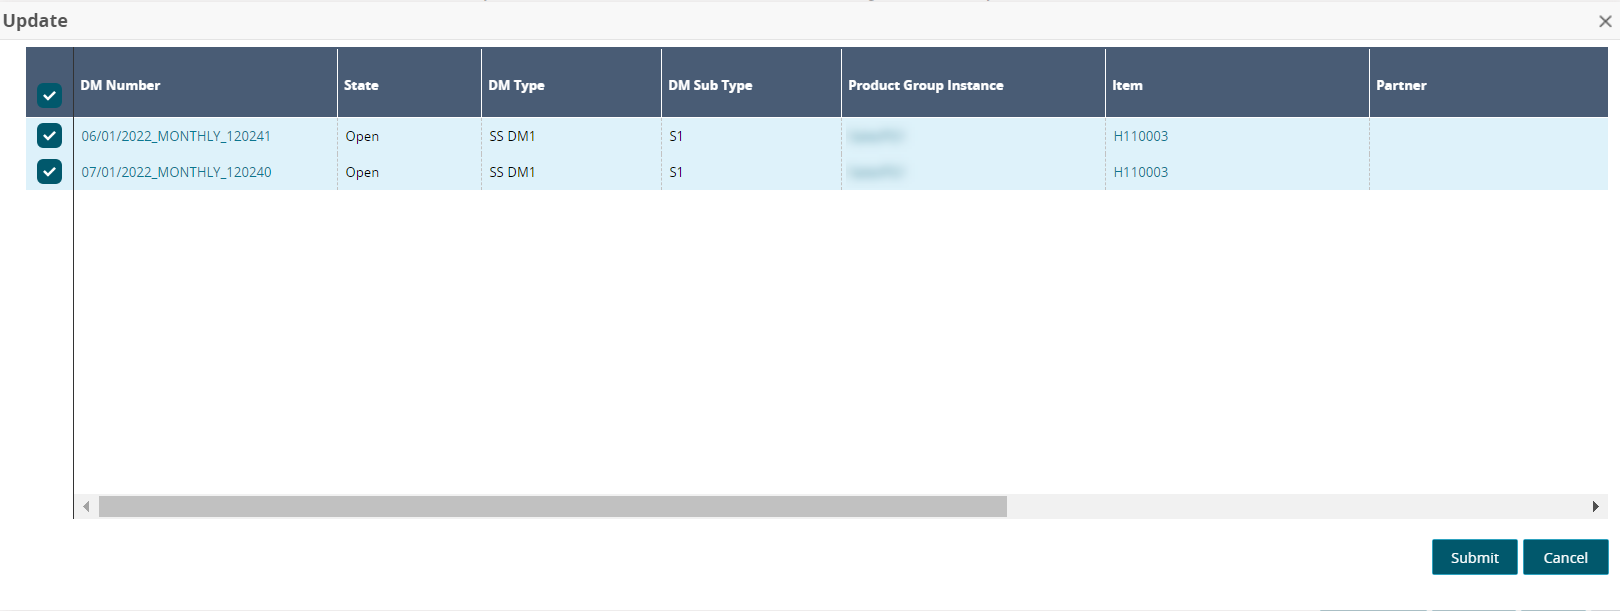
Update the User Override Quantity, Quantity, and Override Comments as required.
Click the Submit button.
A green success message displays.