Searching Shipments
This topic describes how to search the shipments in the system.
Complete the following steps to search shipments:
L og in to the ONE system.
Click Menus/Favs > Transportation > Search Shipments.
In the NEO UI, users can click on the Menus/Favs icon on the left sidebar and type in the name of the screen in the menu search bar. For more information, see "Using the Menu Search Bar."
The Search Shipments screen displays.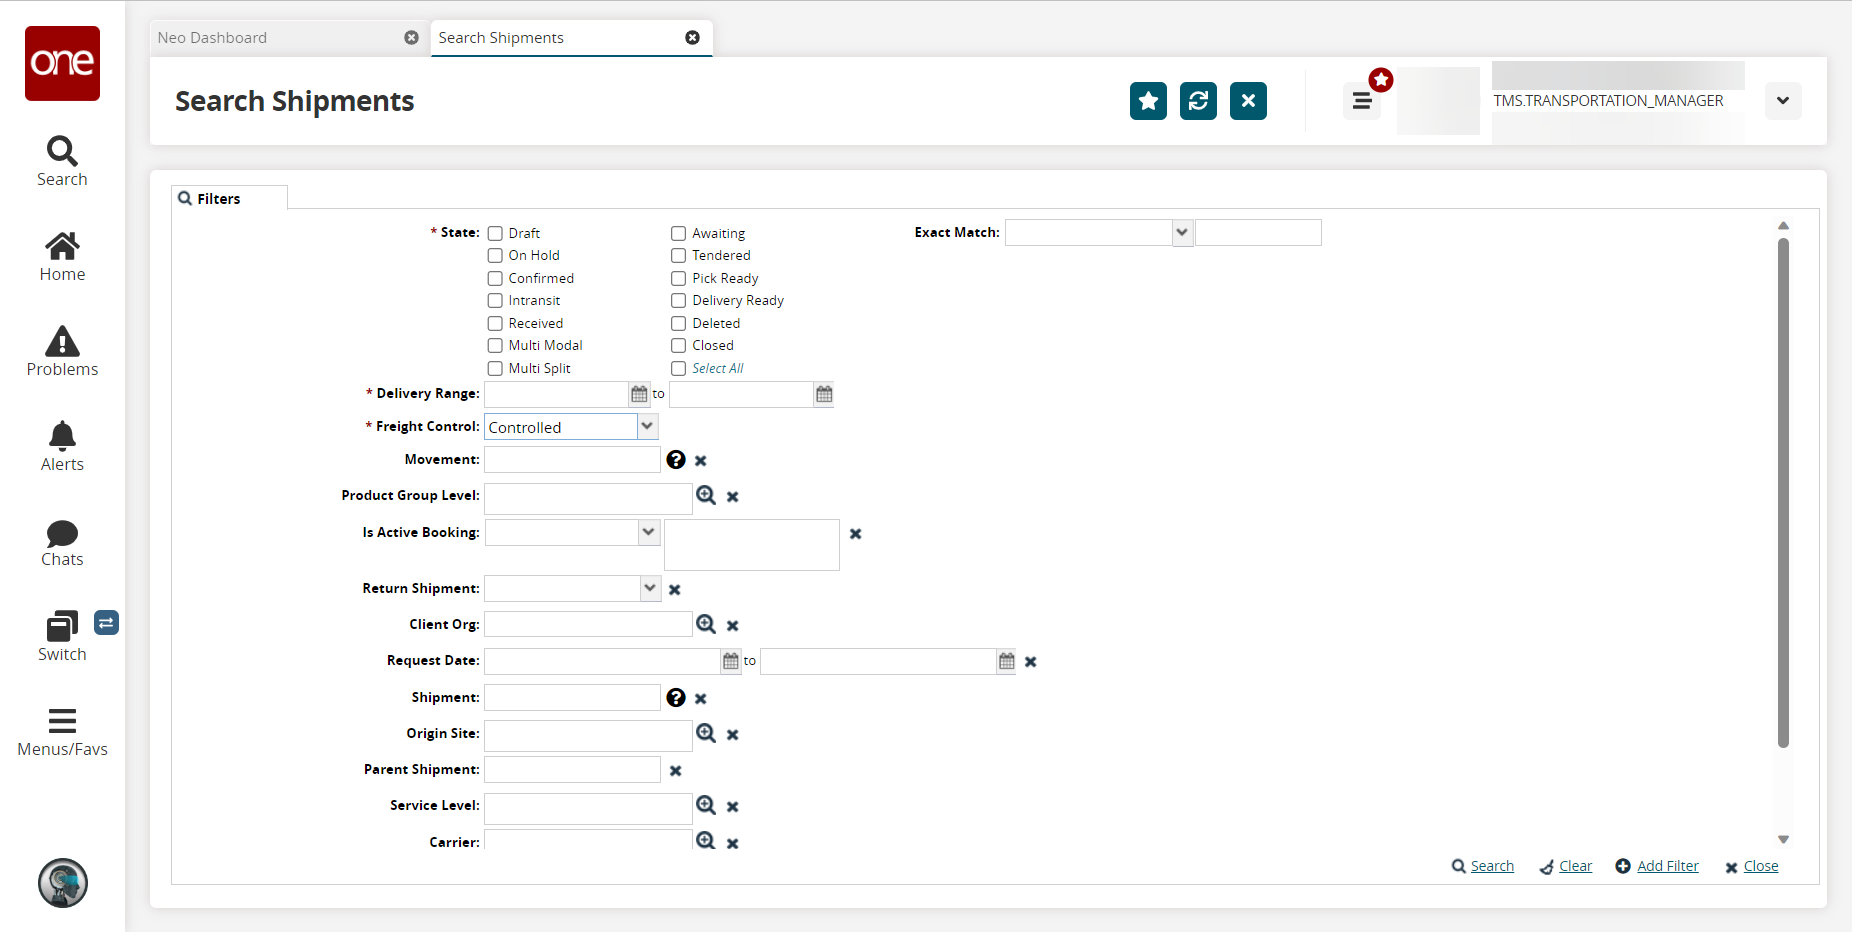
Fill out the following fields. Fields with an asterisk ( * ) are required.
Field
Description
State
Select one or more state checkboxes for the shipments. These checkboxes correspond to the different states of a shipment in the system.
Delivery Range
Click the calendar and clock icons to select a date range in which the shipments were delivered.
Freight Control
Select the freight control option from the drop-down menu
Movement
Enter a movement number
Product Group Level
Use the picker tool to select a product group level
Is Active Booking
Select the active booking option from the drop-down menu
Return Shipment
Select the return shipment option from the drop-down menu
Client Org
Use the picker tool to select a client organization
Request Date
Click the calendar icon to select a date range
Shipment
Enter a shipment number.
Origin Site
Use the picker tool to select an origin site
Parent Shipment
Enter a parent shipment number.
Service Level
Use the picker tool to select a service level
Carrier
Use the picker tool to select a carrier
Port Of Discharge
Enter a port of discharge
Distribution Code
Use the picker tool to select a distribution code
To add more search filters, click the Add Filter link, and then click one or more filter options from the Add Filter list.
Fill out the filters as desired, and click the Search link.
The search results display.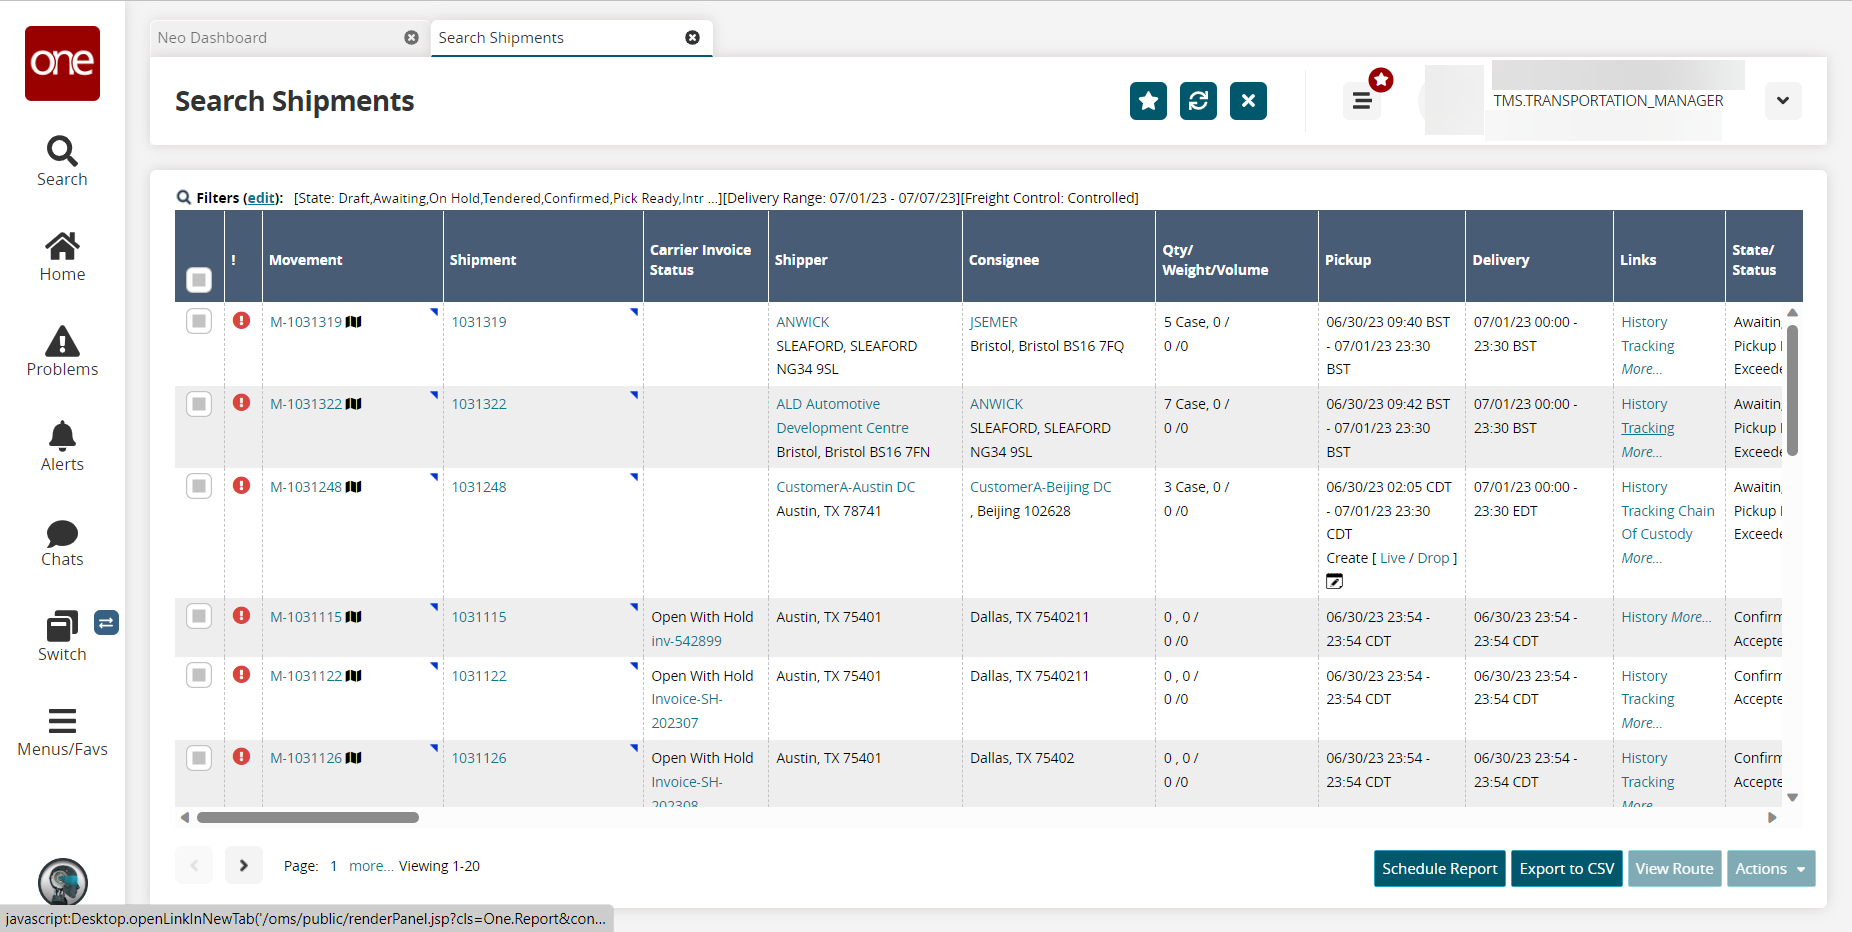
Click the Schedule Report button to schedule a report for the shipments.
Click the Export to CSV button to export the report to a CSV file.
Click a checkbox to the left of a shipment to select it and click the View Route button to view the route map for that shipment.
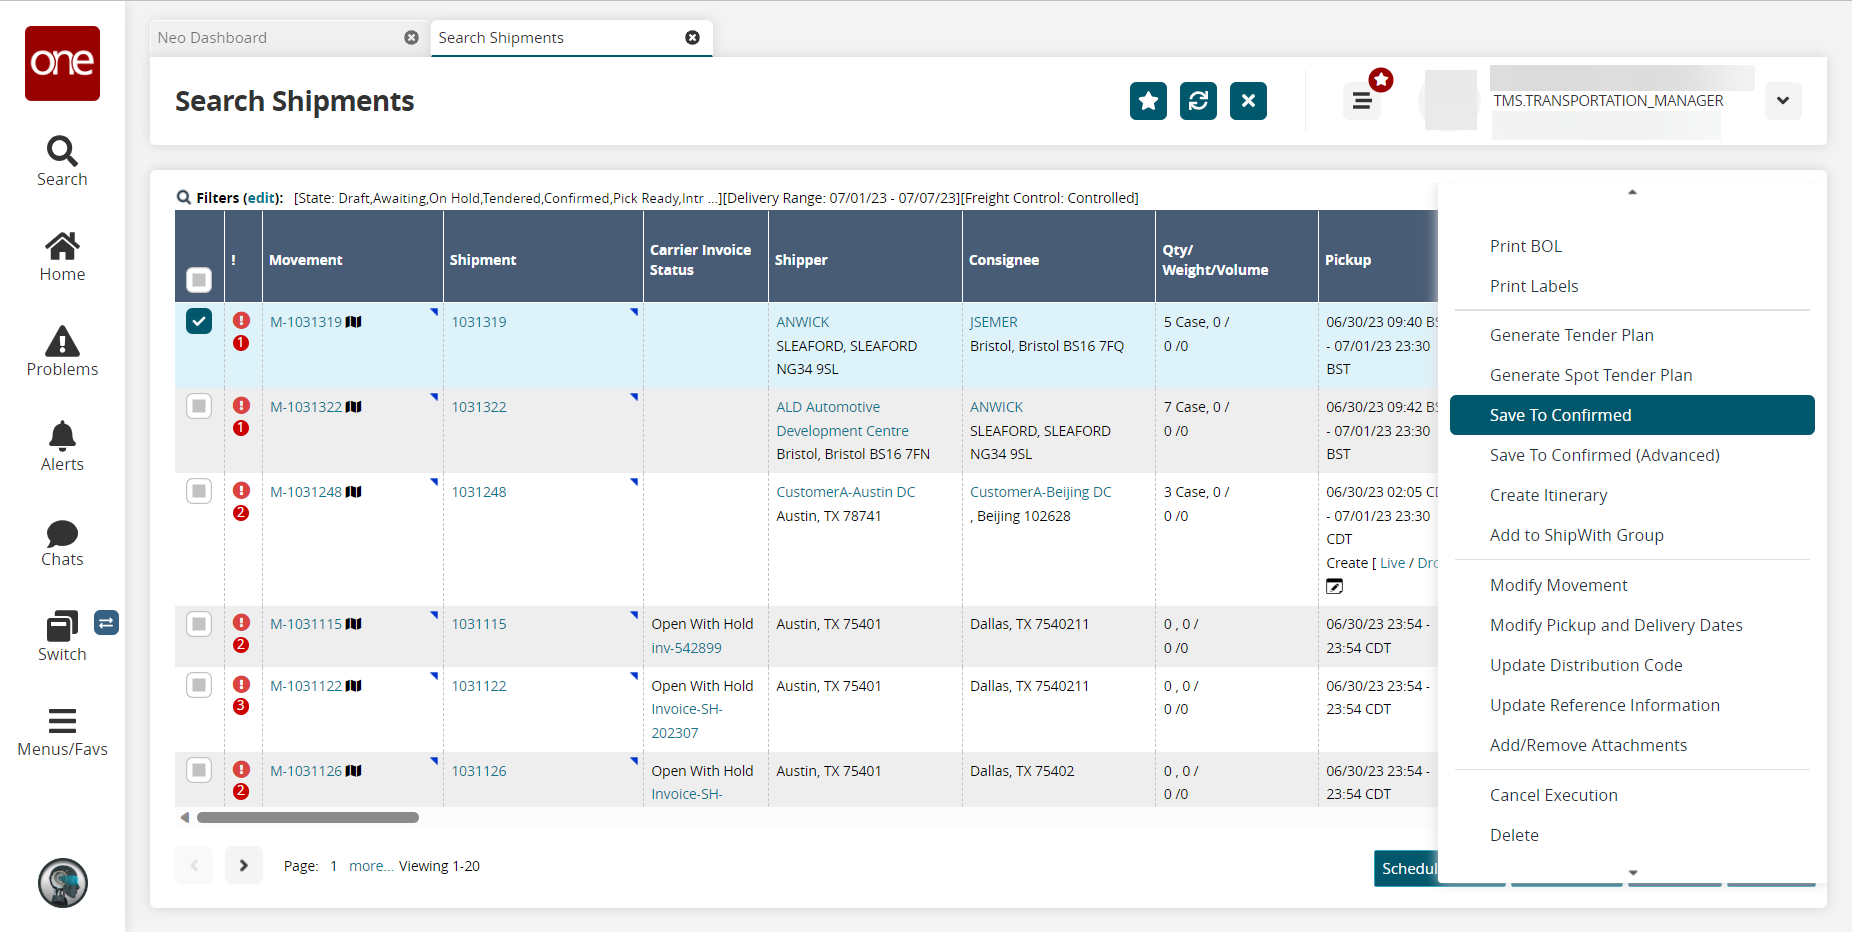
Click a checkbox to the left of a shipment to select it and click the Actions button to view actions available for that shipment.
In the Shipment column, click a shipment number to display the shipment details in a new tab.
In the Movement column, click a movement number to display the movement details in a new tab.