Searching and Updating Routing Operations
Complete the following steps to view or update a routing and/or a routing operation:
L og in to the ONE system.
Click Menu/Favs > Production Planning > Routing > Search Routing.
In the NEO UI, users can click on the Menus/Favs icon on the left sidebar and type in the name of the screen in the menu search bar. For more information, see "Using the Menu Search Bar."
The Search Routing screen displays.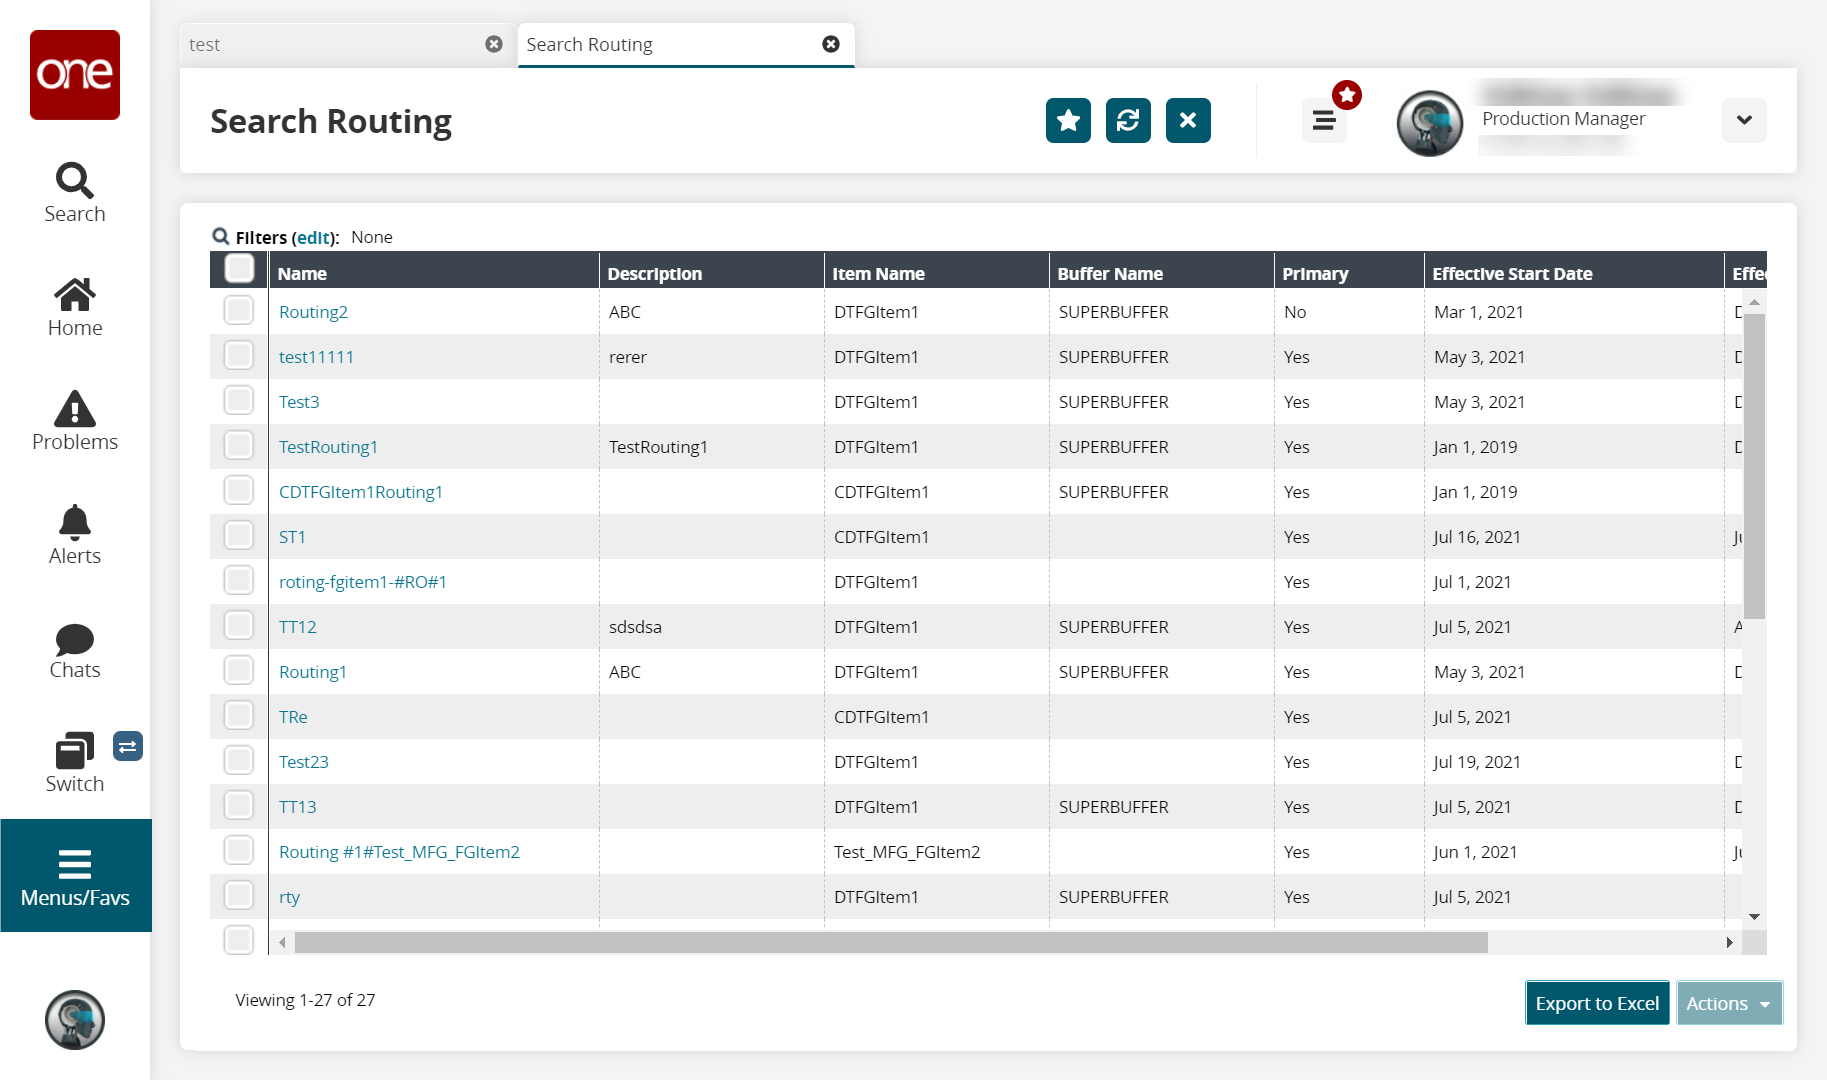
In the Name column, click the name link of the routing you wish to view.
The routing details screen displays in a new tab. The Name, Item, Effective Start Date, and Revision fields populate automatically and cannot be changed on this screen.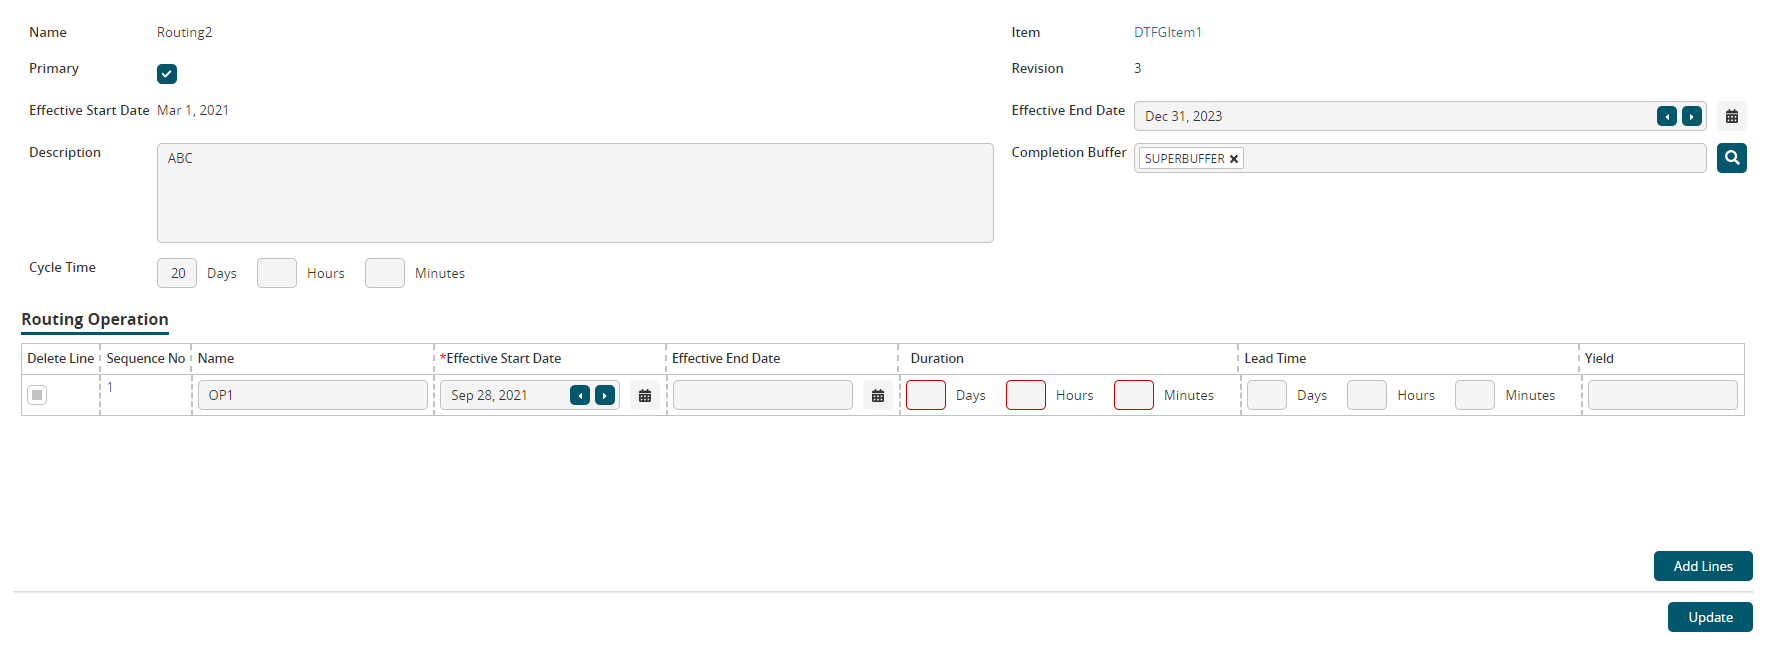
Fill out the following fields. Fields with an asterisk ( * ) are required.
Field
Description
Effective End Date
Click the calendar icon or use the right and left arrows to select the effective end date.
Description
Enter a description.
Completion Buffer
Click the search icon to select a completion buffer.
Cycle Time
Enter the cycle time in Days, Hours, and Minutes.
When using this field, adding lines to the Routing Operation section is not required.
Users can choose to use either Cycle Time or Routing Operation, but not both.In the Routing Operation section, click the Add Lines button to add a routing operation. (optional)
Users can choose to use either Cycle Time or Routing Operation, but not both.
An additional line appears in the Routing Operation section.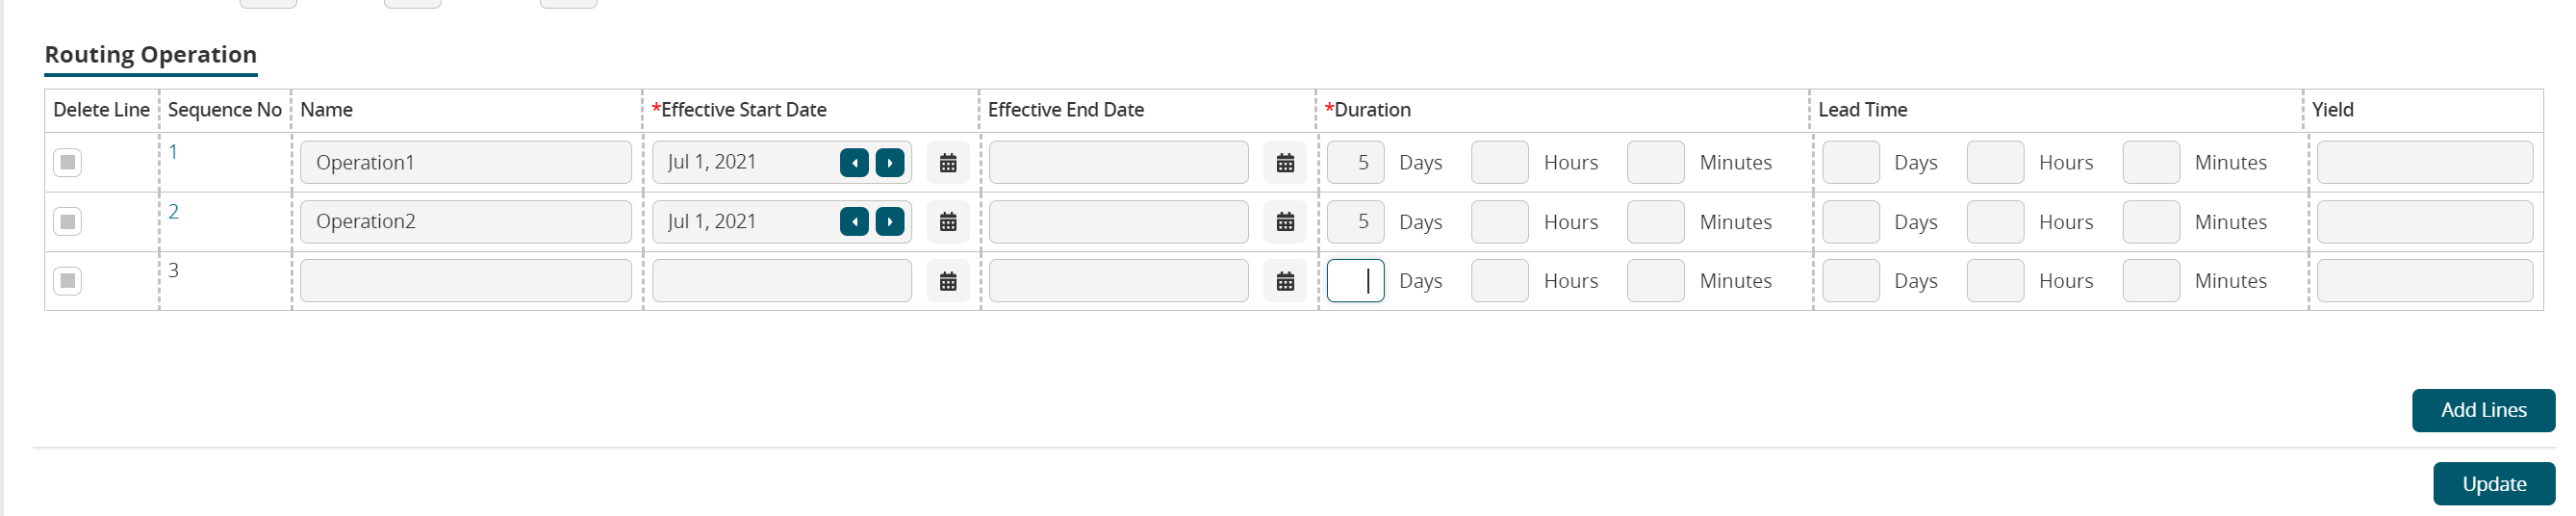
Fill out the following fields. Fields with an asterisk ( * ) are required.
Field
Description
Name
Enter the name.
* Effective Start Date
Click the calendar icon to select an effective start date.
Effective End Date
Click the calendar icon to select an effective end date.
* Duration
Enter the duration in days, hours, and minutes.
Lead Time
Enter the lead time in days, hours, and minutes.
Yield
Enter the yield.
Click the Add Lines button to add additional lines if desired.
In the columns of the existing Routing Operation lines, change or add information if desired.
Click the Update button.
If desired, click the checkbox in the Delete Line column for a line you want to delete and click the Update button.
In the Sequence No column, click a link to view or update a routing operation.
The Routing Operation detail screen appears in a new tab with the Component section.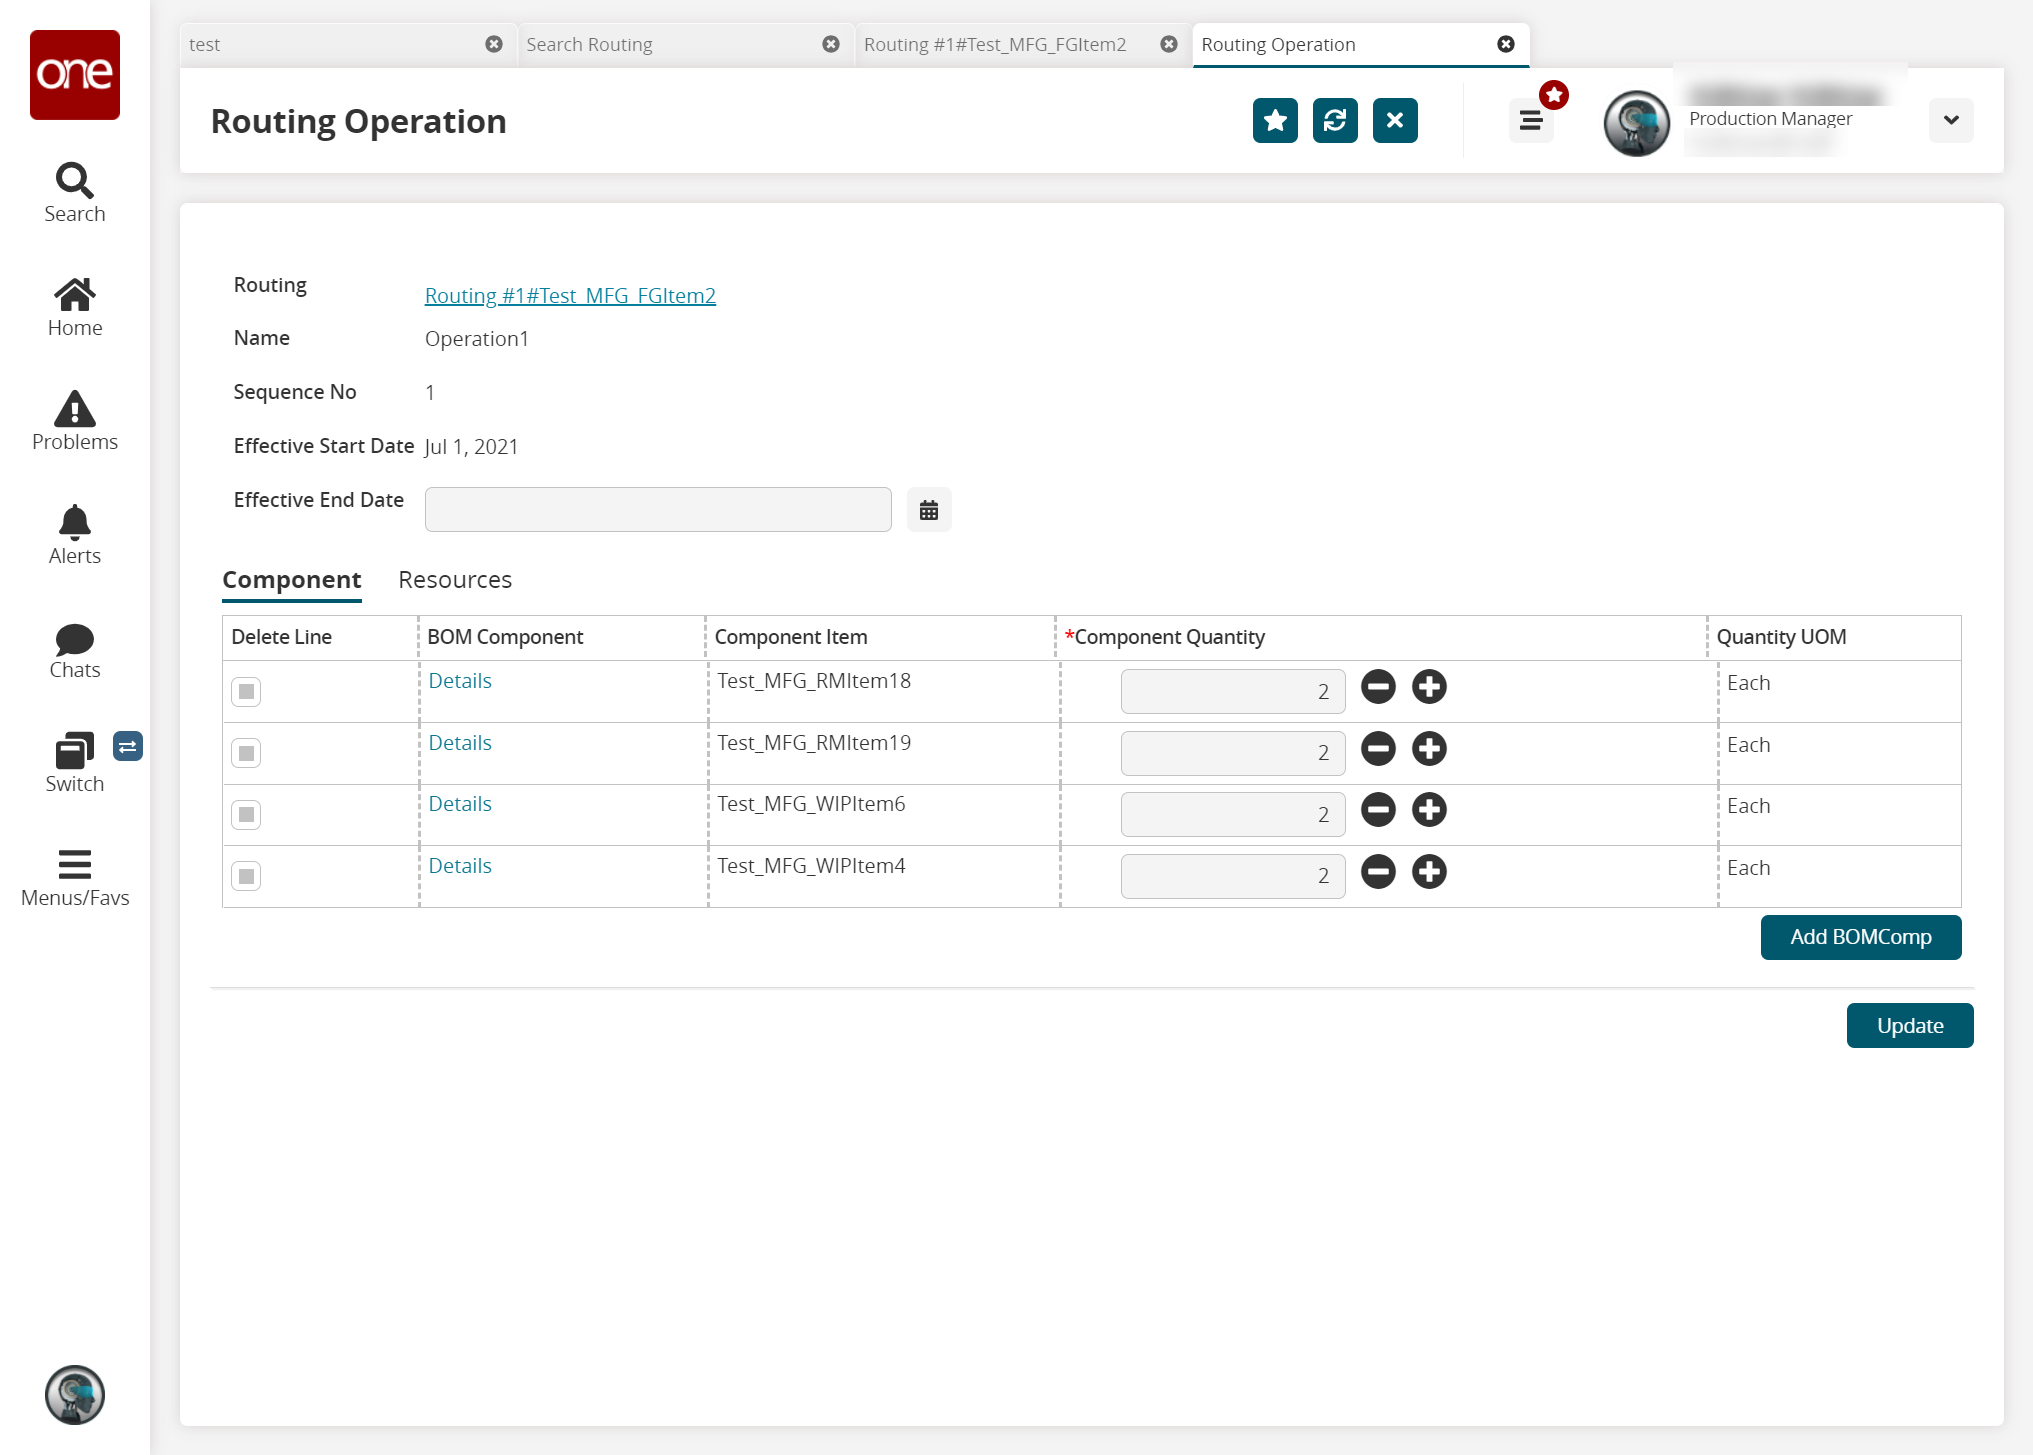
In the Effective End Date field, click the calendar icon to select or update the effective end date for the routing operation (optional).
In the Component Quantity column in the Component section, click the plus or minus button to adjust the bill of materials (BOM) component quantity if desired.
Click the Add BOMComp button to select additional BOM components for the routing operation if desired.
In the Delete Line column, select a checkbox beside a BOM component you want to delete from the routing operation (optional).
Click the Update button.
In the BOM Component column, click the Details link to view a BOM component details.
The BOM Comp Details screen displays in a new tab.