Site Resource Administration - Creating Tracking Events
Complete the following steps to administer site resources:
L og in to the ONE system.
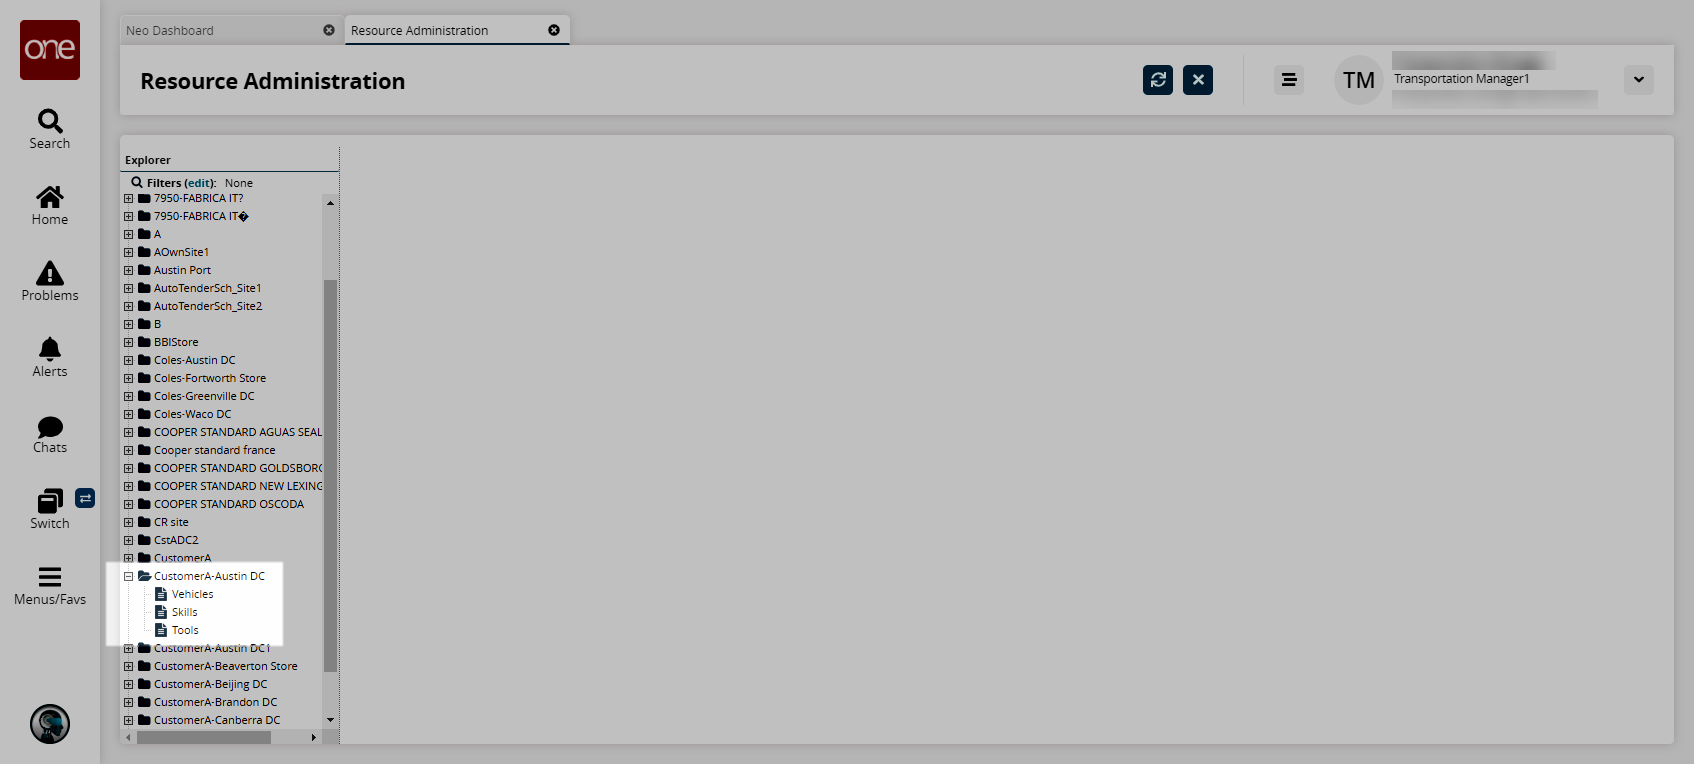
Select Menus/Favs > Fleet Mgmt > Resource Administration. In the NEO UI, users can click on the Menus/Favs icon on the left sidebar and type in the name of the screen in the menu search bar. For more information, see "Using the Menu Search Bar."
The Resource Administration screen displays.Expand a site folder to view its vehicle, skill, and tool resources.

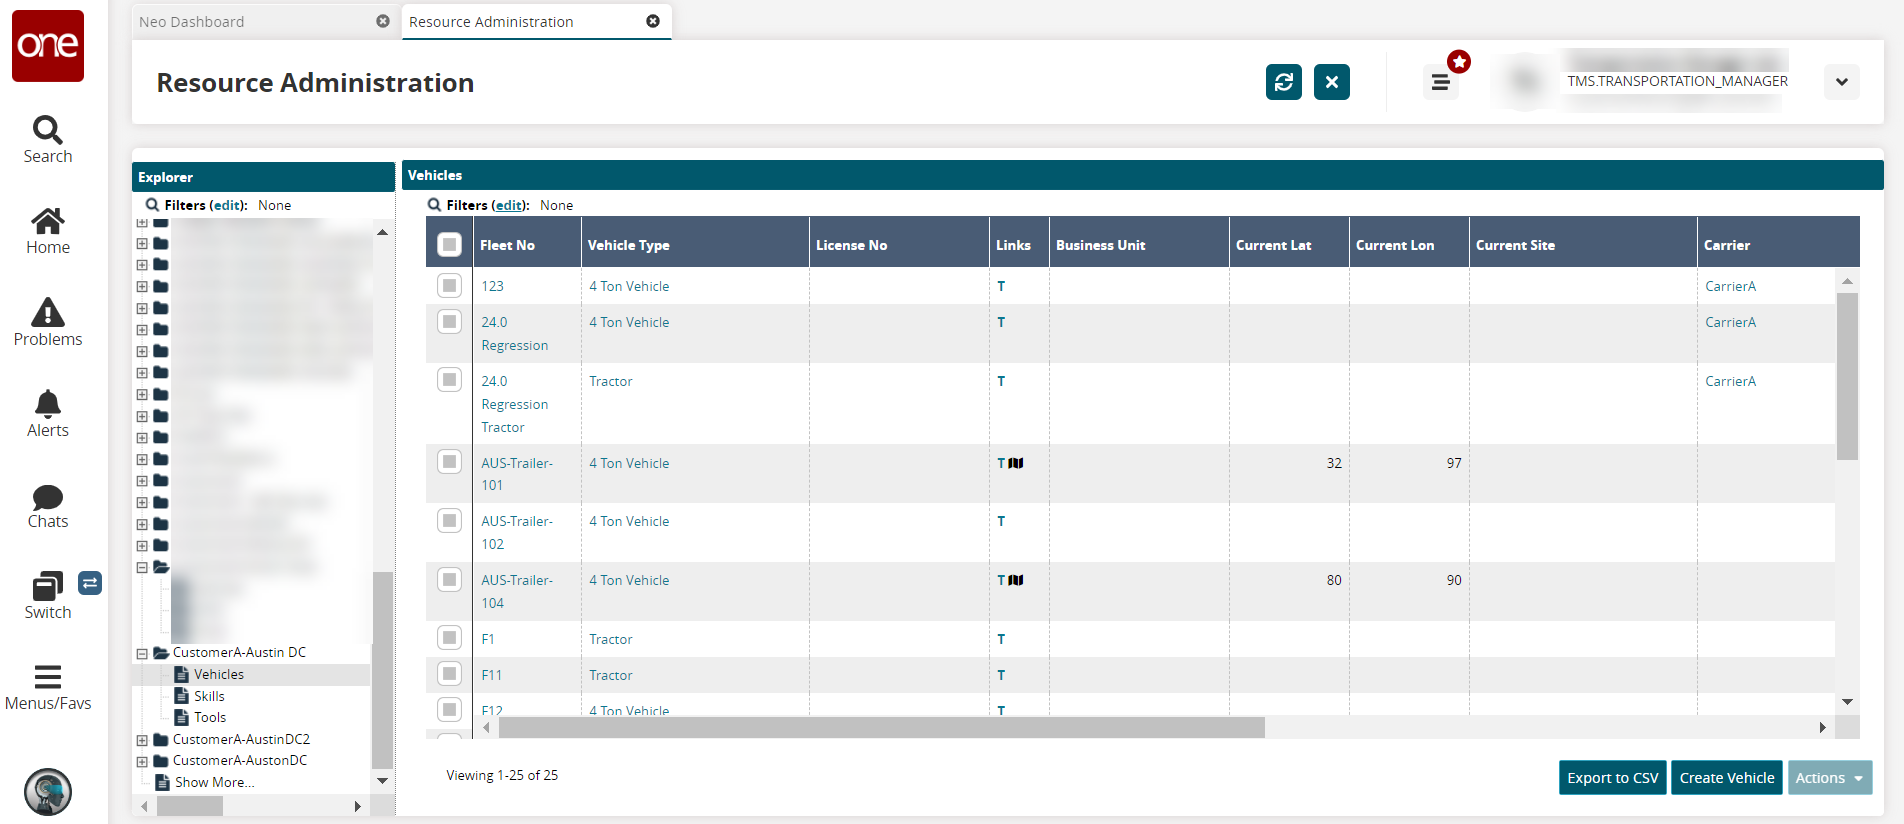
Click on Vehicles in the Explorer pane.
The current vehicles assigned to that site display.
Click on a T link to create a tracking event.
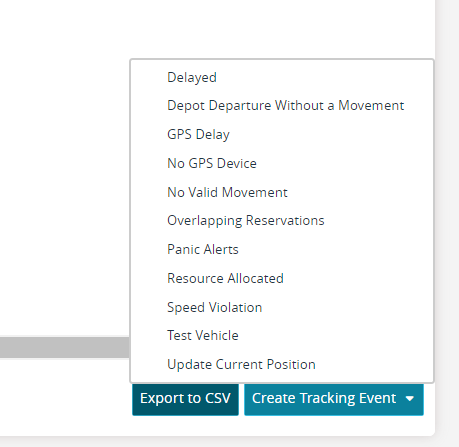
The Tracking Events screen displays.Click the Create Tracking Event button.
A menu of possible tracking events related to vehicle management at a site displays.
Click a tracking event option.
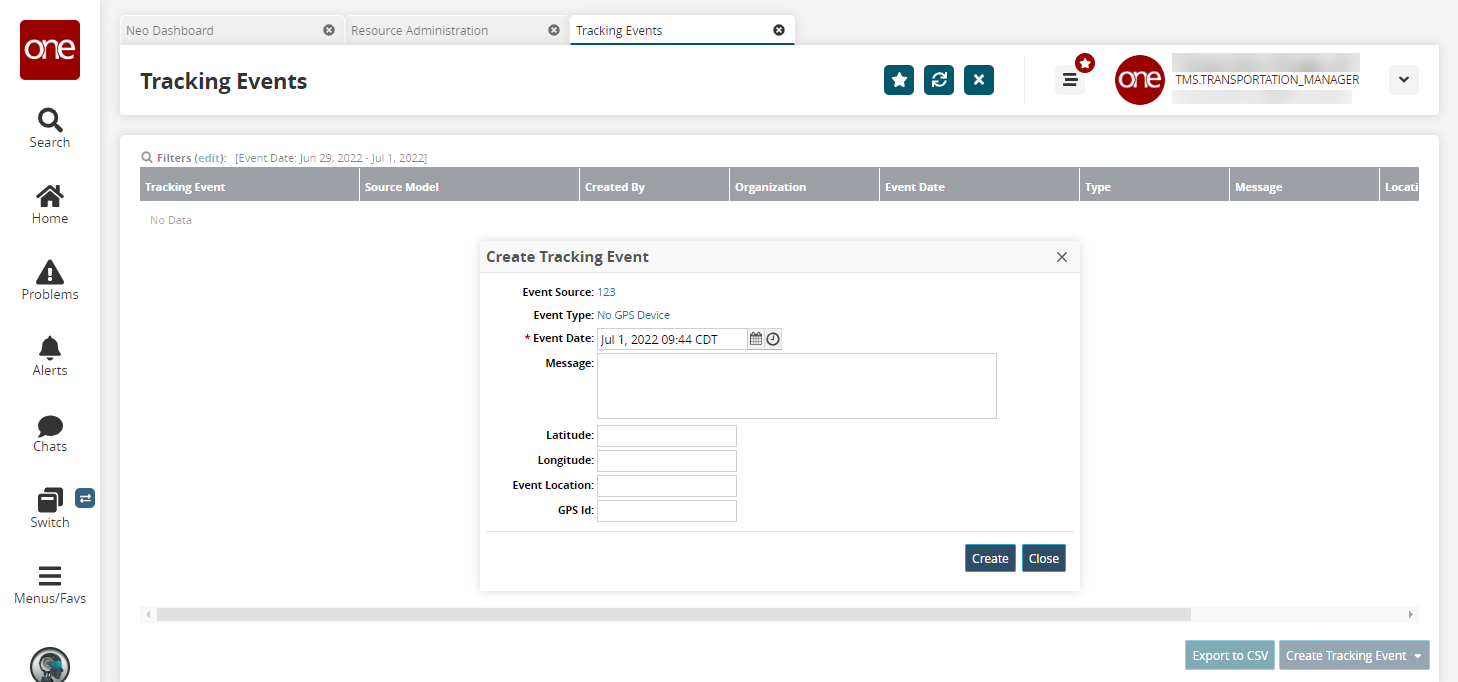
The Create Tracking Event popup displays.
Enter values for fields described in the table below. Fields with an asterisk ( * ) are required.
Field
Description
Event Source
This field auto populates.
Event Type
This field auto populates.
* Event Date
Use the calendar and clock tools to select the event date.
Message
Enter a message for the event that displays when it is triggered.
Latitude
Enter the latitude for the tracking event.
Longitude
Enter the longitude for the tracking event.
Event Location
Enter the location of the event for tracking.
GPS ID
Enter the Global Positioning System (GPS) identification coordinates.
Click the Create button.
A success message displays.Click the Close button.
The Tracking Events page updates with the new event.Click the Export to CSV button to export the report to a CSV file.