Site Resource Administration - Setting Work Hours
Work hours can be set via vehicles, skills, or tools via site administration. Hours can also be set through the Administration menu for site administration. See the "Editing the Site Calendar" section of the Online Help for more information.
Complete the following steps to view work hours for a vehicle, skill, or tool at a site:
L og in to the ONE system.
Select Menus/Favs > Fleet Mgmt > Resource Administration. In the NEO UI, users can click on the Menus/Favs icon on the left sidebar and type in the name of the screen in the menu search bar. For more information, see "Using the Menu Search Bar."
The Resource Administration screen displays.Expand a site to view its vehicle, skill, and tool resources in the Explorer pane. In the example that follows, we will access the Work Hours UI via a tool's details page. The same instructions apply for work hours applied through skills and vehicles.
Click Tools.
The Tools pane displays tools associated with the site.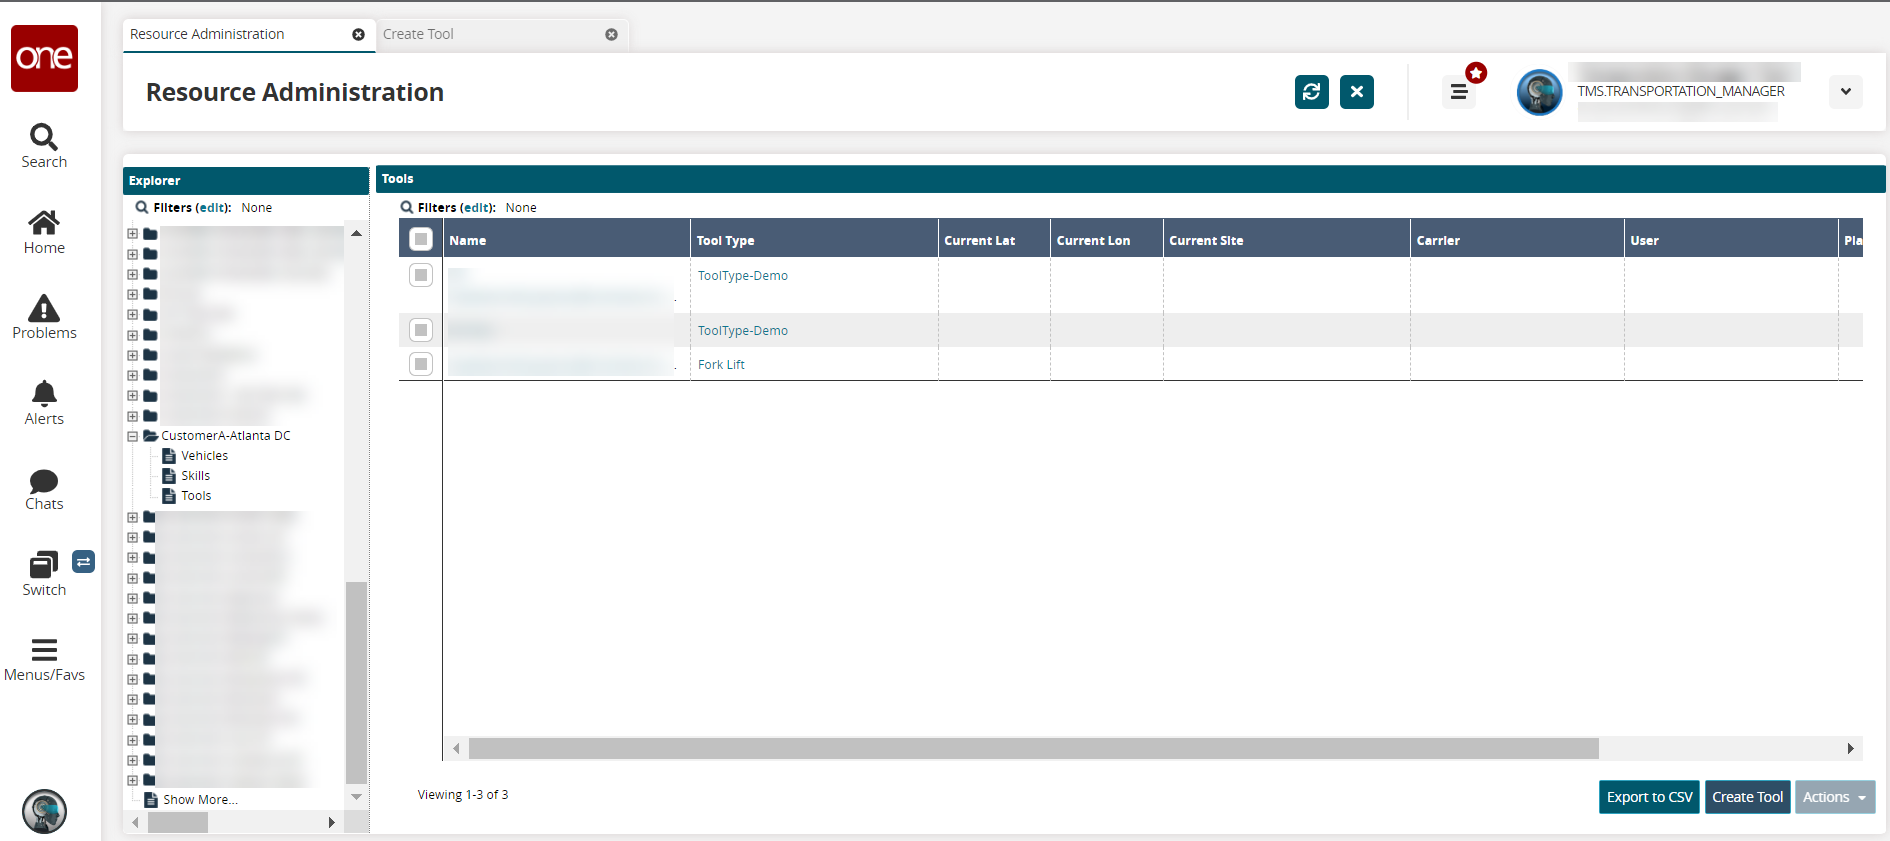
Click the Name link for a tool.
The details page displays for that tool.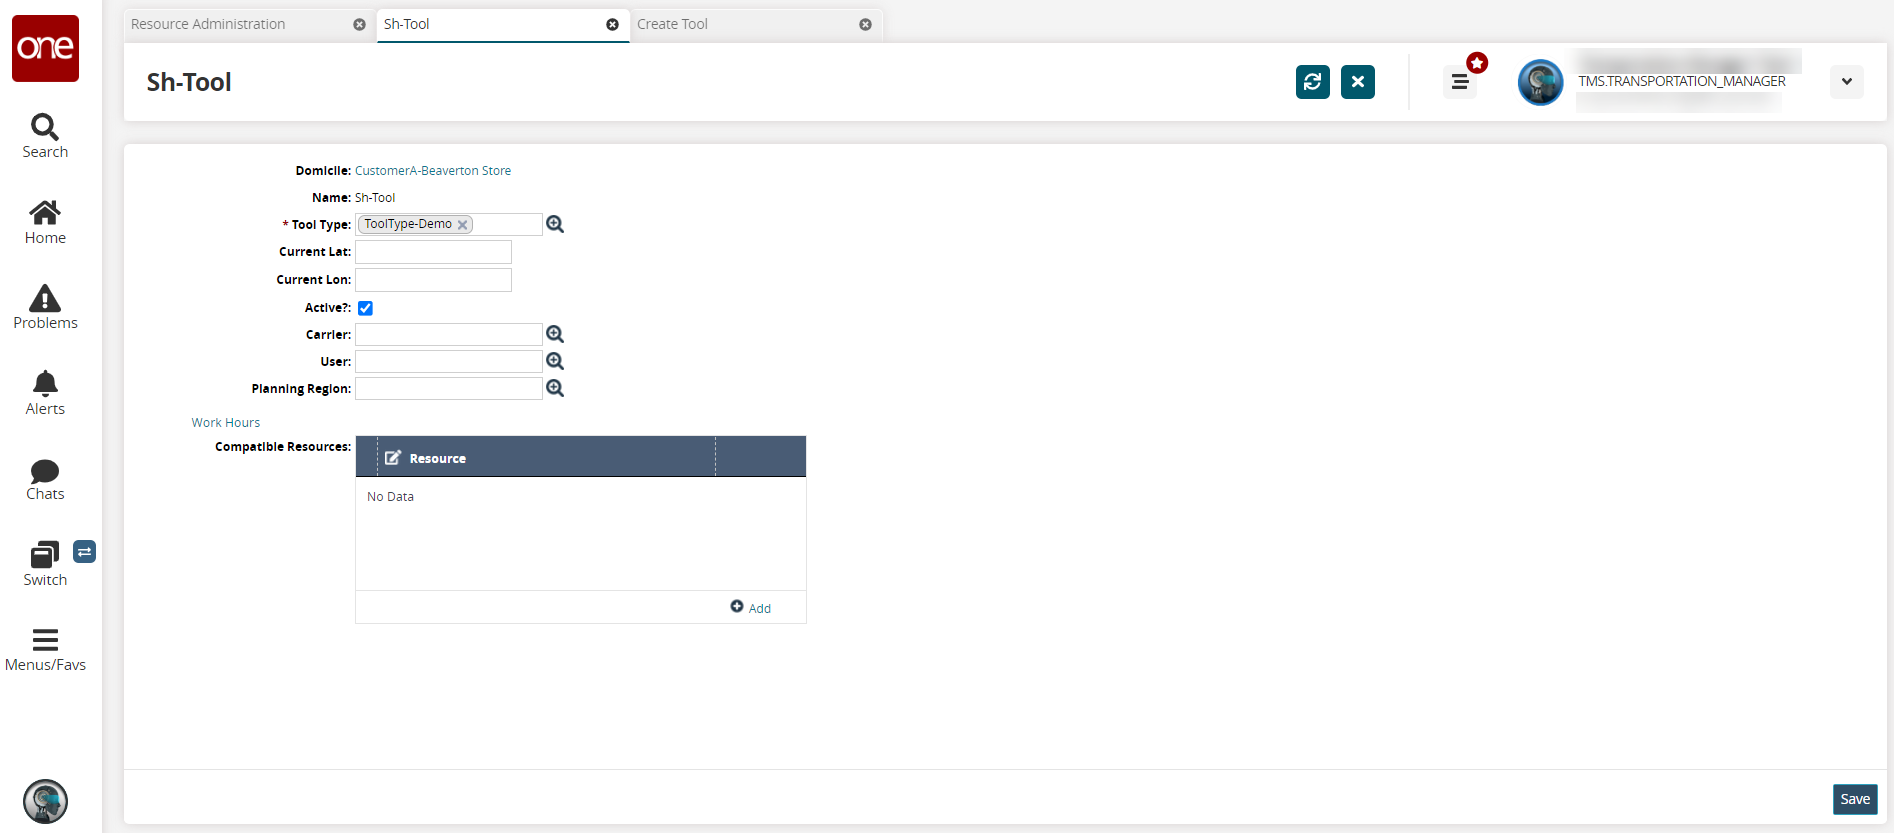
Click the Work Hours link.
The work hours screen displays.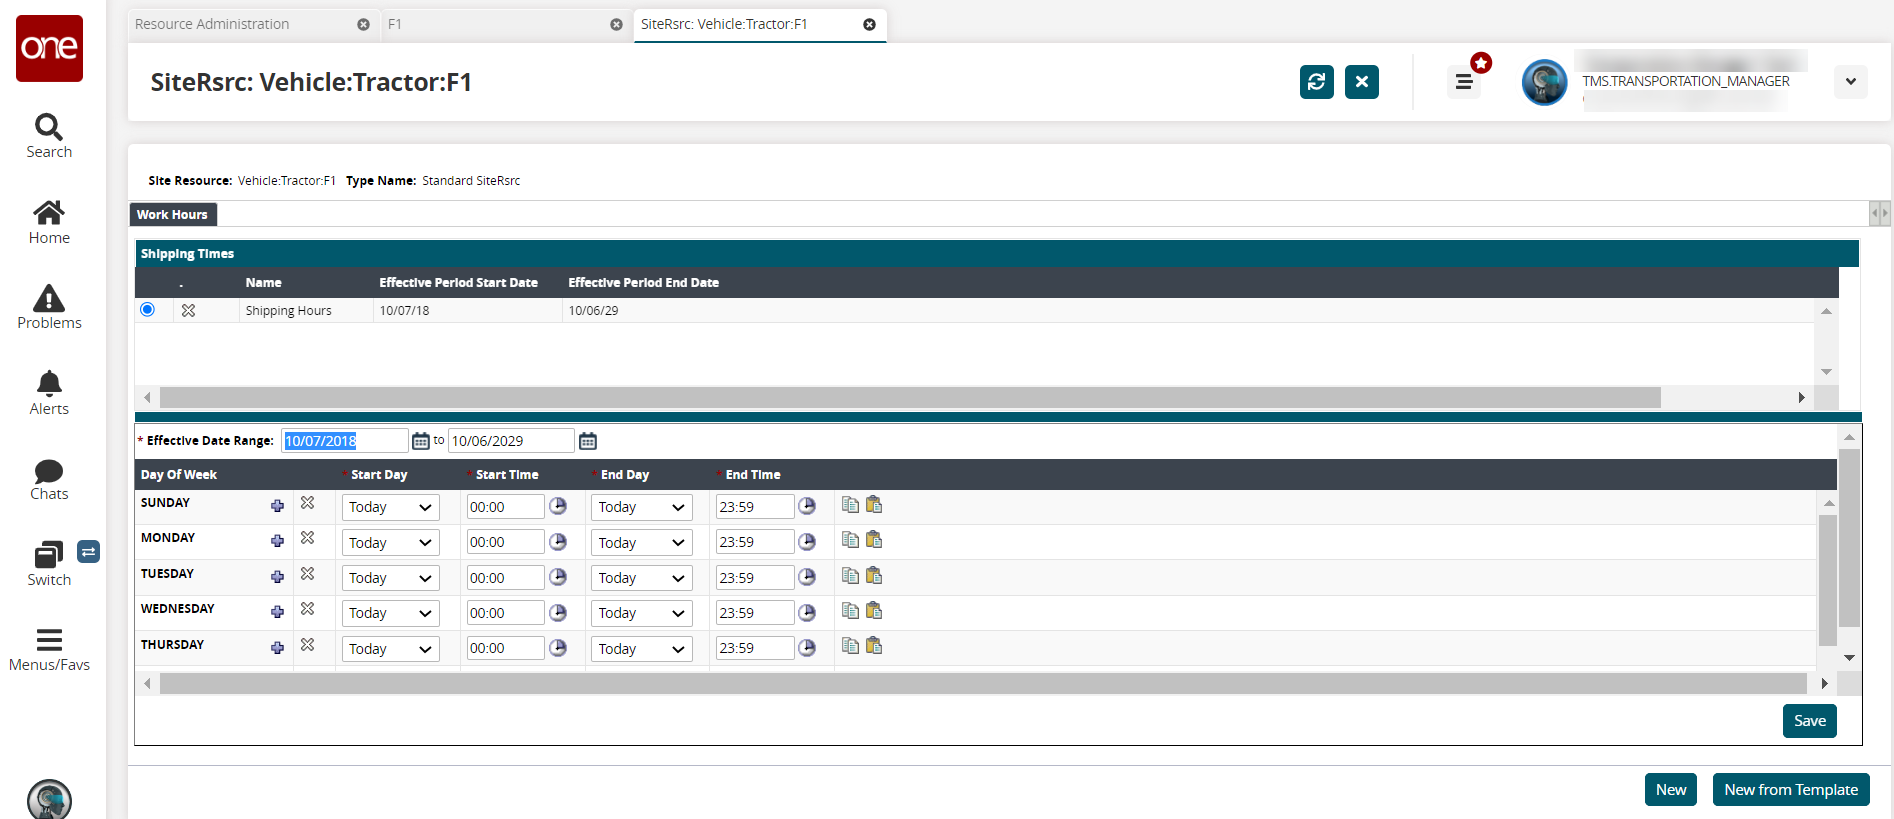
Update Existing Work Hours
Use the calendar tool to modify the dates for the * Effective Date Range. Fields with an asterisk ( * ) are required.
Select an option from the dropdown lists for *Start Day and * End Day.
Click the clock tool to select a time for the hours.
Click the copy and paste icons to replicate the values from one day to another.
Click the large plus (+) sign to add another row for additional work hour ranges for a day of the week.
Click the X to delete a day.
Click the Save button.
A success message displays.
Creating New Work Hours
Click the New button.
The bottom pane refreshes.Enter a name for the new hour schedule in the * Name field.
Complete the fields as described above.
Click the Save button.
A success message displays, and the new schedule for work hours displays in the top Shipping Times pane.Click the X to delete a shipping work hour schedule.
A confirmation popup displays.Click the OK button.
The page refreshes and deletes the schedule.
Creating New Work Hours from a Template
Click the New from Template button.
The bottom pane refreshes.Choose a template from the Select a Template dropdown list.
The established work hours in the template display.Complete the * Name and * Effective Date Range fields as described above.
Complete the work hours for the days of the week as described above.
Click the Save button.
A success message displays, and the new work hour schedule displays in the top Shipping Times pane.Click the X to delete a shipping work hour schedule.
A confirmation popup displays.Click the OK button.
The page refreshes and deletes the schedule.