Updating Buffers
Complete the following steps to update buffers from the Administration menu:
L og in to the ONE system.
Click Menus/Favs > Administration > Buffer > Search Buffer.
The Search Buffer screen appears with the Filters header displayed as a default.Enter values in the filter fields as required. For more information about the filter fields, please see the "Searching Buffers" section in the Online Help.
Click the Search link.
A list of existing buffers meeting the filter requirements display. There are two ways to update buffers as described below.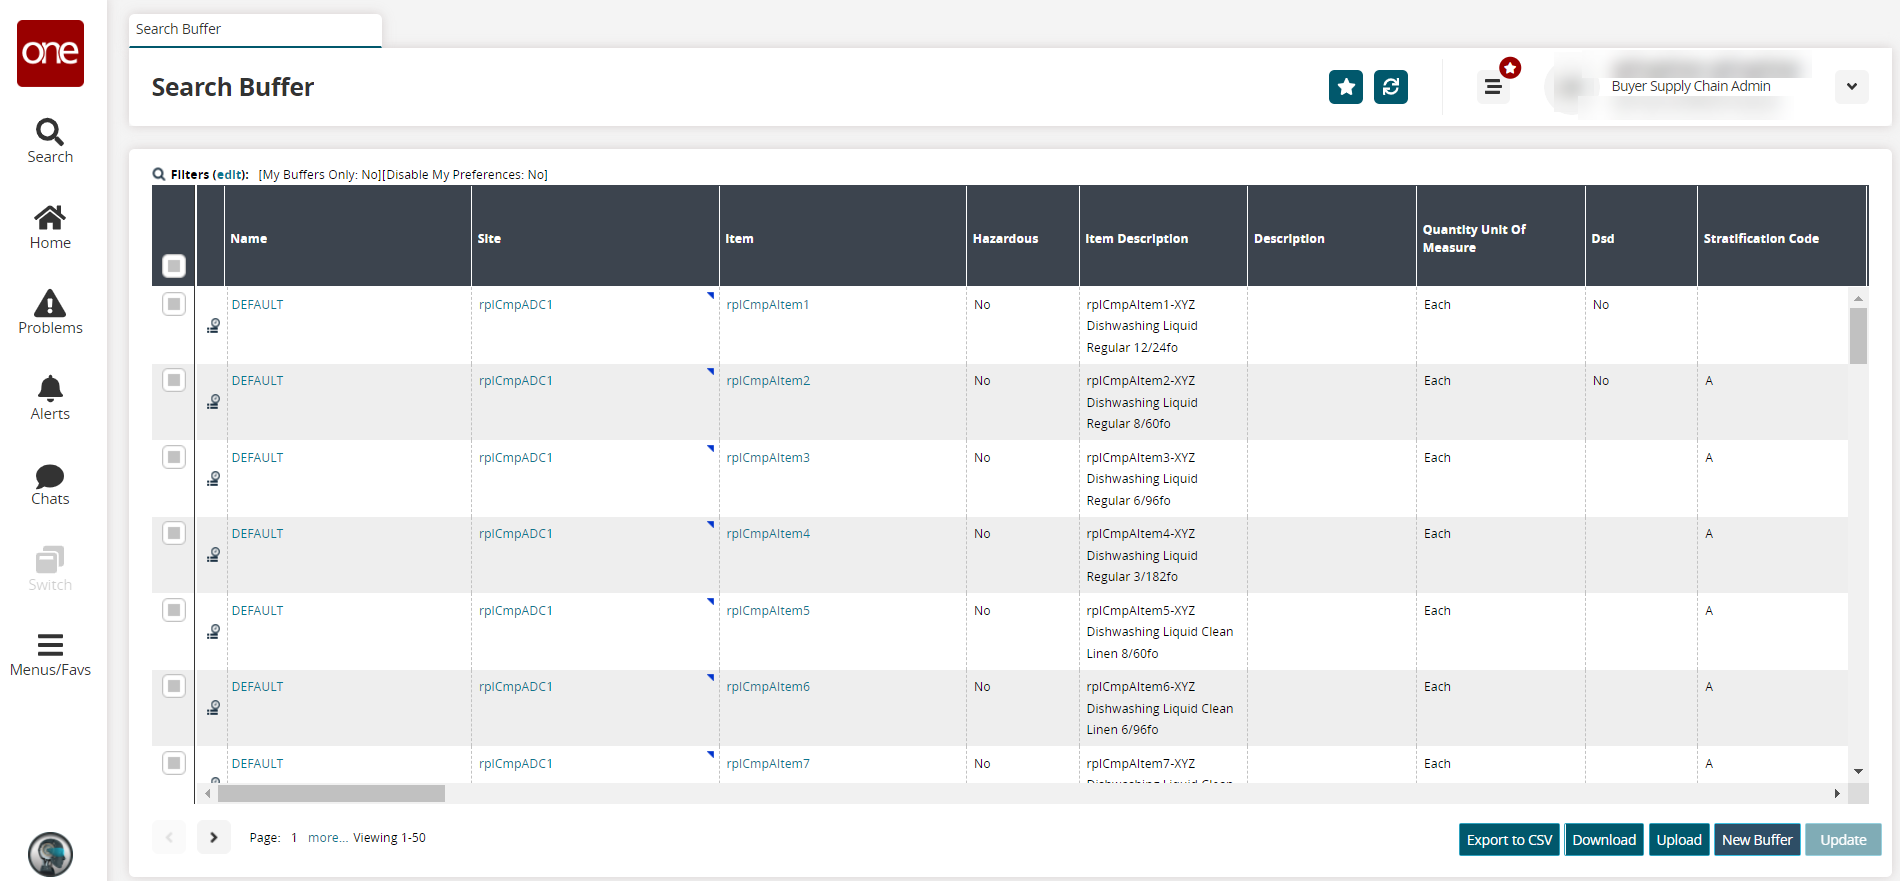
Method 1
Select the checkbox(es) that corresponds to the buffer(s) you are updating, and click the Update button.
The screen refreshes to display only the buffer(s) selected. Fields with a pencil icon are editable.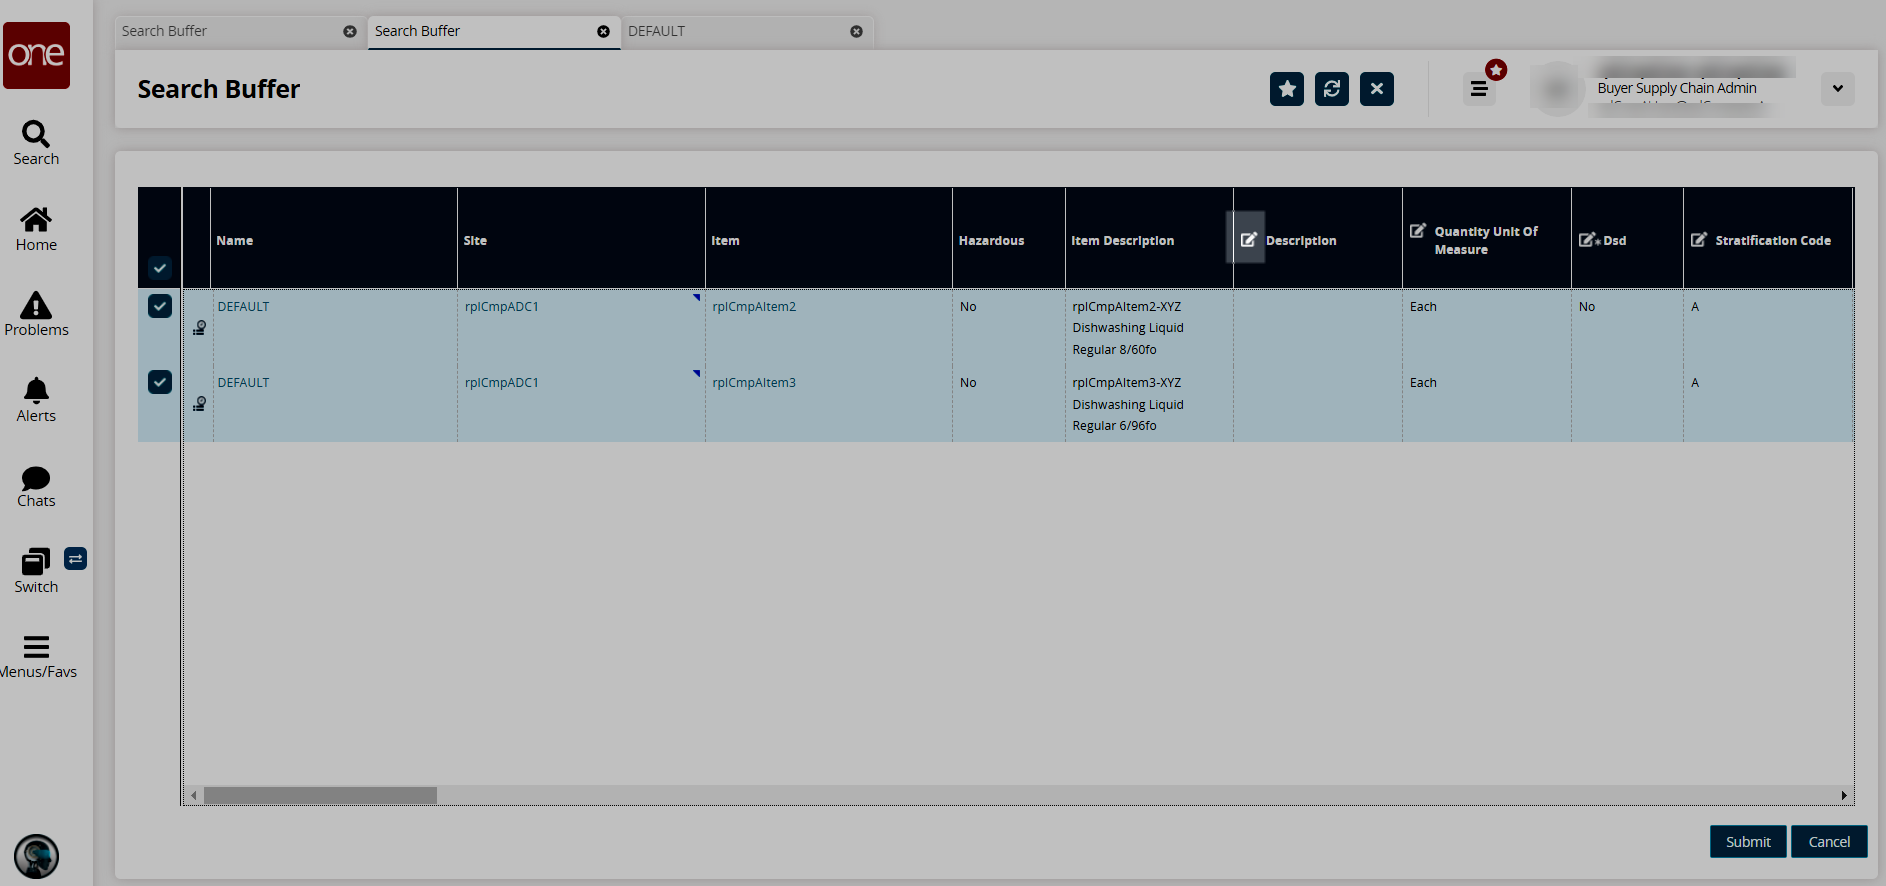
Click the Submit button.
A success message appears, and the Search Buffers page refreshes to show all previously listed buffers.Method 2
Click the link of the buffer under the Name column.
The buffer details screen displays.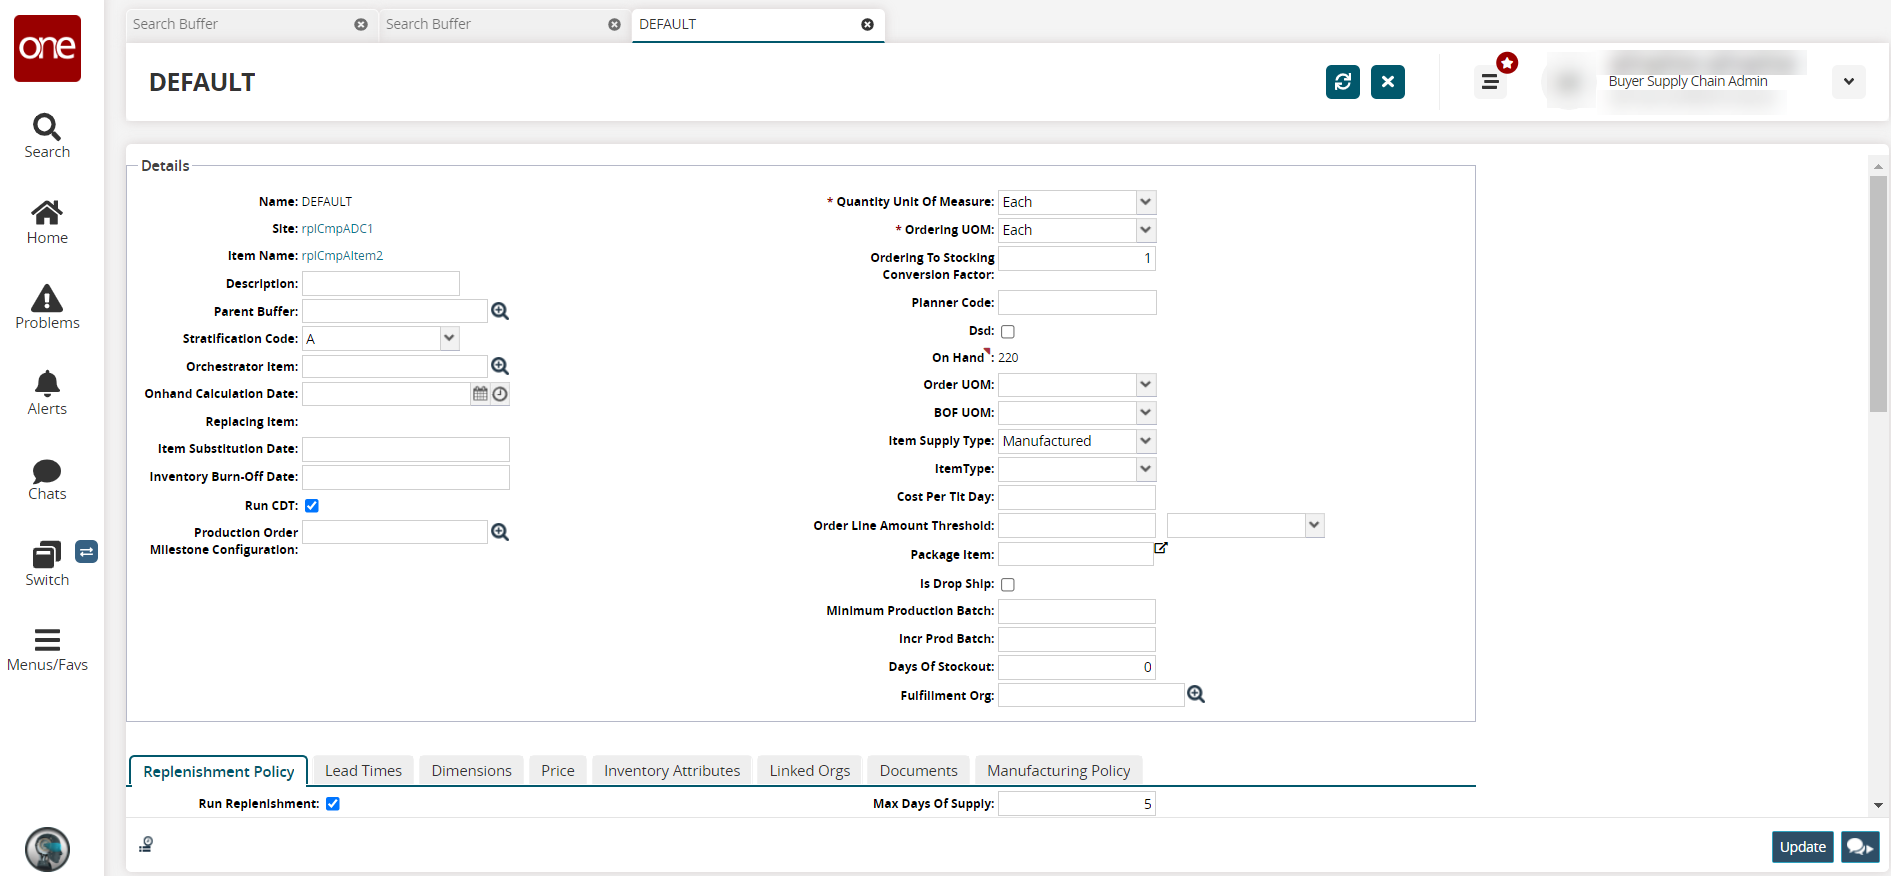
Edit values as required. For more information on fields for the Details header or any of the tabs, please see the ".Creating Buffers 1 vNEO_3.7" section and appropriate tabs pages in the Online Help.
Click the Update button.
A success message appears.Click the chat icon to start a chat session for this buffer. Please see the "Using the Chat Feature" section in the Online Help for more information.
Click the audit trail (
 ) icon to view a history of changes to this buffer.
Complete the following steps to update buffers as the Inventory Planning role:
L og in to the ONE system.
Click Menus/Favs > Administration > Configuration > Search Buffer.
Complete any filter fields as required, and click the Search link. See the steps found in the "Searching Buffers" section for more information.
Click the Name link of the buffer you are updating.
The buffer details page appears.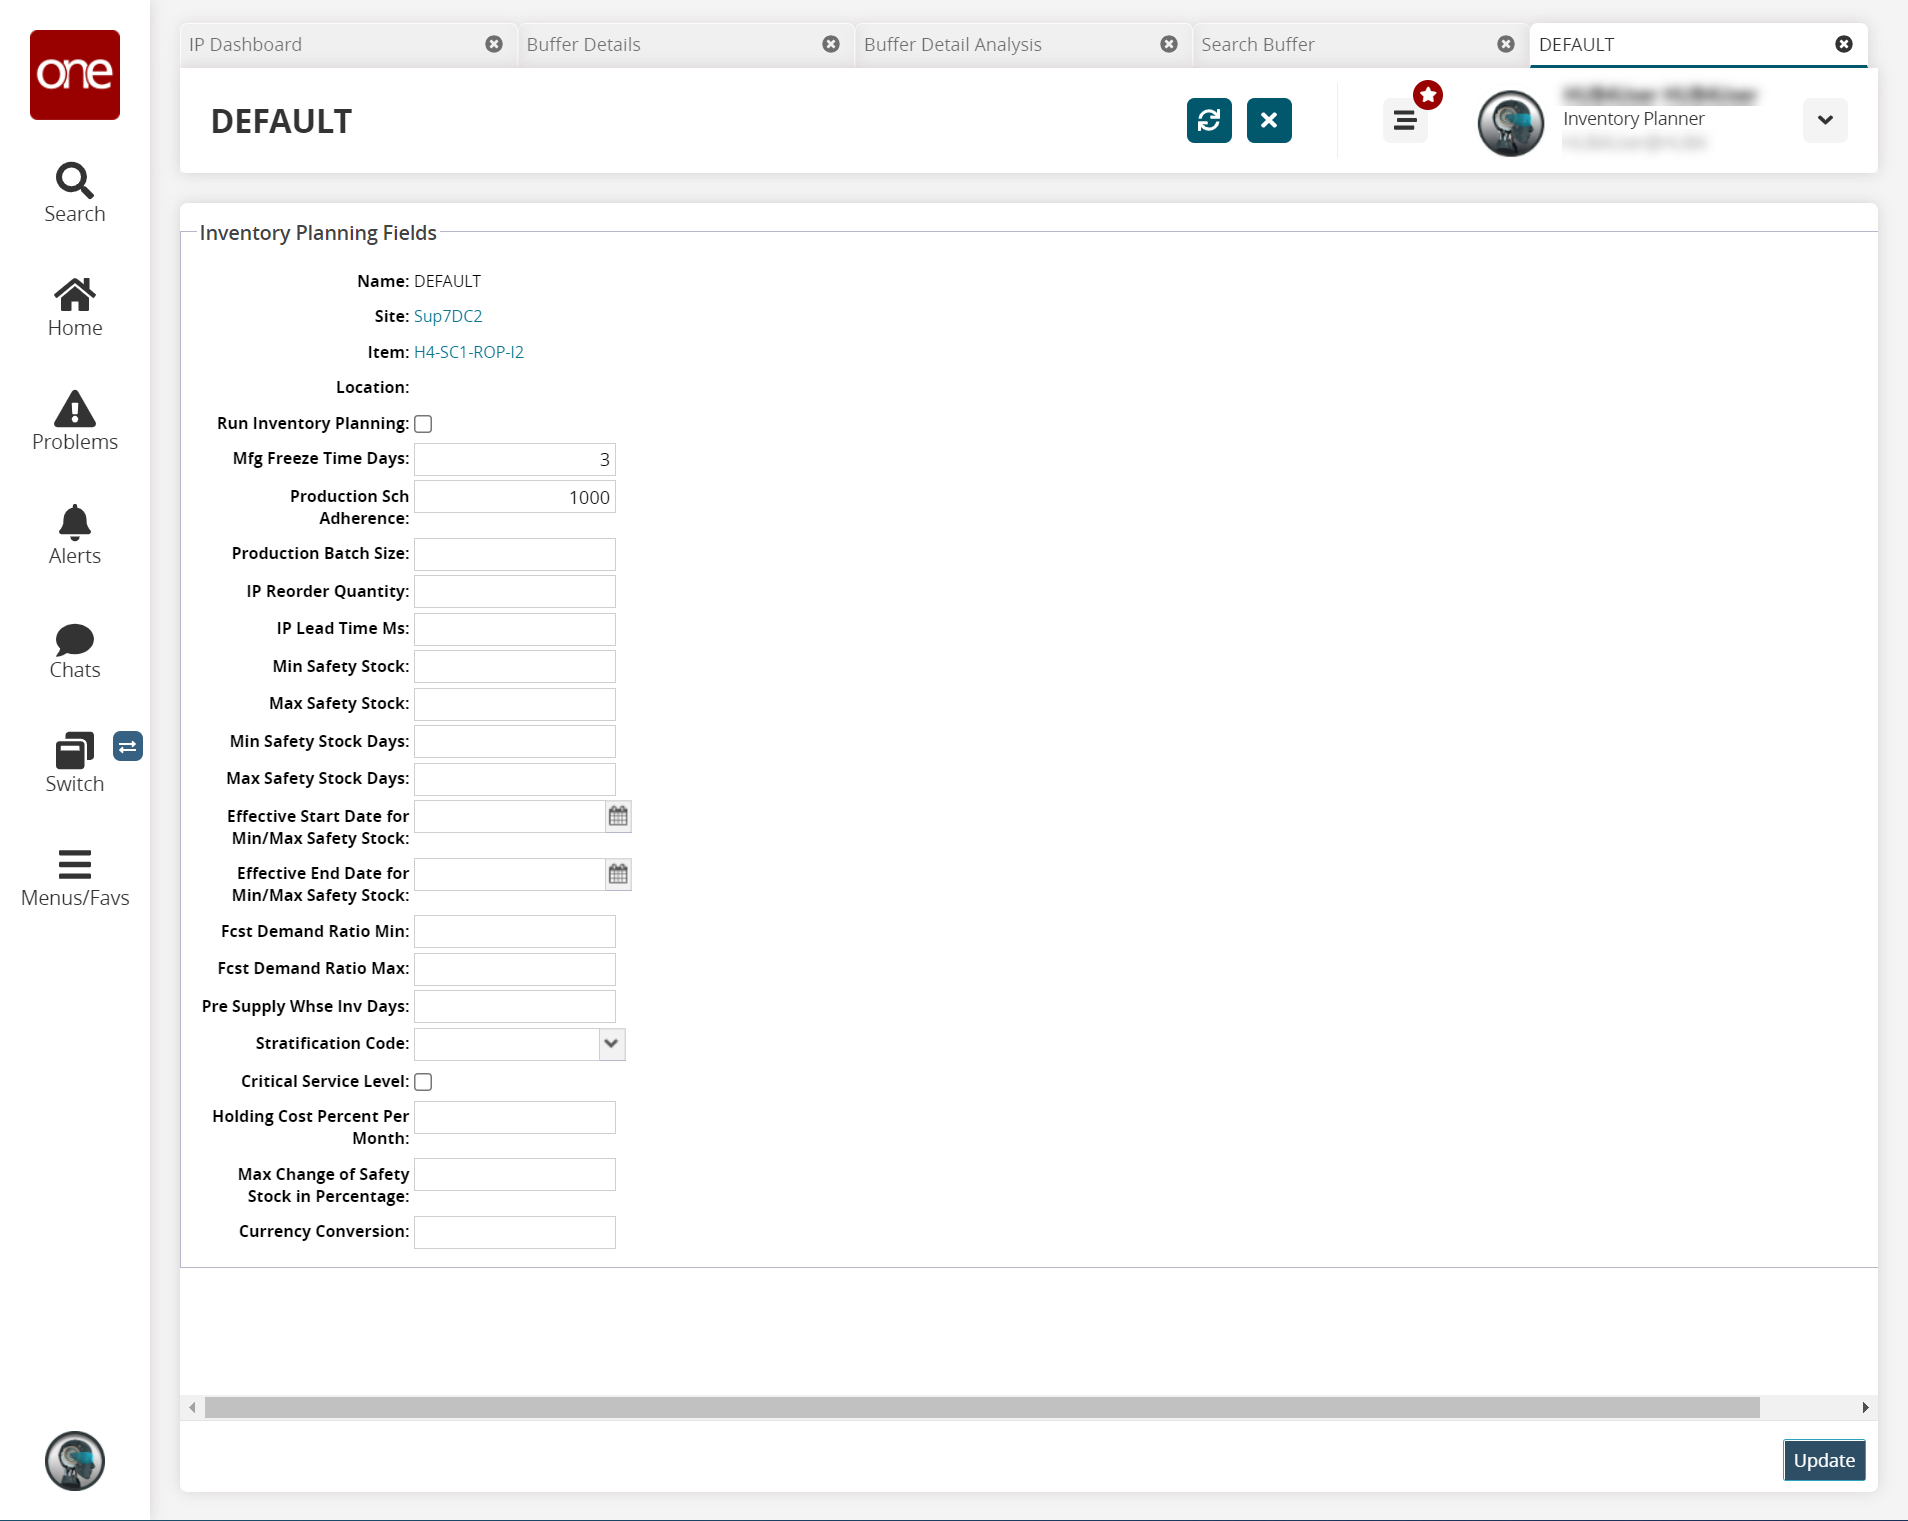
Enter values for fields described in the table below. Fields with an asterisk ( * ) are required.
Field
Description
Name
The name for the buffer is generated by the system. The name appears in the field when the buffer is created.
Site
This field auto-populates the site for the buffer selected.
Item
This field auto-populates the item for the buffer selected.
Location
This field auto-populates for the buffer selected.
Run Inventory Planning
Select this checkbox to run inventory planning for this buffer.
Mfg Freeze Time Days
Enter the manufacturing freeze time in days.
Production Sch Adherence
Enter a numerical value for the production schedule adherence.
Production Batch Size
Enter a numerical value for the production batch size.
IP Reorder Quantity
Enter a numerical value for the inventory planning reorder quantity.
IP Lead Time Ms
Enter the inventory planning lead time in minutes.
Min Safety Stock as Quantity
Enter a numerical value for the minimum safety stock.
Max Safety Stock as Quantity
Enter a numerical value for the maximum safety stock.
Min Safety Stock Days
Enter the minimum safety stock in days.
Max Safety Stock Days
Enter the maximum safety stock in days.
Effective Start Date for Min/Max Safety Stock
Use the calendar icon to select the effective start date for the set minimum and maximum safety stock quantity.
Effective End Date for Min/Max Safety Stock
Use the calendar icon to select the effective start date for the set minimum and maximum safety stock quantity.
Fcst Demand Ratio Min
Enter a numerical value for the forecast demand ratio minimum.
Fcst Demand Ratio Max
Enter a numerical value for the forecast demand ratio maximum.
Pre Supply Whse Inv Days
Enter the pre-supply warehouse inventory in days.
Stratification Code
Select the stratification code from the dropdown list.
Critical Service Level
Select the checkbox to identify this buffer as having a critical service level.
Holding Cost Percent Per Month
Enter the holding cost percent per month.
Max Change of Safety Stock in Percentage
Enter the maximum change of safety stock in percentage.
Currency Conversion
Enter a numerical value for the currency conversion.
Do Not Stock
Select Yes or No to set a do not stock policy.
Mfg Lead Time
Enter the manufacturing lead time in (D)ays, (H)ours, and (M)inutes.
Click the Update button.
A success message appears.