Searching Buffers
Complete the following steps to search buffers:
L og in to the ONE system.
Click Menus/Favs > Administration > Buffer > Search Buffer.
In the NEO UI, users can click on the Menus/Favs icon on the left sidebar and type in the name of the screen in the menu search bar. For more information, see "Using the Menu Search Bar."Buffers can also be searched from the Menu/Favs > Inventory Planning > Configuration > Search Buffer menu.
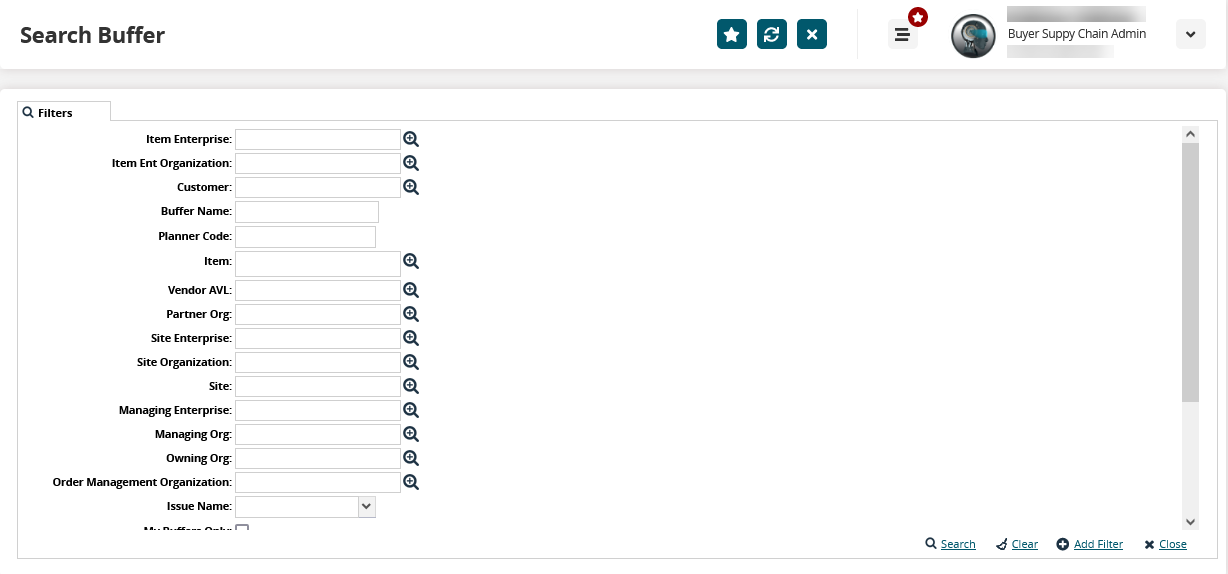
The Search Buffer screen appears.

Fill out the following fields. Fields with an asterisk ( * ) are required.
Field
Description
Item Enterprise
Type the item enterprise name or select one using the picker tool.
Item Ent Organization
Type the item enterprise organization name or select one using the picker tool.
Customer
Type the customer name or select one using the picker tool.
Buffer Name
Enter the buffer name.
Planner Code
Enter the planner code.
Item
Type the item name or select one using the picker tool.
Vendor AVL
Type the approved vendor list name or select one using the picker tool.
Partner Org
Type the partner organization name or select one using the picker tool.
Site Enterprise
Type the site enterprise name or select one using the picker tool.
Site Organization
Type the site organization name or select one using the picker tool.
Site
Type the site name or select one using the picker tool.
Managing Enterprise
Type the managing enterprise name or select one using the picker tool.
Managing Org
Type the managing organization name or select one using the picker tool.
Owning Org
Type the owning organization name or select one using the picker tool.
Order Management Organization
Type the order management organization name or select one using the picker tool.
Issue Name
Type the issue name or select one using the picker tool.
My Buffers Only
Select the checkbox to view only the buffers specific to your organization.
Run Replenishment
Select a Yes or No option from the dropdown list
Stratification Code
Select a stratification code from the list
Hazardous Code
Select one of the following options from the dropdown list:
Blank - Include both hazardous and non-hazardous items in search results.
Hazardous Only - Search for the hazardous items only and exclude non-hazardous items.
Exclude Hazardous - Search for non-hazardous items only and exclude hazardous items.
Run Rebalance
Select Yes to run buffer rebalancing or select No from the dropdown list.
Fill out the filters as desired, and click the Search link.
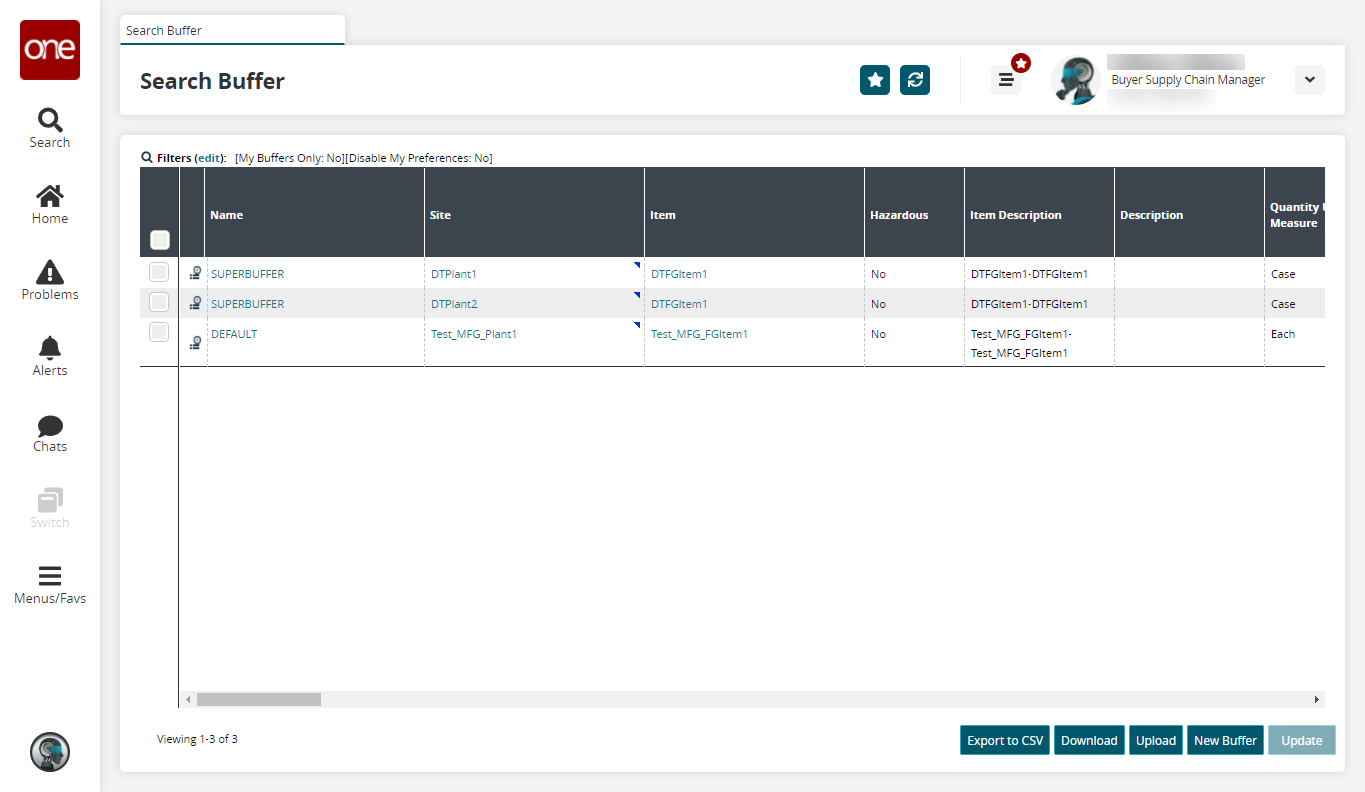
The search results display.
Use the following options to work with the search results:
Click the Export to CSV button to export the report to a CSV file.
Click the Download button to download the list into a CSV file.
Click the Upload button to upload a list of buffers through a CSV file.
Please see "Uploading Files" in the Online Help for more information.Select the checkbox for the Name of an existing buffer and click the Update button to update the buffer.
Click the Audit Trail icon in front of the Name column to view the audit trail details of the buffer.
Click the New Buffer button to create a new buffer.
Please see "Creating a Buffer" in the Online Help for more information.To select a buffer, click the Buffer Name link.
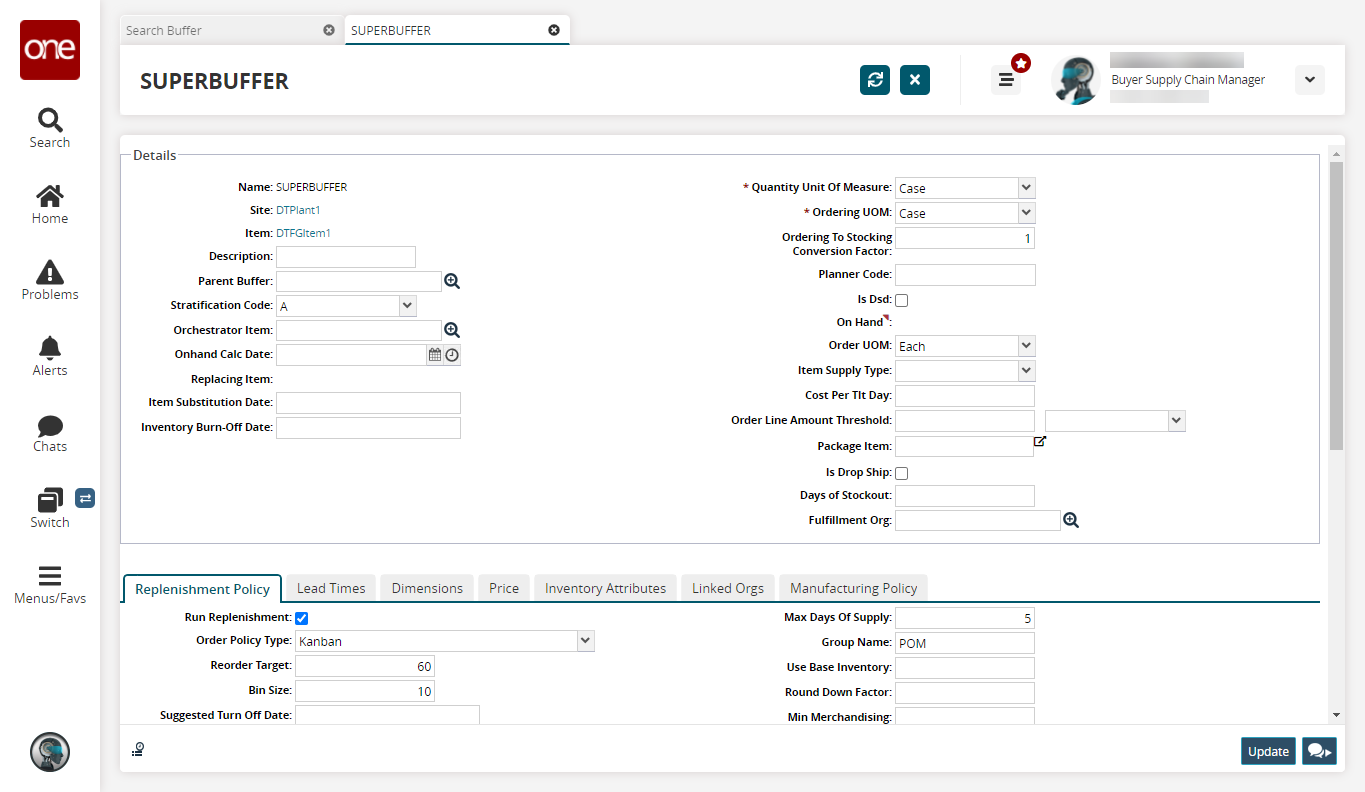
The buffer details page appears.
See the ".Creating Buffers 1 vNEO_3.7" section in the Online Help for more information on these fields.Click the Chat button (
 )to open a chat about the site.
A new chat is available.
See the "Chats Slide-Out" page for further instructions on using the chat feature.
See the "Updating Buffers" section for more information on updating buffers.