Updating Customers
Complete the following steps to update a customer profile:
L og in to the ONE system.
Click Menu/Favs > Administration > Customers.
In the NEO UI, users can click on the Menus/Favs icon on the left sidebar and type in the name of the screen in the menu search bar. For more information, see "Using the Menu Search Bar."
The Customers screen appears.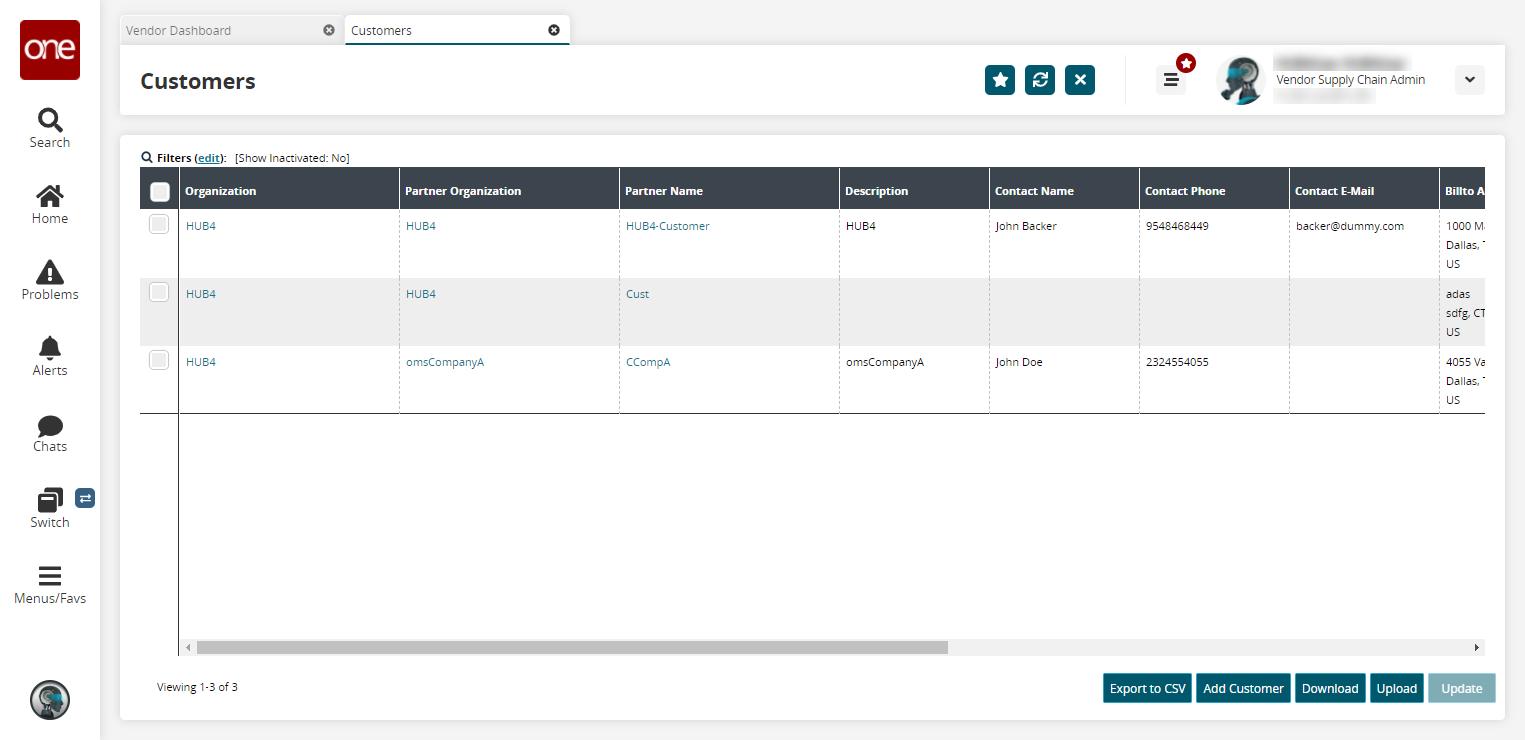
Click the checkbox in the column to the left of the customer(s) you are updating.
Click the Update button.
The customer(s) selected displays in a new table. Fields marked with an edit icon (pencil) become editable.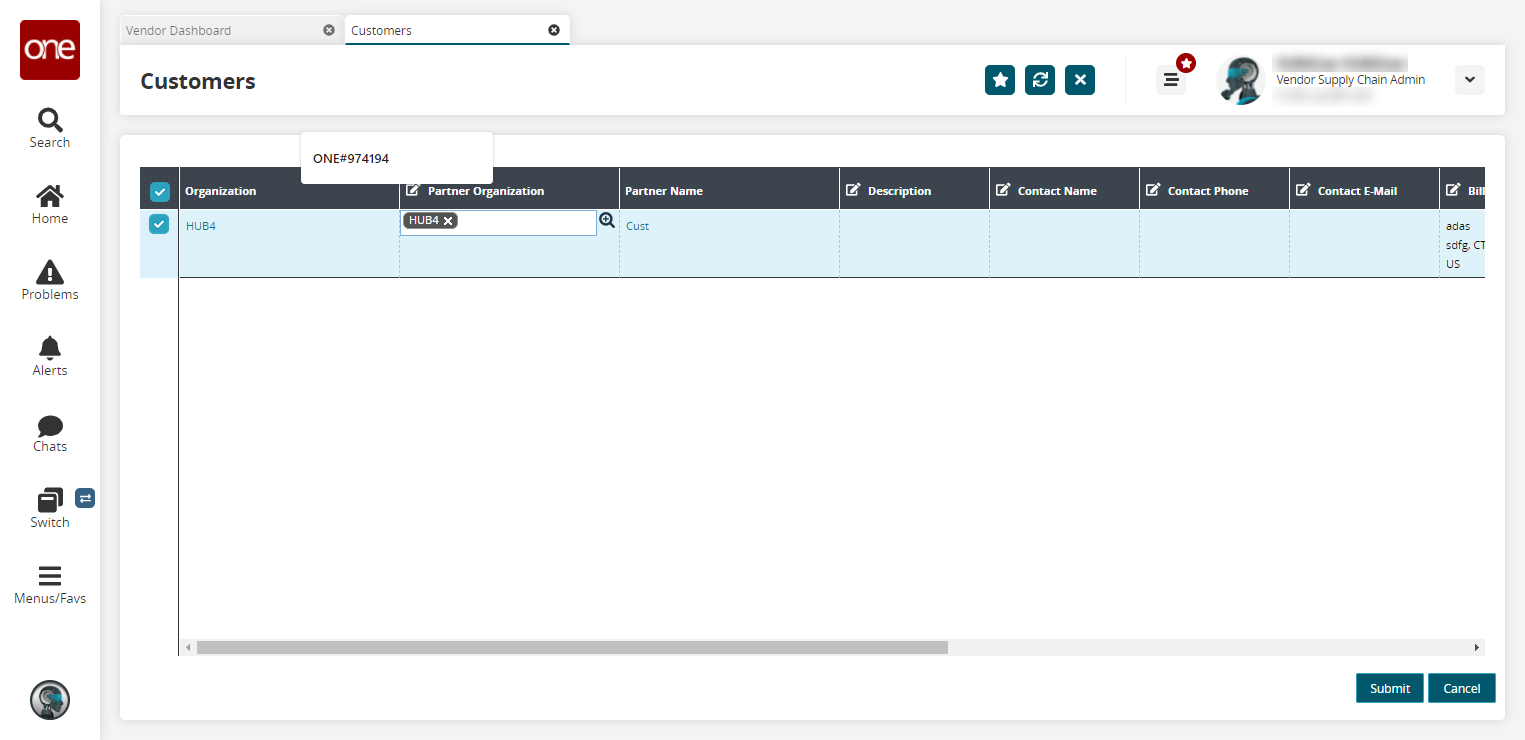
Click in the field to make the update.
Additional fields for a single customer can be updated by clicking the link under the Partner Name column.
The details screen for the customer partner displays with the Contact tab showing as the default. Any fields that were populated during the customer's creation show that value when editing.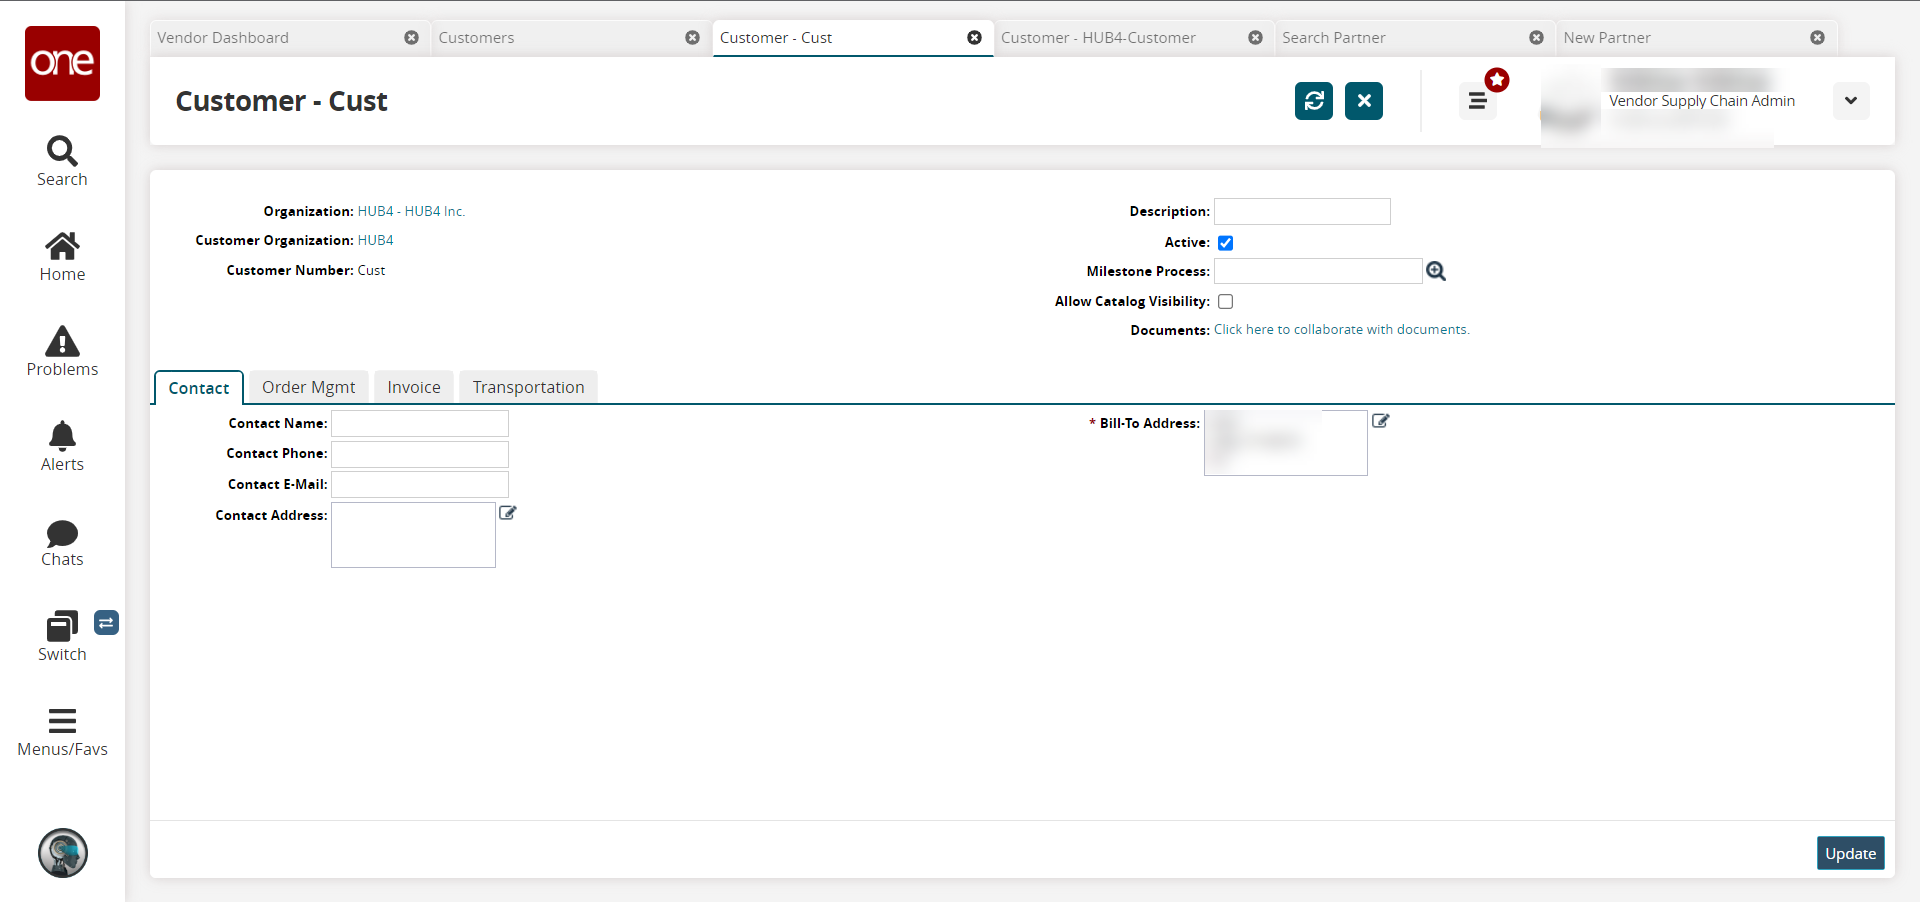
Update fields as required. For a complete list of fields, please see the "Creating Customers" section in the Online Help.
Click the Update button.
A success message appears.