Updating Vendors
Complete the following steps to create a vendor:
L og in to the ONE system.
Click Menus/Favs > Administration > Vendors.
In the NEO UI, users can click on the Menus/Favs icon on the left sidebar and type in the name of the screen in the menu search bar. For more information, see "Using the Menu Search Bar."
The Vendors screen opens.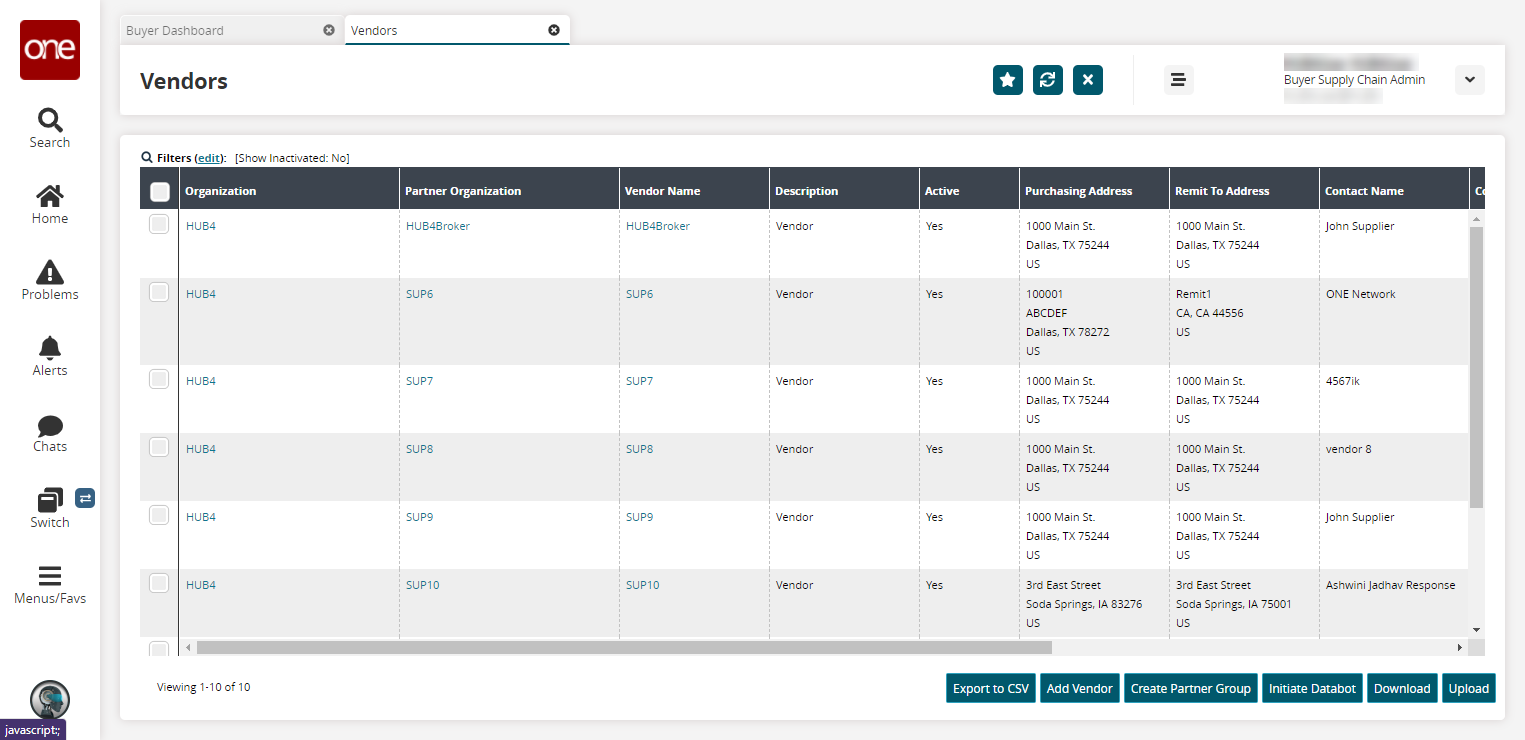
In the Vendor Name column, click a Vendor Name link.
The vendor details screen opens. The Contact tab displays by default.
Fill out the following fields. Fields with an asterisk ( * ) are required.
Section
Field
Description
Header
* Organization
This field is populated from when the vendor was created in the system.
* Vendor Organization
This field is populated from when the vendor was created in the system.
* Vendor Number
This field is populated from when the vendor was created in the system.
Managing Org
Use the picker tool to select the managing organization.
Currency
Select a currency code from the dropdown list.
* Description
Enter a description for the vendor.
Active
Check the box if this vendor will be active.
Milestone Process
Use the picker tool to select a milestone process for this vendor.
Notes
Click the edit icon to add notes for this vendor.
Documents
Click the link to upload documents for this vendor.
Contact tab: Contact section
Name
Enter the vendor contact's name.
Phone
Enter the vendor contact's phone number.
Email
Enter the vendor contact's email address.
Address
Enter the vendor contact's physical address. Click the popout icon to fill in the address fields.
Contact tab: Shipping section
Name
Enter the vendor shipper's name.
Phone
Enter the vendor shipper's phone number.
Email
Enter the vendor shipper's email address.
Address
Enter the vendor shipper's physical address. Click the popout icon to fill in the address fields.
Contact tab: Expedite section
Name
Enter the vendor expedite contact's name.
Phone
Enter the vendor expedite contact's phone number.
Email
Enter the vendor expedite contact's email address.
Address
Enter the vendor expedite contact's physical address. Click the popout icon to fill in the address fields.
Click the Procurement tab.
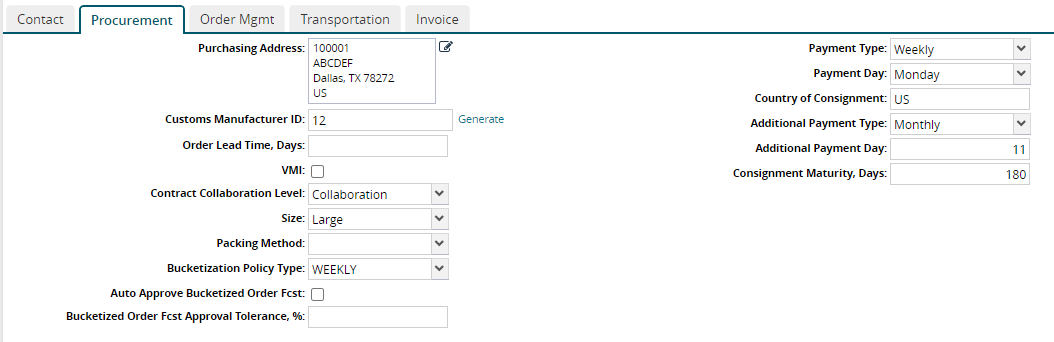
Fill out the following fields. Fields with an asterisk ( * ) are required.
Field
Description
Purchasing Address
Enter the physical address. Click the edit icon to enter information into the address fields.
Customer Manufacturer ID
Enter a value for the customer's manufacturer identification or click the Generate link.
Order Lead Time, Days
Enter the number of days for lead time on orders.
VMI
Check the box if this vendor will have vendor-managed inventory.
Contract Collaboration Level
Select the contract collaboration level from the dropdown list.
Size
Select the size from the dropdown list.
Packing Method
Select the packing method from the dropdown list.
Bucketization Policy Type
Select the bucketization policy type from the dropdown list.
Auto Approve Bucketized Order Fcst
Check the box if the bucketized order forecast should be automatically approved.
Bucketized Order Fcst Approval Tolerance, %
Enter a percentage for the tolerance approval for a bucketized order forecast.
Payment Type
Select the payment type from the dropdown list.
Payment Day
If the payment type is Monthly, enter a date (1-31). If the payment type is Weekly, select a day of the week from the dropdown list. This field is context-sensitive to the Payment Type field and is required if a value is selected for the payment type.
Country of Consignment
Select the country of consignment from the list or click Manage addresses.
Additional Payment Type
Select an additional payment type from the dropdown list.
Additional Payment Day
If the payment type is Monthly, enter a date (1-31). If the payment type is Weekly, select a day of the week from the dropdown list. This field is context-sensitive to the Additional Payment Type field and is required if a value is selected for an additional payment type.
Consignment Maturity, Days
Enter the number of days until the consignment has matured.
Click the Order Mgmt tab.
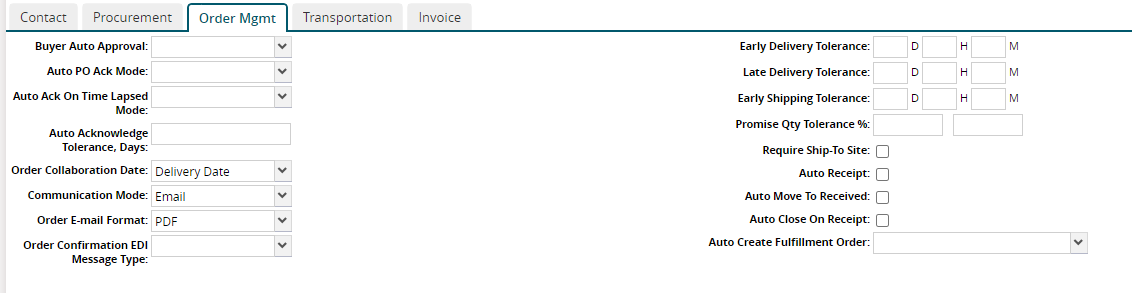
Fill out the following fields. Fields with an asterisk ( * ) are required.
Field
Description
Buyer Auto Approval
Select the auto-approval process for the buyer.
Auto PO Ack Mode
Select the auto-acknowledgment mode for purchase orders.
Auto Ack On-Time Lapsed Mode
Select the mode for any auto-acknowledged orders where the On-Time status has lapsed.
Auto Acknowledge Tolerance, Days
Enter the number of days of tolerance for auto-acknowledged orders.
Order Collaboration Date
Select the date for order collaboration.
Communication Mode
Select the type of preferred communication.
Order E-mail Format
Select an email from the list or click Manage addresses.
Order Confirmation EDI Message Type
Select the EDI message type for sending an order confirmation.
Early Delivery Tolerance
Enter values for (D) days, (H) hours, and (M) minutes for the tolerance buffer for early delivery.
Late Delivery Tolerance
Enter values for (D) days, (H) hours, and (M) minutes for the tolerance buffer for late delivery.
Early Shipping Tolerance
Enter values for (D) days, (H) hours, and (M) minutes for the tolerance buffer for early shipping.
Promise Qty Tolerance %
Enter percentage values for the promised quantity tolerance.
Require Ship To Site
Check the box if a Ship To site is required.
Auto Receipt
Check the box if auto receipt is enabled.
Auto Move To Received
Check the box if orders are automatically moved to the Received state.
AutoClose On Receipt
Check the box if orders are automatically closed upon receipt.
Auto-Create Fulfillment Order
Select an option from the dropdown menu. When Deployment Order or Purchase Order is selected, fulfillment orders are automatically created from the selected order type for the vendor.
Click the Transportation tab.
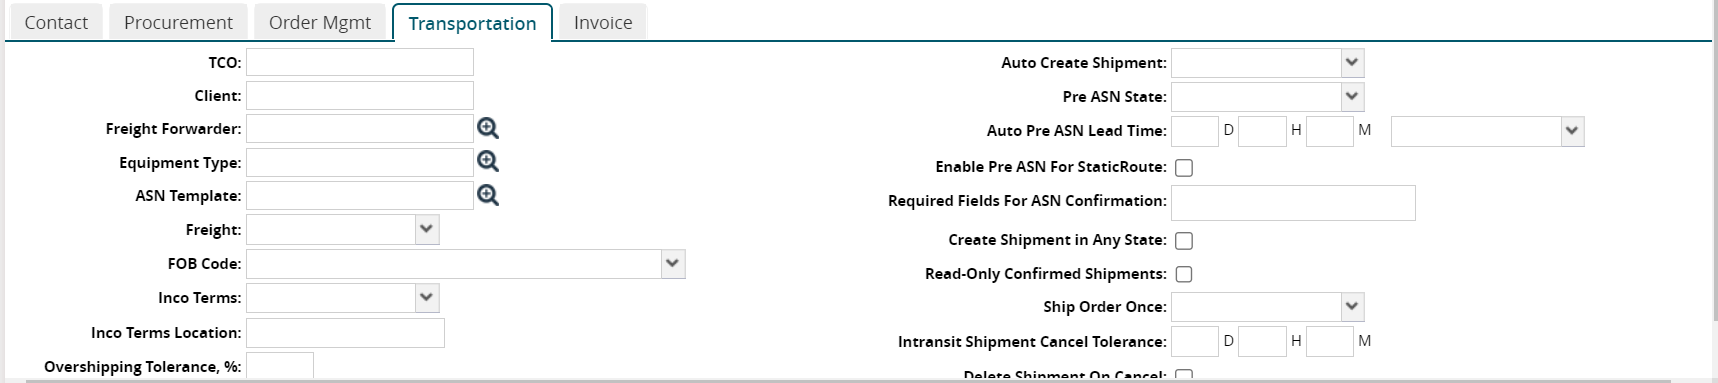
Fill out the following fields. Fields with an asterisk ( * ) are required.
Field
Description
TCO
Enter the transportation coordinator.
Client
Enter the client organization. The Client field is populated based on how the Transportation Controlling Organization (TCO) is picked on the order. If the TCO is picked from a buffer, then the system will pick the corresponding client identified in the buffer, but i f the TCO is not picked from any master data and a default value is picked, then the Client field will be null. In all cases, the Client displays an organization with a Client Partner partnership with the TCO and where the TCO has a Freight Forwarder Partner partnership with the Client.
Freight Forwarder
Use the picker tool to select the freight forwarder entity.
Equipment Type
Use the picker tool to select the equipment type.
ASN Template
Use the picker tool to select a template for auto-ship notices.
Freight
Select the type of freight collection from the dropdown list.
FOB Code
Select the Freight On Board code from the dropdown list.
Inco Term
Select the shipping incoterms from the dropdown list.
Inco Terms Location
Enter the location for the incoterms.
Overshipping Tolerance %
Enter the percentage of tolerance for overshipping.
Shipping Instructions
Type in any shipping instructions.
Auto Create Shipment
Select the state for shipments that are auto-created.
Pre ASN State
Select the state from the list or click on Manage addresses.
Auto Pre ASN Lead Time
Enter in values for (D) days, (H) hours, and (M) minutes for lead time on auto pre ASNs. Select business or calendar days from the dropdown list for the fourth field.
Enable Pre ASN for Static Route
Check the box to enable pre-ASNs to be generated for static routes.
Required Fields for ASN Confirmation
Select fields from the context-sensitive list that are required for an ASN confirmation.
Create Shipment in Any State
Check the box to enable shipment creation in any state.
Read-Only Confirmed Shipments
Check the box to enable read-only status for confirmed shipments.
Ship Order Once
Select a value from the dropdown list.
Intransit Shipment Cancel Tolerance
Enter values for (D) days, (H) hours, and (M) minutes for a tolerance buffer for canceling in-transit shipments.
Delete Shipment on Cancel
Check the box to enable deleting shipments when they are canceled.
Click the Invoice tab.
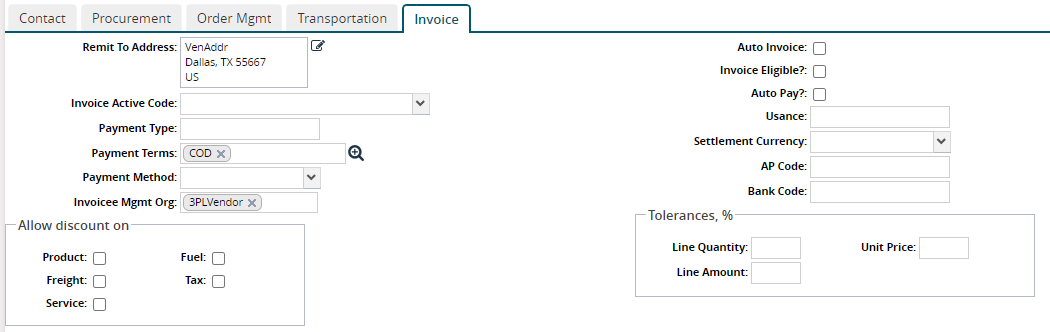
Fill out the following fields. Fields with an asterisk ( * ) are required.
Section
Field
Description
Invoice
Remit To Address
Enter an address for remitting invoices. Click the edit icon to enter data into address fields.
Invoice Active Code
Select the code from the dropdown list when an invoice should be activated.
Payment Type
Enter a value for the payment type.
Payment Terms
Use the picker tool to select payment terms.
Payment Method
Select the method of payment from the dropdown list.
Invoicee Mgmt Org
Enter an invoicee management organization.
Auto Invoice
Check the box to enable automatic invoicing.
Invoice Eligible?
Check the box to enable this vendor to receive invoices.
AutoPay?
Check the box to enable an automatic payment.
Usance
Type in a numeric value for usance.
Settlement Currency
Select the currency code for use in settlements from the dropdown list.
AP Code
Enter the accounts payable code.
Bank Code
Enter the bank code.
Allow Discount On
Product
Check the box if a product discount is allowed.
Freight
Check the box if a freight discount is allowed.
Service
Check the box if a service fee discount is allowed.
Fuel
Check the box if a fuel discount is allowed.
Tax
Check the box if a tax discount is allowed.
Tolerances, %
Line Quantity
Enter a percentage value for tolerances allowed for the line quantity.
Line Amount
Enter a percentage value for tolerances allowed for the line amount.
Unit Price
Enter a percentage value for tolerances allowed for the unit price.
Click the Update button.
A success message appears.