Uploading New Buffers
Users can upload new buffers to the system.
Complete the following steps to upload new buffers:
L og in to the ONE system.
Click Menus/Favs > Administration > Buffer > Search Buffer.
In the NEO UI, users can click on the Menus/Favs icon on the left sidebar and type in the name of the screen in the menu search bar. For more information, see "Using the Menu Search Bar."
The Search Buffer screen appears with the filter fields displayed by default.Click the Search link. Note that there is no reason to enter values for the filter fields because you will be uploading buffers from a CSV file.
The buffers display.
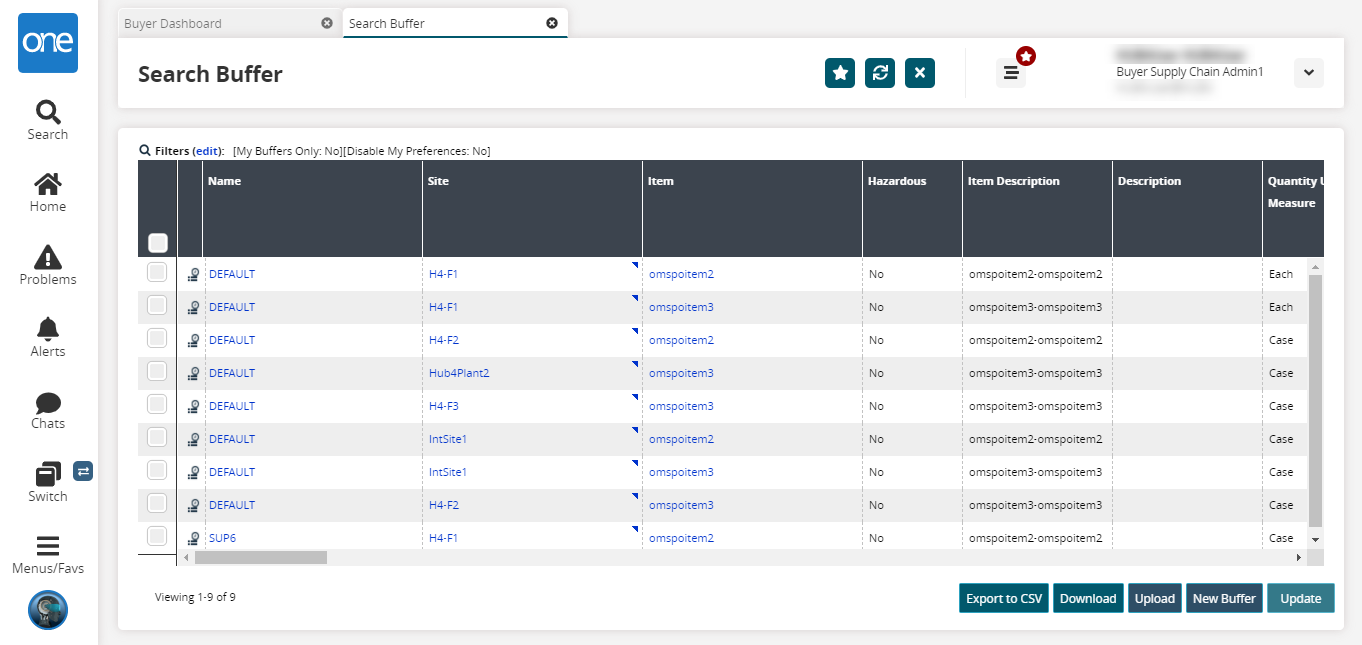
Click the Upload button to upload a list of buffers through a CSV file.
The Buffer Upload screen appears with the Select File to Upload popup window.
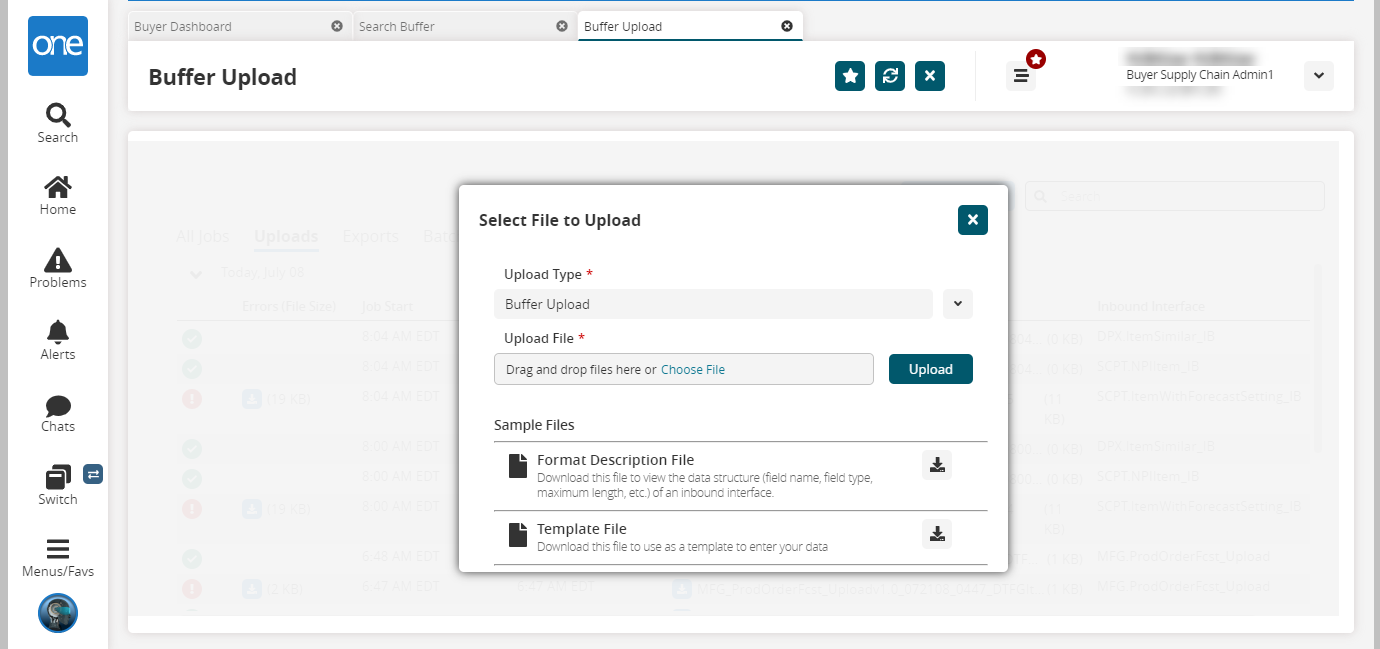
Choose the upload type from the Upload Type dropdown menu. By default, it is Buffer Upload.
Click the Choose File link and select the desired file.
Click the Upload button.
The Buffer Upload screen displays the status of the upload.