Using NEO Prescriptions in the Transportation Planner Workbench
Users can use NEO, ONE's optimization agent, in the Transportation Planner Workbench to analyze and suggest optimization strategies. After a subnet is specified, the workbench displays the movements within the parameters and NEO analyzes them to provide optimization suggestions.
Complete the following steps to use NEO Prescriptions.
Log in to the ONE system.
Click on Menus/Favs > Transportation > Planner Workbench.
The Planner Workbench screen displays.
Complete the following fields to populate the subnet for the planner workbench. Fields with an asterisk ( * ) are required.
Use the calendar and clock tools to fill in the * Delivery Range dates. Users can select single dates or set patterns.
Use the picker tool to select the sites for the Depots field.
Type in the value for the Shipment Number field. Asterisks ( * ) as wild cards are permitted.
Click on the dropdown arrow to Add a field... if more filters are required for the search parameters.
The new field displays.Select a value for the new field.
Click on the Apply button.
The screen refreshes with a map in the background, a list of shipments, and a popup window for NEO Prescriptions. The movements list on the left side of the screen shows Unplanned, In Progress, and Planned movements. The NEO Prescriptions agent begins to analyze the existing data to provide optimization strategies.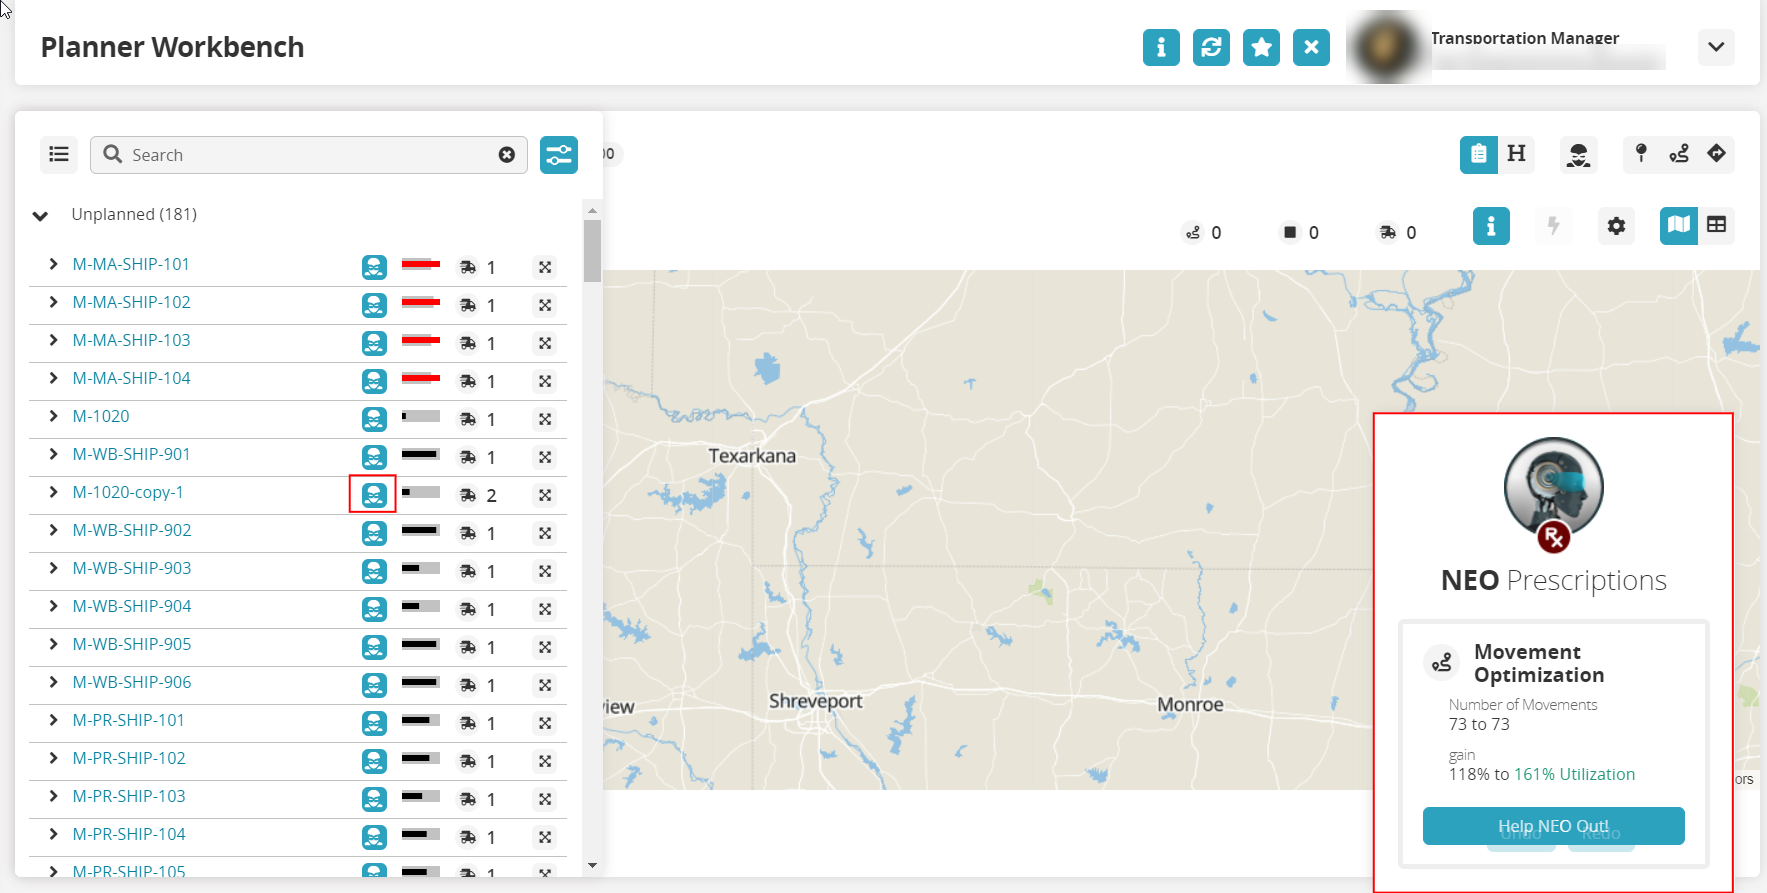
There are several ways that the LPW offers NEO Prescriptions as suggested optimization strategies.
Using NEO in the Movements List
Click on the NEO icon next to a movement from the list of movements on the left side of the screen. If there are nearby movements, the NEO Nearby Movements popup window displays.
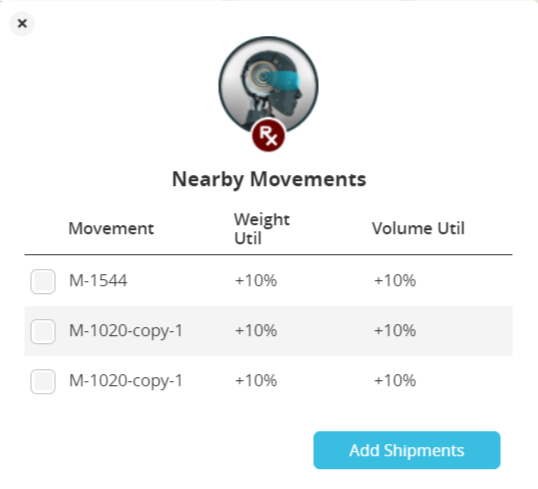
Click on the checkbox next to an initial movement.
Click on the Add Shipments button.
The selected shipments are added to the initial movement, and the movement moves to In Progress.
If there are no nearby movements to consolidate shipments, then the NEO Prescriptions window on the bottom right of the screen refreshes with the number of movements and the percentage of gain in utilization. See the instructions below to continue using NEO Prescriptions.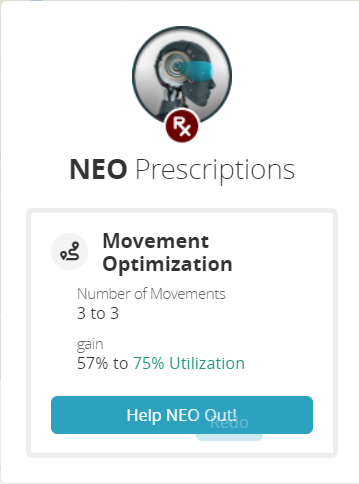
Using NEO Prescriptions
Click the Help NEO Out! button
The NEO Prescription Agent slide-out appears. The slide-out will continue to hold movement optimization suggestions until they are added to the Scratchpad or until the user exits the planning workbench.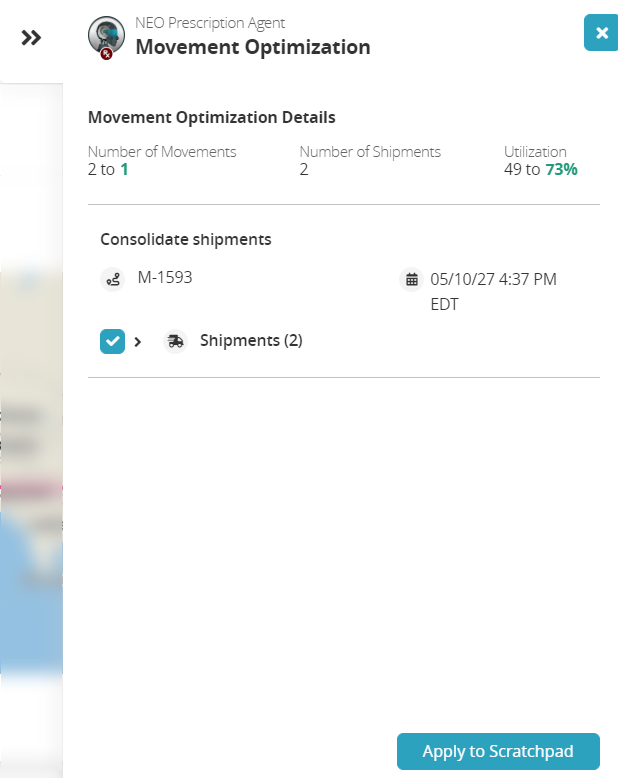
If multiple movements are being analyzed, they will all be displayed. Select or deselect by clicking on the blue check.
Click on the Apply to Scratchpad button.
The screen refreshes, and the NEO suggestions are added to the Scratchpad Tasklist.Click the Tasklist icon.

The Tasklist popup window displays all tasks that have been added to the scratchpad. Users can delete tasks with a trashcan icon.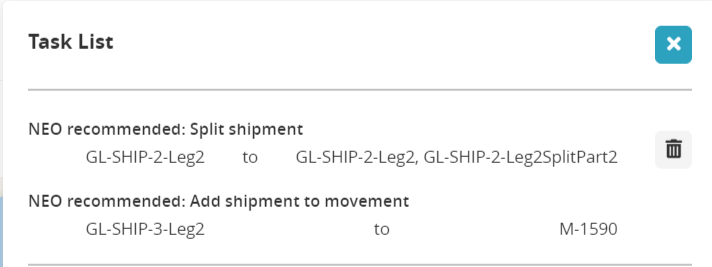
At this point, users have two options to move forward with the movement.
Click on the Execute button (

) to execute the changes.
Click on the Compare to Baseline button (

) to view utilization details in the baseline and new scratchpads.