Working with Financial Policies
Users can create new financial policies for an organization, as well as edit or delete existing financial policies.
Complete the following steps to create a financial policy:
L og in to the ONE system.
Click Menus/Favs > Financials > Financial Policies.
The Financial Policies screen opens.Click the New Financial Policy link.
The Financial Policies right pane displays new fields.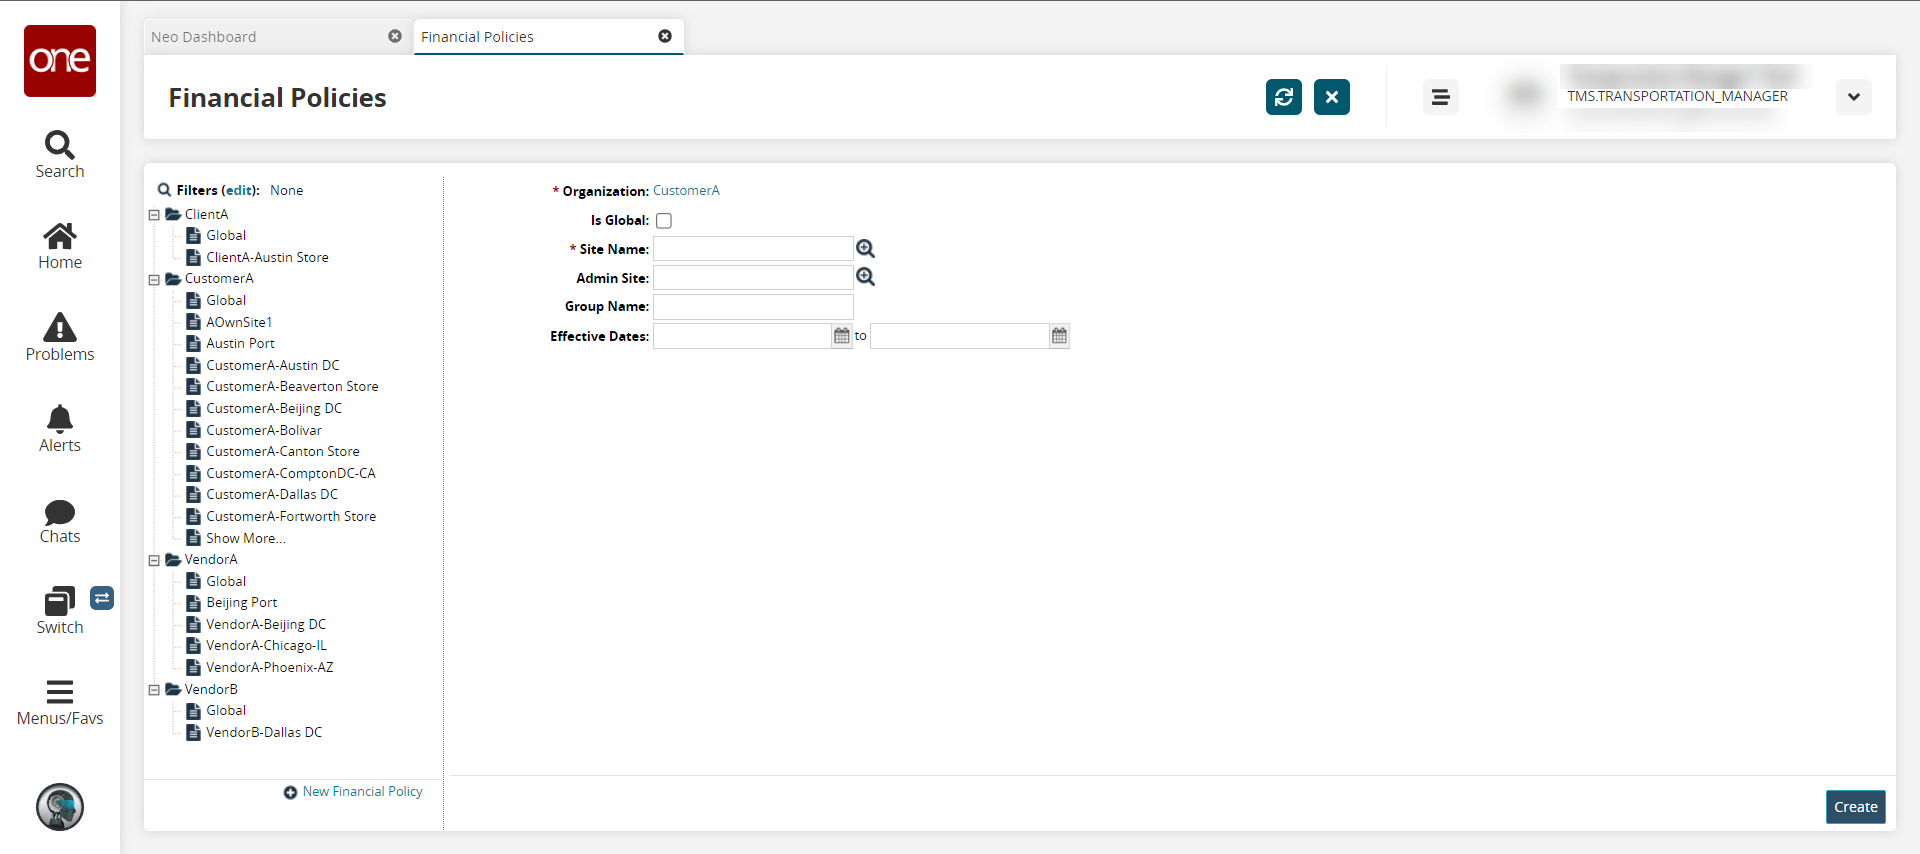
Enter values for fields described in the table below. Fields with an asterisk ( * ) are required.
Field
Description
* Organization
The field is auto populated.
Is Global
Check the box to determine if the policy is applied globally or not.
* Site Name
Use the picker tool to select a site.
Admin Site
Use the picker tool to select an admin site.
Group Name
Enter a group name.
Effective Dates
Use the calendar tools to enter beginning and ending dates for the effective date range.
Click the Create button to save the financial policy.
A green success message displays.
Complete the following steps to view or update existing financial policies:
L og in to the ONE system.
Click Menus/Favs > Financials > Financial Policies.
The Financial Policies screen displays. The left pane contains the list of organizations and sites, and the right pane displays the site details.Click the required site name.
The right pane displays the details of the site.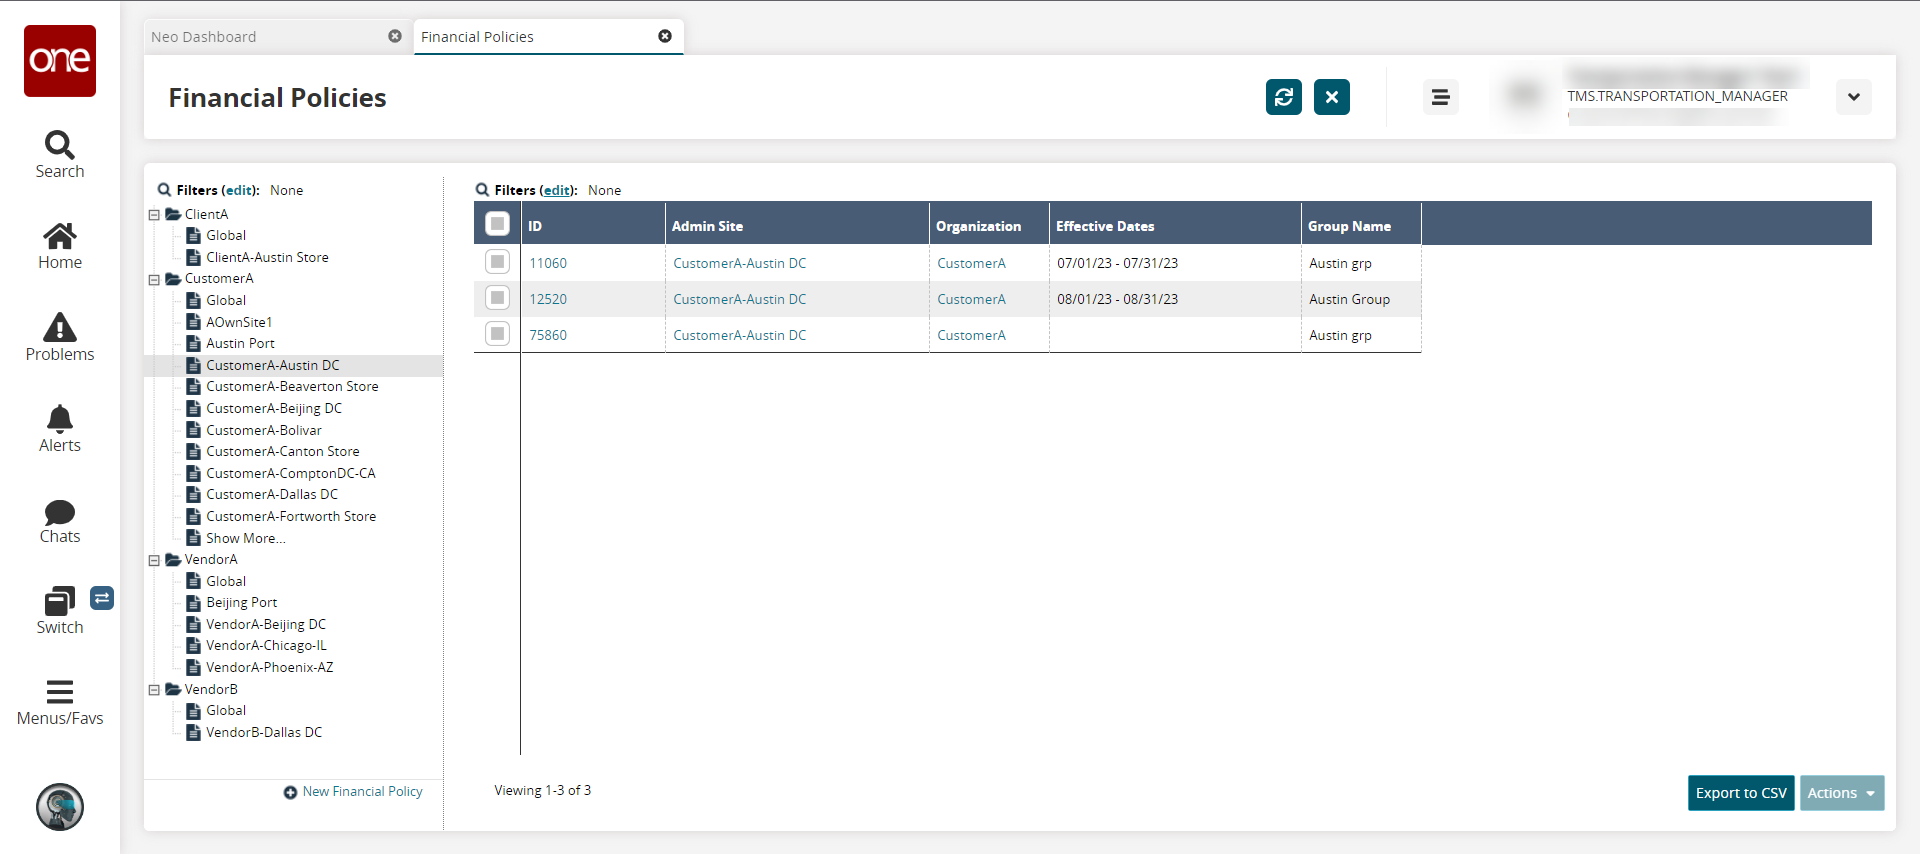
Select the row checkbox for the policy.
Click the Actions button, and then click the Update option.
The Update popup displays. Any fields with an edit icon (pencil) are editable.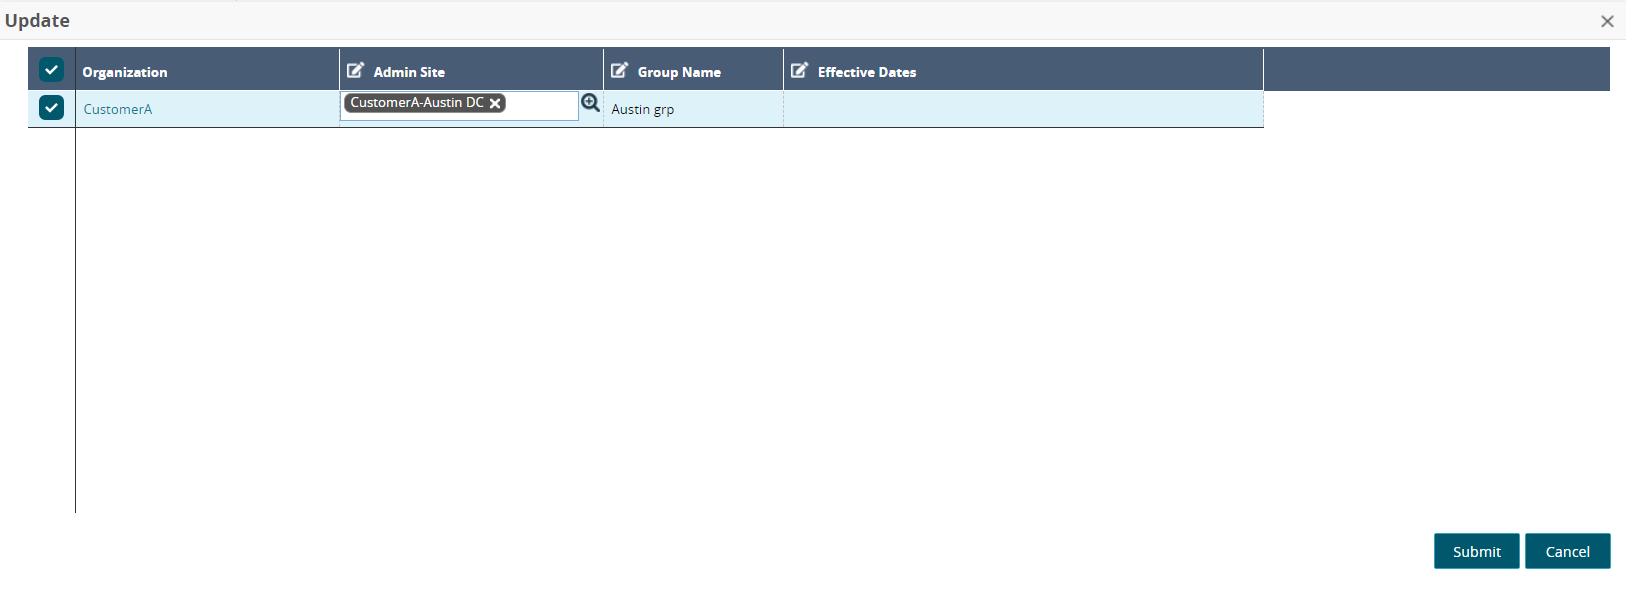
Click the cell for the Admin Site field, and use the picker tool to select a site.
Click the Group Name cell, and update the name.
Click the cells for the Effective Date field, and use the calendar tools to set the beginning and ending dates for the policy.
Click the Submit button.
A green success message displays.Click the Export to CSV button to export the list into a spreadsheet.