Working with Holds on Pick Lists
Users can create manual holds on pick lists with the below procedure.
Complete the following steps to work with holds on pick lists:
L og in to the ONE system.
Click Menus/Favs > Warehouse Mgmt > Pick Lists.
The Pick Lists screen appears with the site explorer on the left.Select a site from the site explorer.
The Pick Lists Report appears for the selected site.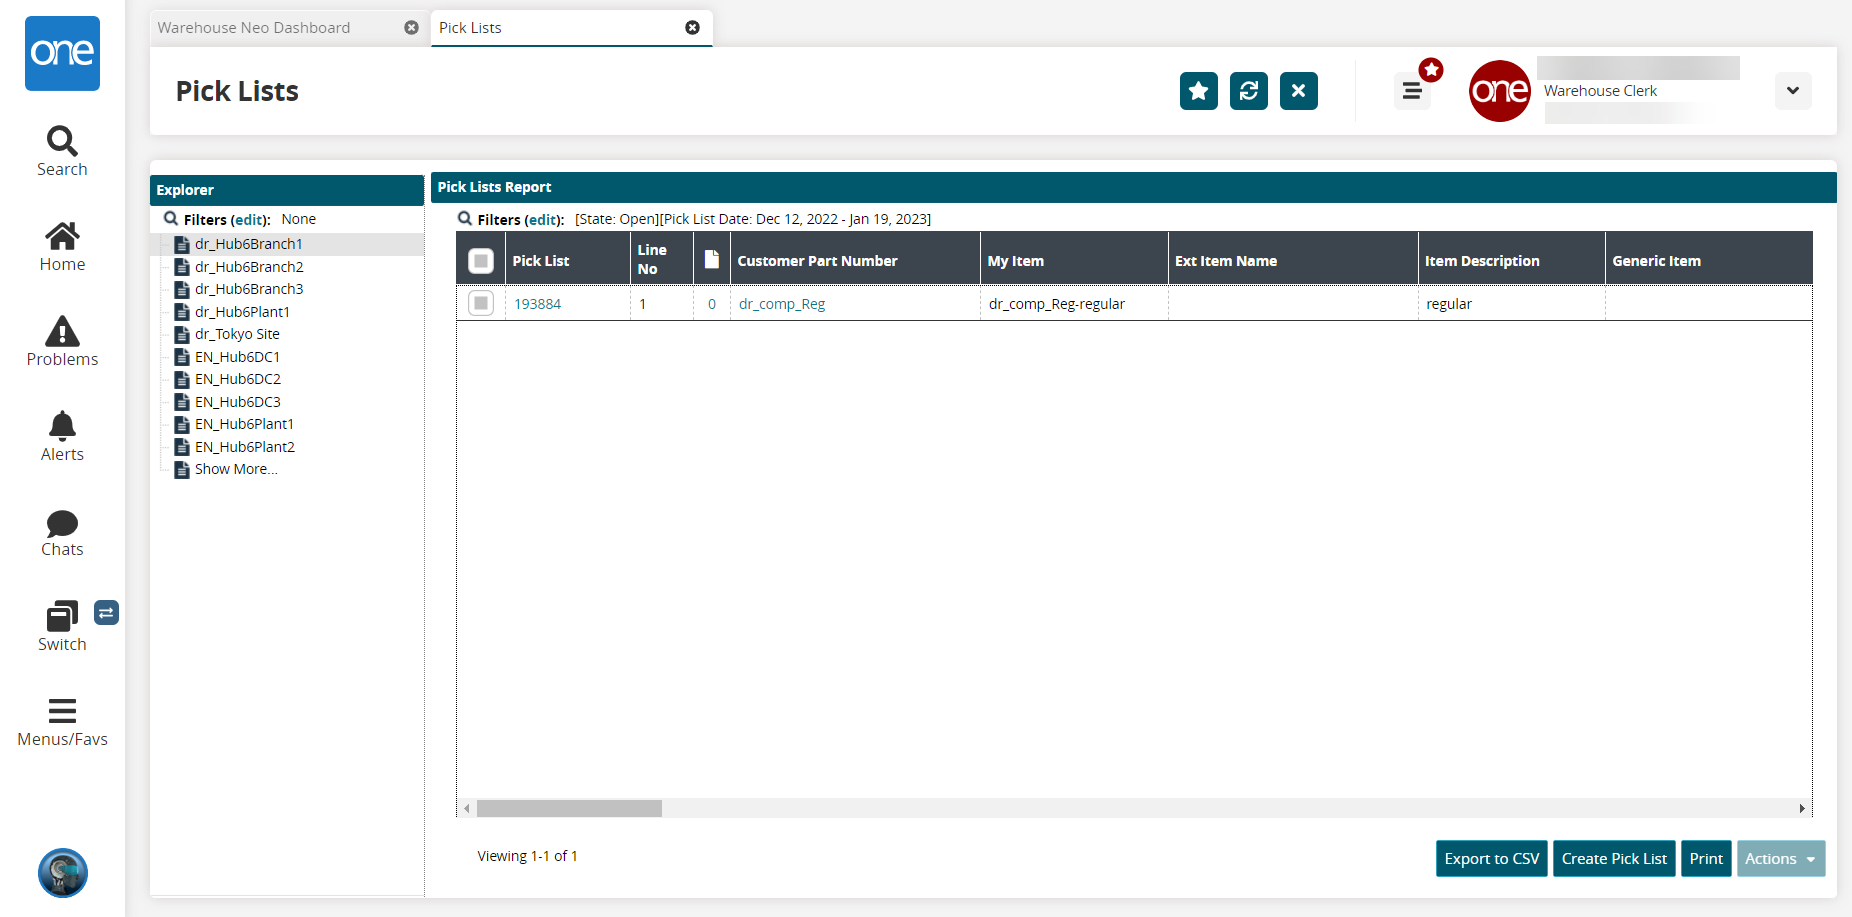
In the Pick List column, click the link for the pick list you want to view.
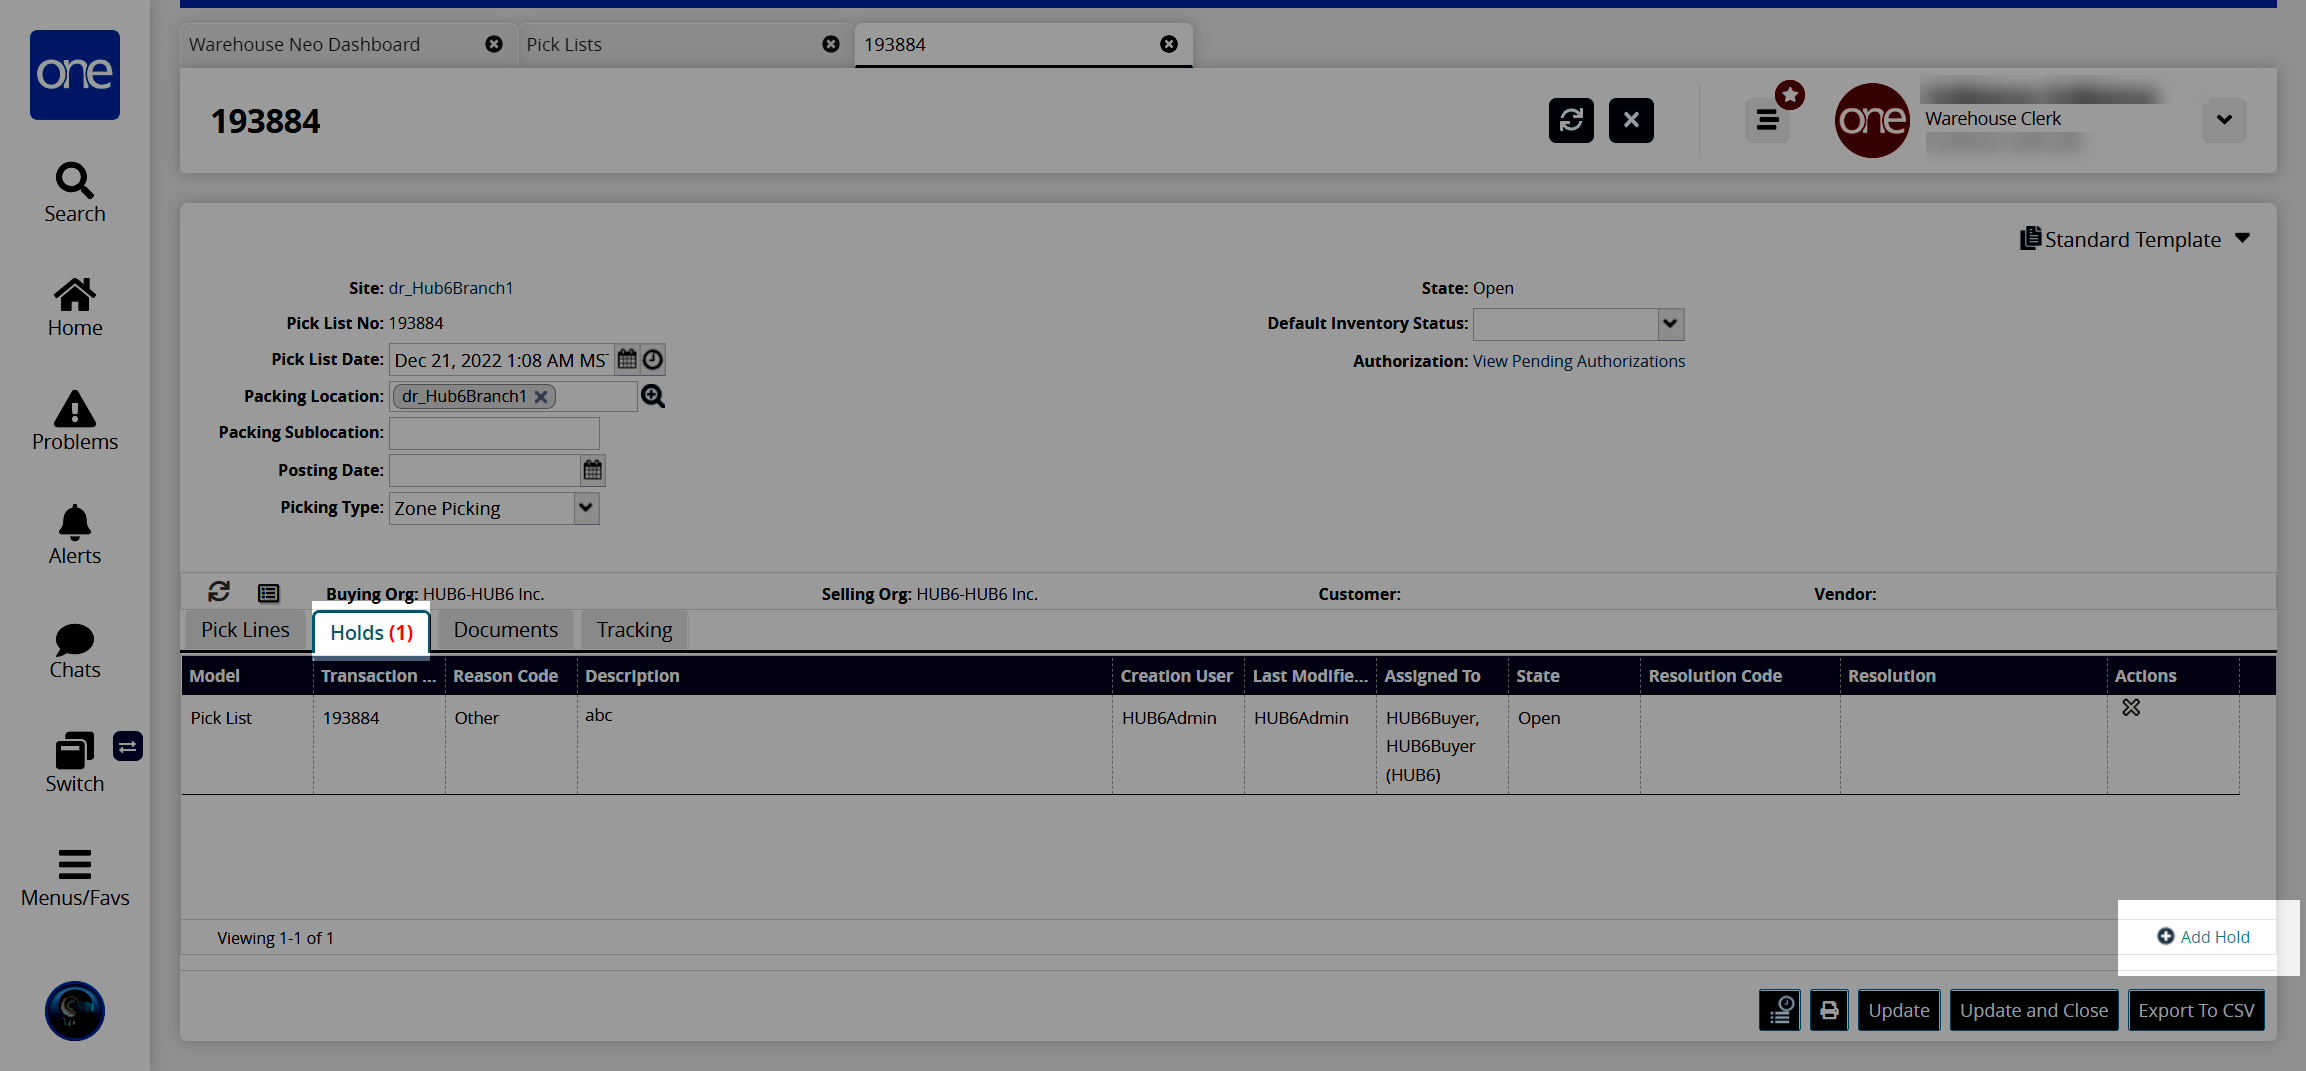
The Pick List details screen appears in a new tab.Click the Holds tab.
The Holds report appears.Click the Add Hold link.
The Create Hold popup window appears.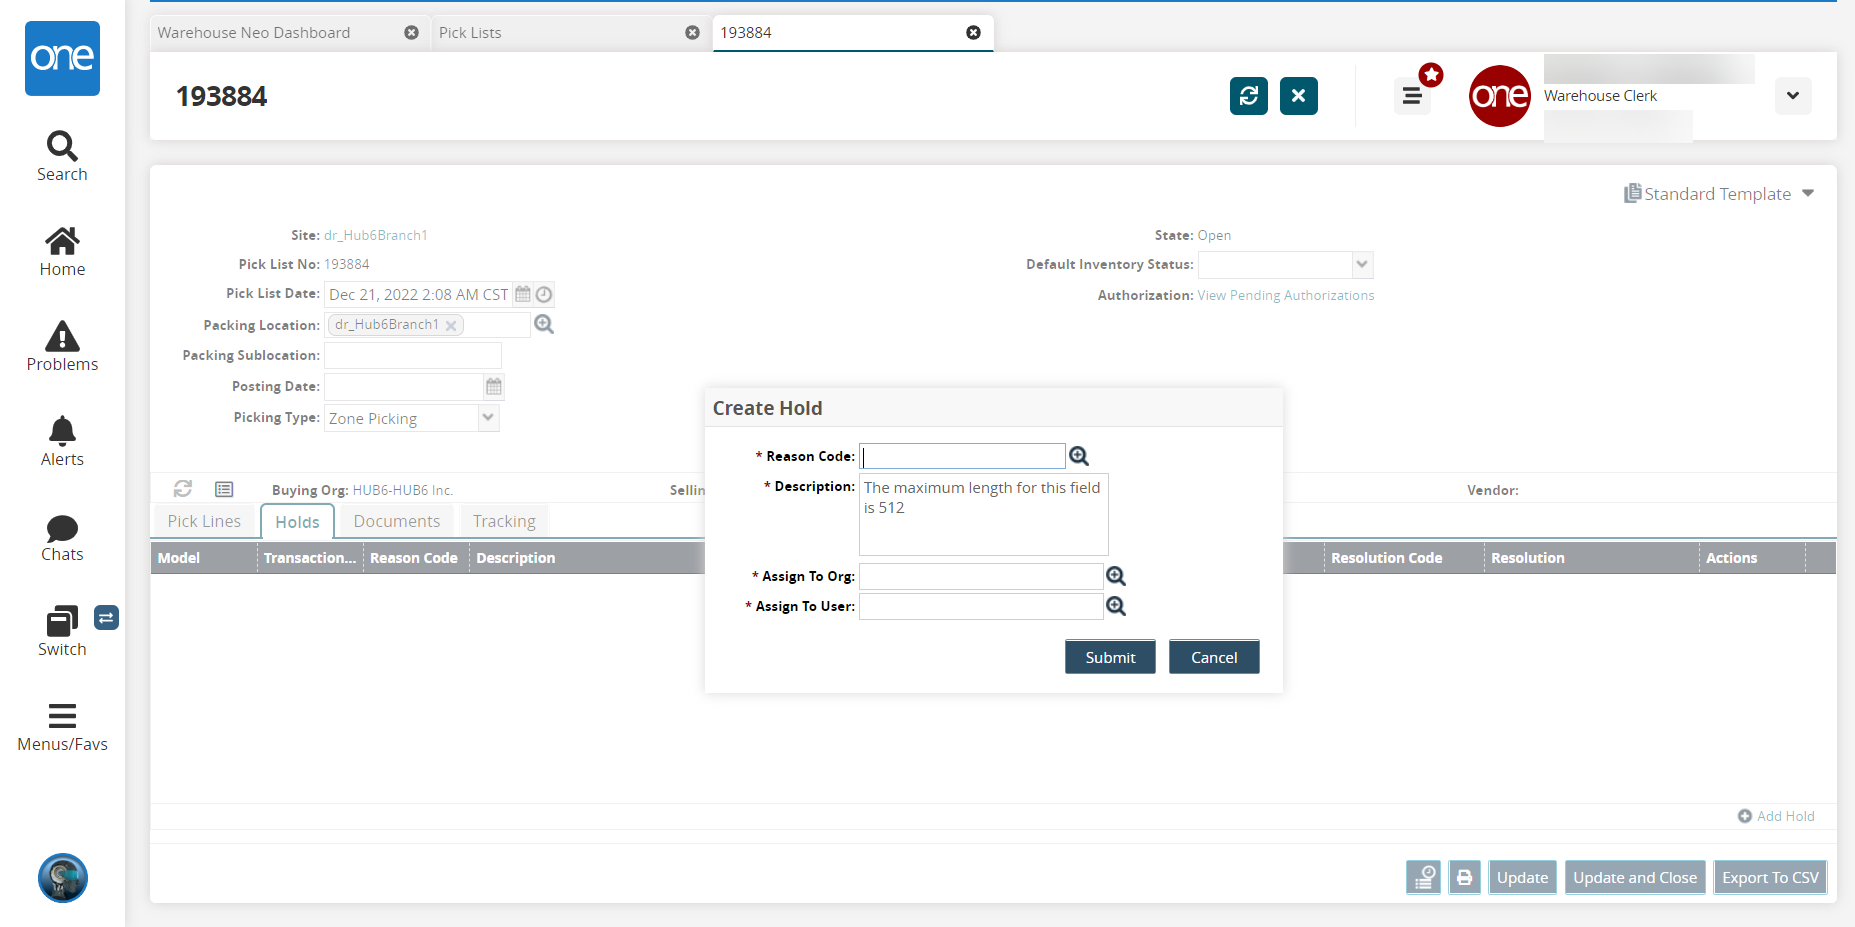
Fill out the following fields. Fields with an asterisk ( * ) are required.
Field
Description
* Reason Code
Select a reason code using the picker tool.
* Description
Enter a description.
* Assign To Org
Select an assign-to organization using the picker tool.
* Assign To User
Select an assign-to user using the picker tool.
Click the Submit button.
The added hold appears under the Holds tab.