Working with Lost Sales
Lost sales are sales that cannot be recovered because they occur before the earliest order point, and there is not enough on-hand inventory to supply them. The recovery of lost sales can vary by the type of item or promotion. Some lost sales are rarely recovered, while others are recovered but may be delayed. The delay, and eventual recovery, of this demand, is called Deferred Sales. The system detects lost sales, determines how much of those lost sales should be deferred, and then applies that deferred demand to order points in the future.
Configuring Lost Sales
Buffers include options for lost sale data. The Replenishment Planner can perform tasks related to buffers and lost sales.
To configure lost sales on buffers:
From the Configuration menu, select Buffers, and then Buffers.
The Buffers screen appears.Tip
You can filter these results as necessary.
Select a buffer by clicking a link under the Name column.
Buffer information appears in a new tab.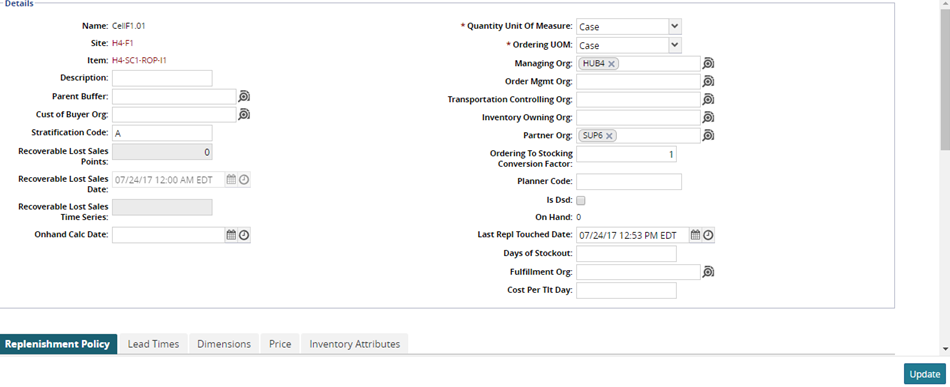
Scroll down to find the Replenishment Policy options.
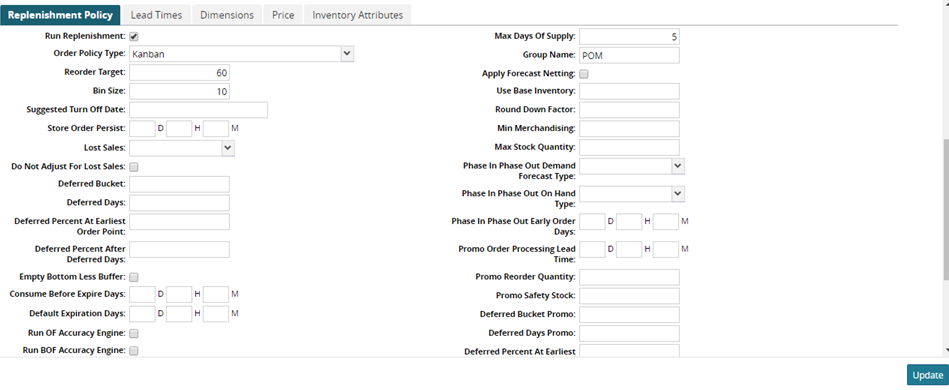
Use the table below to configure lost sales options.
Field
Description
Lost Sales
Select Earliest Order Point, End of Day, or leave blank.
Do not Adjust For Lost Sales
Select this check box so that the engine does not adjust orders to compensate for lost sales.
Deferred Bucket
The entire time between plan start and earliest order point. This number represents the number of days before the earliest order point through the earliest order point to aggregate lost sales and determine how much is deferred.
Deferred Days
Number of days to delay sales from the bucket in which it was expected to occur.
Deferred Percent at Earliest Order Point
Percentage of sales to delay until the first day after the current bucket in which the sales were expected.
Deferred Percent After Deferred Days
Percentage of sales to delay until the first day after the current bucket in which the sales were expected PLUS the deferred days.
Deferred Bucket Promo
Deferred bucket promotional variation.
Deferred Days Promo
Deferred days promotional variation.
Deferred Percent At Earliest Order Point Promo
Deferred percent at earliest order point promotional variation.
Deferred Percent After Deferred Days Promo
Deferred percent after deferred days promotional variation.
To save changes made to the buffer, click the Update button at the bottom of the page.
A success message appears.
Running the Advanced Replenishment Engine
To run the Advanced Replenishment Engine:
From the Engines menu, select Invoke Advanced Replenishment Engine.
The Invoke Advanced Replenishment Engine screen appears.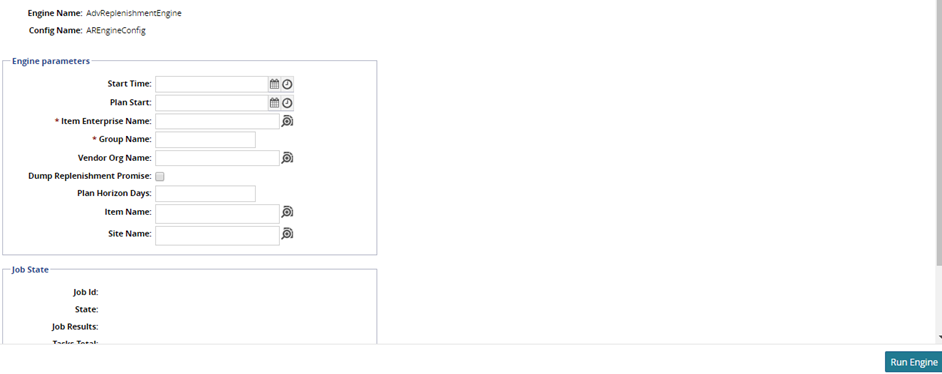
Select a Start Time for the engine to begin.
For Plan Start, select a start time for the replenishment plan.
Use the picker tool to select an enterprise for Item Enterprise Name.
Enter a value for a planning subnet group name in the Group Name field.
Select a Vendor Org Name, Item, and Site Name, as necessary.
To start the replenishment engine, click RunEngine.
A success message indicates that the engine is scheduled.
Viewing the Replenishment Analysis PIV
To view the Replenishment Analysis PIV:
From the Analysis menu, select Replenishment Analysis PIV.
The Replenishment Analysis PIV screen appears.Select either a Site or Location for the report.
Select an Item.
Enter a valid Date Range for the inventory period.
Click the Search link.
A grid view appears.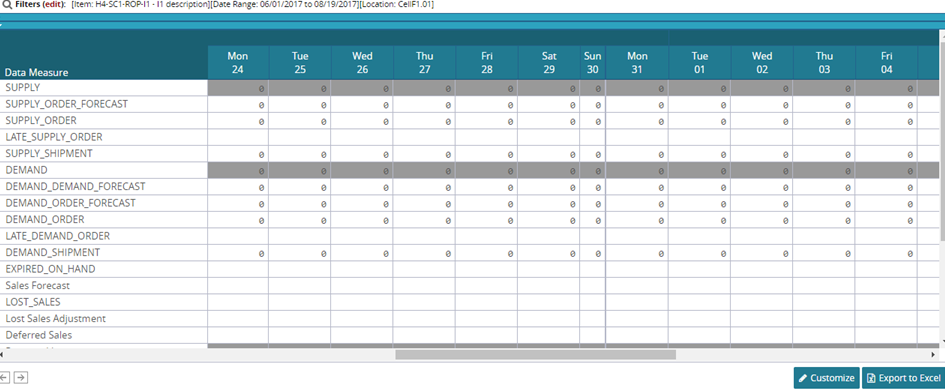
To customize the visible rows in the report, click the Customize button at the bottom of the page.
The rows become editable.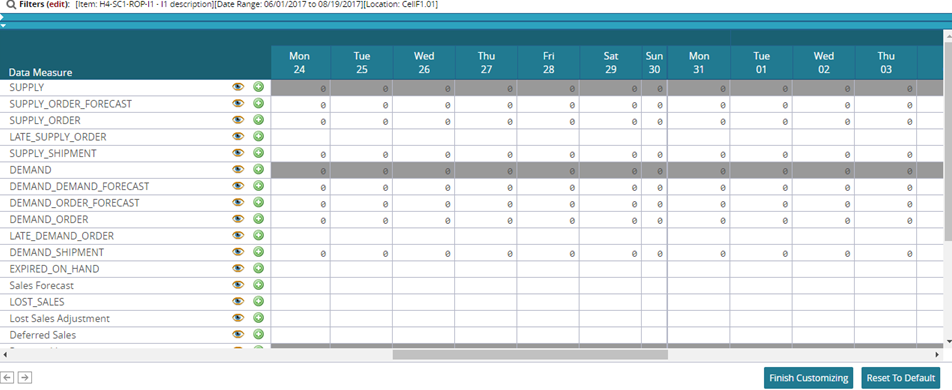
To hide a row, click the eye icon for that row.
To save changes, click the Finish Customizing button at the bottom of the page.
To export the results to a spreadsheet, click the Export to CSV button.