Working with Order Classification
Users now have a field to store order classification on the order screens for purchase orders (PO), deployment orders (DO), sales orders (SO), and return orders (RO). Users can also filter NEO widgets using order classification.
Complete the following steps to add order classification to an order creation page:
Log in to the ONE system.
Click Menus/Favs > Order Mgmt, and select the new order screen for a PO, DO, or SO. For a RO, click Menus/Favs > Order Mgmt > Return Order > New Return.
The new order screen displays. The example below is the New Return screen. The Order Classification field is not present.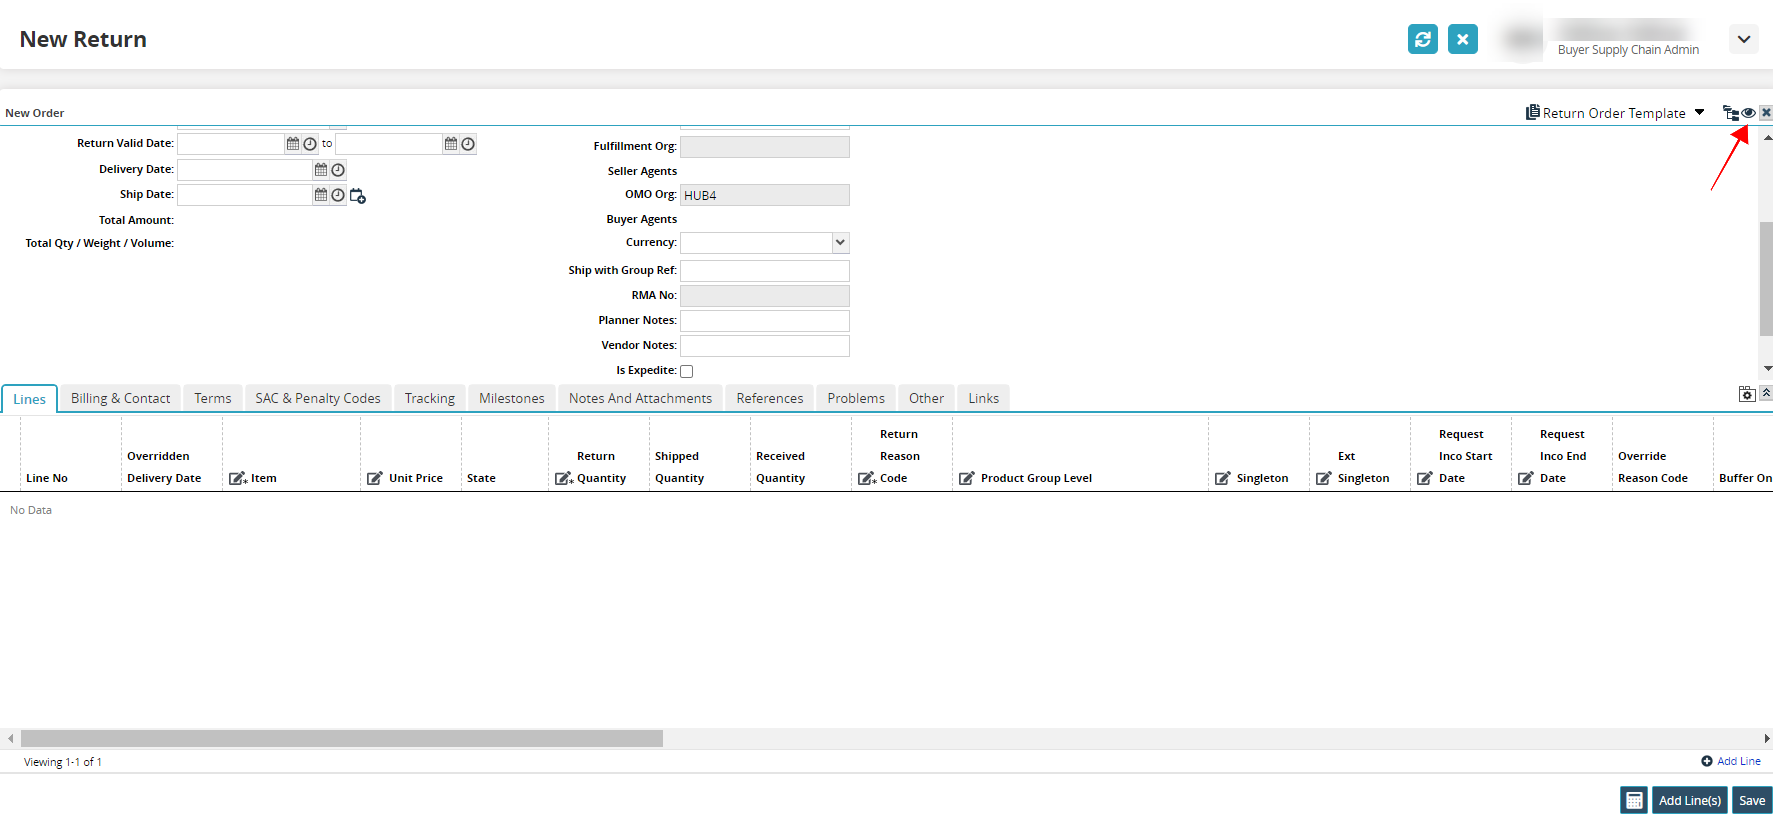
Click the eye icon in the upper right corner of the screen. It has the tooltip: Manager Field Visibility.
A menu of fields for display in the order details header of the screen displays.Click the checkbox next to Order Classification.
The Order Classification field now displays.
Complete the following steps to add the Order Classification field as a search report filter.
Log in to the ONE system.
Click Menus/Favs > Order Mgmt, click the menu item for the type of order to search, and then click the search link. (Example: Menus/Favs > Order Mgmt > Purchase Order > Search POs.)
The search screen displays the type of order selected. The Search POs screen is shown below as an example.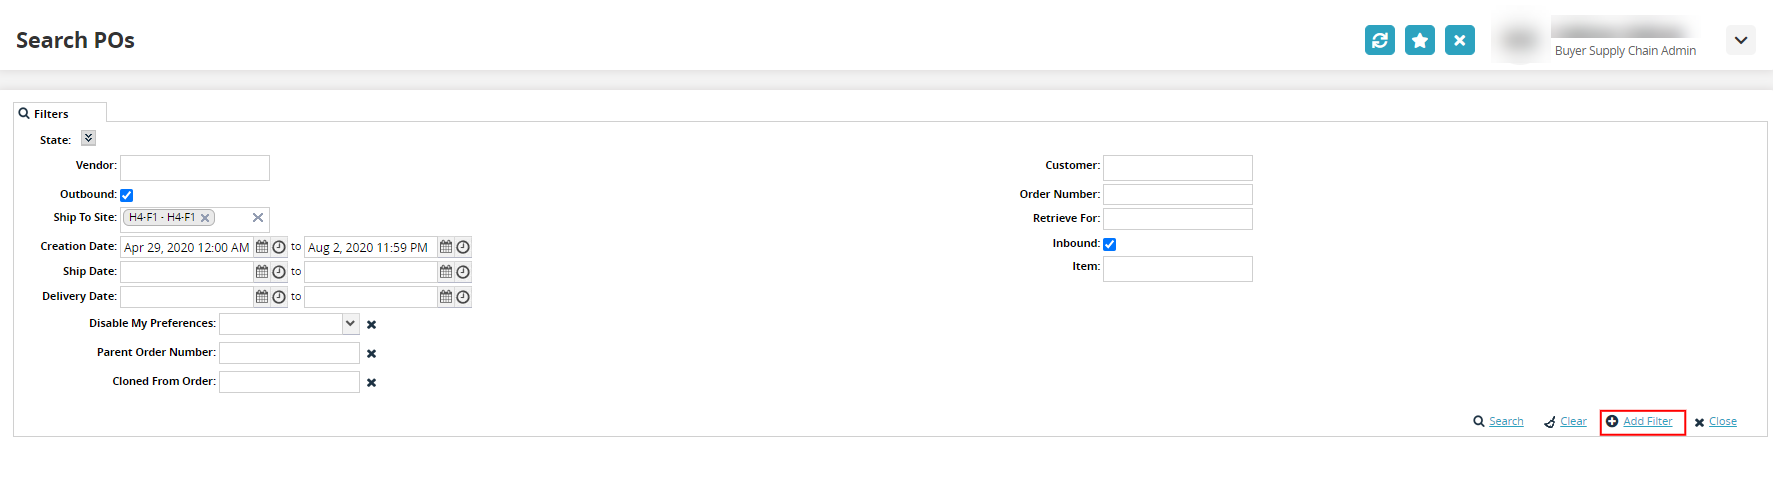
Click the Add Filter link.
A menu displays.Click Order Classification from the list of filter options.
The Order Classification field now displays as a search filter on the screen.
Complete the following steps to filter a NEO widget using order classification:
Log in to the ONE system.
Click the Filter icon for any of the following widgets on your dashboard. The Deployment Order Lines Missing ASN widget header is shown below as an example.
Deployment Order Awaiting Approval
Inbound Purchase Order Summary
Purchase Order Summary
Deployment Order Lines Missing ASN
Inbound Return Order Summary
Return Order Lines Missing ASN
Deployment Order Lines Shipped Short
My New Purchase Order
Return Order Lines Shipped Short
Deployment Orders Projected Late Deliveries
Order Line Missing ASN
Return Orders Awaiting Approval
Deployment Order Schedule Summary
Order Line Promised Short
Return Order Schedule Summary
Deployment Order State Summary
Order Line Shipped Short
Return Orders Projected Late Deliveries
Deployment Orders Waiting For Shipping
Orders Waiting For Shipping
Return Order State Summary
Inbound Deployment Order Summary
Projected Late Deliveries
Return Orders Waiting For Shipping
Inbound Intransit Deployment Orders
Purchase Order Awaiting Approval
Sales Order State Summary
Inbound Intrasit Purchase Orders
Purchase Order Schedule Promise Late
Sales Order Schedule Summary
Inbound Intransit Return Orders
Purchase Order Schedule Summary
The widget configuration popup window displays.
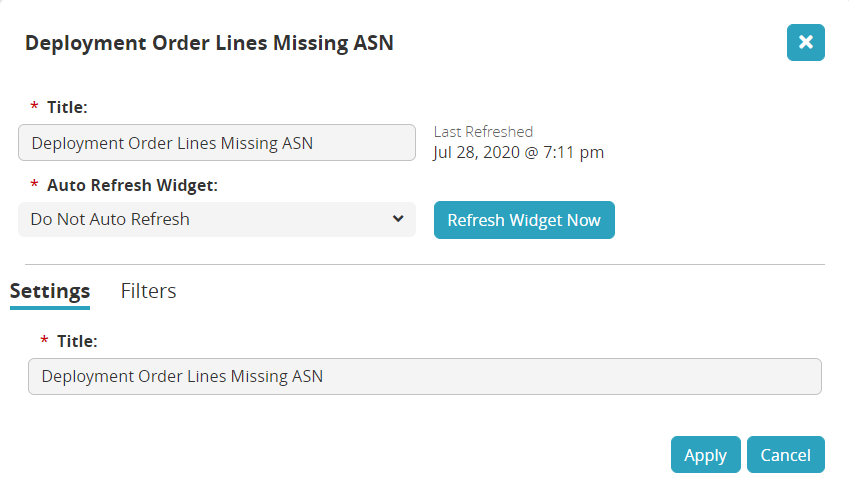
Click the Filters link.
The list of filters displays. Widgets will have different filters.Click the Add a field.. dropdown arrow.
A menu of more fields that can be added as filters displays.Click Order Classification.
A filter field for order classification displays.Click the dropdown arrow and select an order classification from the list.
Click the Apply button.
The widget on the dashboard refreshes with the new data with a specified order classification.