Create the Page Flow and Page
The overall detail screen for a model level is called a Page Flow. A Page Flow is made up of multiple Pages, each of which is either editable or read-only and holds a collection of form fields.
Log in to NEO, with the user name BookstoreUser and the password of password. You should be able to see the new menu item "Page Editor Explorer". Open the Page Editor Explorer, and click the "Add Page Flow" button. You will be shown a dialog prompting for the Model Level and Page Flow Name:
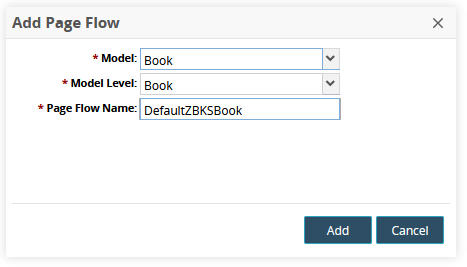
Fill it out and click Add.
After the Page Flow has been created, it should add some items to the tree panel on the left:

The Page Flow you just created is currently selected. Page Flows are organized by Model Level, so it appears under a Model Level tree node (we'll discuss that more later). Page Flows are made up of one or more Pages, and a default one is always created with each new Page Flow. Click the Default Page node to open the Page Editor:
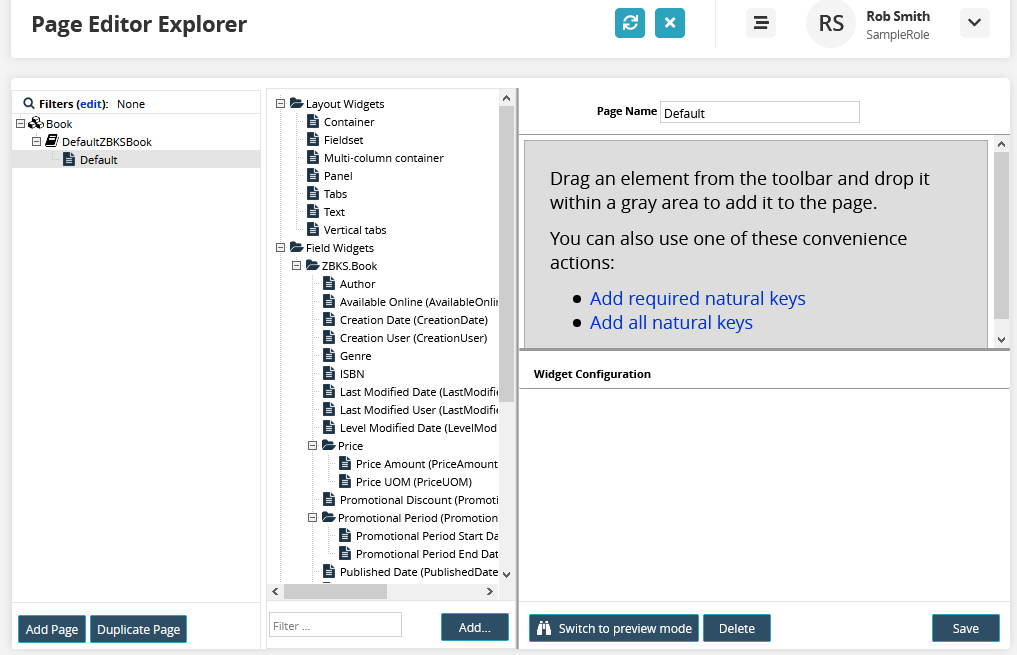
The Page Editor is a drag-and-drop editor, with fields and layout elements within the left panel, a configuration panel on the bottom, and a workspace area in the middle. To start, click the "Add required natural keys" link to automatically add those to the workspace. Then you can drag some other fields over:
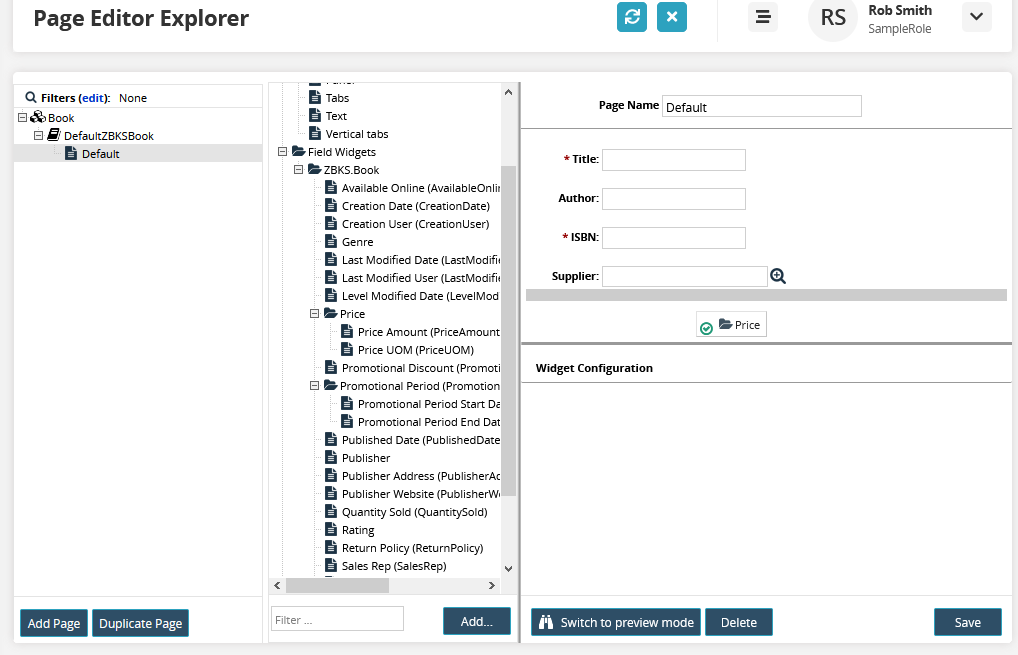
Once you've added a few fields (and maybe some layout elements), you can click Save.
For ModelLink field Supplier, picker and autocomplete config must be specified to determine what set of models the User has access to choose from. So, the Administrator can set a value for the Query config field.
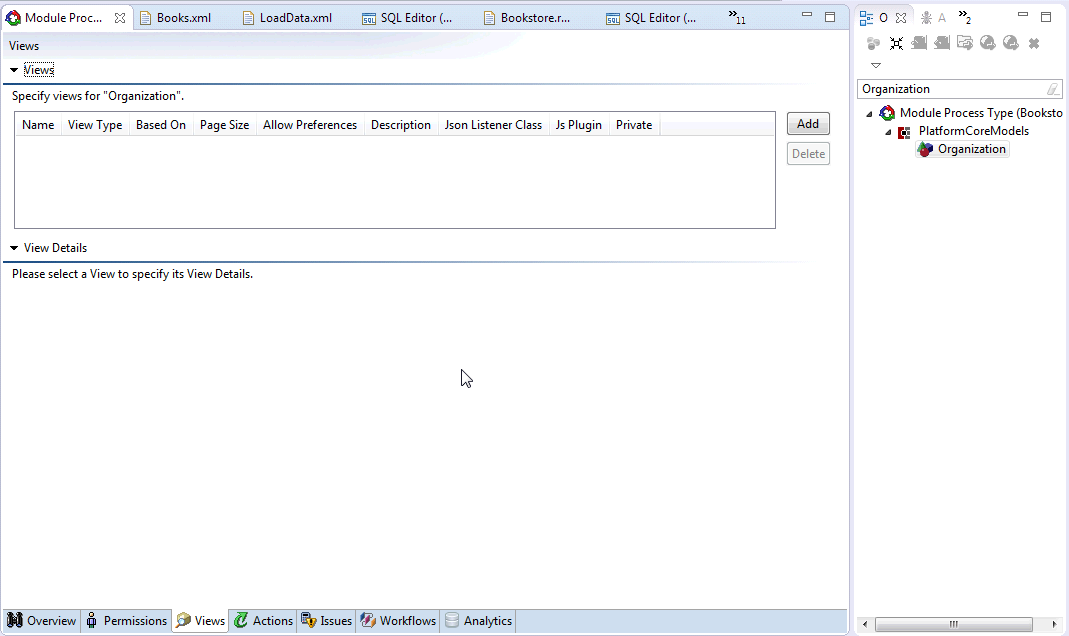
Lets first create a ModelPicker view on Organization model. For that we need to go back to the MPT Editor. Go to the Platform SDK perspective, Then Search the Organization Model in search box of Outline tile.
In the Permissions tab (at the very bottom of the editor), add "By Dimension" read permission for ZBKS.SampleRoleType. As we are fetching all Organizations, just provide the ValueChain level permission. (In a real business scenario, you would probably restrict this based on Enterprise or Organization.)
Then click on the Views tab, at the very bottom of the editor:
Click the Add button to create a new view. In the View Properties dialog that opens, enter the following information:
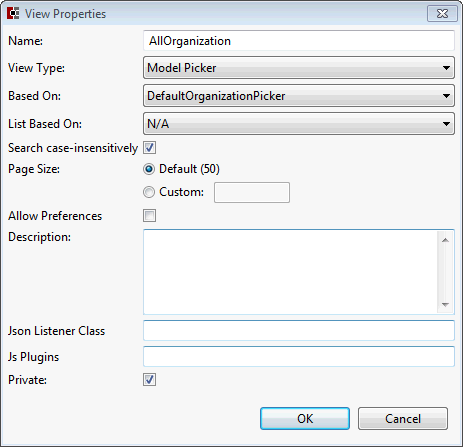
Then click OK, Now go to the Permissions tab, select the Can access this view check box for our ZBKS.SampleRoleType.
Save the MPT, and then Click
 Submit to submit it to the server.
Queries are registered by the Developer using the following API. This should be placed in your GlobalRegistry.js file. you can find this file in web/public folder of BookStore project.
One.ext.page.PageManager.registerModelLinkQuery({ name: 'AllOrganization' ,modelLevel: 'Organization' ,staticConfig: { pickerView: { viewName: 'ZBKS.AllOrganization' ,customModelName: 'Standard Organization' } ,autocompleteSqlName: 'ZBKS.SampleSqls.GetAllOrganization' } });Save the File, and then Click
Submit to submit it to the server.For autocomplete add the following code in Sample.sqlDefs file after the existing<SqlDef>element before </SqlDefList>. you can find this file in sql folder of BookStore project.
<SqlDefName="GetAllOrganization"GroupName="SampleSqls"> SELECT SYS_ORG_ID, ORG_NAME FROM ORGANIZATION </SqlDef>Save the File, and then Click
Submit to submit it to the server.Refresh NEO UI so the administrator able to see the following:
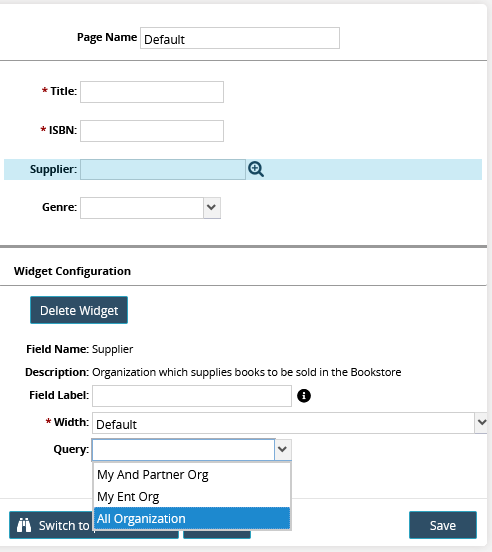
Select All Organization option and save the page. Now go back to your Default ZBKS.Book Page Flow in the tree.
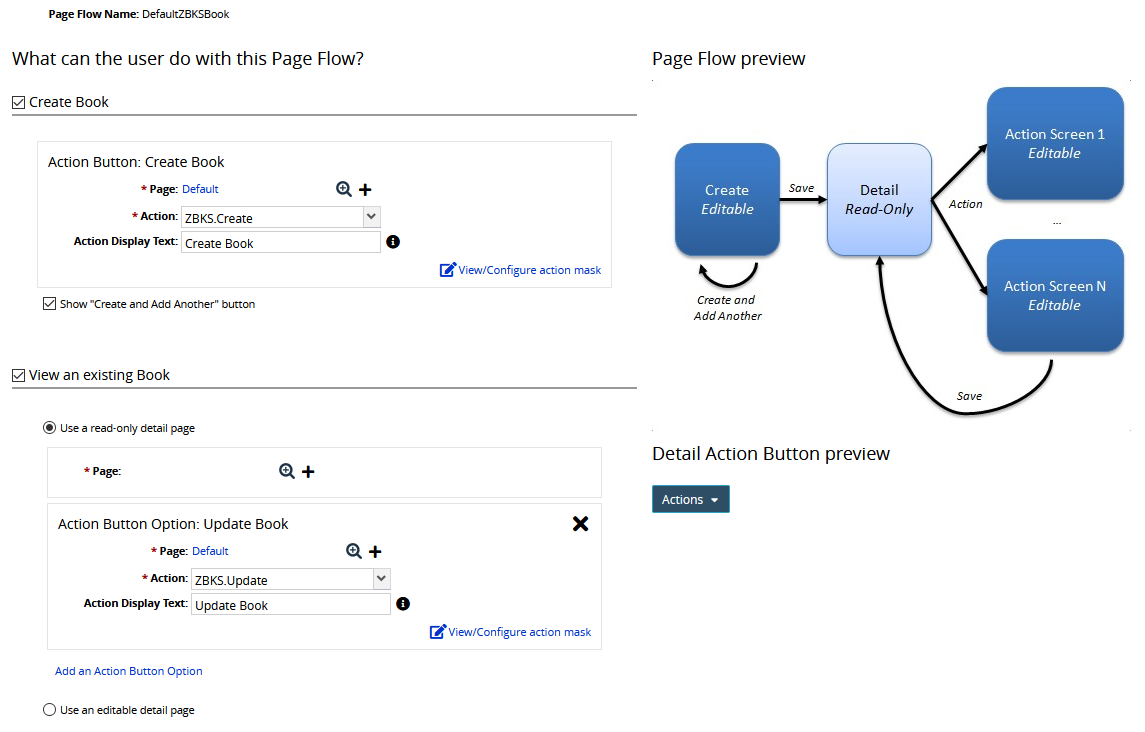
For this tutorial, we're going to create a ZBKS.Book detail screen that has the following capabilities:
Create ZBKS.Book
Create and add another ZBKS.Book
View read-only details of a ZBKS.Book
Execute an update action on a ZBKS.Book
To do that, we'll need to first select Create Book. The Page Flow Editor automatically also selects View an existing ZBKS.Book, because there's rarely a case where a user would be allowed to construct a create screen without being able to view the corresponding detail screen. Check the Show "Create and Add Another" button and also click the Add an Action Button Option. Your screen should look something like this:

You'll notice that there are several required Page fields. Click the magnifying glass icon to select the Default Page for each one. In practice, you can have different layouts for each page by configuring and using unique Page instances, but for this tutorial, we will reuse the same one.
The Action fields are combo boxes that are populated with MPT/SPT actions. The Developer must expose actions within Studio for them to be available to use within a User-Defined Page. To do that, open the MPT within Studio and double-click the ZBKS.Create action for ZBKS.Book. Check System of Control and Allow Ent Role Customization. Then give your role permission to execute the action. Then close and reopen the Page Editor Explorer and navigate back to the Page Flow Editor, and you should see ZBKS.Create in the combo box dropdown.
Do the same for ZBKS.Update for the action under the View an existing ZBKS.Book section, and then populate the Action Display Text fields (this is the button text that is displayed to the User). Your screen should look similar to this:
Then click Save.