Adding Items in the Item Master
Buyer Supply Chain Admin and Vendor Supply Chain Admin roles can add items to the Item Master.
Complete the following steps to add new items:
L og in to the ONE system.
Click Menus/Favs > Administration > Items > New Item.
The New Item screen appears.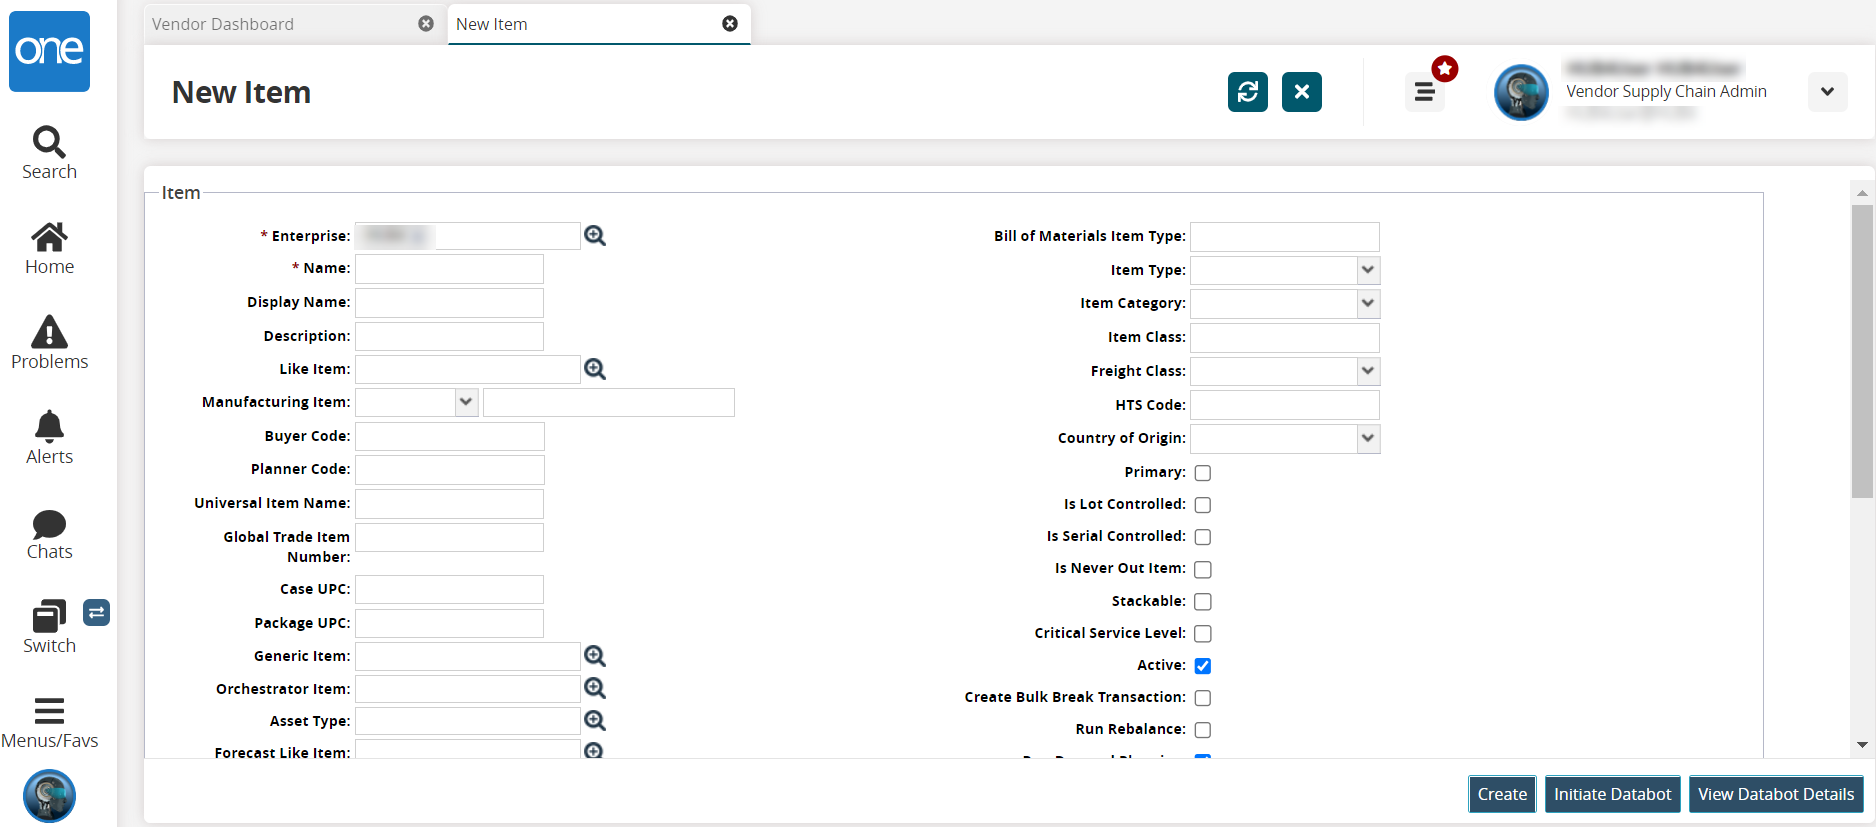
Enter values for fields described in the table below. Fields with an asterisk ( * ) are required.
Field
Description
* Enterprise
Enter the enterprise name or use the picker tool to select an enterprise.
* Name
Enter a name for the new item.
Display Name
Enter a display name for the new item.
Description
Enter a description of the item.
Like Item
Enter a similar item's name or use the picker tool.
Manufacturing Item
Select an item manufacturing type from the dropdown list in the first field and select or type in the name in the second field.
Buyer Code
Enter a buyer code. A context-sensitive list will display to choose the code from.
Planner Code
Enter a planner code. A context-sensitive list will display to choose the code from.
Universal Item Name
Enter a universal item name.
Global Trade Item Number
Enter the global trade item number.
Case UPC
Enter the Universal Product Code (UPC) for the case.
Package UPC
Enter the Universal Product Code (UPC) for the package.
Generic Item
Enter a generic item name or use the picker tool to select one.
Orchestrator Item
Enter the orchestrator's item name or use the picker tool to select one.
Asset Type
Enter the asset type or use the picker tool to select one.
Forecast Like Item
Enter the name of a similar item used in forecasts or use the picker tool to select one.
Package Item
This field will auto-populate packaging information. Click the icon to see the item's packing resource.
Is Drop Ship
Check the box to set this item for drop shipping.
Stratification Code
Select a stratification code from the dropdown list.
Technical Description
Enter a technical description.
Customs Description
Enter a description for customs.
Bill of Materials Item Type
Enter an item type for the bill of materials (BOM).
Item Type
Select the item type from the dropdown list.
Item Category
Select the item category from the dropdown list.
Item Class
Enter an item class.
Freight Class
Select the freight class from the dropdown list.
HTS Code
Enter the Harmonized Tariff Schedule code.
Country of Origin
Select the country or origin abbreviation from the dropdown list.
Primary
Check the box to set this item as a primary item.
Is Lot Controlled
Check the box to set this item as lot controlled.
Is Serial Controlled
Check the box to set this item as serial controlled.
Is Never Out Item
Check the box to set this item as never out.
Stackable
Check the box to set this item as stackable.
Critical Service Level
Check the box to set this item for critical service levels.
Active
Check the box to set this item as active.
Create Bulk Break Transaction
Check the box to set this item as part of a create bulk break transaction.
Run Rebalance
Check the box to set this item as part of a rebalance.
Run Demand Planning
Check the box to set this item as part of demand planning.
Run Autonomous Adjustment
Check the box to set this item as part of autonomous adjustments.
Run Demand Translation
Check the box to set this item as part of demand translations.
Run Inventory Planning
Check the box to set this item as part of inventory planning.
Run ABC Analysis
Check the box to set this item as part of an ABC analysis.
Click the Create button or enter more details on the tabs, which are described in the following sections:
"Item Contacts Tab"
"Item Dimensions Tab"
"Item Price Tab"
"Item Order Info Tab"
"Item Life-cycle Tab"
"Item Hazardous Tab"
"Item Additional Info Tab"
"Item Attributes Tab"
"Item Local Tab"
"Item Commodity Codes Tab"
"Item Documents Tab"
"Item Environmental Social Governance Tab"
"Item Customs Tab"
Click the Initiate Databot button to open the Databot Builder. Please see the "Creating Databot Using Databot Builder" section for more information.
Click the View Databot Details button.
The List of Databots popup window displays.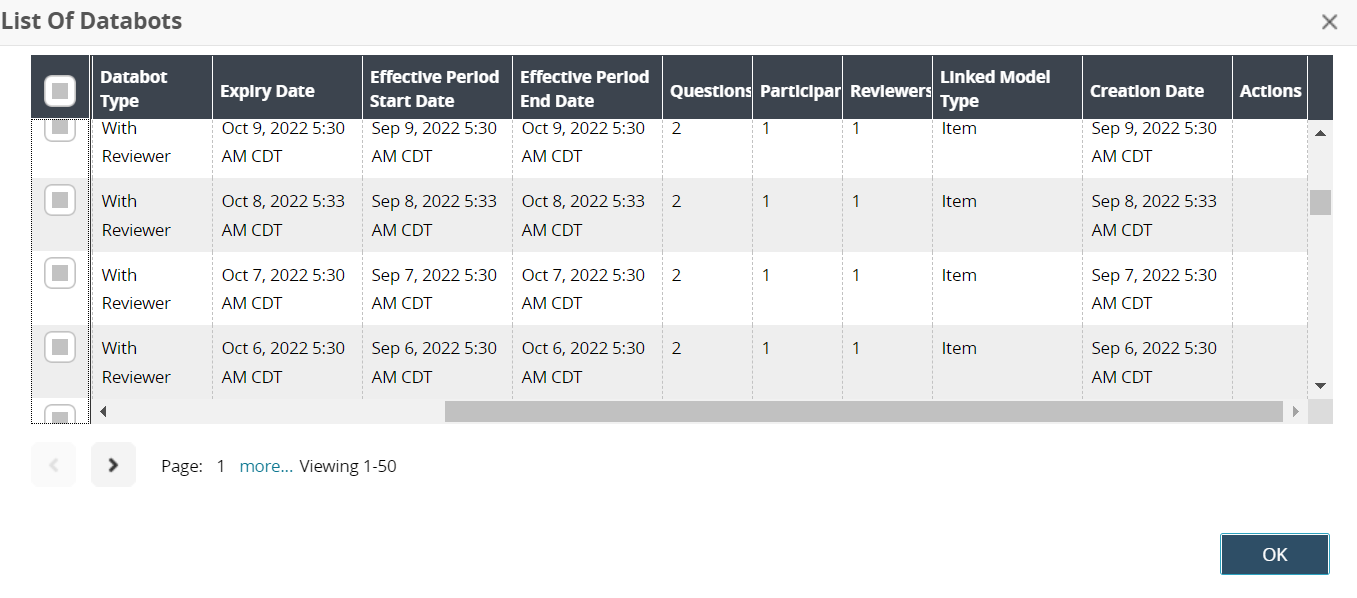
Click the checkbox(es) to select databot(s), and click on the OK button.