Adding Itineraries
Users can add itineraries for movements and shipments from both the Search Movements and Search Shipment screens. From both screens, users can add an itinerary from a shipment's contextual menu (blue icon). The example described below uses the contextual menu on the Search Shipments screen.
Complete the following steps to add itineraries:
L og in to the ONE system.
Click Menus/Favs > Transportation > Search Shipments.
The Search Shipments screen displays.
Search for movements in the Awaiting status. See the "Searching Shipments" section in the Online Help for more information.
Click the contextual menu (blue triangle) in the Shipment cell, and select Add Itinerary.
The Add Itinerary details screen for the selected shipment displays with no legs under the Itinerary section.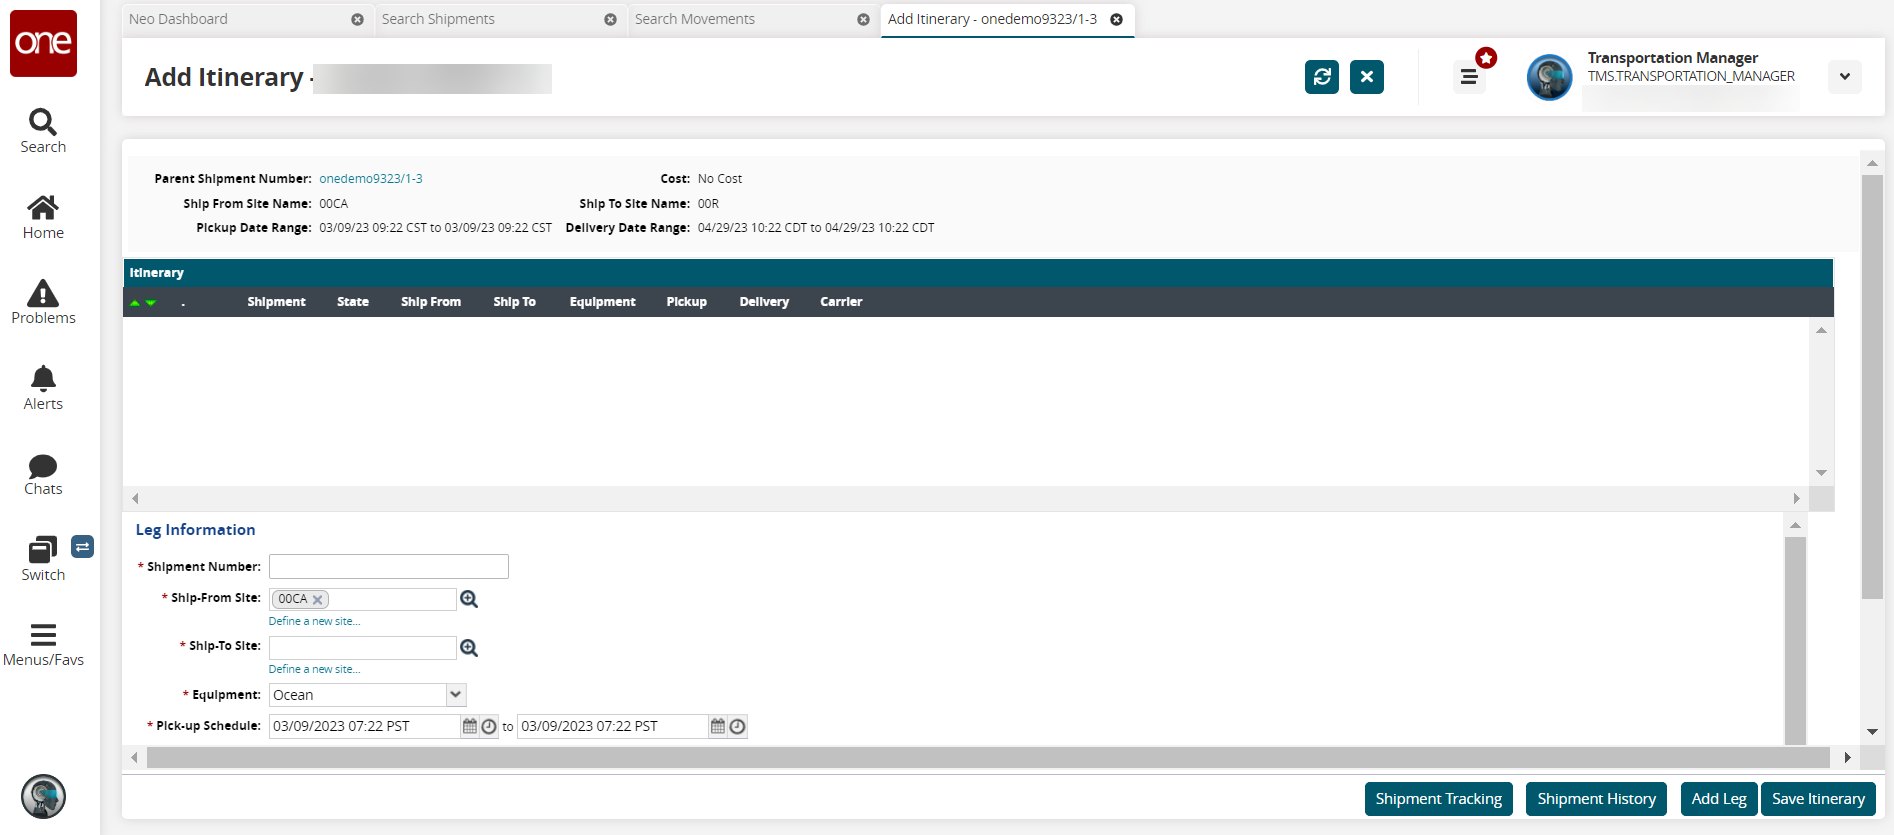
Enter values for fields described in the table below. Fields with an asterisk ( * ) are required.
Field
Description
* Shipment Number
Enter the shipment number
* Ship-From Site
Use the picker tool to select an existing origin site or click the link to define a new site. The following instructions describe defining a new site:
Click the Define a new site.... link.
The *Ship From Address field displays.Click the box or the edit icon (pencil).
A popup box for the new site address displays.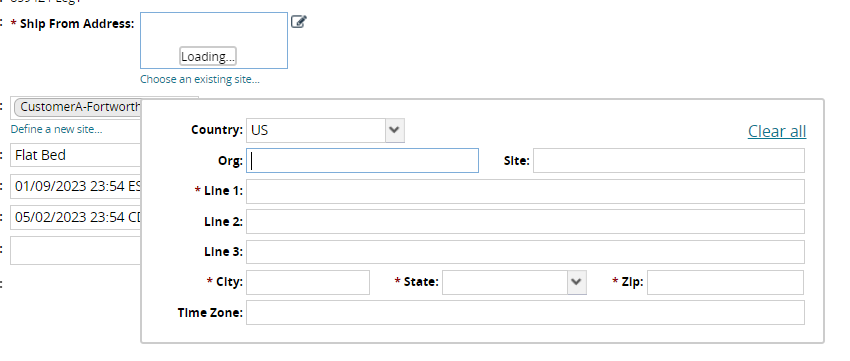
Enter values for fields described in the table below. Fields with an asterisk ( * ) are required.
Field
Description
Country
Select a country code from the dropdown list. Please note that the rest of the fields in the popup may change based on the address format for that country.
Org
Enter the organization name.
Site
Enter a name for the site.
* Line 1
Enter the primary address line.
Line 2
Enter a second address line.
Line 3
Enter a third address line.
* City
Enter the city for the site.
* State
Enter the state for the site.
* Zip
Enter the ZIP or postal code for the site.
Time Zone
Enter the time zone for the site.
Click inside the box.
The site information populates the field.
* Ship-To Site
Use the picker tool to select an existing destination site or click the link to define a new site.
* Equipment
Select the equipment from the dropdown list.
* Pick-up Schedule
Use the calendar and clock tools to enter the beginning and end dates for the pickup.
* Delivery Schedule
Use the calendar and clock tools to enter the beginning and end dates for the delivery.
Carrier
Use the picker tool to select a carrier.
Service Level
This field auto-populates based on carrier information from the system.
Carrier Cost
This field auto-populates based on carrier information from the system.
Click the Save Leg button.
The screen refreshes and updates the information in the Itinerary section.Click the Shipment Tracking button.
The Tracking Event screen for the shipment displays.Click the Shipment History button.
The History Page screen for the shipment displays.Click the Add Leg button.
A set of fields to define the new leg displays. See the description above.Click the Save Itinerary button.
The screen refreshes and updates the information.