Assigning Resources to Movements
You can edit current resource assignments or complete missing resource assignments.
Complete the following steps to assign resources for movements:
L og in to the ONE system.
Click Menus/Favs > Fleet Mgmt > Resource Assignment. In the NEO UI, users can click on the Menus/Favs icon on the left sidebar and type in the name of the screen in the menu search bar. For more information, see "Using the Menu Search Bar."
The Resource Assignment screen displays.Select the site in the Explorer pane.
The Movement Schedule pane displays. Each movement shows the default date range of -2 to +2 days from the current date.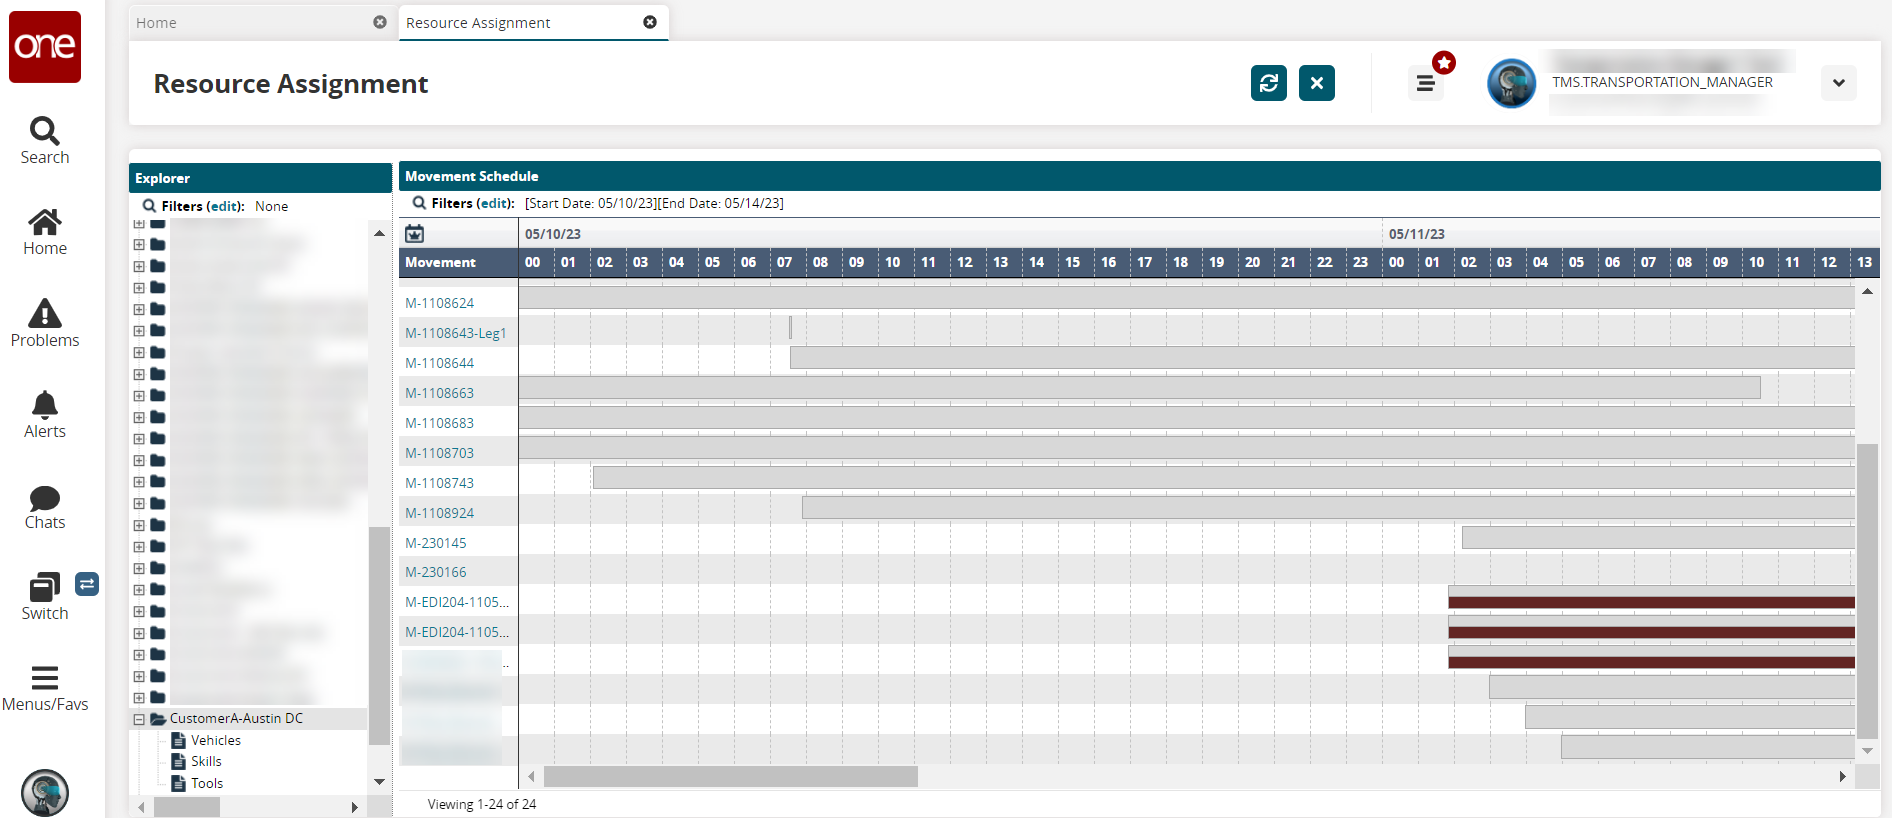
Click the movement's timeline block.
The detail pane displays at the bottom of the Movement Schedule pane. A list of assigned resources also displays.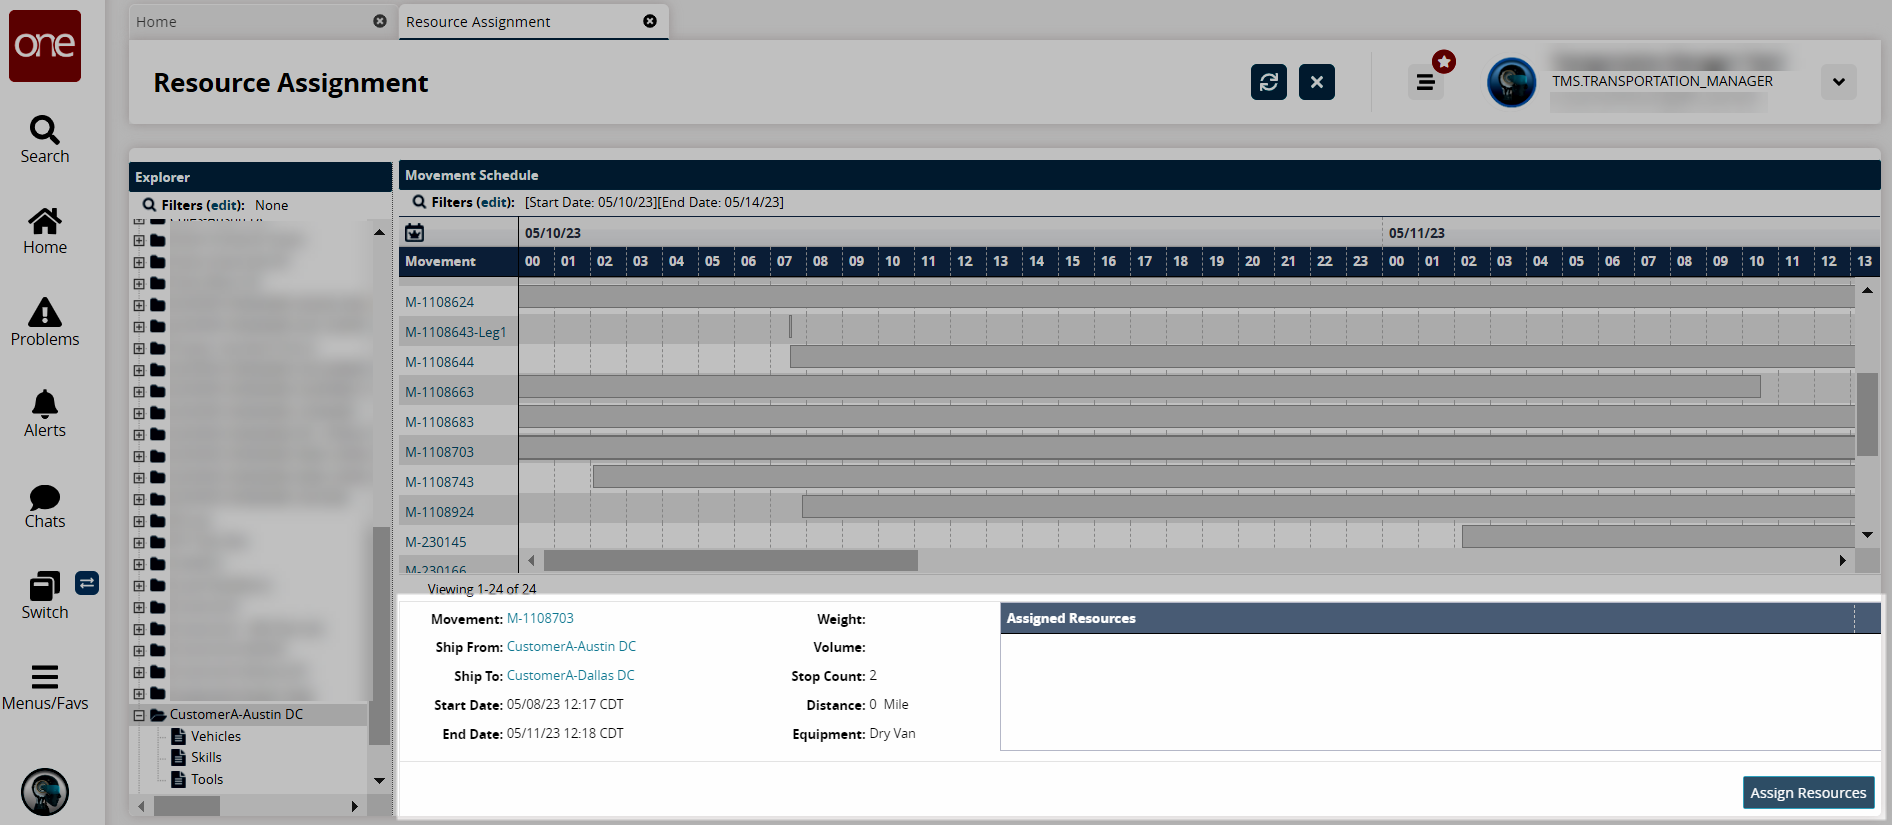
Click the Assign Resources button.
The movement's resource assignment screen displays with the Movement section auto populated. The following movement has no resources assigned to it.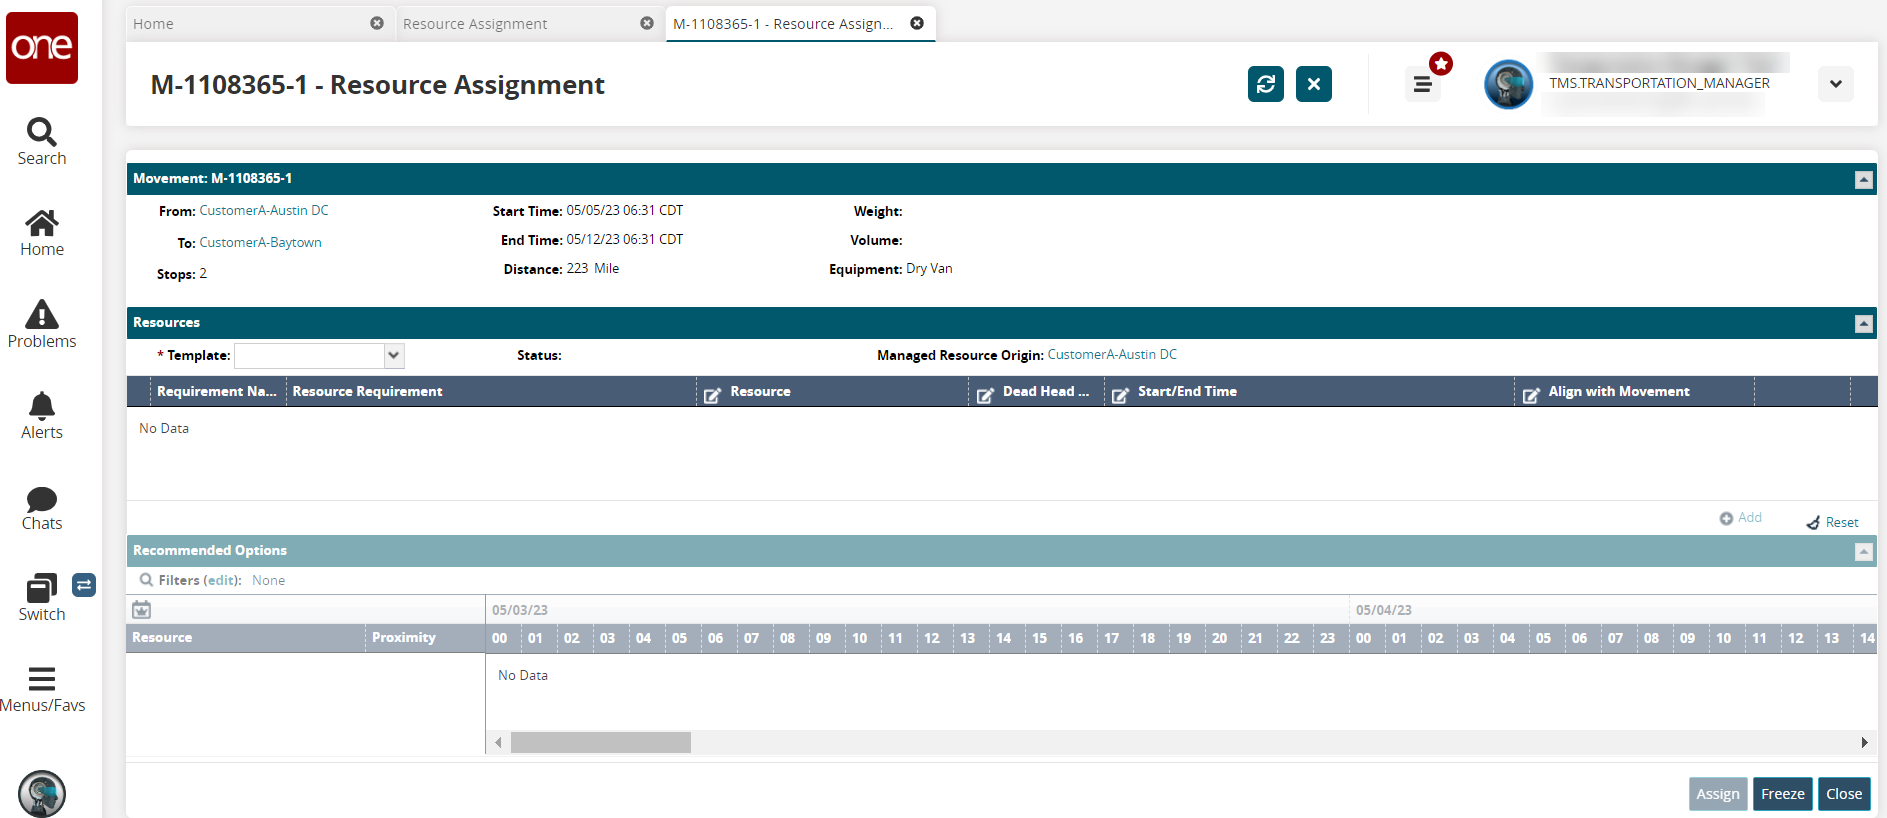
Select an option from the dropdown list for the * Template field. Fields with an asterisk ( * ) are required.
The Resources section updates.If you change the template for an existing resource assignment, a warning message displays: "All assignments made through this template will be discarded." Click the OK button to change the template and continue.
Click in a cell with an edit icon (pencil) to schedule the resources manually. See the instructions below to schedule resources based on system recommendations.
Use the picker tool to select a value in the Resource column.
Select Yes or No for the Dead Head Managed column.
Use the calendar and clock tools to set the days and times in the Start/End Time column to set the range manually, or click the checkbox for Yes or No in the Align with Movement column to populate the range from the movement's start and end times as shown in the header section of the screen.
The Assign button activates. See step 11 to continue.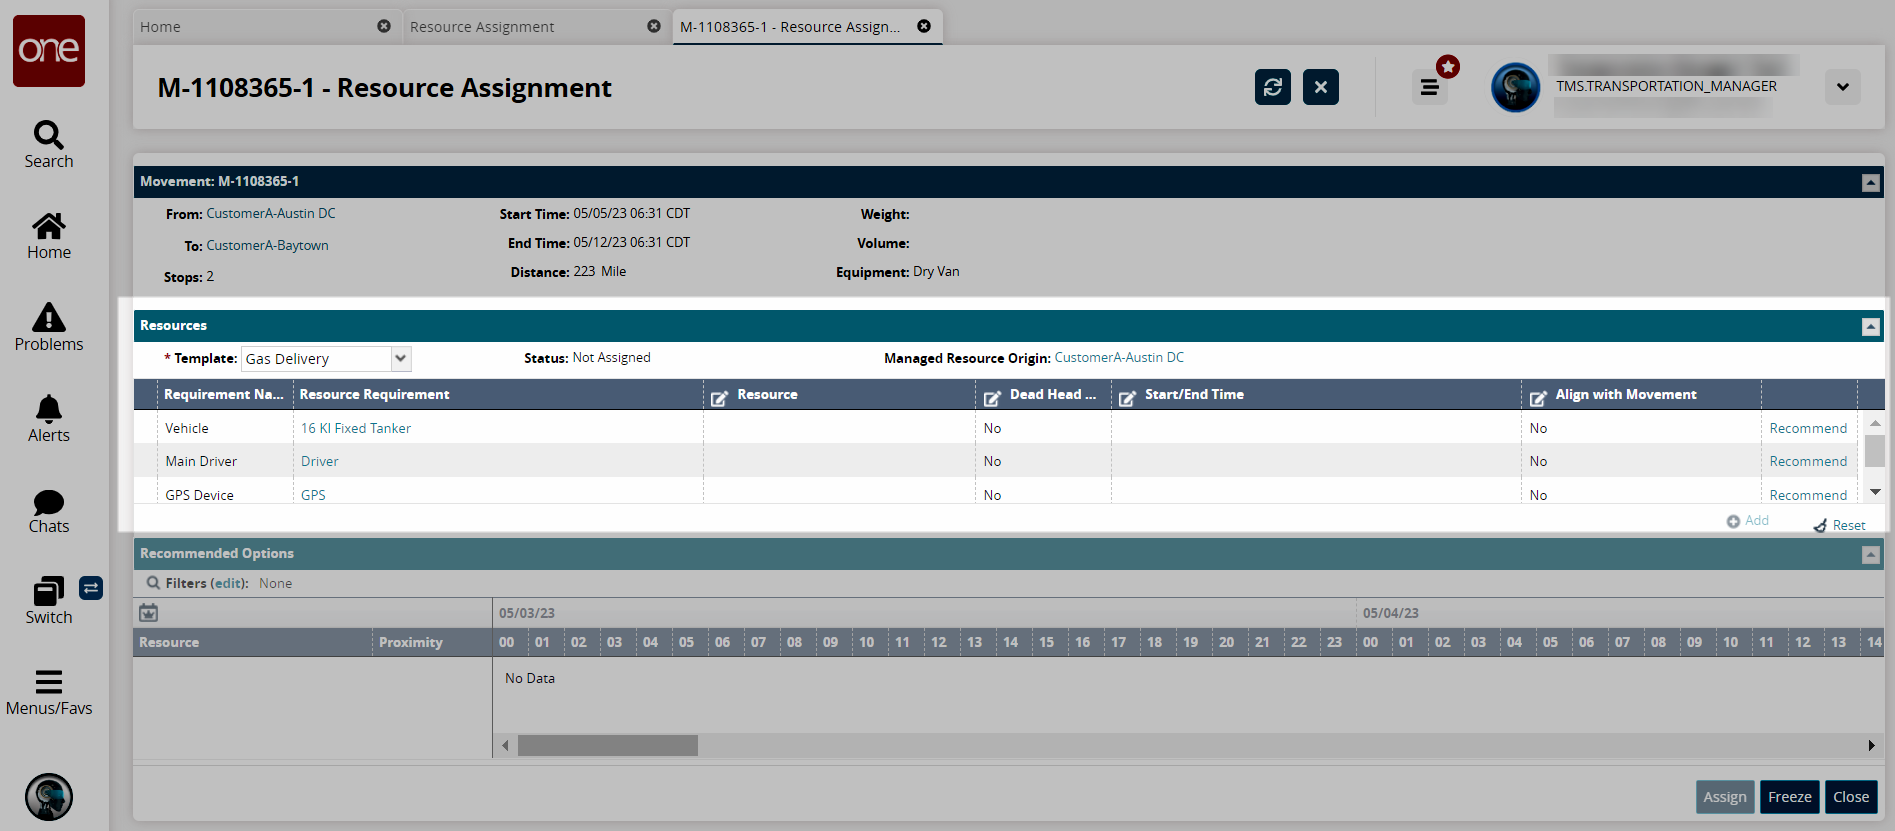
Click the Recommend link to schedule resources based on system recommendations.
The recommended resources update in the Recommended Options section.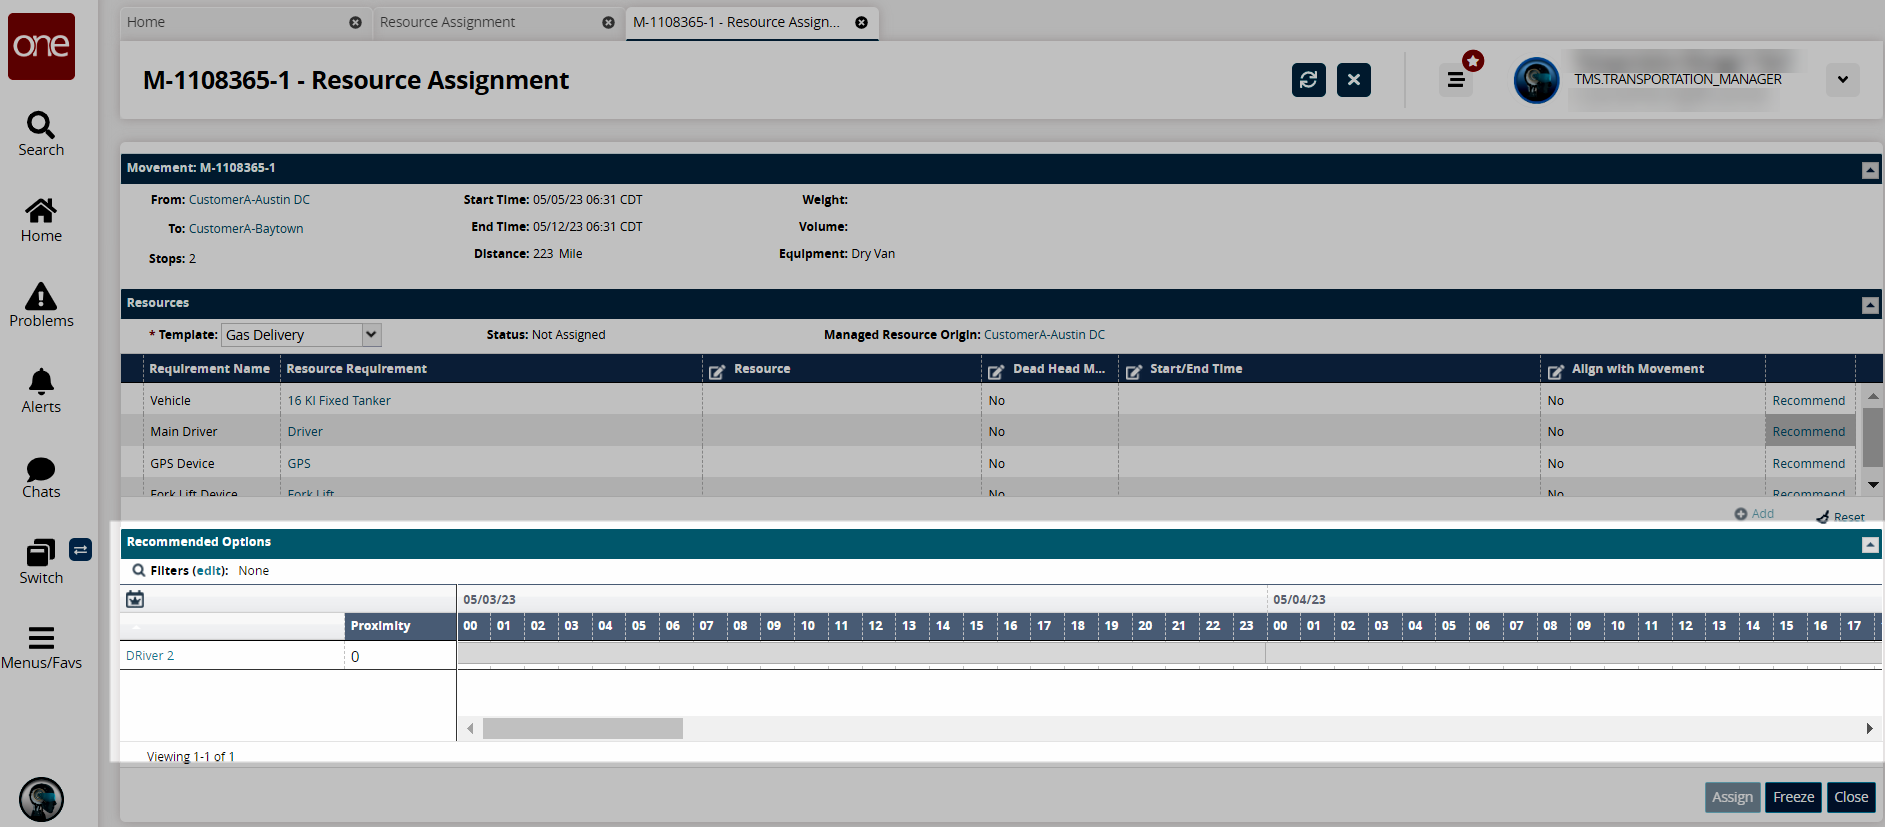
Recommendations are based on the resource being in that geographical area at the time of current movement requirements.
Consideration for other already assigned resources will be given. For example: If Driver "John Doe" has already been selected as a resource, and if John Doe is working with another resource before taking this move, resources used in the previous move will be considered.
Click the bar for the resource desired.
The Assign button activates.Click the Add button to add a new resource in the Resources section.
A new resource row displays.Click the Reset button to reset the template to the previous settings.
A confirmation popup displays.Click the Yes button.
A green success message displays.Click the Assign button to assign the resources to the movement.
A green success message displays.Click the Freeze button to freeze the movement.
A green success message displays, and the button now displays as Unfreeze.Click the Unfreeze button to unfreeze the movement.
A green success message displays.Click the Close button to close this screen in the UI.