Attaching Carrier and Shipper Terms to Shipments
The Transportation Manager role can attach both the Carrier Terms and Shipper Terms to shipments. Users can attach the terms files using different workflows as described below. Users can add carrier and/or shipper terms documents when saving a shipment in the Awaiting state to Confirmed. This option can be accessed from the Actions menu or from the contextual menu (blue icon) if it is available. Both menus show only the menu options available for the movement or shipment in its current state.
Adding Terms Using the Save To Confirmed Option
Complete the following steps to attach carrier and shipper terms using the Save To Confirmed option:
L og in to the ONE system.
Search for shipments in the Awaiting state using the process described in the "Searching Shipments" section of the Online Help.
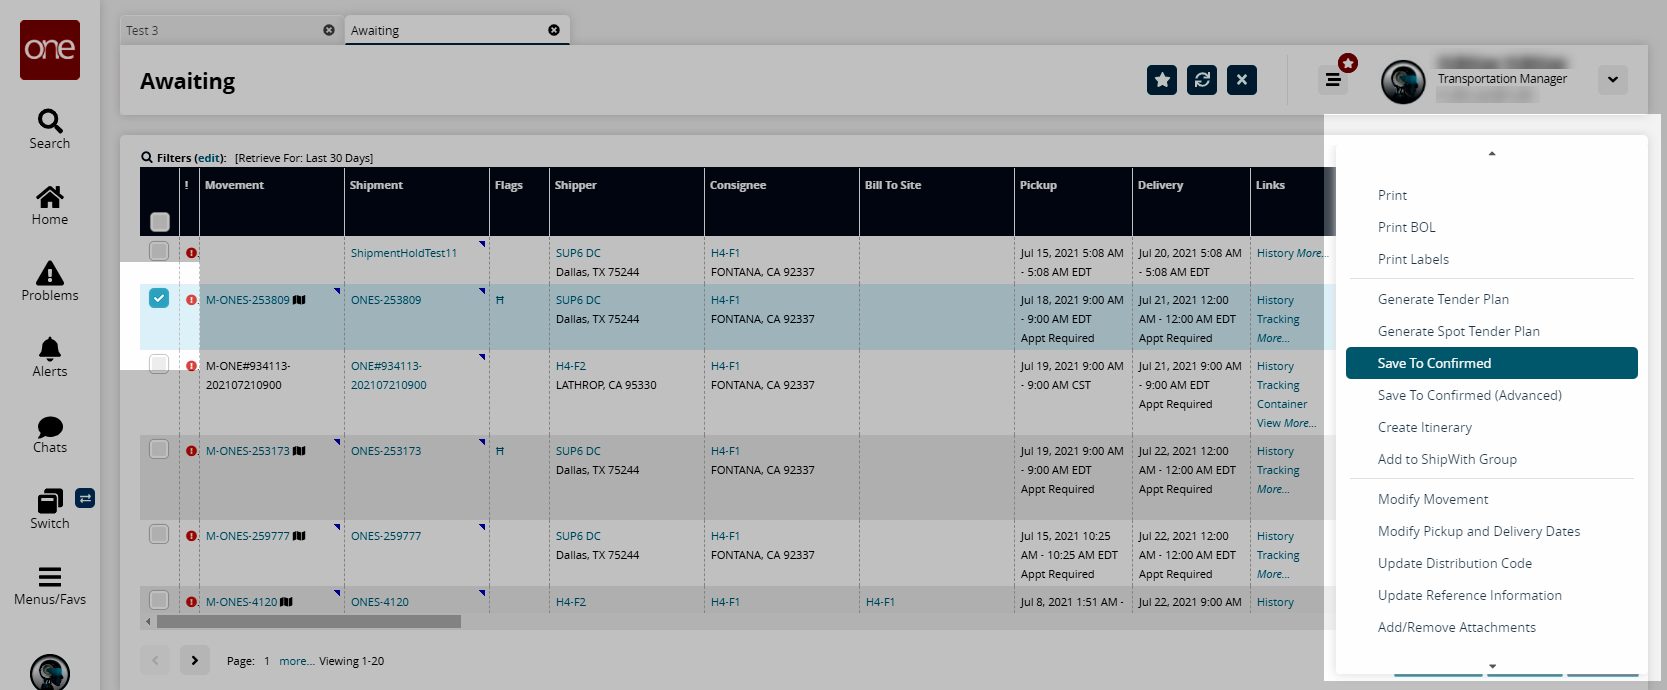
Select the checkbox of the shipment number that you want to perform an action on and then click on Actions > Save to Confirmed. You can also select this option from the contextual menu (blue icon) for the movement or shipment.
The Save To Confirmed popup displays.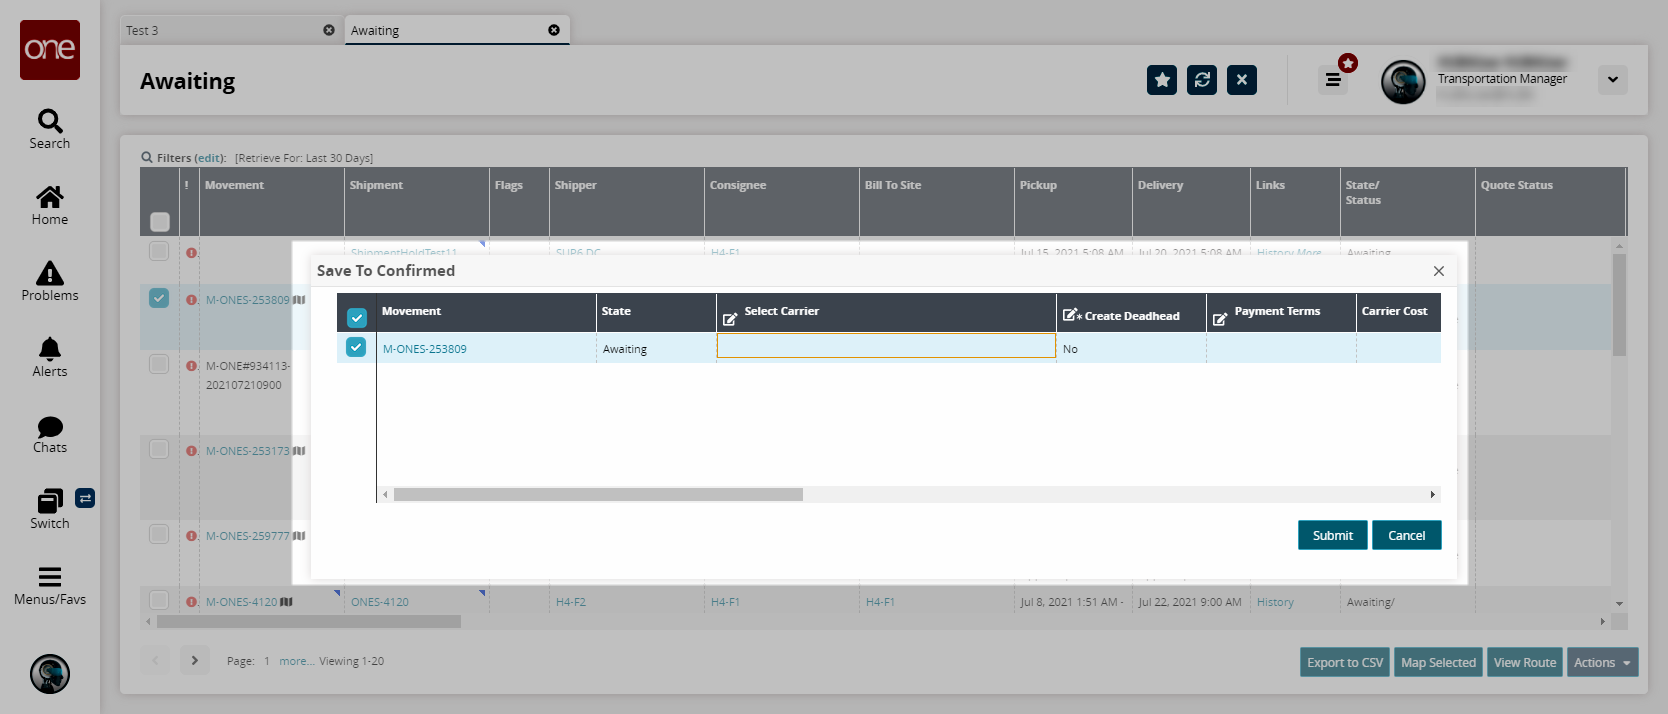
Select a Carrier using the picker tool.
Click the Upload link in the Carrier Terms and/or Shipment Terms fields.
Your computer's Open dialog box displays.Select a file from your computer, and click the Open button.
The file displays in the popup.Click the Submit button.
A success message displays.Click the Close and Refresh button.
The terms documents are now attached to the tender plan of the shipment or movement.
Adding Terms Using the Save To Confirmed (Advanced) Option
Complete the following steps to attach carrier and shipper terms using the Save To Confirmed (Advanced) option:
L og in to the ONE system.
Search for shipments in the Awaiting state using the process described in the "Searching Shipments" or "Searching Movements" sections of the Online Help.
Select the checkbox of the movement or shipment number that you want to perform an action on and then click on Actions > Save to Confirmed (Advanced). You can also select this option from the contextual menu (blue icon) for the movement or shipment.
The popup displays sections for movement and carrier information.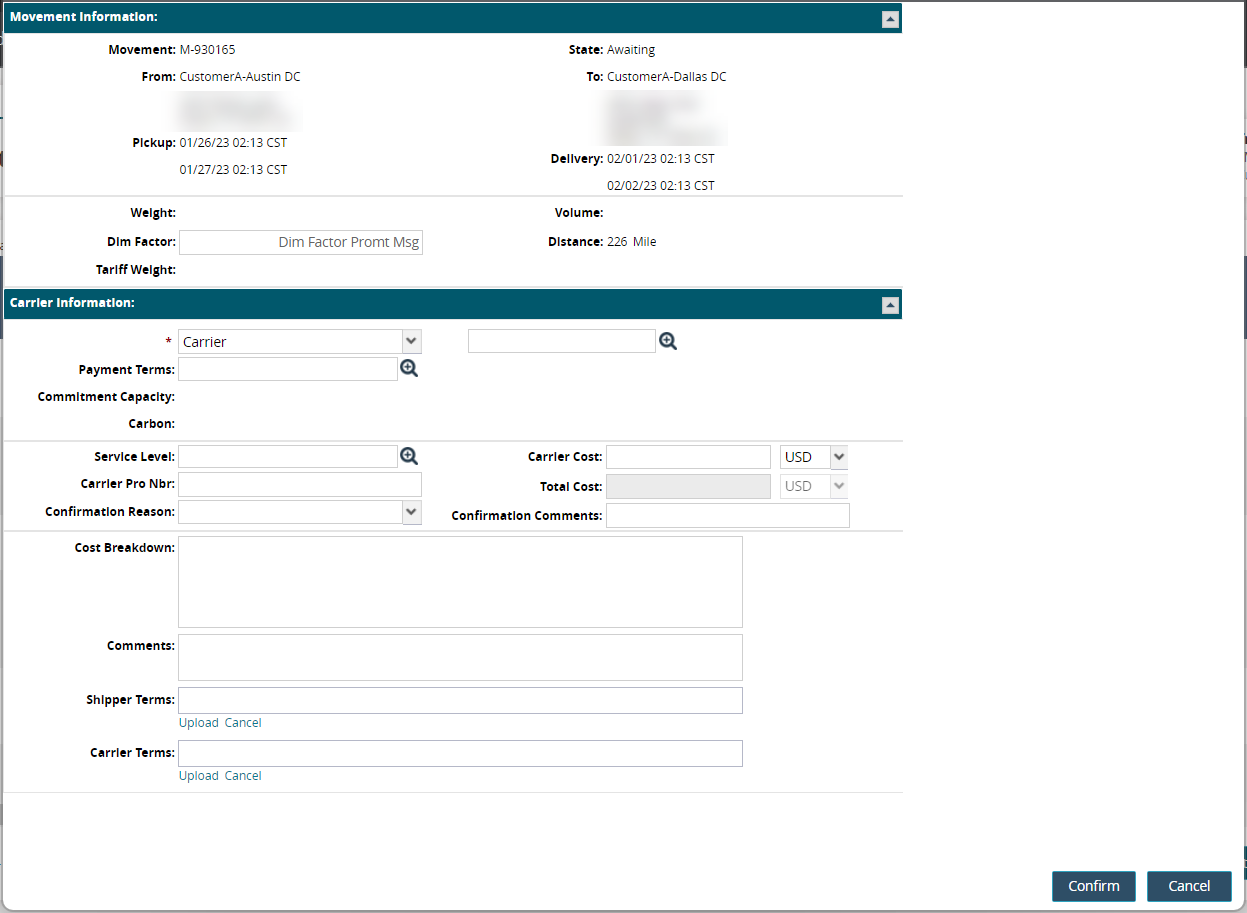
Select a Carrier using the picker tool.
Click the Upload link for the Carrier Terms and/or Shipment Terms fields.
Your computer's Open dialog box displays.Select a file from your computer, and click the Open button.
The file is added in the popup.Click the Confirm button.
A success popup displays.Click the OK button.
Click the Close and Refresh button.
The terms documents are now attached to the tender plan of the movement or shipment.
View and Download Carrier Terms on the Tender Details Page for Shipments
L og in to the ONE system.
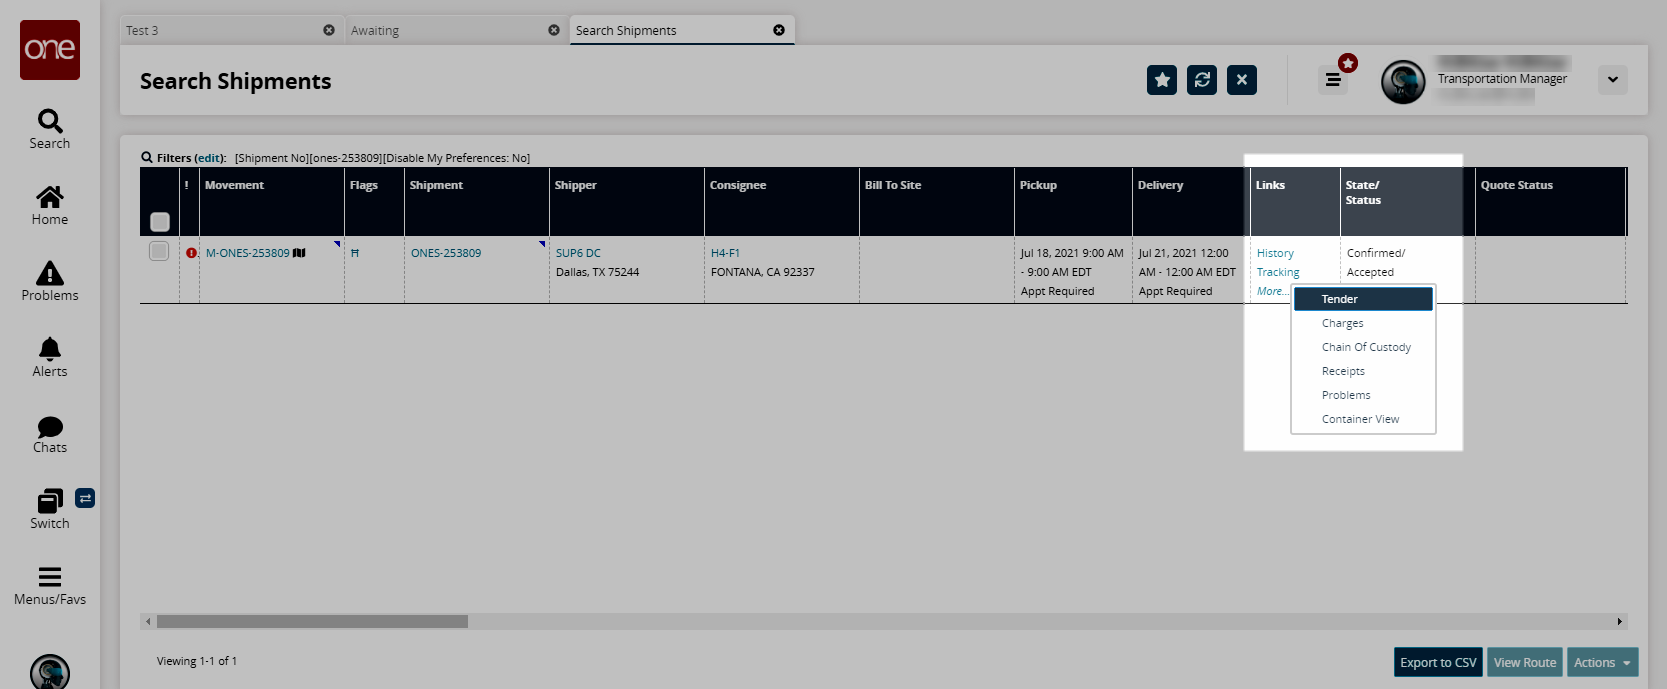
Click Menus/Favs > Transportation > Search Shipments.
The Search Shipments page displays.Click the Tender link in the Links column for the movement/shipment.
The tender details screen displays.
Scroll across the columns in the Tender Plan to locate the Carrier Terms field.
Click on the attachment link to download the file to your computer.