Create a Demand Planning Scenario
The Demand Planning engine supports multiple scenarios. Forecasting can be run for different scenarios, and the results can be compared. A scenario holds all the parameters necessary to run the forecasting engine. They include the statistical forecasting technique to use, model names for demand history data, split ratios, and output forecasts. A number of scenarios can be saved in the system, however, no more than three scenarios may be active at the same time. Only one of the active scenarios may be used for replenishment.
Complete the following steps to create a Demand Planning scenario:
L og in to the ONE system.
Click Menus/Favs > Demand Planning > Simulation > Create DP Scenario.
In the NEO UI, users can click on the Menus/Favs icon on the left sidebar and type in the name of the screen in the menu search bar. For more information, see "Using the Menu Search Bar."
The Create DP Scenario screen appears.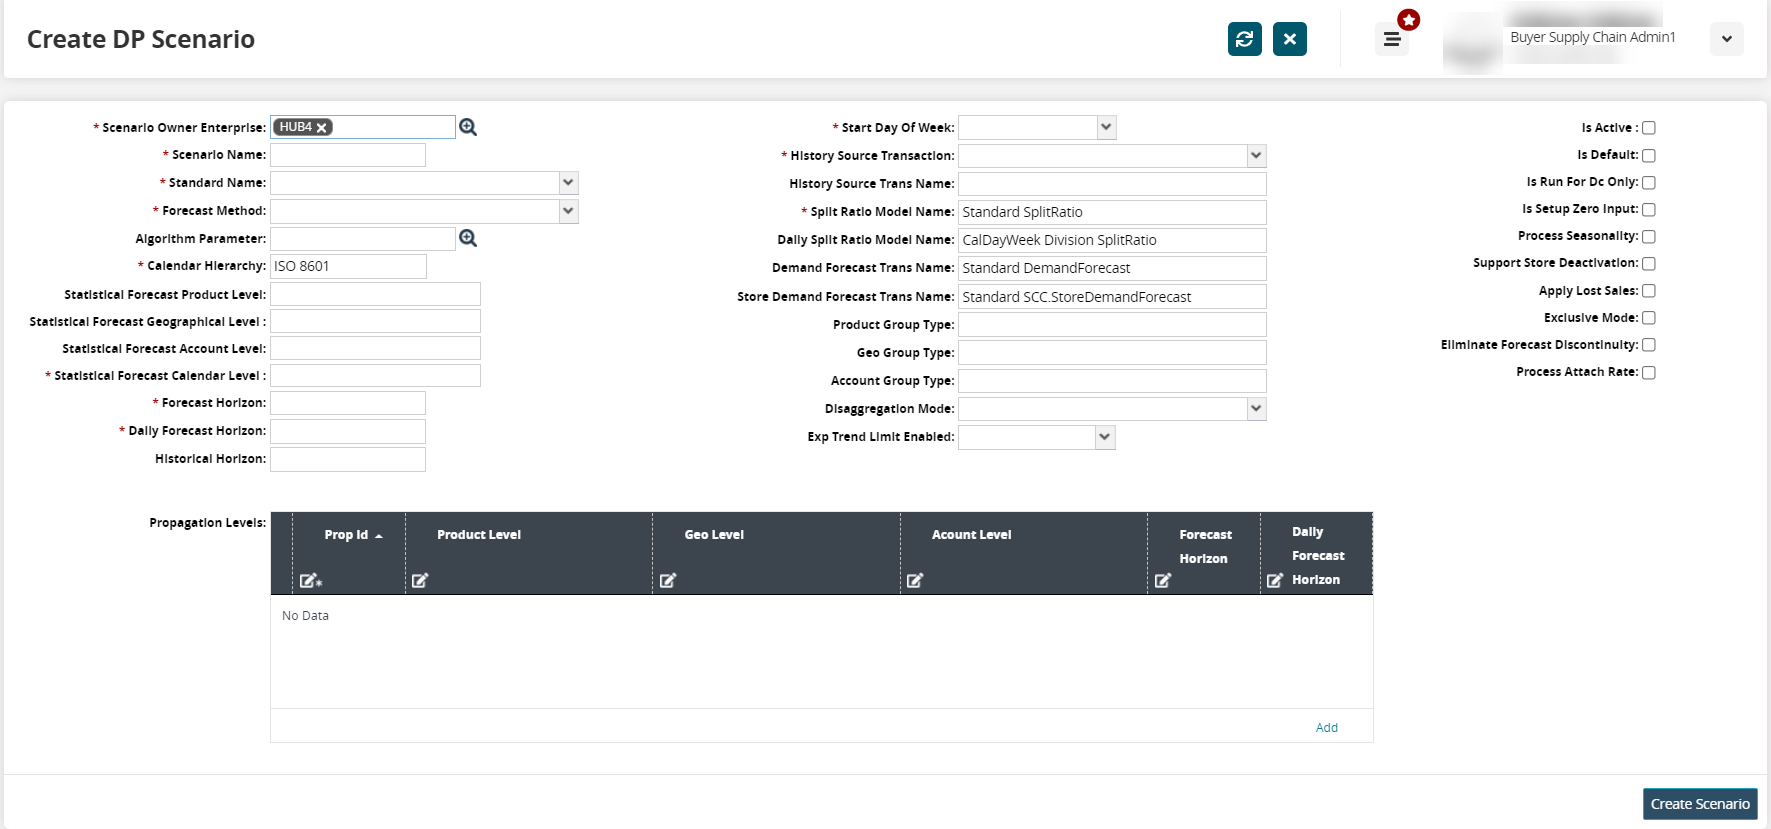
Enter values for fields described in the table below. Fields with an asterisk ( * ) are required.
Column 1
Field Name
Description
* Scenario Owner Enterprise
Use the picker tool to select an enterprise for the DP Scenario.
* Scenario Name
Type a name for the DP Scenario.
* Standard Name
Select a standardized name for the DP Scenario. Defines which set of columns is processed by the scenario.
Forecast Method
Use the picker tool to select an algorithm used to forecast the current scenario.
Algorithm Parameter
Use the picker tool to select an algorithm parameter.
* Calendar Hierarchy
Type the hierarchy used for the scenario calendar. The default value is ISO 8601.
Statistical Forecast Product Level
Select a product level for the forecast.
Statistical Forecast Geographical Level
Select a geographical level for the forecast.
Statistical Forecast Account Level
Select an accounting level for the forecast.
* Statistical Forecast Calendar Level
Choose either a yearly, monthly, weekly, or daily calendar level.
* Forecast Horizon
Enter a plot point for the forecast.
* Daily Forecast Horizon
Enter a daily representation of the forecast horizon.
Historical Horizon
Enter a value to specify the limit of historical data to use in forecasting.
Column 2
* Start Day Of Week
Select the day of the week on which the calendar begins.
* History Source Transaction
Select the source for the aggregated transaction history for the scenario.
History Source Trans Name
Type in a name for the History Source Transaction.
* Split Ratio Model Name
Select the name for the split ratio model. The default value is Standard SplitRatio.
Daily Split Ratio Model Name
Select the daily split ratio model. The default value is CalDayWeek Division SplitRatio.
Demand Forecast Trans Name
Select the demand forecast transaction name. The default value is Standard DemandForecast.
Store Demand Forecast Trans Name
Select the demand forecast transaction name. The default value is Standard SCC.StoreDemandForecast.
Product Group Type
Select the hierarchical group type for products that are waiting to be forecast.
Geo Group Type
Select the geographical hierarchy group type.
Account Group Type
Select the account group type.
Disaggregation Mode
Select a disaggregation mode from the dropdown list.
Exp Trend Limit Enabled
Select Yes or No to enable the exponential trend limit.
Column 3
Is Active
Check this box to make the scenario active.
Is Default
Check this box to make the scenario the default scenario for the DP engine.
Is Run For DC Only
Check this box to run for distribution centers only.
Is Setup Zero Input
Check this box for the scenario to run without input.
Process Seasonality
Check this box to process using a seasonality scheme.
Support Store Deactivation
Check the box to support the deactivation of a store.
Apply Lost Sales
Check this box to factor in lost sales for the demand planning scenario.
Exclusive Mode
Check this box so that other scenarios can't override forecasts produced by this scenario.
Eliminate Forecast Discontinuity
Chick this box to eliminate the forecast discontinuity.
Process Attach Rate
Check this box to process the attached rate.
To add Propagation Levels, click the Add link.
A row is added to the table.Enter values for fields described in the table below. Fields with an asterisk ( * ) are required.
Field
Description
*Prop ID
This field is auto-populated.
Product Level
Select a product level.
Geo Level
Select a geographical level.
Account Level
Select an account level.
Forecast Horizon
Enter a value for the forecast horizon.
Daily Forecast Horizon
Enter a value for the daily forecast horizon.
Click the Create Scenario button.
A success message appears.Tip
To make any changes to the scenario, click the Update button at the bottom of the page.