Creating Business Rules
Complete the following steps to create business rules:
L og in to the ONE system.
Click Menus/Favs > Tools > Business Rules.
The Business Rules screen appears.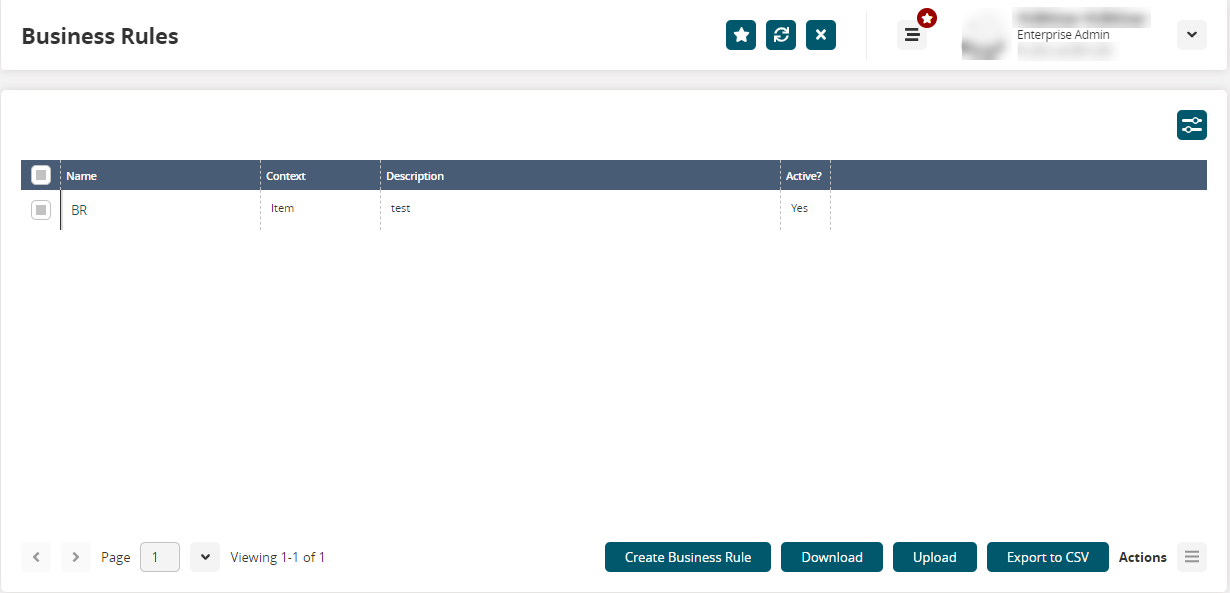
Click Create Business Rule.
The Create Business Rule popup window appears.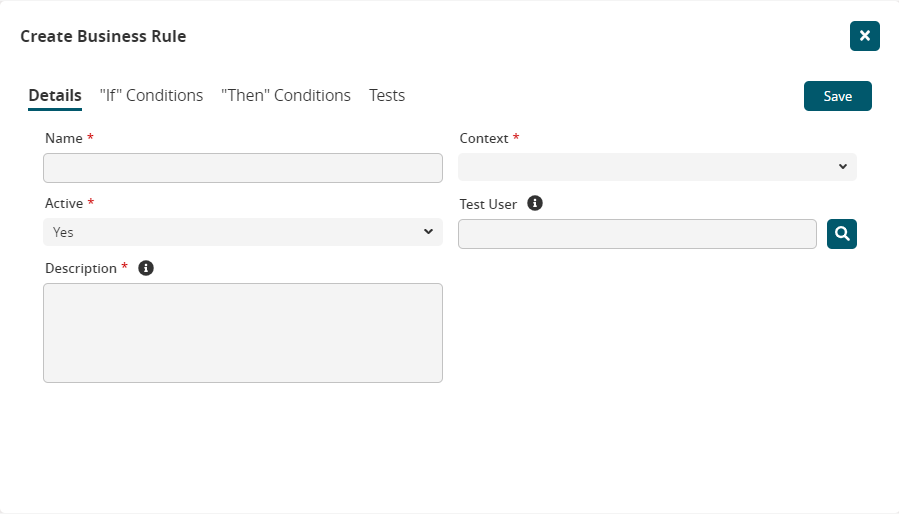
Fill out the following fields. Fields with an asterisk ( * ) are required.
Field
Description
Name *
Enter a name for the new business rule.
Context *
Select a context from the dropdown menu.
Active *
Select Yes to mark the business rule as active, or select No to mark it as inactive.
Test User
Type a user name or use the picker tool to select the test user. If a user name is specified, the validation is only executed for that specific user.
Description *
Type a description for the business rule. Users see this description if the validation fails.
Click "If" Conditions to go to the next tab.
The "If" Conditions tab appears.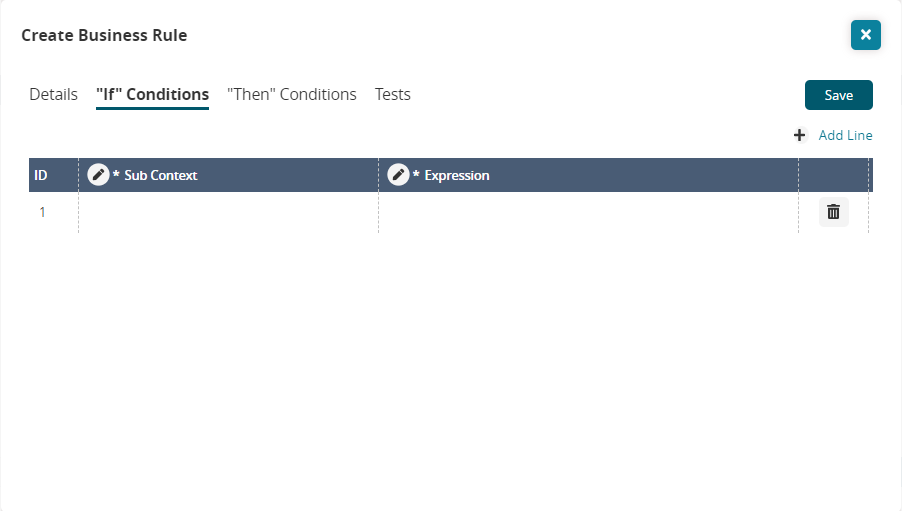
Click Add Line.
In the * Sub Context column, click inside the field.
A Sub-Context popup appears.Select a sub-context from the dropdown field, and then click Apply.
In the * Expression column, click inside the field.
The Configure "IF" expression popup window appears.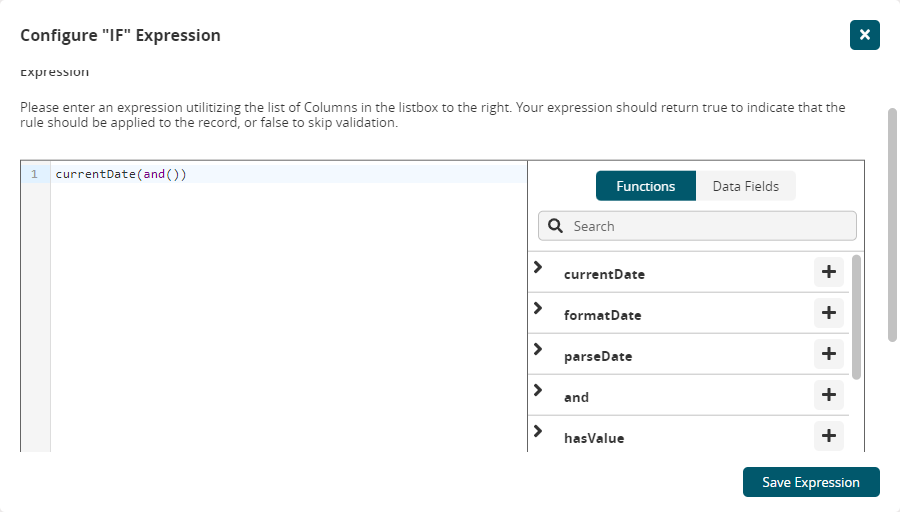
Select a function by clicking the (+) sign next to it or click Data Fields and select a data field.
Click Save Expression.
Click the "Then" Conditions to go to the next tab.
The "Then" Conditions tab appears.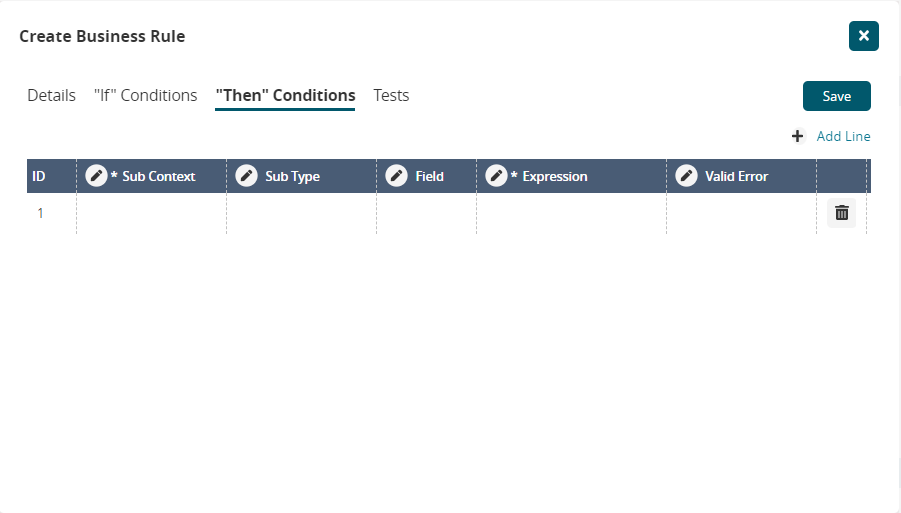
Click Add Line and fill in the following fields. Fields with an asterisk (*) are required.
Field
Description
ID
This field is auto-populated.
*Sub Context
Select a sub-context from the dropdown menu and click Apply.
Sub Type
Select a subtype from the dropdown menu and click Apply.
Field
Select a field from the dropdown menu and click Apply.
*Expression
Click to enter a valid condition and click Apply.
Valid Error
Click to enter a validation error message.
Click Save.
Adding Validation Tests
Click the Tests tab on the Create Business Rule popup window.
The Tests tab appears.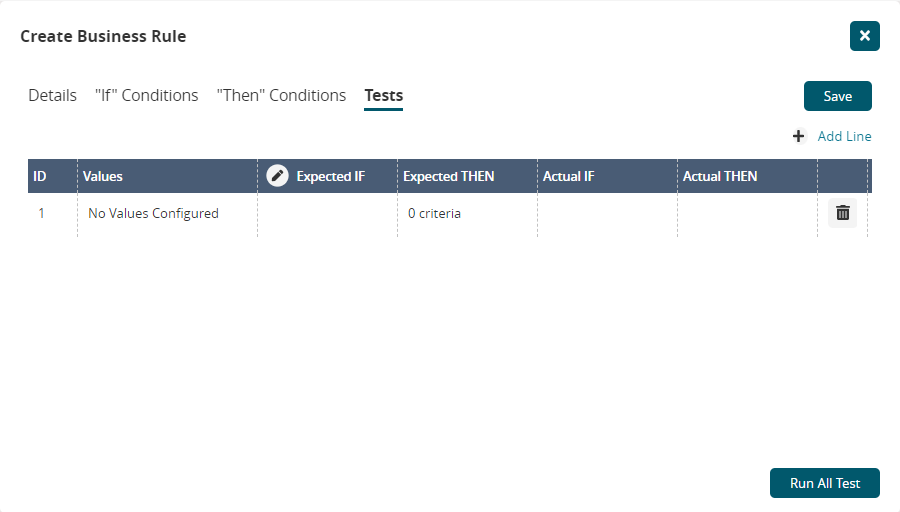
Click Add Line.
Click in the Values column.
A popup window appears.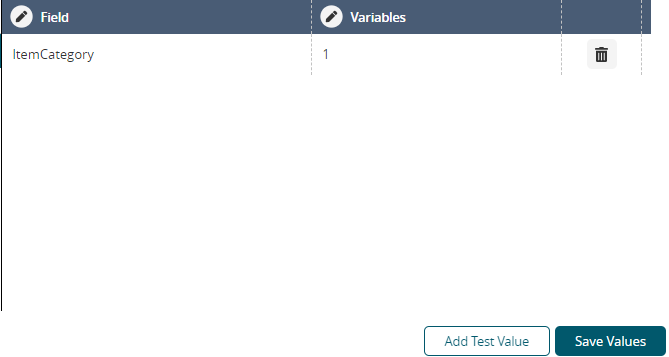
In the Fields column, select a value from the dropdown menu and click Apply.
In the Variables column, type the variable value.
Click Add Test Value to add more tests.
Click Save Values.
A success message appears.