Creating EDI Subscriptions
To create EDI subscriptions:
From the Tools menu, click New EDI Subscription.
The New EDI Subscription tab appears.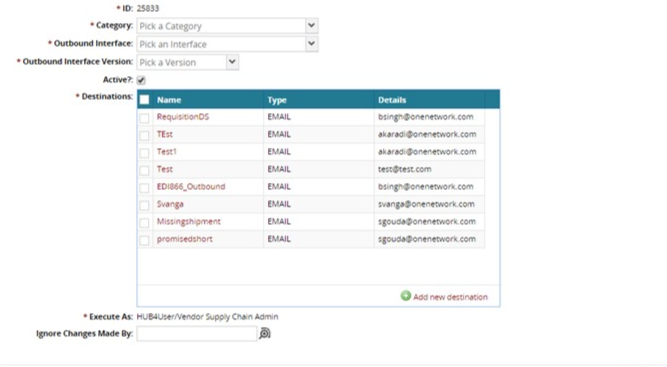
In the Category list, select a category option.
In the Outbound Interface list, select an outbound interface option.
In the Outbound Interface Version list, select a version option.
As required, select or clear the Active? check box.
In the Destinations table, to add new message destinations, click Add new destination .
The New Message Destination dialog box appears.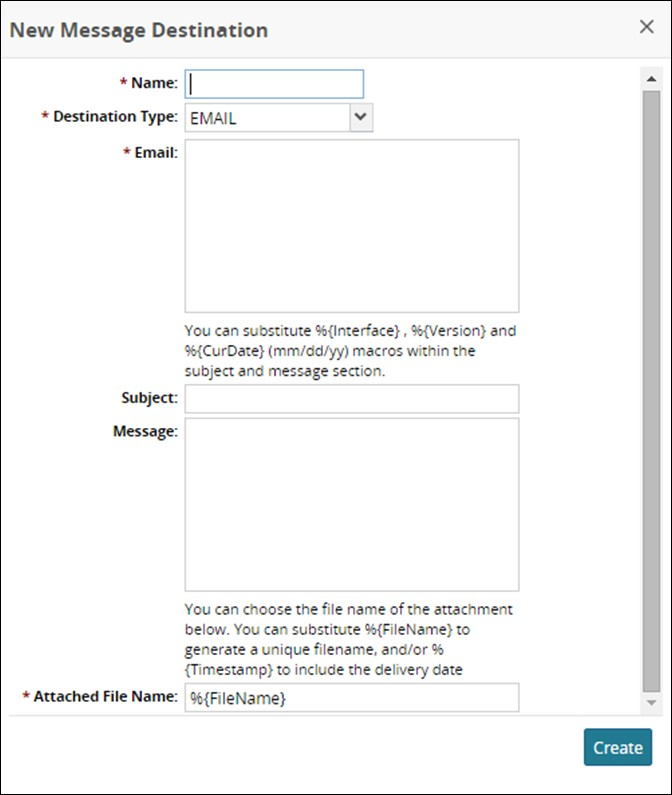
In Name, type the name of the new destination.
In the Destination Type list, select EMAIL or SFTP.
In the Email box, type the e-mail addresses of the new recipient.
In Subject, type the name of the report that appears the subject line of the e-mail.
In the Message box, type a brief message to be included with each e-mail.
In Attached File Name, type a file name for the attachment, or use %{FileName} to generate a unique file name each time the message is sent.
Click Create.
A success message appears.Close the New Message Destination box.
The new destination appears in the Destinations table.Select at least one destination from the table.
To set a schedule, in the Schedule table, click Add .
A new schedule row appears.Enter an option for the day and enter an option for the time of day.
Repeat this for each additional required report schedule.
After all EDI subscriptions have been specified, click Create.
A success message appears.