Creating Receivable Invoices
Complete the following steps to create a receivable invoice:
L og in to the ONE system.
Click Menu/Favs > Financials > Receivables > New Invoice.
In the NEO UI, users can click on the Menus/Favs icon on the left sidebar and type in the name of the screen in the menu search bar. For more information, see "Using the Menu Search Bar."
The New Invoice screen displays.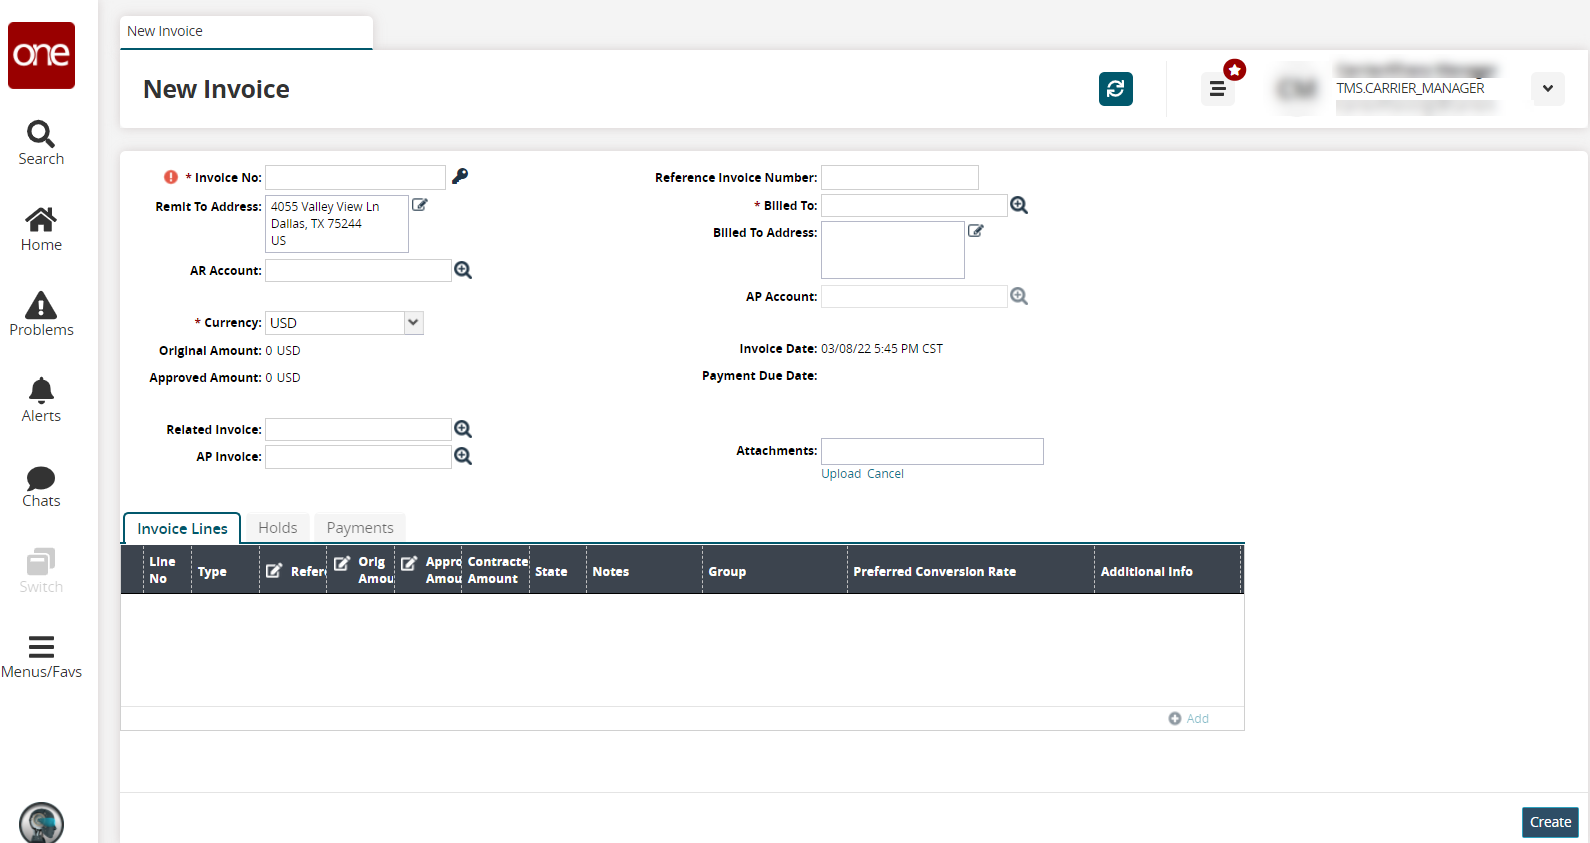
Fill out the following fields. Fields with an asterisk ( * ) are required.
Field
Description
* Invoice No
Enter an invoice number or click the key icon to create an auto-generated number.
Remit To Address
This field may be automatically populated based on the organization. Otherwise, click the edit icon and enter values for the fields.
Different countries will display different fields. The following example is for the US.
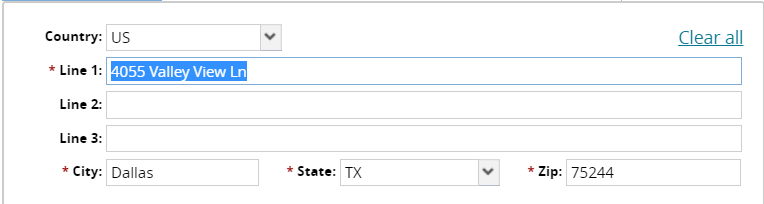
Fields with an asterisk ( * ) are required.Field
Description
Country
Select a country code from the dropdown list. The fields on this popup may vary based on the country selected.
* Line 1
Enter the physical address for this location.
Line 2
Enter a second address line, if necessary.
Line 3
Enter a third address line, if necessary.
* City
Enter the city for this location.
* State
Select a state from the dropdown list or type it in (based on the country code selected).
* Zip
Enter the ZIP or postal code.
AR Account
Use the picker tool to select the accounts receivable account for this invoice.
* Currency
Select the country code for the currency.
Original Amount
This field is auto-populated and will reflect the currency from the selected country.
Approved Amount
This field is auto-populated and will reflect the currency from the selected country.
Related Invoice
Use the picker tool to select a related invoice.
AP Invoice
Use the picker tool to select the related accounts payable invoice.
Reference Invoice Number
Enter the reference invoice number.
* Billed To
Use the picker tool to select the organization the invoice is billed to.
Billed To Address
This field will auto-populate based on the Billed To organization selected. If another address is required, click the edit icon and complete the address for the Bill To organization. The popup information is similar to that explained above.
AP Account
Use the picker tool to select the accounts payable account for the invoice.
Invoice Date
This field is auto-populated when the user opens the screen.
Payment Due Date
This field is auto-populated.
Attachments
Click the Upload link to add files from your computer as attachments to this invoice.
Click the Add link on the Invoice Lines tab.
The New Invoice Line popup will display.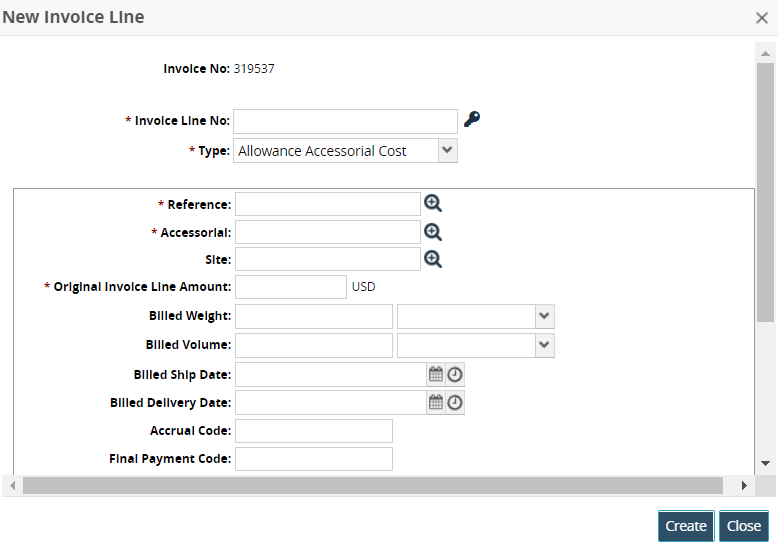
Enter a number or click the key icon for an auto-generated number for the * Invoice Line No field.
Select an invoice line type from the dropdown list in the Type field.
Every option in the Type field will offer different required and optional fields.
Click the Create button on the popup.
The invoice line populates a row in the Invoice Lines tab.Click the Create button on the New Invoice screen.
A green success message displays. After the receivable invoice has been created, the Holds and Payments tabs are active.