Creating Shortcut Widgets
Users can add a Shortcut widget to a dashboard that links to an internal screen (perspective), a user favorite within the ONE system, or an external URL. When users click this shortcut in the dashboard, the target location opens.
Complete the following steps to add a Shortcut widget:
Log in to the ONE system.
The current NEO dashboard for the user displays.Click the Edit (pencil) button to add the Shortcut widget to the current dashboard or click the My Dashboards button (
 ) to select another dashboard for the new widget, and then click the Edit button.
The editing mode for dashboards opens.If a Fixed section does not exist, click the Add Fixed Layout button.
Click the plus sign to add the widget.
The Add a Fixed Widget popup window displays a selection of widgets that can be added.Select Other Widgets from the Category dropdown menu or type in Shortcut in the Search box.
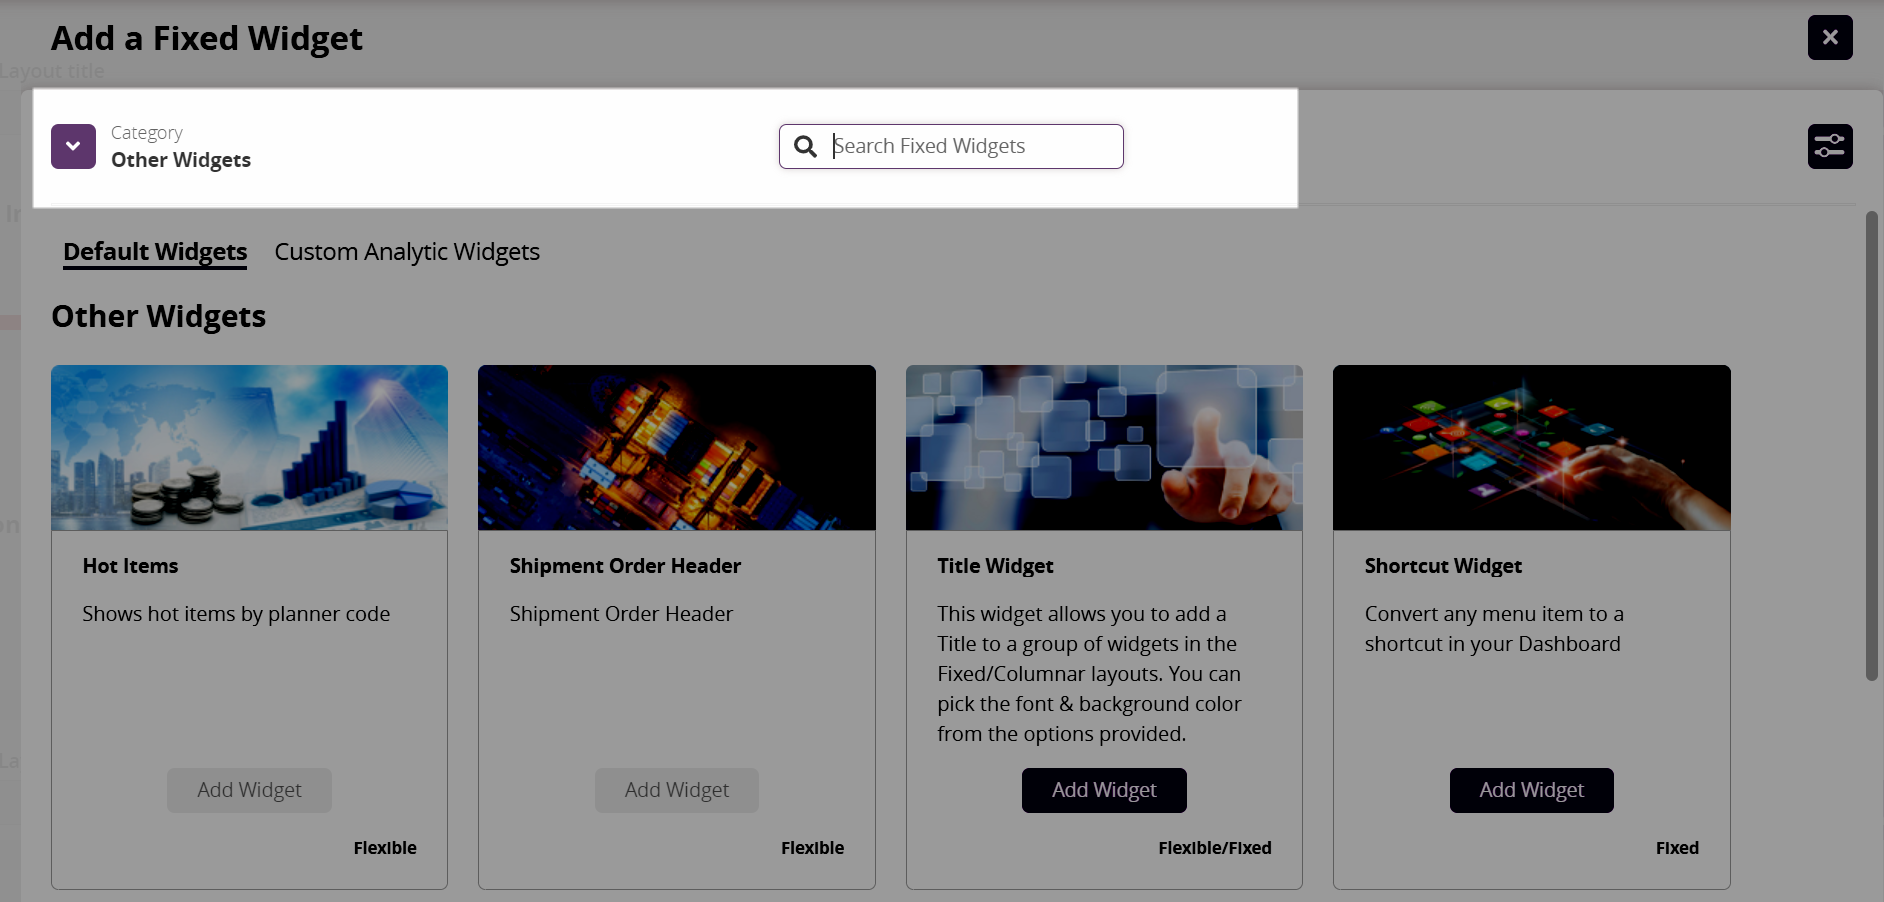
Click the Add Widget button for the Shortcut Widget.
The new widget is added to a grid in the dashboard layout.If the Add Widget button is inactive for a widget, you have clicked the plus sign for the Flexible layout. Most widgets work with either the flexible or the fixed (columnar) layout.
Hover the cursor over the widget, and click the three vertical dots.
A menu displays.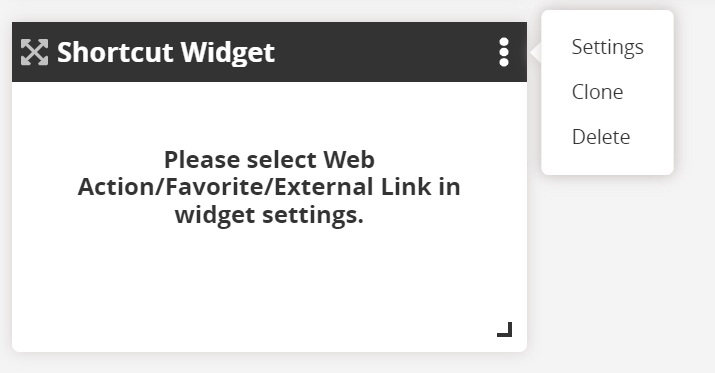
Click the Settings option.
The customization popup, Shortcut Widget, displays.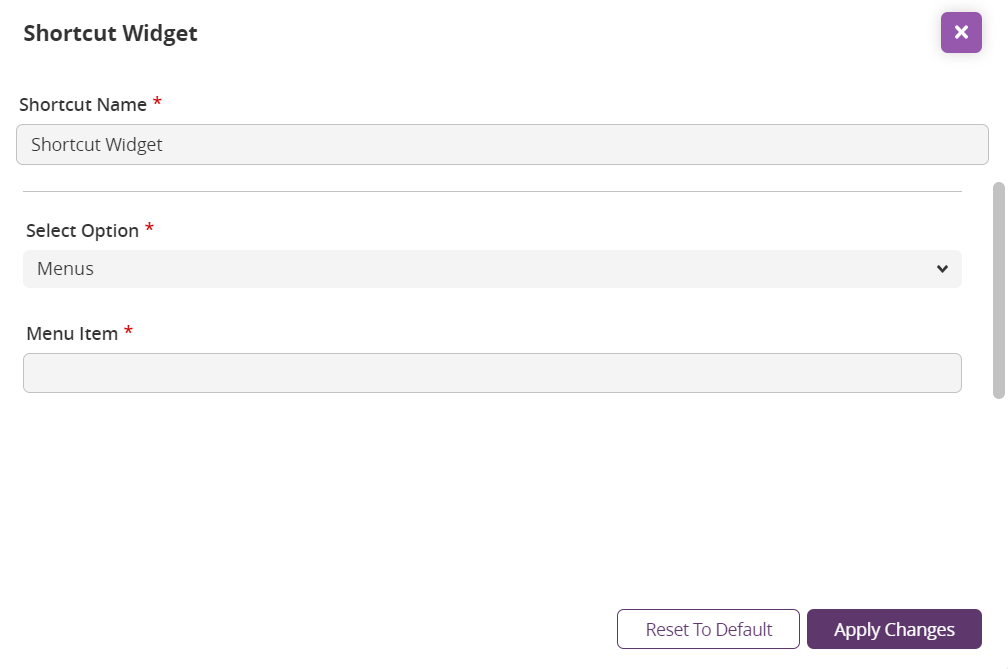
In the Shortcut Name * field, enter a name for the widget. Fields with an asterisk ( * ) are required.
Select a value from the Select Option * dropdown menu.
The next field name changes based on the option type selected: Menus, Favorites, External Link.Type the name of the desired page.
Internal reports from the NEO menu or favorited screen names display in a list. External links do not.Select the option from the list, if appropriate.
Existing system images and custom images display along with an icon to upload an image. This image will display on your dashboard.Click an image for the widget's display, or click the icon under Upload Image to create a shortcut icon with your image.
Click the Apply Changes button.
The edit mode of the dashboard shows the report, page name, or URL on the widget.Click the Save the Dashboard button at the top of the screen.
The widget displays in the dashboard.Users click the shortcut widget, and the page or URL opens.