Configuring Widgets
Widgets can be configured for further customization on dashboards.
Complete the following steps to configure widgets on the NEO UI dashboard:
Log in to the ONE system.
Click the Edit Dashboard button at the top of the NEO UI dashboard or click the Filter Options button on the widget on the dashboard.
If editing the dashboard, roll the cursor over the widget. The editing header appears.
Click the Settings option.
The widget's configuration popup appears. The example below shows the Alert Summary widget settings.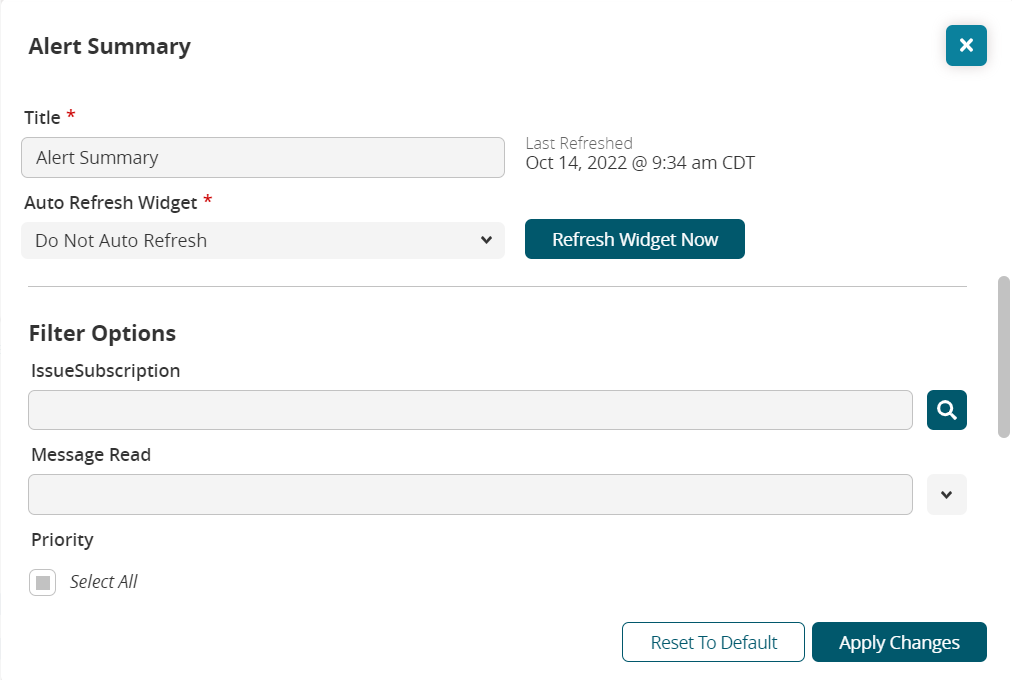
Change the Title * , the Auto Refresh Widget * duration, and any other filter options that are available on the popup window.
Filter options vary based on the individual widget.Click the Refresh Widget Now to refresh the data.
Click the Apply Changes button.
The widget updates. No other steps are required if you are not editing the dashboard.Click the Reset to Default button to remove any changes.
If you are editing in the dashboard, click the Save the Dashboard button to save the dashboard.
The dashboard displays the widget's new customization.