Creating VMI Spot Purchase Orders
Vendor-managed inventory (VMI) spot purchase orders (POs) are available to Vendor role types. As required, you can add buyer notes to the order. There are two types of VMI POs under the Order Mgmt menu:
New VMI PO: For use when an approved vendor list (AVL) is active in the system.
New VMI PO Release: For situations with no active AVL in the system. This option is used when the buyer creates the purchase order on behalf of the vendor.
The following procedure is the same for both options.
You can add duplicate items to multiple lines in the same order if the Duplicate Items on Order feature is enabled. Contact One Network support to enable or disable this feature. If enabled, items are identified by both item name and line number throughout the system. This eliminates the possibility of any confusion resulting from having duplicate items with the same name in the same order.
Complete the following steps to create New VMI spot purchase orders:
L og in to the ONE system.
Click Menus/Favs > Order Mgmt > New VMI PO.
In the NEO UI, users can click on the Menus/Favs icon on the left sidebar and type in the name of the screen in the menu search bar. For more information, see "Using the Menu Search Bar."
The New VMI PO screen displays.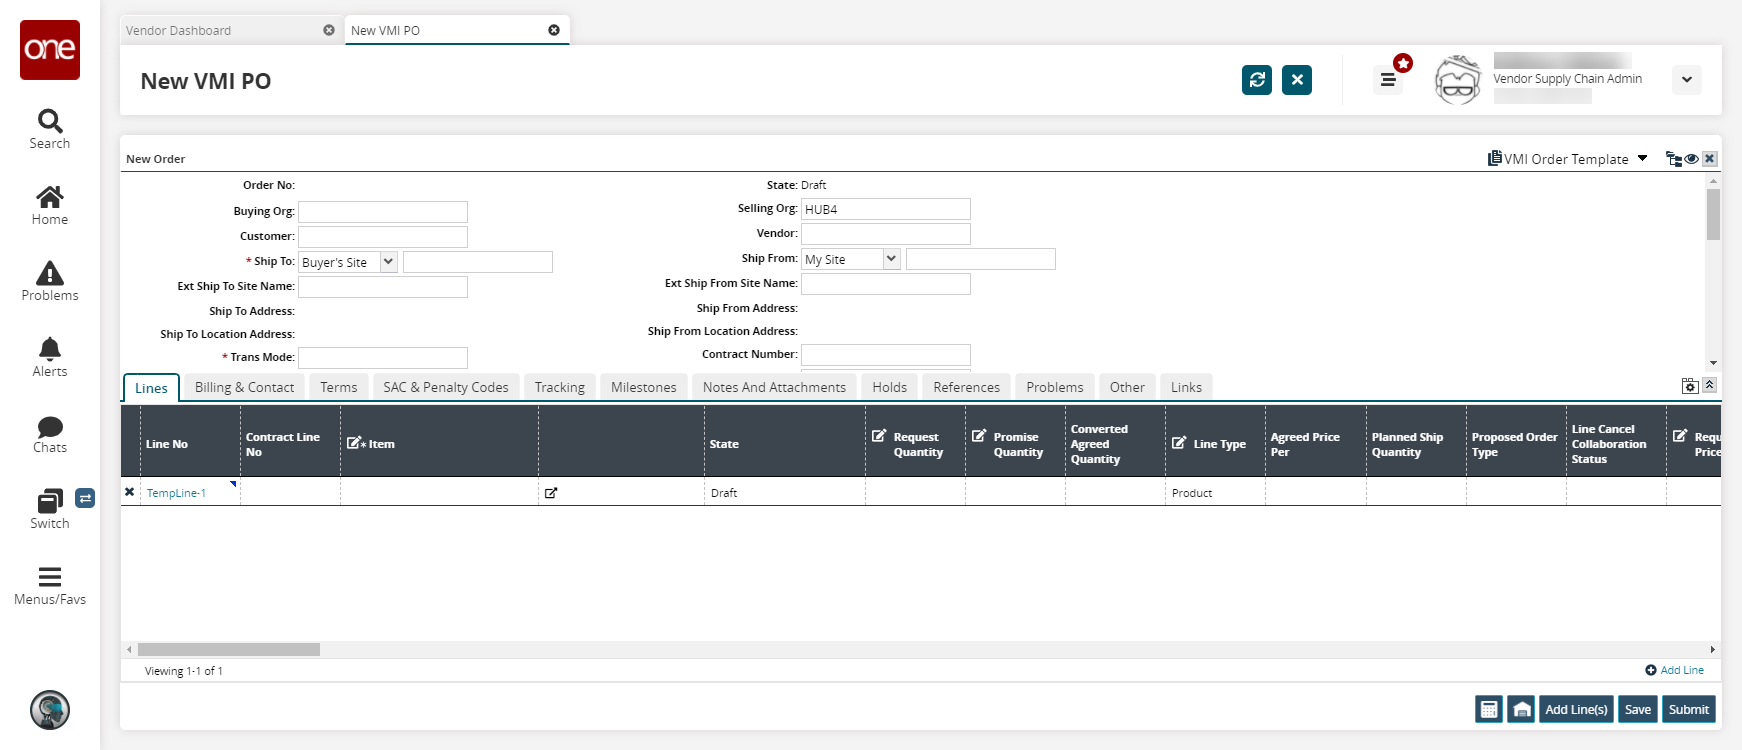
Fill out the following fields. Fields with an asterisk ( * ) are required.
Field Name
Description
Order Number
Unique number for the order assigned by the system.
* Buying Org
The organization that is creating the purchase order.
* Ship To (Drop-down menu)
Filter for the Ship To location. The available options are My Site, My Partner Site, and My Location.
* Ship To (Text box)
The name of the location receiving the shipment.
Ship To Address
Non-editable Ship To address field. Populated by Ship To selection.
Ship To Location Address
This field is auto-populated.
* Trans Mode
The mode of transport for the purchase order creation.
Request Delivery Date
The date on which the purchase order is requested to be delivered.
Request Ship Date
The date on which the purchase order is requested (by the buyer) to be shipped (by the vendor).
Ext Transaction
Enter an external transaction number here.
3PL's Order Number
Third-Party Logistics order number
OMO's Order Number
OMO's order number
Total Amount
Total cost of the order.
Total Weight/ Quantity/Volume
The total weight, quantity, or volume of the order.
Authorization
Indicates order is authorized.
Order Subtype
This field indicates the subtype of the order. Select an option from the drop-down menu. The available options are Blank, Consignment, Rebalance, Standard, or VMI.
State
The state of the purchase order.
* Vendor
The vendor associated with the purchase order. The vendor must be listed on the Vendor Master List.
* Ship From (Dropdown menu)
Filter for the Ship From location. The available options are Vendor's Site, Vendor's Partner Site, and Vendor's Location.
* Ship From (Text box)
The name of the location sending the shipment.
Ship From Address
Non-editable Ship From address field. Populated by Ship From selection.
Ship From Location Address
This field is auto-populated.
Parent Order No
Enter a parent order number
Fulfillment Org
The name of the fulfillment organization.
Seller Agents
The name of the seller agent.
OMO Org
The order management organization.
Buyer Agents
The name of the buyer agent.
BPO No
BPO number
Currency (Dropdown menu)
Select the currency used for this purchase order. The field is pre-populated but editable.
Owning Site
A pre-populated, editable field to track the site which owns the order.
Planner Notes
The planner can add notes here.
Vendor Notes
The vendor can add notes here.
Is Expedite
Select the checkbox if the purchase order needs to be accelerated or hurried.
Is Emergency
Select the checkbox if the purchase order is in an emergency or very important
For a more in-depth description of this process, see the "Creating Purchase Orders" section on the Online Help.
In the Lines tab, enter the Item name, or you may use the item as per your item mapping. For more information, see the "Creating New Item Mappings" section on the Online Help.
As required, click Add Line to add lines to the purchase order.
A new purchase order line row appears.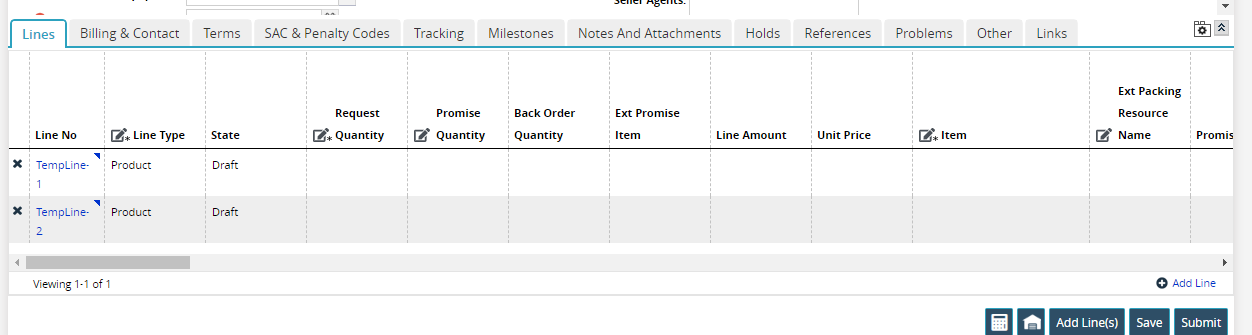
As required, double-click inside cells labeled with pencil icons and type or select new information or edit existing information.
After order details have been entered, click on the Save button.
Enter the Request Quantity.
Click the Billing and Contract tab to add purchasing address details.
Click the Other tab to expedite the purchase order by selecting the Expedite checkbox.
Click the Notes and Attachments tab to enter comments.
Order No assigned by the system appears at the top of the tab.Click the Actions button and select the required actions from the list.
Click the Vendor Update button to update the vendor.
Click the Populate Current BOH button to populate the BOH.