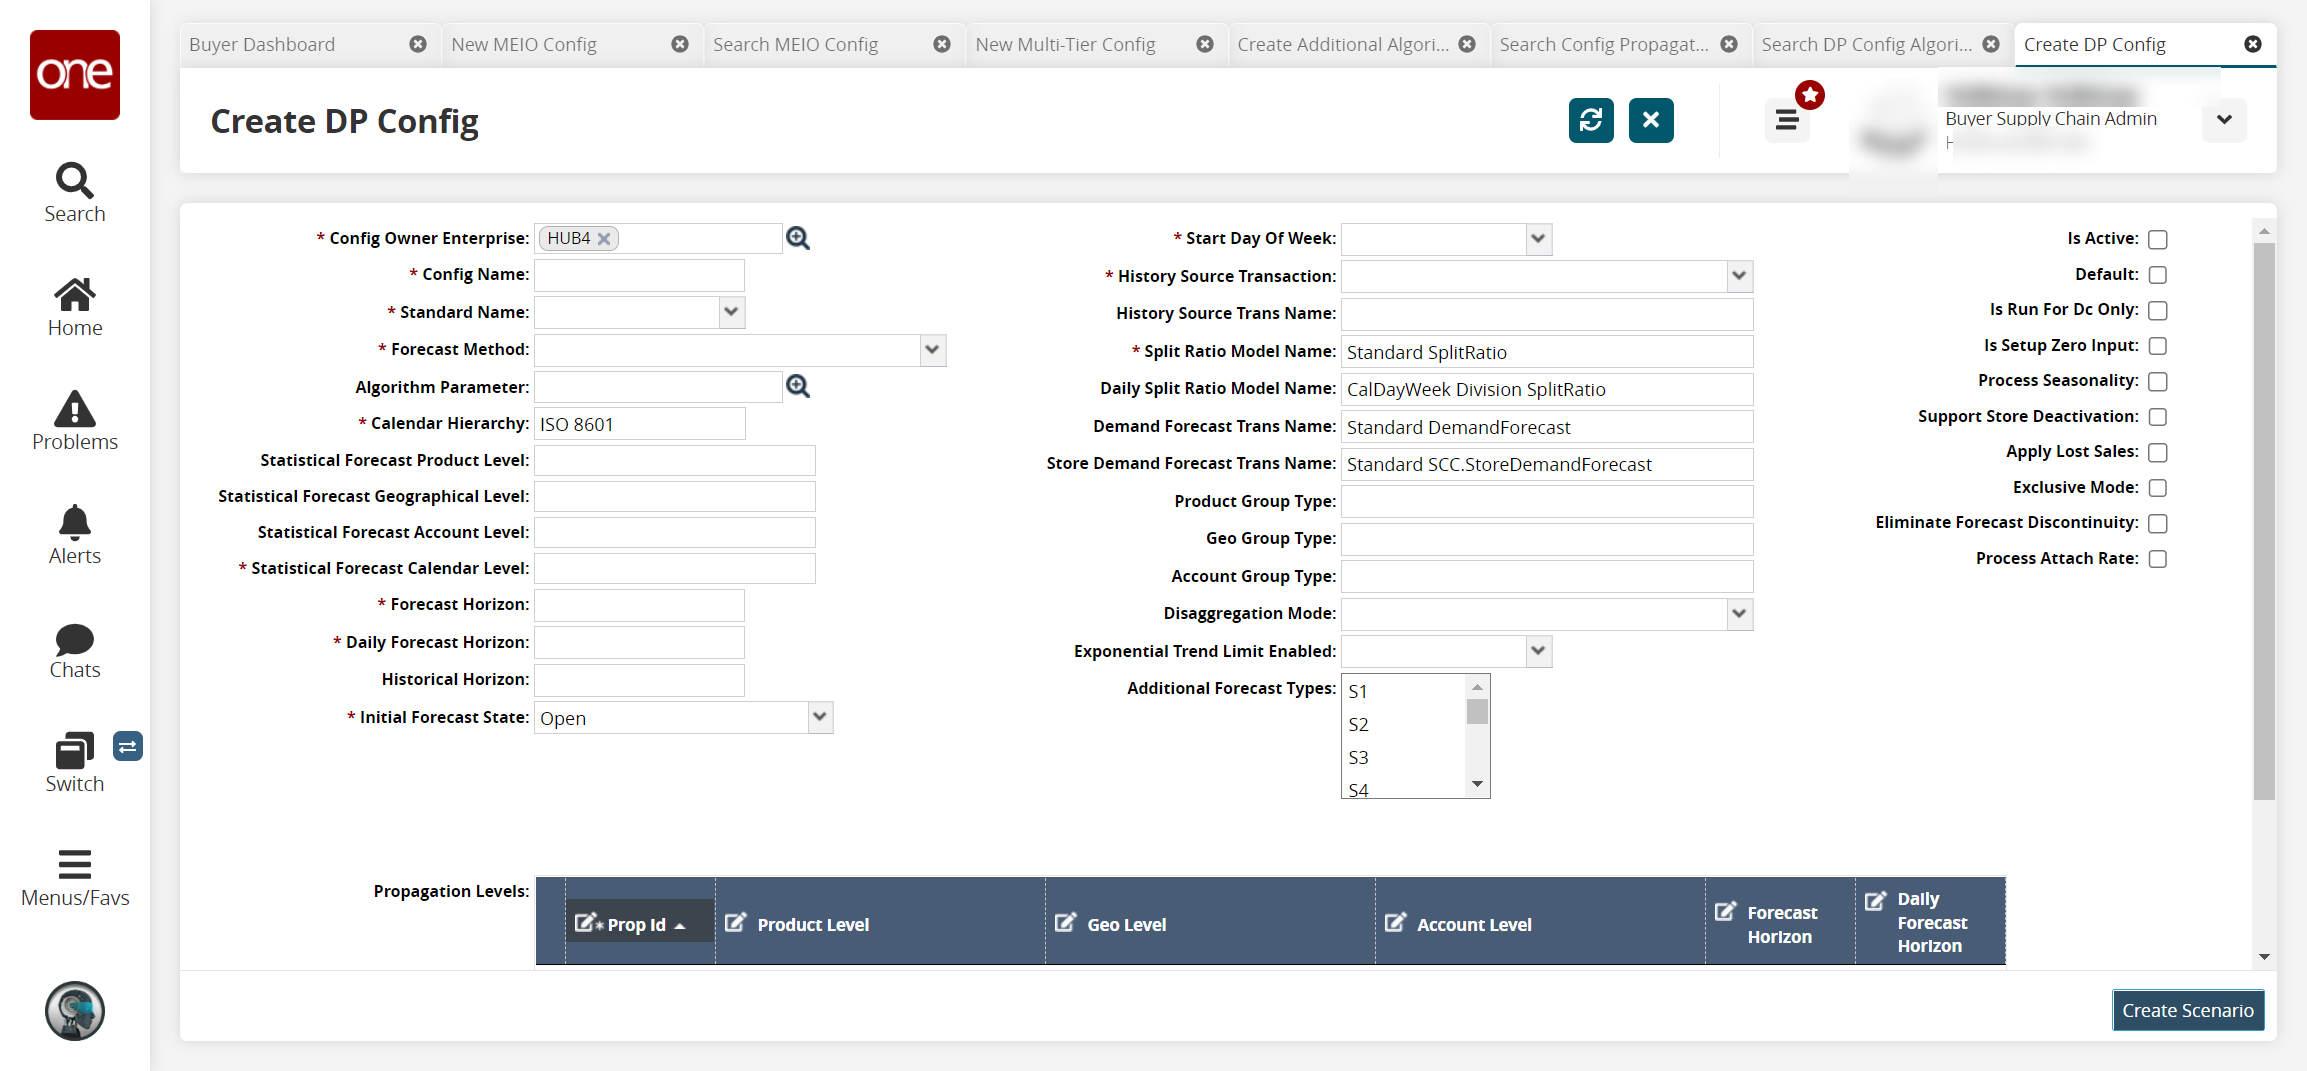
Creating a Demand Planning Configuration for Auto-Adjusting Exponential Forecasts
Prerequisites:
The following custom engine configurations must be created:
Trend Period
Trend Adjustment Period
Trend Adjustment Percentage
Limit of Allowed Trend Effect as Ratio
Complete the following steps to create a Demand Planning (DP) configuration (config):
Log in to the ONE system.
Click Menus/Favs > Demand Planning > Forecast Processing > Create DP Config.
The Create DP Config screen displays.

Using the table below, fill in any necessary fields. Fields with an asterisk ( * ) are required.
Field Name
Description
* Config Owner Enterprise
The enterprise for the DP config.
* Config Name
A name for the DP config.
* Standard Name
A standardized name for the DP config. Defines which set of columns is processed by the config.
* Forecast Method
The algorithm used to forecast the current config. Set this field to Best Fit.
Algorithm Parameter
An algorithm parameter associated with the selected owner enterprise.
* Calendar Hierarchy
The hierarchy used for the calendar. The default value is "ISO 8601."
Statistical Forecast Product Level
A particular level for product forecasting. There are five levels to choose from.
Statistical Forecast Geographical Level
The geographical level for product forecasting. There are five levels to choose from.
Statistical Forecast Account Level
An accounting level for the forecast.
* Statistical Forecast Calendar Level
Choose either a yearly, monthly, weekly, or daily calendar level.
* Forecast Horizon
A plot point for the forecast.
* Daily Forecast Horizon
A daily representation of the Forecast Horizon.
Historical Horizon
A historical representation of the forecast.
* Initial Forecast State
Select the initial forecast state from the dropdown menu.
* Start Day Of Week
The day of the week on which the calendar begins.
* History Source Transaction
How the engine will gather aggregated transaction history for the config.
History Source Trans Name
The name for the History Source Transaction.
* Split Ratio Model Name
The name for the model. The default value is "Standard SplitRatio."
Daily Split Ratio Model Name
The default value is "CalDayWeek Division SplitRatio."
Demand Forecast Trans Name
The default value is "Standard DemandForecast."
Store Demand Forecast Trans Name
The default value is "Standard SCC.StoreDemandForecast."
Product Group Type
A hierarchical setting for products that are waiting to be forecasted.
Geo Group Type
A geographical hierarchy setting.
Account Group Type
A partner for the DP configuration. Several options are available for the account group partner.
Disaggregation Mode
Select the disaggregation mode from the dropdown list.
Exponential Trend Limit Enabled
Select Yes or No from the dropdown list.
Additional Forecast Types
Select additional forecast types from the dropdown list.
Is Active
Check this box to make the configuration active.
Default
Check this box to make the config the default configuration for the DP engine.
Is Run For DC Only
Check this box to run for distribution centers only.
Is Setup Zero Input
Check this box for the configuration to run without input.
Process Seasonality
Check this box to process using a seasonality scheme.
Support Store Deactivation
Supports the deactivation of a store.
Apply Lost Sales
Factors in "Lost Sales" for the demand planning configuration.
Exclusive Mode
Defines that other configs can't override forecasts produced by this configuration.
Eliminate Forecast Discontinuity
Check this box to eliminate the forecast discontinuity.
Process Attach Rate
Check this box to process the attach rate.
Once all information has been entered, click the Create Scenario button.
A success message appears.