Creating and Searching Assets
Users can create and search assets under the Asset Management menu.Not all users and roles have access to this particular feature.
Please see the following sections:
Creating Assets
Complete the following steps to create an asset:
Log in to the ONE system.
Click Menus/Favs > Asset Management > New Asset.
The New Asset screen appears.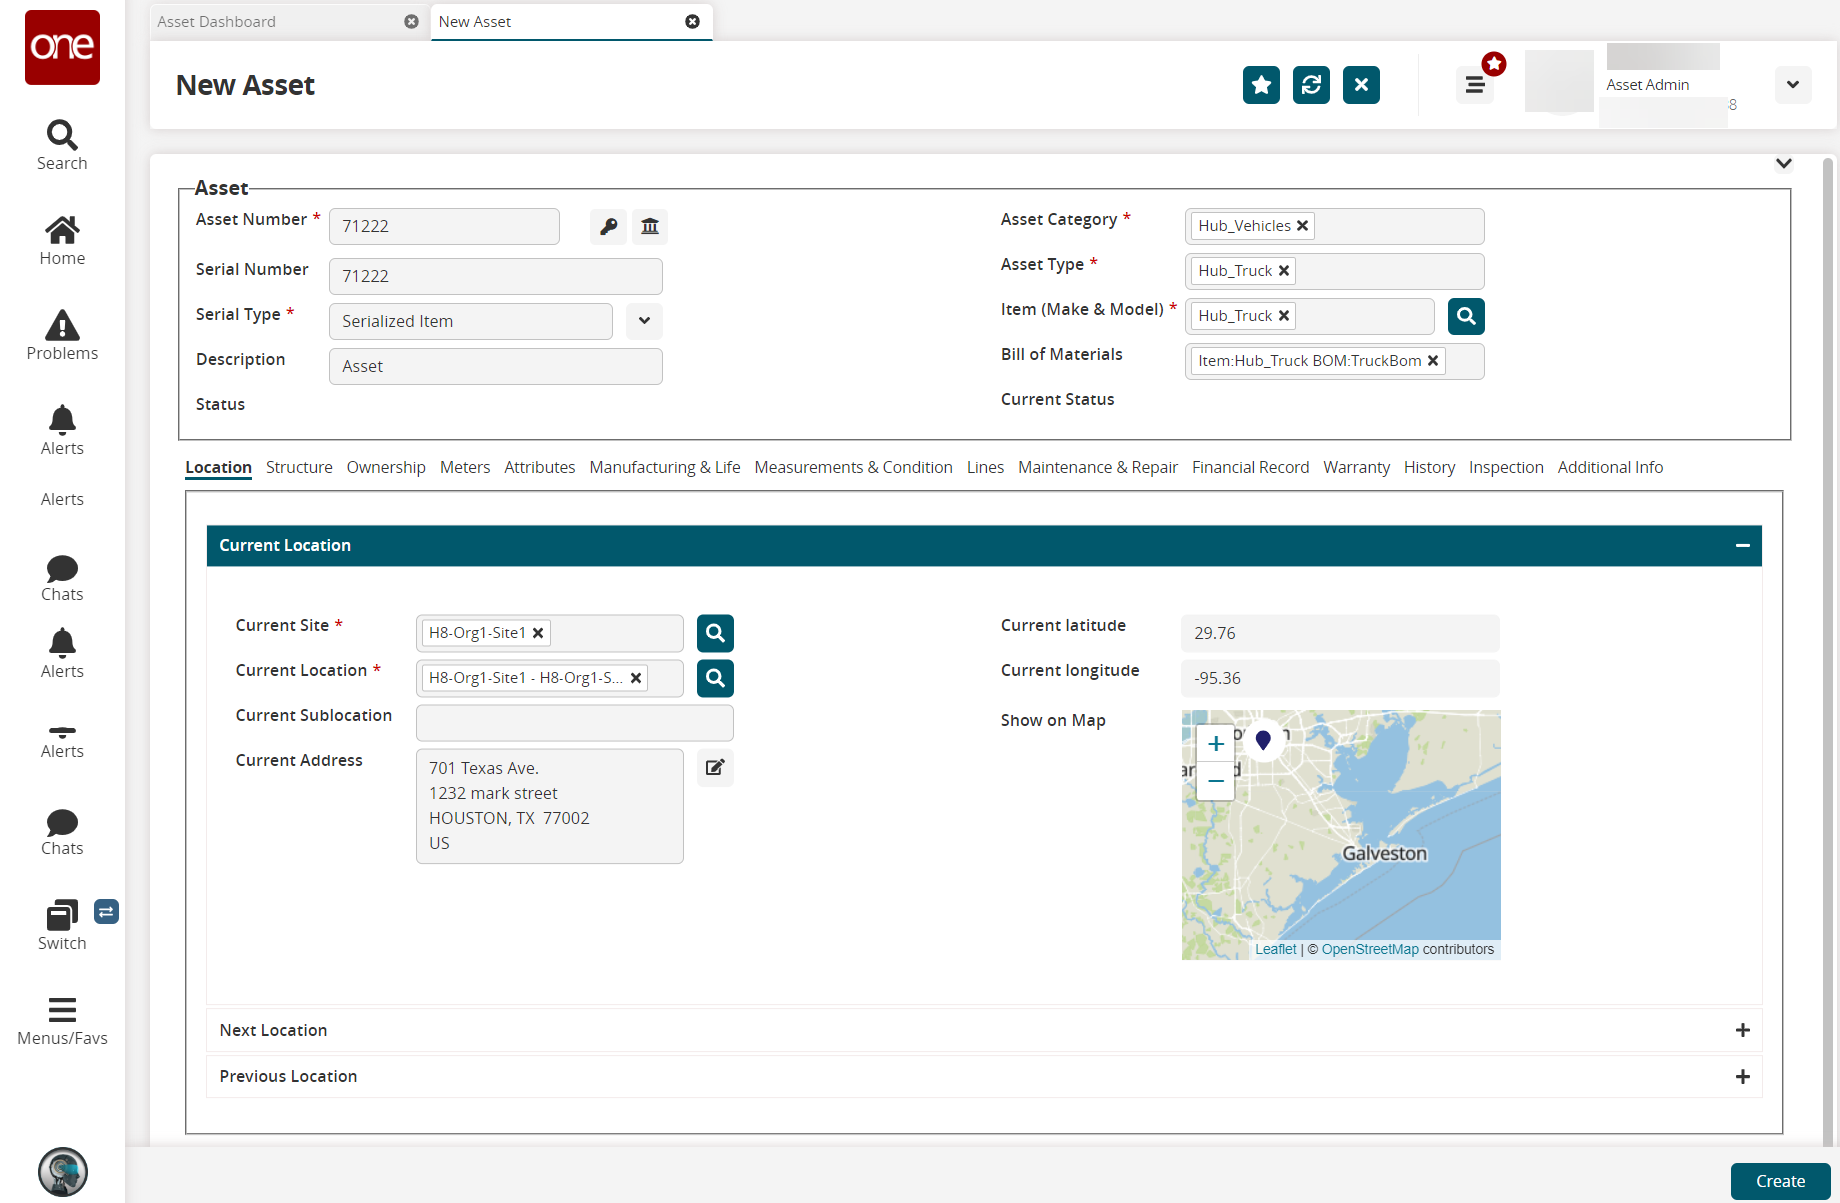
In the Asset section, complete the following fields. Fields with an asterisk ( * ) are required.
Field
Description
* Asset Number
Click one of the icons to generate the asset number. The key icon generates a unique system-generated asset number. The icon with three columns generates an asset number from the Organization-specific sequence. (The Organization-specific unique number is defined based on the client's requirements.)
* Serial Number
The serial number is the same as the Asset Number.
* Serial Type
Select the item type from the drop-down list.
Description
Enter a description of the asset.
Status
This is an auto-populated field.
* Asset Category
Enter the category for this asset. Predictive text will help narrow your search, or click the icon to select the respective asset category.
* Asset Type
Enter a value for the type. Predictive text will help narrow your search, or click the icon to select the respective asset type.
* Item (Make & Model)
Enter the item associated with this asset or click the search icon to browse for the item. Predictive text will help narrow your search.
Bill of Materials
Select the Bill of Materials (BOM) that can be applied for the asset. The Bill of Materials is coupled with the Item (Make and Model).
Current Status
This is an auto-populated field.
Click the Location tab to update the site information details.
The Current Location fields for the new asset appear.
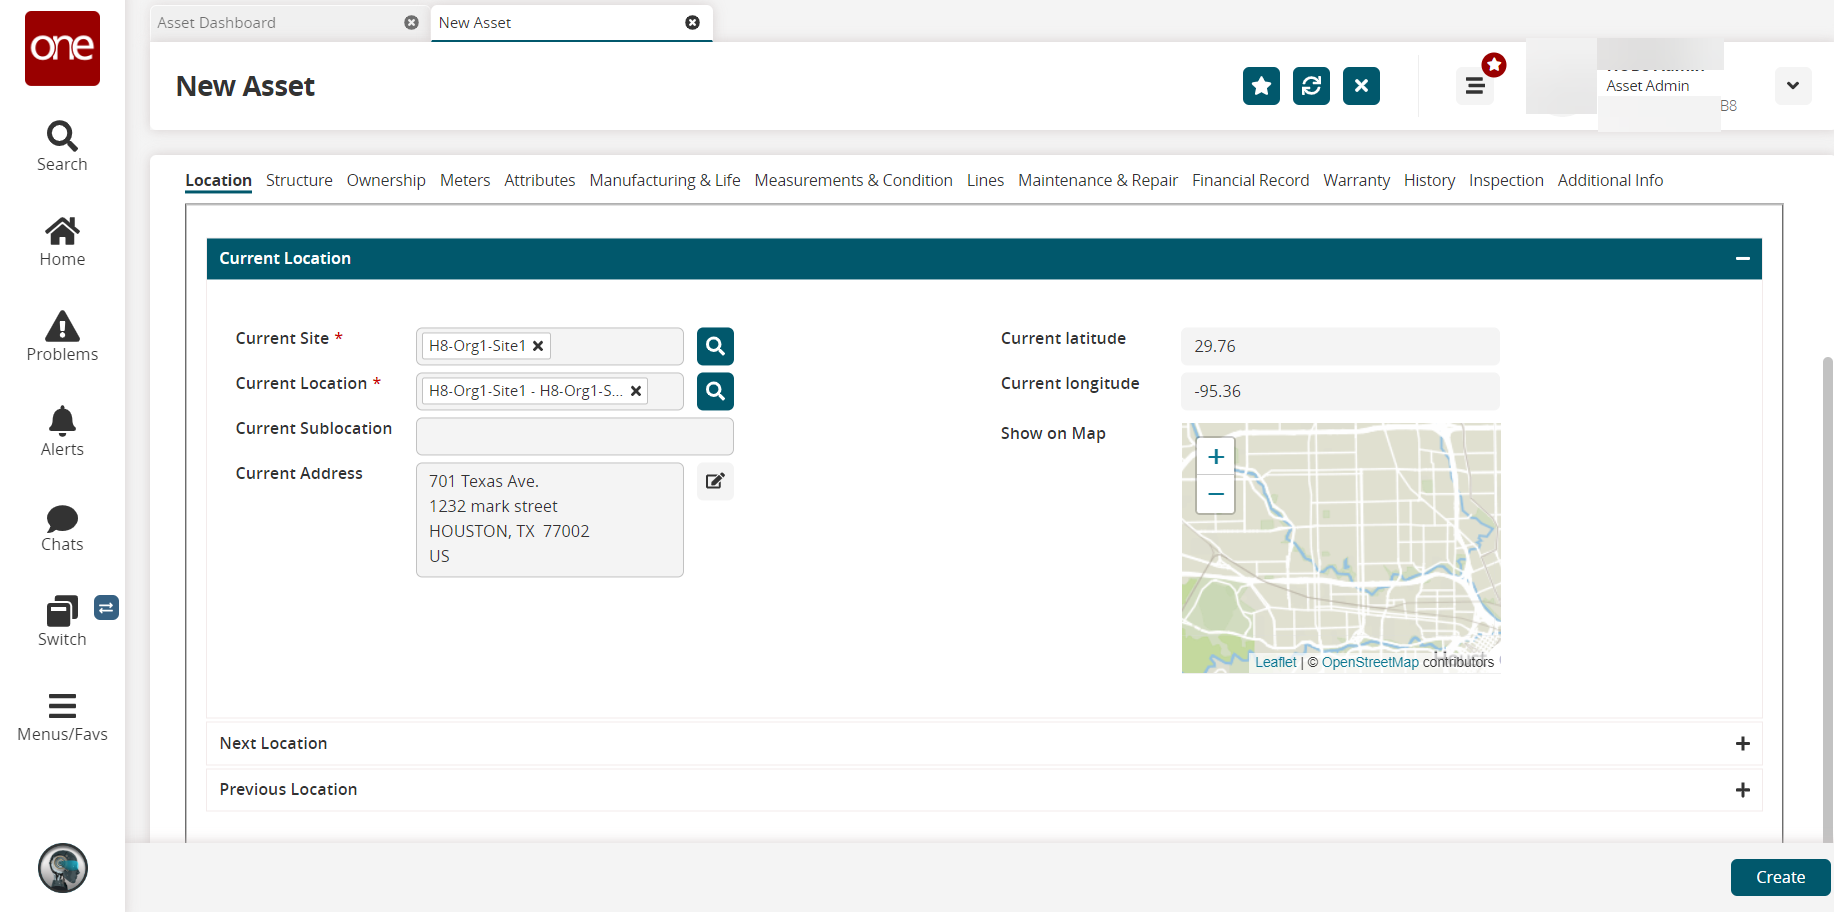
Complete the following fields as desired.
Field
Description
Current Site
Enter the current site or click the search icon to select the current site.
Current Location
Enter the current location or click the search icon to select the current location.
Current Sublocation
Enter the current sublocation details based on the current location.
Current Address
Click the edit icon to edit the address field.
Current Latitude, Current Longitude
These fields auto-populate.
Show on Map
Click the plus or minus icon to zoom in or out the location view on map
On the Location tab, click the plus icon to expand the Next Location tab.
The Next Location fields for the new asset appear.
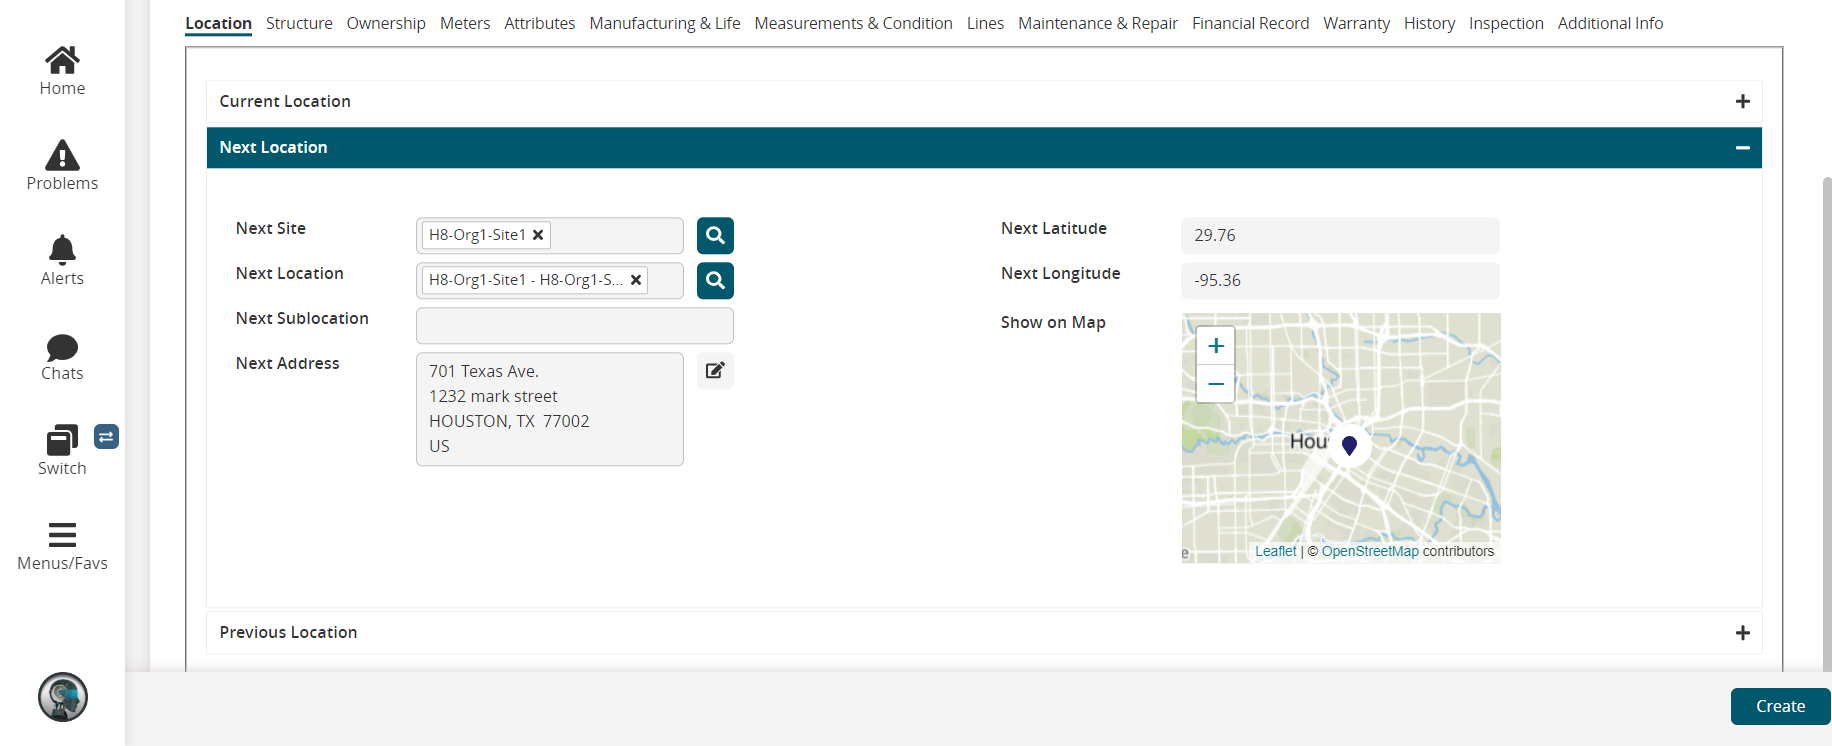
Complete the following fields as desired.
Field
Description
Next Site
Enter the next site or click the search icon to select the next site.
Next Location
Enter the next location or click the search icon to select the next location.
Next Sublocation
Enter the next sublocation details based on the location.
Next Address
Click the edit icon to edit the address field.
Next Latitude, Next Longitude
These fields auto-populate.
Show on Map
Click the plus or minus icon to zoom in or out the location view on map
On the Location tab, click the plus icon to expand the Previous Location tab.
The Previous Location fields for the new asset appear.
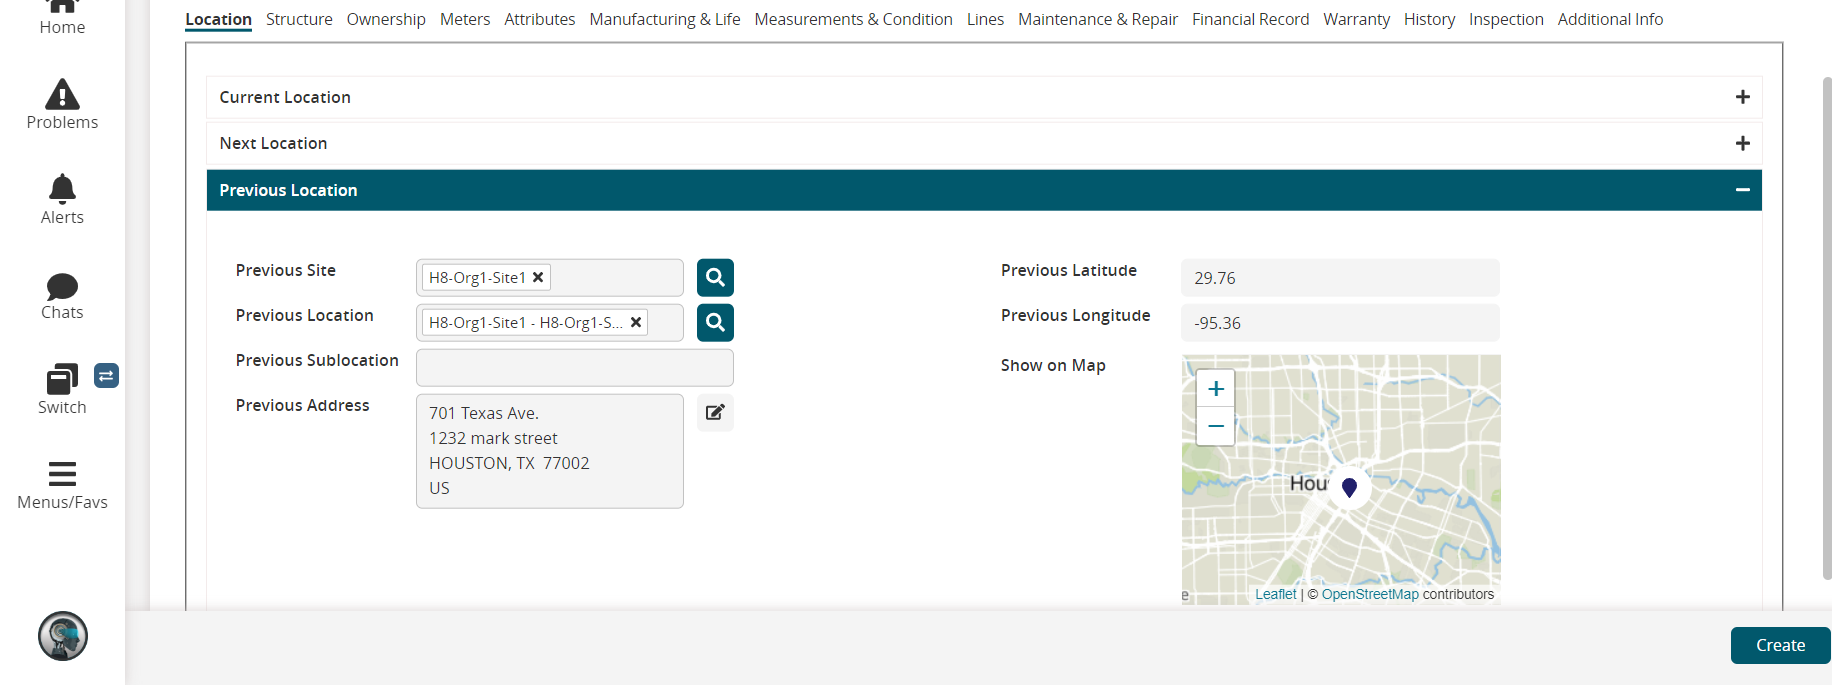
Complete the following fields as desired.
Field
Description
Previous Site
The previous site information is auto-populated.
Previous Location
The previous location information is auto-populated.
Previous Sublocation
The sub-location details are auto-populated based on the location.
Previous Address
Click the edit icon to edit the address field.
Previous Latitude, Previous Longitude
These fields auto-populate.
Show on Map
Click the plus or minus icon to zoom in or out the location view on map.
Note
Based on the organizational requirements, the asset location details in the Previous and Next Location tabs can be onboarded via the inbound interface. If needed the asset admin user can also update this information manually.
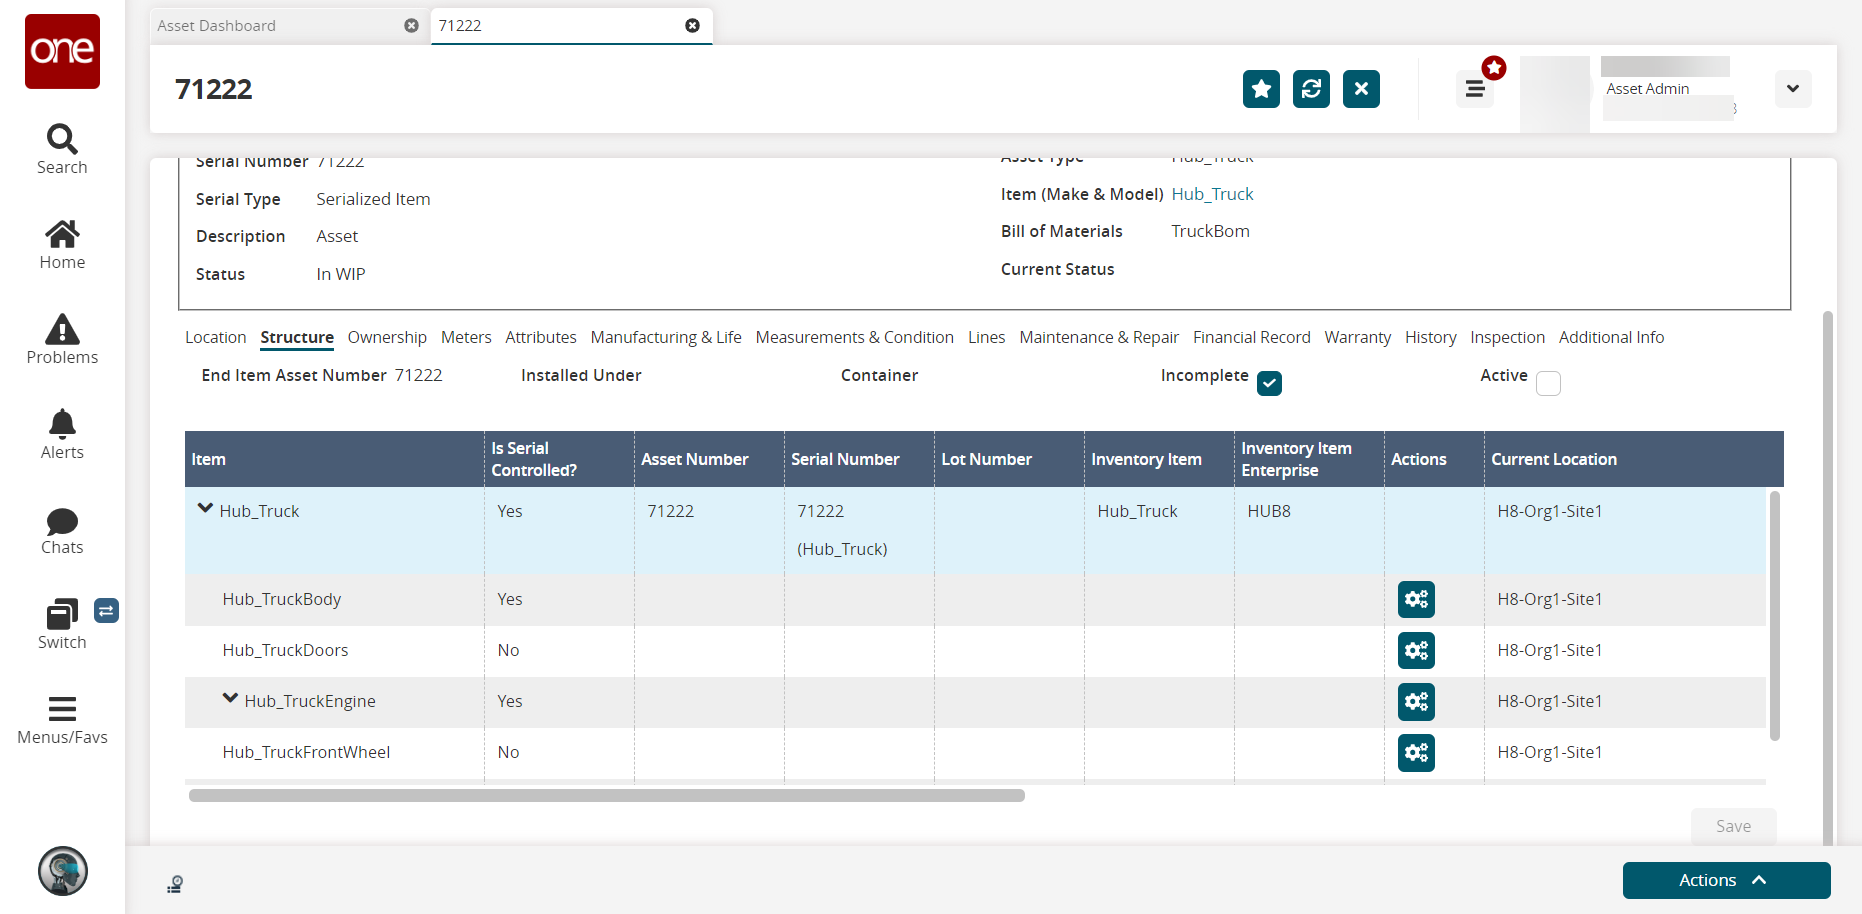
Click Create button to create an asset type. The status of the asset displays In WIP(Work in Progress).
Click the Structure tab to fill out more information.
The End Item Serial Number field auto-populates.Based on the defined Bill of Materials (BOM), the outline of the Asset structure is exploded in a table.
The BOM explosion displays the list of items based on parent /child configuration. For example, Hub_Truck is the parent, and the rest of the component items are its children.Note
If the Bill of Materials (BOM) is not defined for the Asset, then in the Installed Under field, the user can begin typing the name of the parent singleton or click the search icon to select the parent singleton.
Complete the following fields.
Field
Description
Item
Indicates the item type information and respective child items per BOM. Click the icon to expand the item details. Click to select the item components to manage the asset by using drag and drop Inventory pick-up items.
Is Serial Controlled?
Displays Yes if the asset number is a Serialized Item. Alternatively, No is the item type is not a serialized item.
Asset Number
This field value is auto-populated.
Serial Number
This field value is derived from the Asset Number field.
Lot Number
This field value is derived from the Asset Number field.
Inventory Item
This field value is derived from the Asset Number field.
Inventory Item Enterprise
The value identifies the inventory item enterprise
Actions
Click the Settings icon to pick and swap components from the available inventory.
Current Location
The value is auto-populated based on details entered under the Location tab.
Status
This value is auto-populated once the component for the asset is picked or swapped from the inventory.
BOM Quantity
Indicates the quantity for the asset.
BOM Quantity UOM
Indicates the unit of measurement by quantity.
Split Quantity
Indicates the split quantity for the asset.
Split Quantity UOM
Indicates the unit of measurement by quantity.
Allowed Repairs
This field value is derived from the Asset Number field.
Remaining Repairs
This field value is derived from the Asset Number field.
Health
This field value is derived from the Asset Number field.
To pick or swap components from inventory:
Click the
 icon to expand the item details.
In the Actions column, c lick the Settings icon
 .
.
The three Action menu icons appear. (Edit / Swap or Pick Component / Delete icon)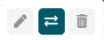
Note
The Edit and Delete icons are only enabled if the component is picked up from the inventory for that respective item type.
Click the Swap or Pick Component icon to pick up or swap internal or external components from the inventory.
The Inventory Summary Picker Report dialog box appears.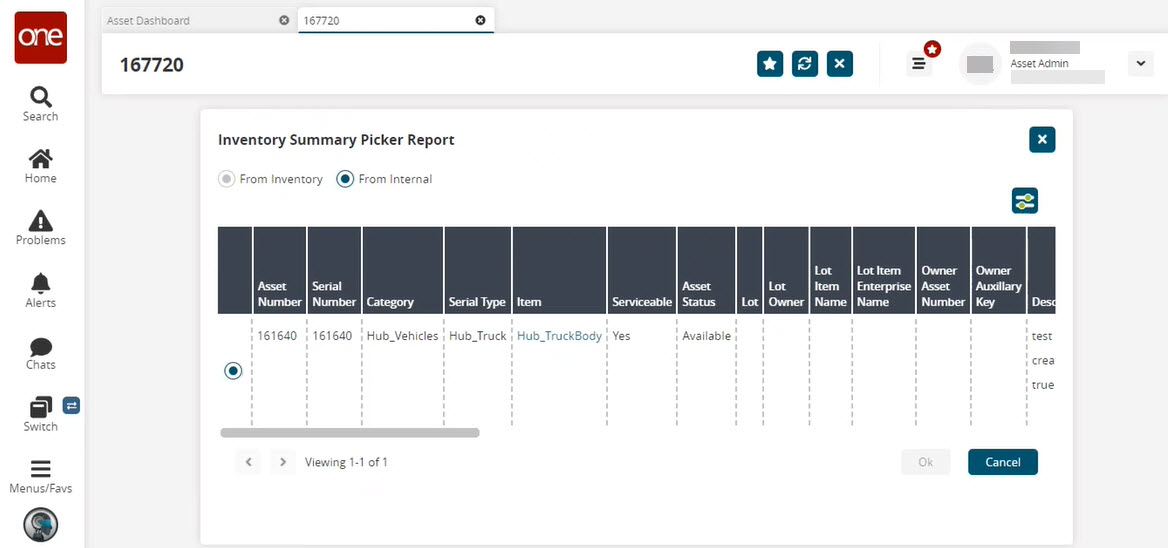
To pick internal components, the asset admin must enable the Disable Multi Inventory Put Back policy from the Maintenance Repair Overhaul (MRO) policy menu as a prerequisite. (Once the policy is set, the True value appears next to the pencil icon.) See the "Searching Policies" section in the Online Help for more information.
Select the From Internal option to pick internal components or select the From Inventory option to pick external components.
Select the desired component and click the Ok button.
The component is added for the corresponding asset item. Similarly, users can update the components for each asset item.
Click the Ownership tab. The Current Owning organization for the new asset is auto-populated.
The Owner field populates automatically.Click the Add button to add ownership information if desired.
A new line displays in the Ownership tab.
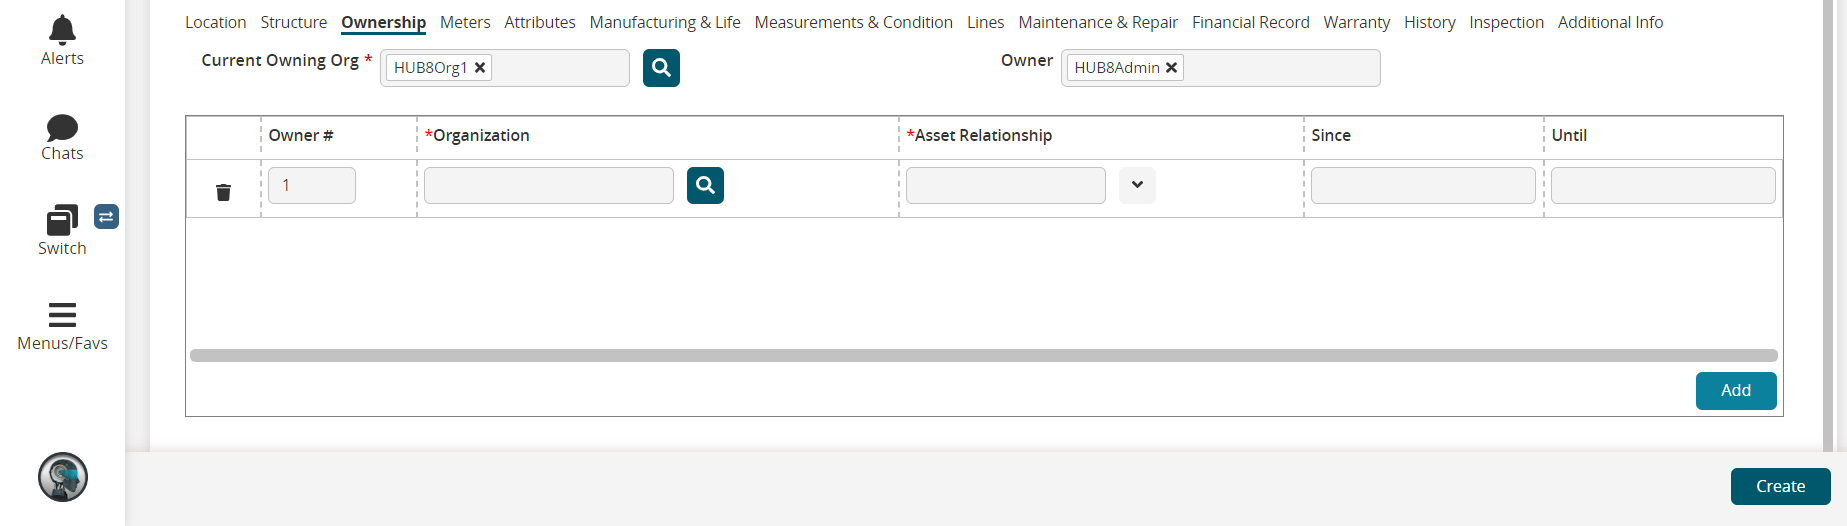
In the Ownership tab, fill in the following fields for the new owner as desired.
Field
Description
Owner #
This field auto-populates.
* Organization
Enter the organization name or click the search icon to select the organization.
* Asset Relationship
Select the organization's relationship to the asset from the dropdown list.
Since
This field auto-populates.
Until
This field auto-populates.
Click the Meters tab to fill out asset metering information.
The metering fields configured for that asset type are displayed.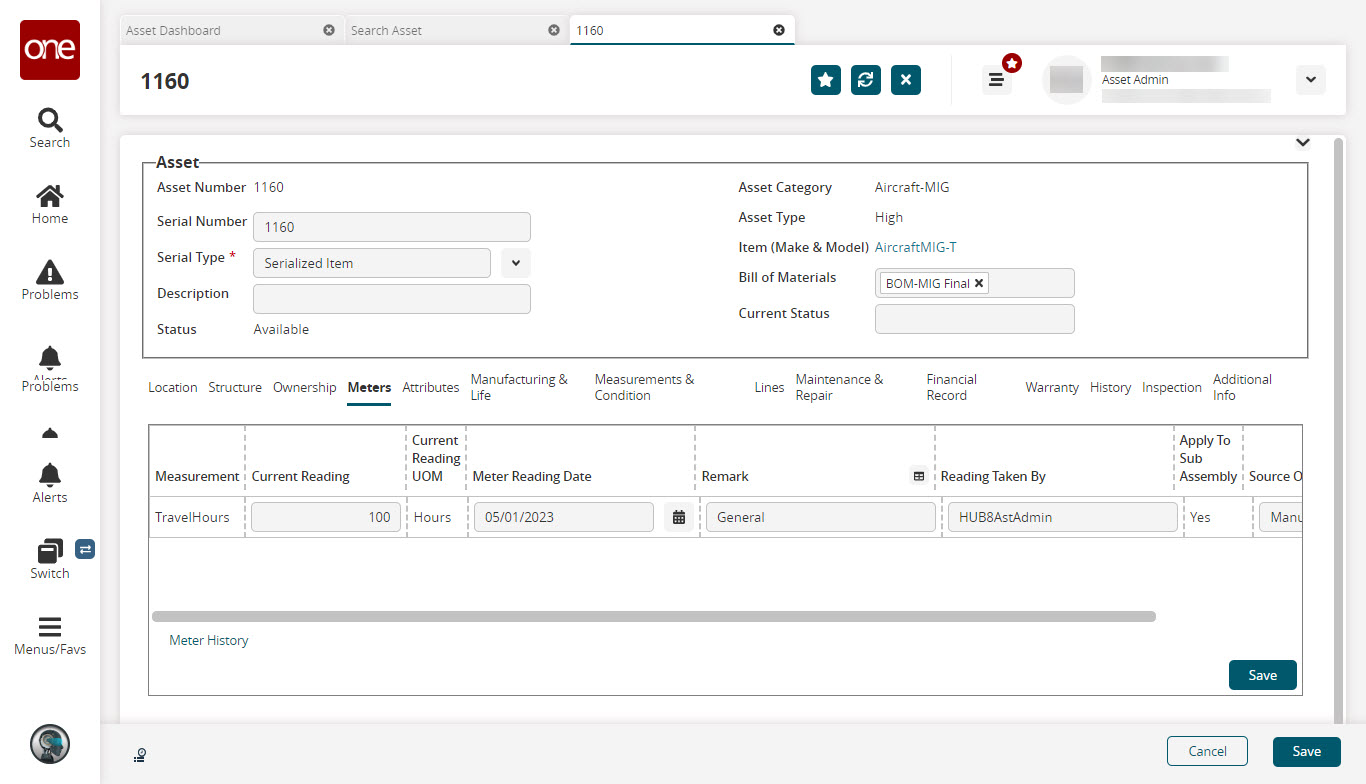
Complete the following fields as desired.
Field
Description
Measurement
This value is auto-populated based on the Asset Meter Configuration report defined for that asset type.
Current Reading
Enter a present meter reading for that particular asset type.
Current Reading UOM
This value is auto-populated based on the Asset Meter Configuration report defined for that asset type.
Meter Reading Date
Click the date icon to enter the meter reading date.
Remark
Enter appropriate remarks as desired.
Reading Taken By
Enter the name of the user who recorded the meter reading.
Apply To Sub Assembly
By default, Yes is displayed.
Source Of Meter
Select the source for a meter reading.
Click the Save button inside the Meters tab.
The metering updates performed on an asset are recorded in the Meter History table.Click the Meter History link to view the details.
The Meter History popup displays.
Click the Attributes tab to fill out more information.
The attribute fields configured for that asset type are displayed.
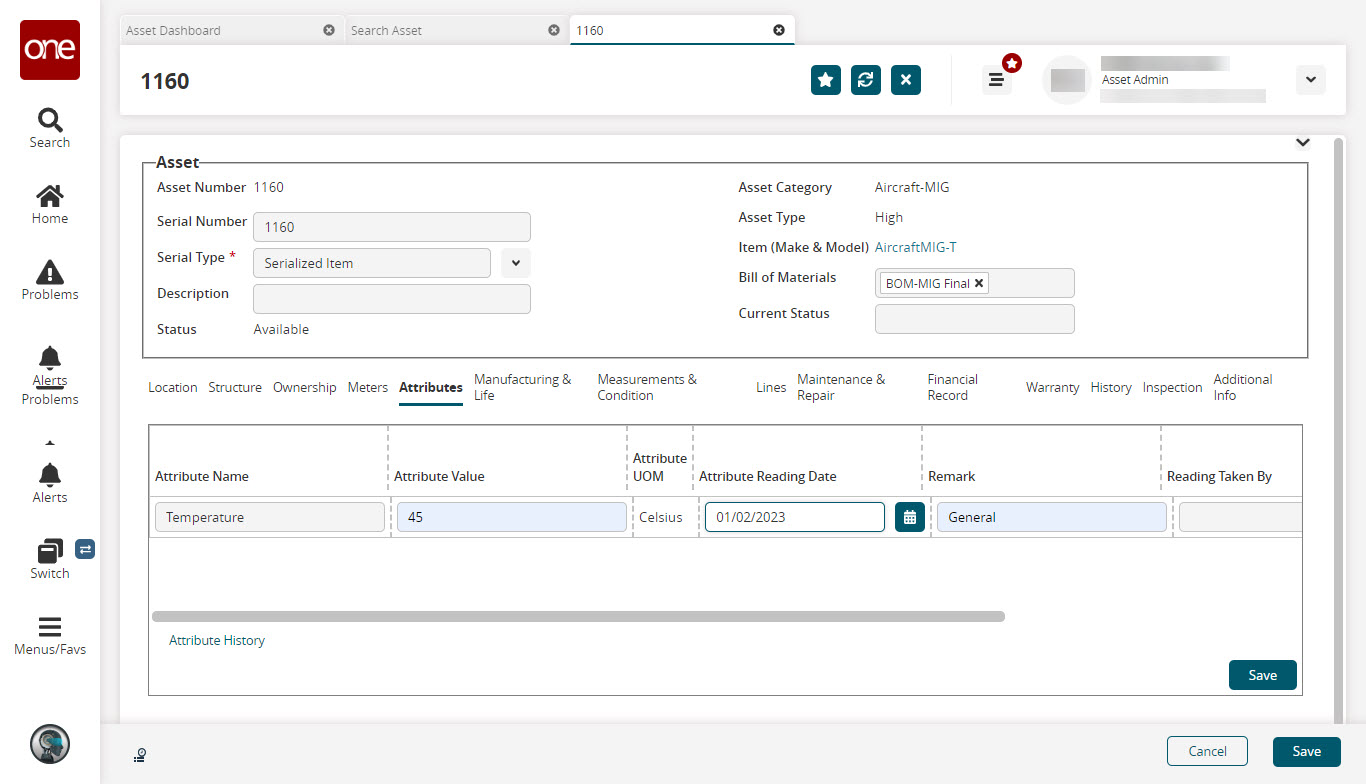
Complete the following fields if desired.
Field
Description
Attribute Name
This value is auto-populated based on the Asset Attribute Configuration report defined for that asset type.
Attribute Value
Enter the attribute value reading for that particular asset type.
Attribute UOM
This value is auto-populated based on the Asset Attribute Configuration report defined for that asset type.
Attribute Reading Date
Click the date icon to enter the attribute reading date.
Remark
Enter appropriate remarks as desired.
Reading Taken By
Enter the name of the user who recorded the attribute reading.
Apply To Sub Assembly
By default, Yes is displayed.
Source Of Attribute
Select the source for attribute reading.
Click the Save button inside the Attributes tab.
The attribute-specific updates performed on an asset are recorded in the Attribute History table.Click the Attribute History link to view the details.
The Attribute History popup displays.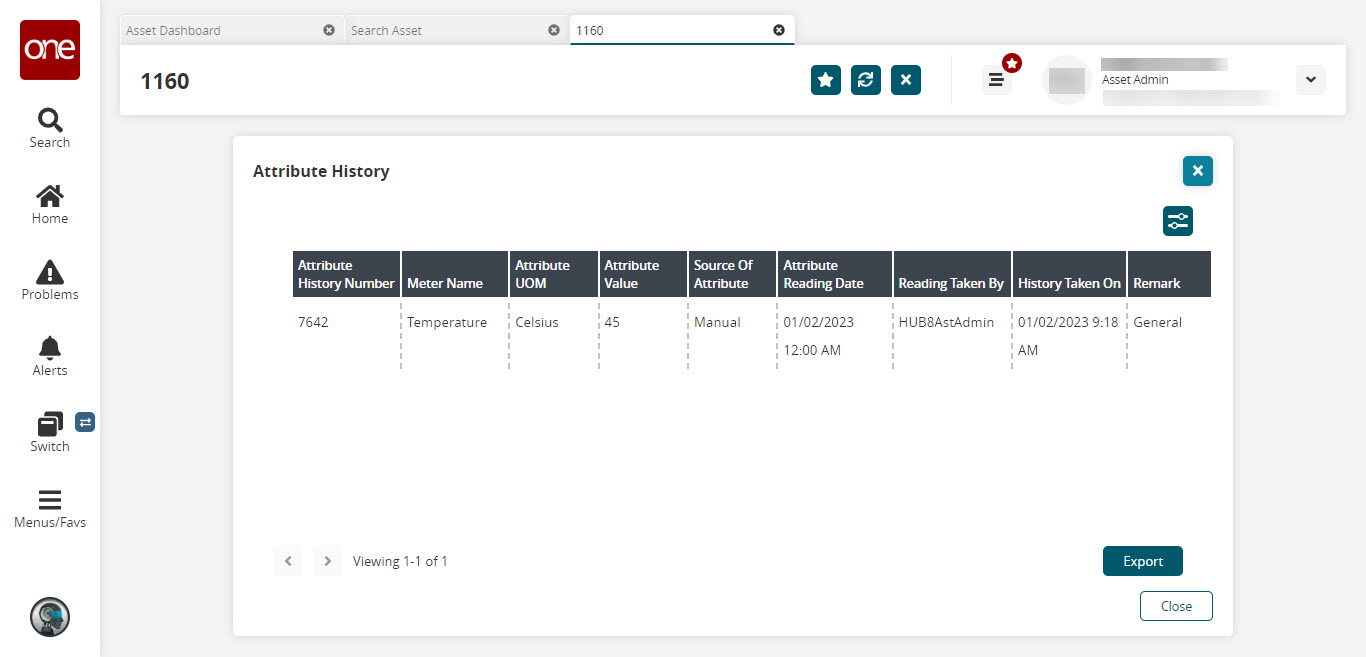
Click the Manufacturing & Life tab to fill out more information.
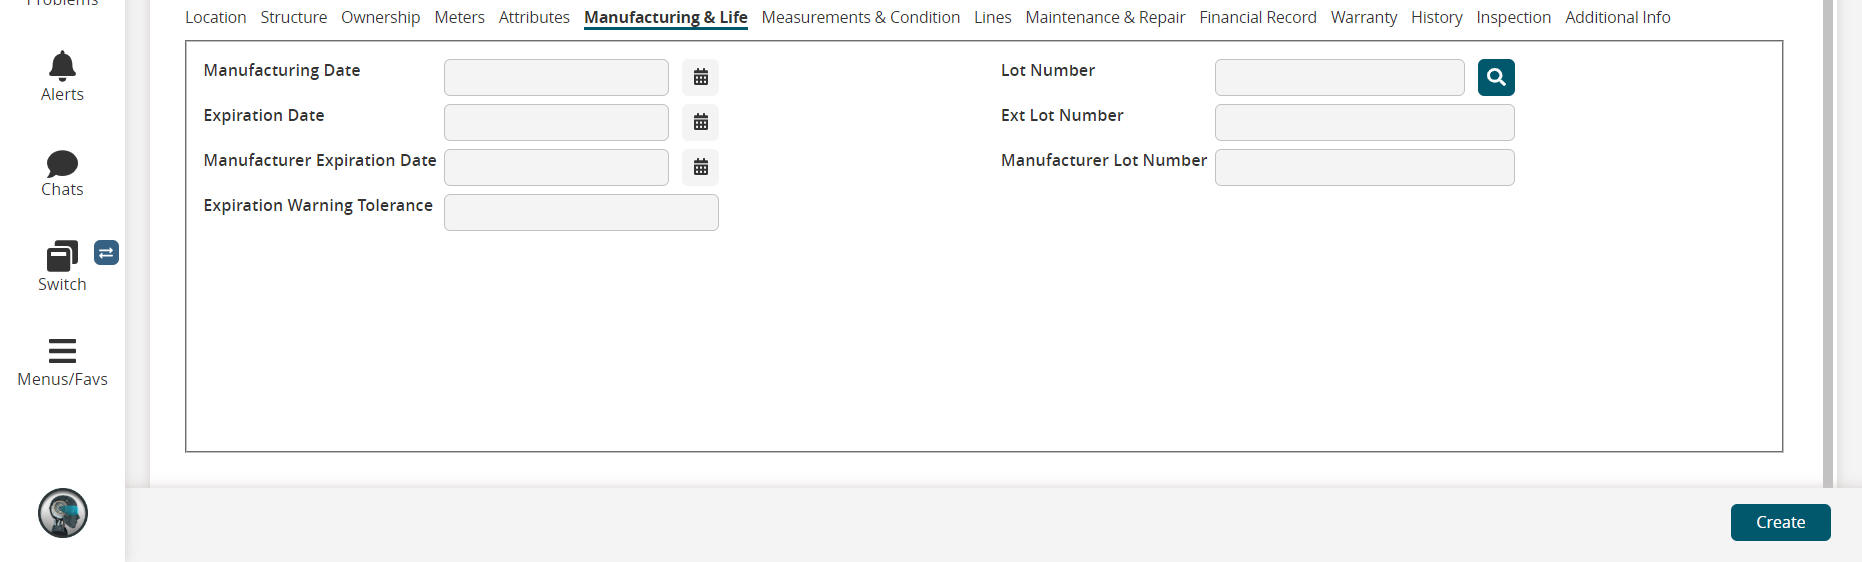
Complete the following fields if desired.
Field
Description
Manufacturing Date
Click the calendar icon and time icon to select a manufacturing date and time for the asset.
Expiration Date
Click the calendar icon and time icon to select an expiration date and time for the asset.
Manufacturer Expiration Date
Click the calendar icon and time icon to select a manufacturer expiration date and time for the asset.
Expiration Warning Tolerance
This field auto-populates based on selections made in the main asset area on the top of the screen.
Lot Number
Click the search icon to select the lot.
Ext Lot Number
This field auto-populates based on selections made in the main asset area on the top of the screen.
Manufacturer Lot Number
Click the search icon to select the lot.
Click the Measurements & Condition tab.
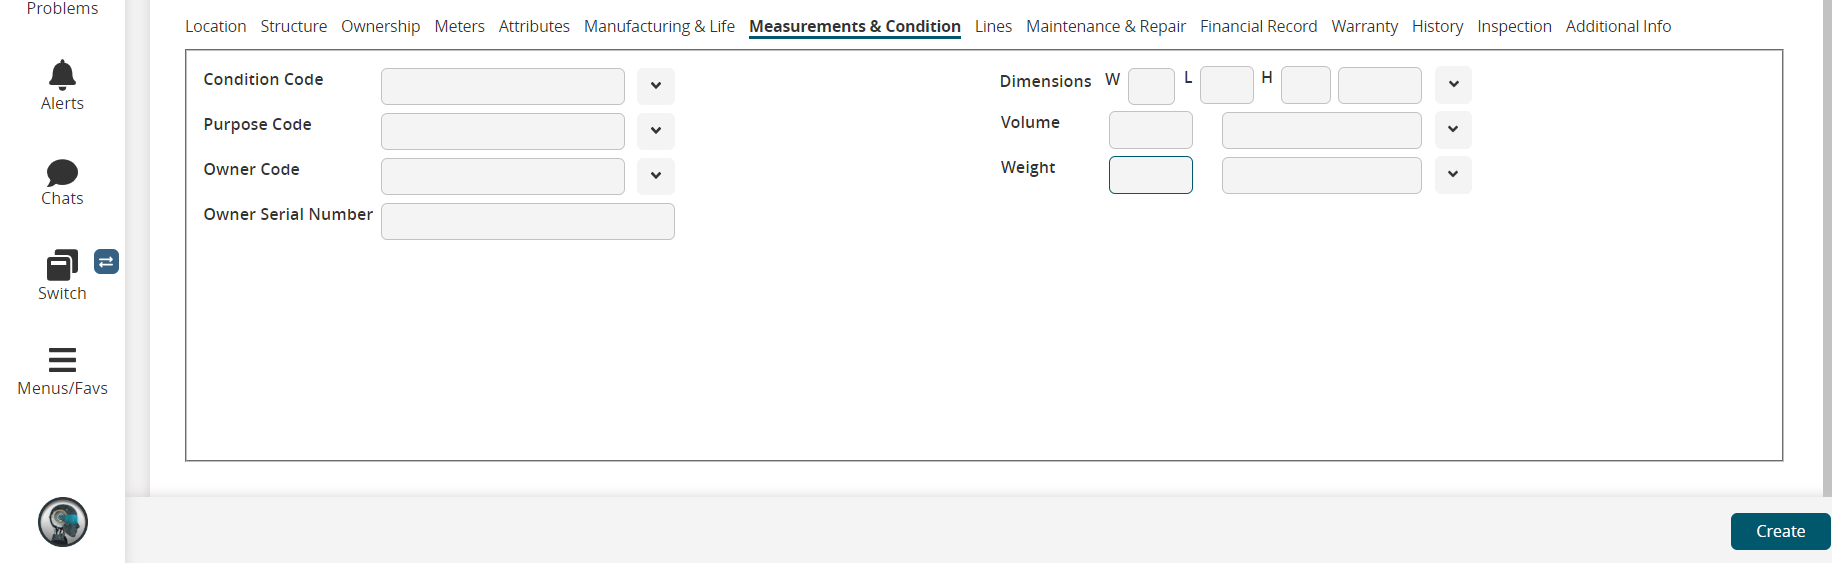
Complete the following fields if desired.
Field
Description
Condition Code
Select the condition code for the asset from the drop-down list.
Purpose Code
Select the purpose code from the drop-down list.
Owner Code
Select the owner code from the drop-down list.
Owner Serial Number
Enter the owner serial number
Dimensions
Enter the width (W), length (L), and height (H) of the asset. Select the unit of measurement (UOM) from the drop-down list.
Volume
Enter the asset volume and select the UOM from the drop-down list.
Weight
Enter the weight of the asset and select the UOM from the drop-down list.
Note
There can be other fields, such as Kit Content, Progenitor, Indivisible, Locked, and Bill of Materials, which are auto-populated based on asset selection.
Click the Lines tab.
If desired, click the Add Lines button to add a new line to the asset.
A new line appears in the Lines tab.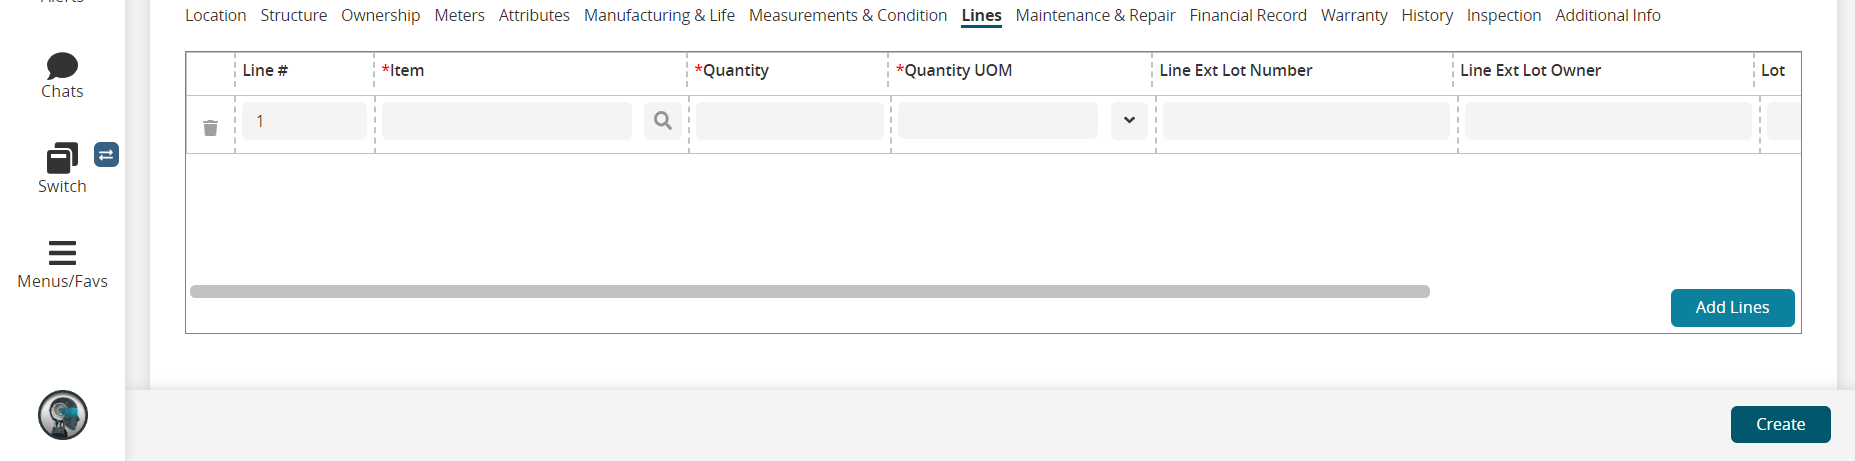
Complete the following fields for the newly added line. Fields marked with an asterisk ( * ) are required.
Field
Description
Line #
This field populates automatically.
* Item
Click the search icon to select an item.
* Quantity
Enter the quantity.
* Quantity UOM
Select the unit of measure (UOM) for the quantity from the drop-down list.
Line Ext Lot Number
Enter the extended lot number.
Line Ext Lot Owner
Enter the extended lot owner.
Lot
Click the search icon to select the lot.
Split Quantity
Enter the split quantity.
Click the Add Lines button to save the new line.
Click the Maintenance & Repair Details tab.
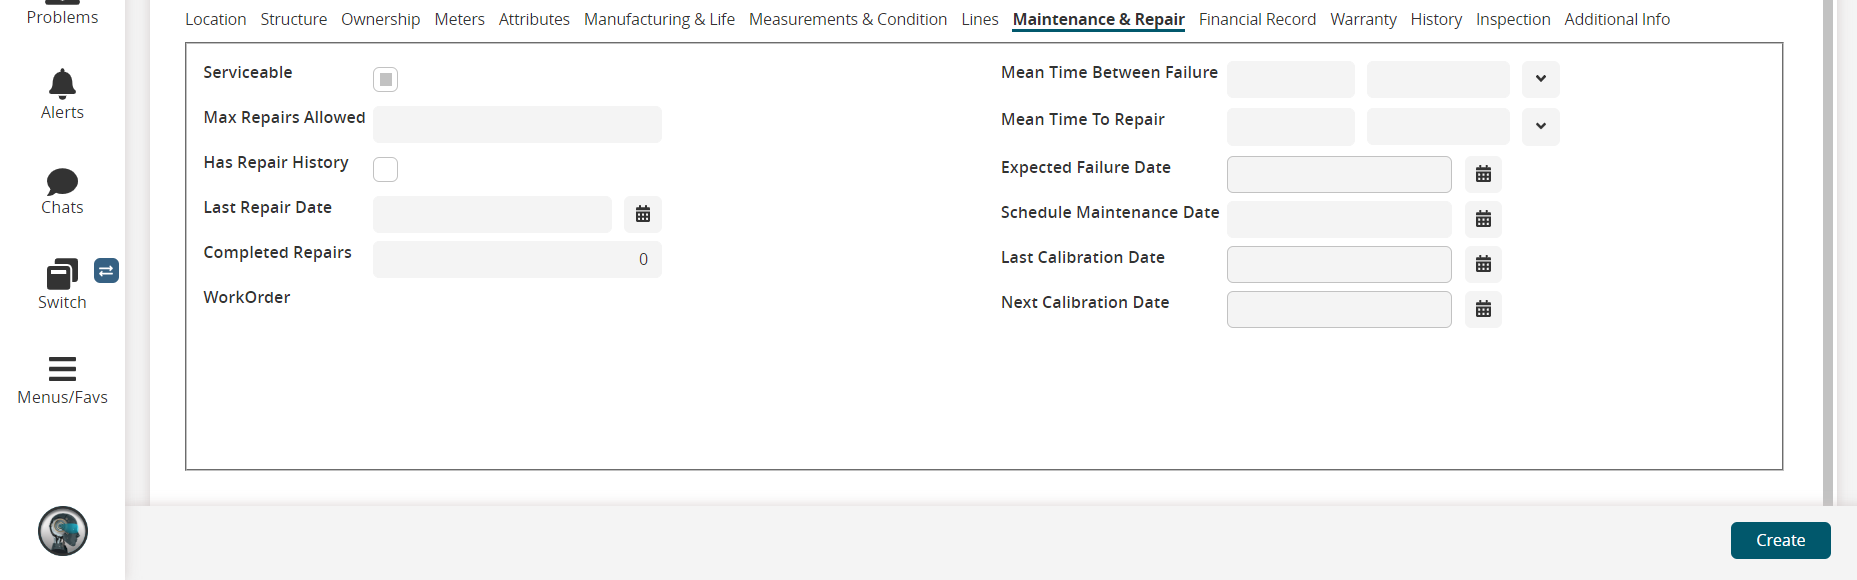
Complete the following fields as desired.
Field
Description
Serviceable
Check the box if this asset is serviceable.
Max Repairs Allowed
Enter a value for the maximum number of repairs allowed.
Has Repair History
Check the box if this asset underwent repair work.
Last Repair Date
Click the calendar and clock icons to select the last repair date and time.
Completed Repairs
Enter a description of the repairs that were completed.
Work Order
If a work order is created for that asset then the respective work order number is auto-populated.
Mean Time Between Failure
Based on the Asset Analytics engine report the value is auto-populated.
Mean Time To Repair
Based on the Asset Analytics engine report the value is auto-populated.
Expected Failure Date
Click the calendar and clock icons to select the date and time for the next expected failure.
Schedule Maintenance Date
This field auto-populates if applicable.
Last Calibration Date
Click the calendar and clock icons to select the date and time for the last calibration.
Next Calibration Date
Click the calendar and clock icons to select the date and time for the next calibration.
Click the Financials Record tab to add financial information (optional).

Complete the following fields as desired and then click the Add Financials button.
Field
Description
Asset Record Number
Enter the asset tag number. This number may be the same as the serial number.
Asset Value
Enter the asset value and select the corresponding currency abbreviation.
Purchase Date
Click the calendar and clock icons to select the purchase date and time.
Acquired Date
Click the calendar and clock icons to select the acquired date and time.
Commissioned Date
Click the calendar and clock icons to select the commissioned date and time.
Disposal Date
Click the calendar and clock icons to select the disposal date and time.
Tax Type
Select the tax type from the drop-down list.
Tax Start Date
Click the calendar and clock icons to select the tax start date.
Tax End Date
Click the calendar and clock icons to select the tax end date.
Insurance Type
Select the insurance type from the drop-down list.
Insurance Start Date
Click the calendar and clock icons to select the insurance start date.
Insurance End Date
Click the calendar and clock icons to select the insurance end date.
Next Calibration Date
Click the calendar and clock icons to select the date and time for the next calibration.
Click the Warranty tab to enter warranty details if desired.
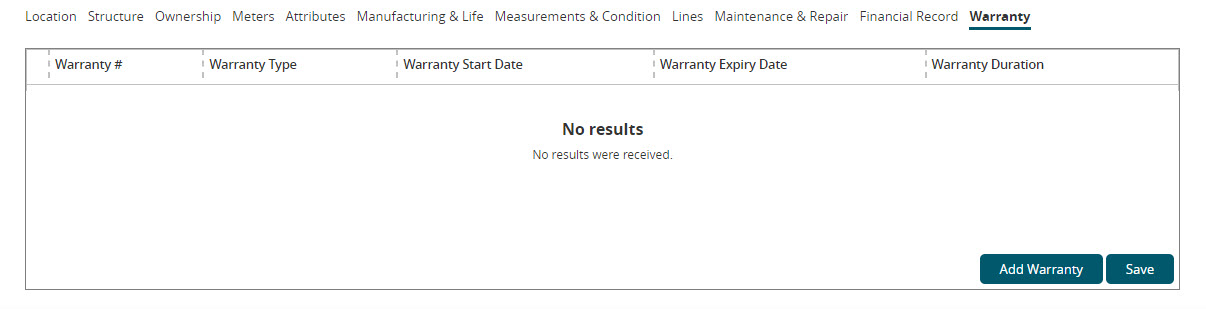
Click the Add Warranty button.
A new line appears for the warranty information.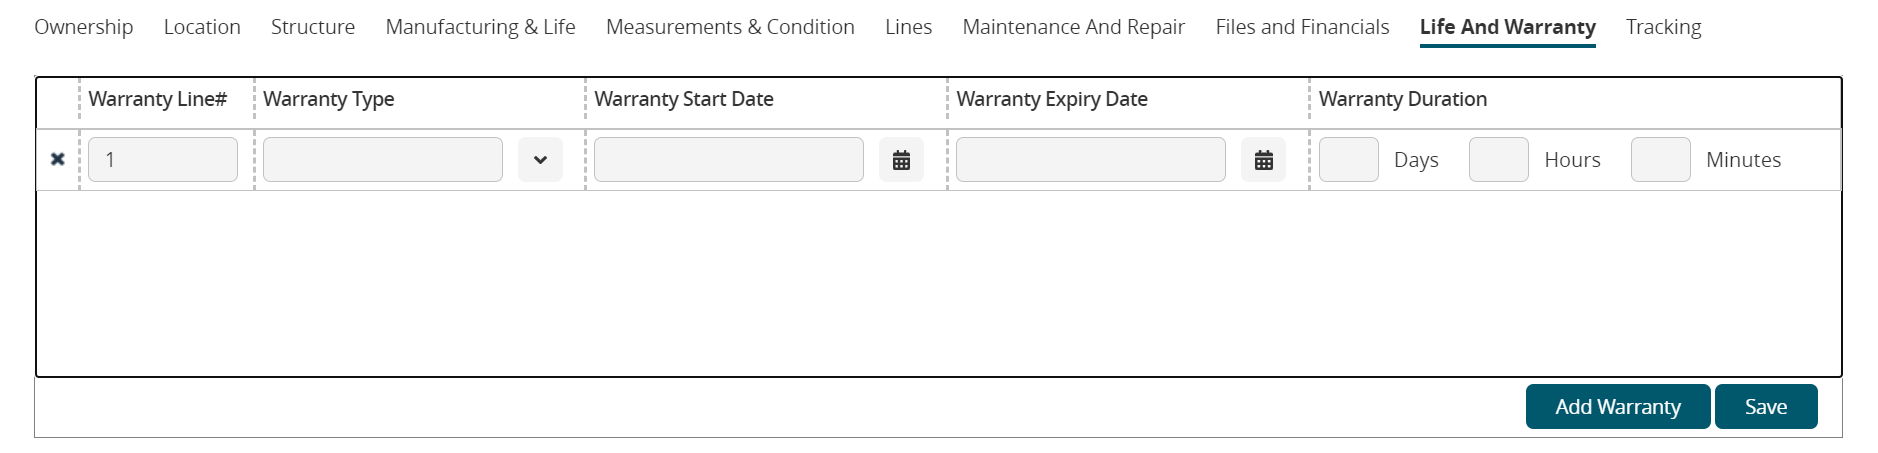
Complete the following fields as desired to add warranty information, and then click the Save button to save the information.
Field
Description
Warranty Line #
This field populates automatically.
Warranty Type
Select the warranty type from the drop-down list.
Warranty Start Date
Click the calendar icon to select the warranty start date.
Warranty Expiry Date
Click the calendar icon to select the warranty end date.
Warranty Duration
Enter the days, hours, and minutes of the warranty duration.
Click the History tab to view the history details if desired.
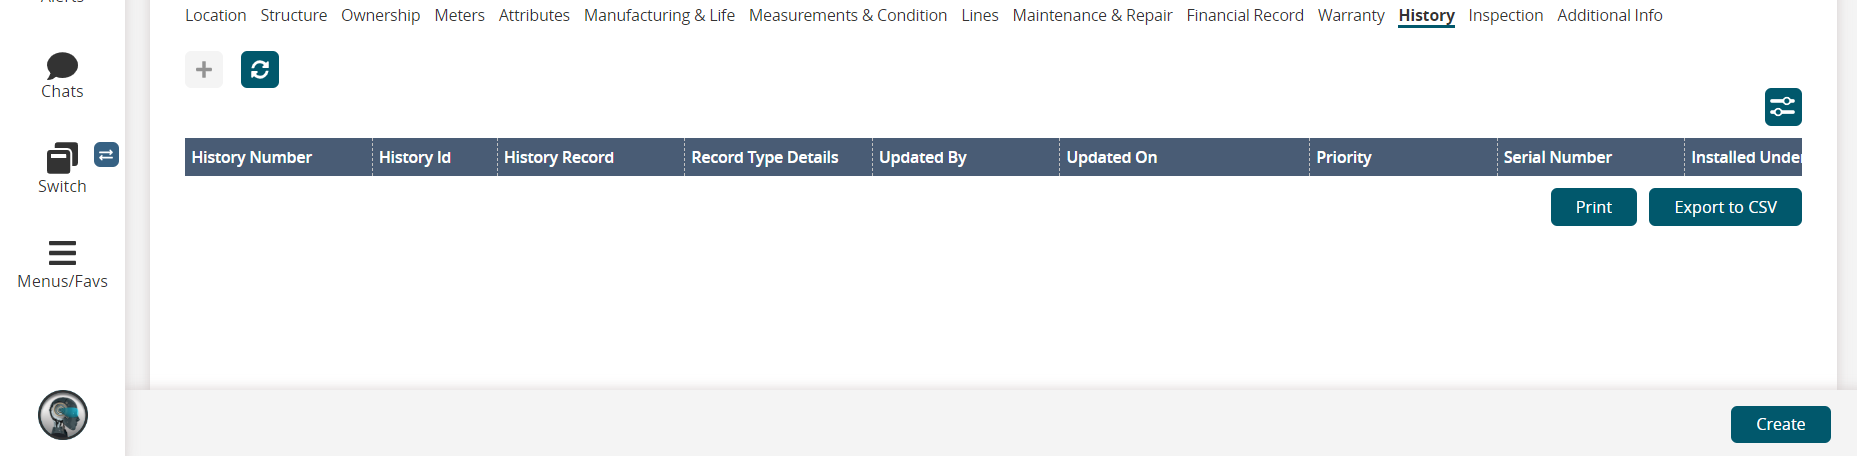
Click the
 Filter icon to filter the history details of the asset.
Click the
 Refresh icon to refresh the History tab.
Click the Print button to print the history details of the asset.
Click the Export to CSV to export the history details of an asset into a CSV file.
Click the Inspection tab to view the inspection details if desired.
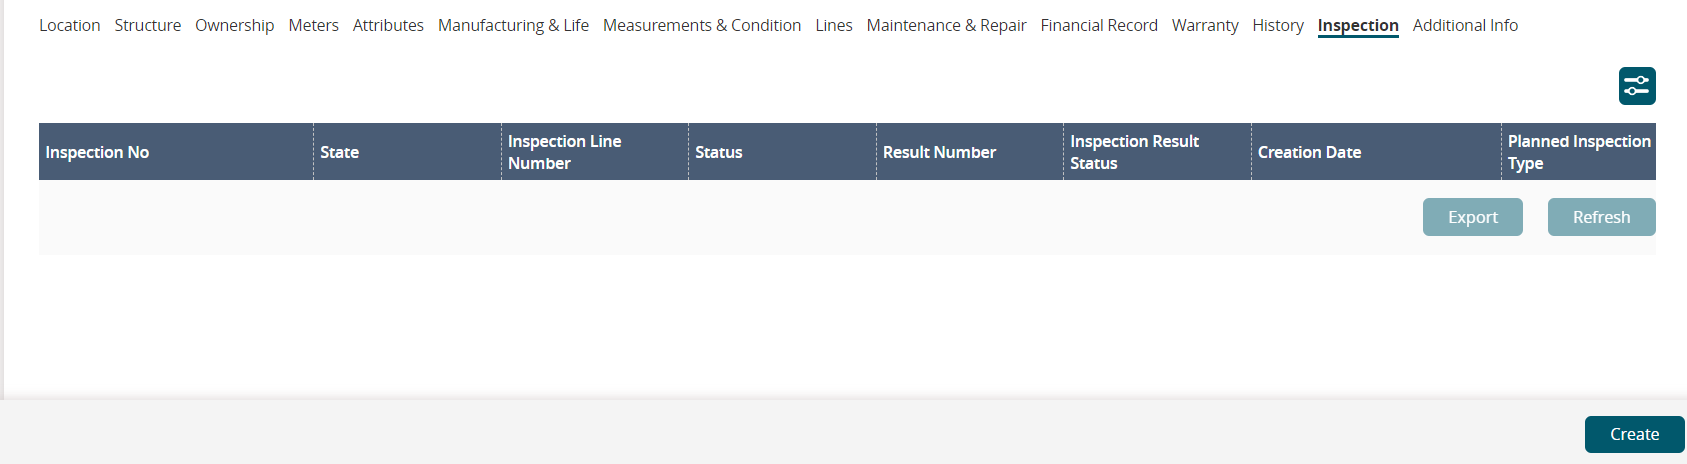
Click the
Filter icon to filter the inspection details of the asset.
Click the Export button to export the inspection information into a CSV file.
Click the Refresh button to refresh the Inspection tab.
Click the Additional Info tab.
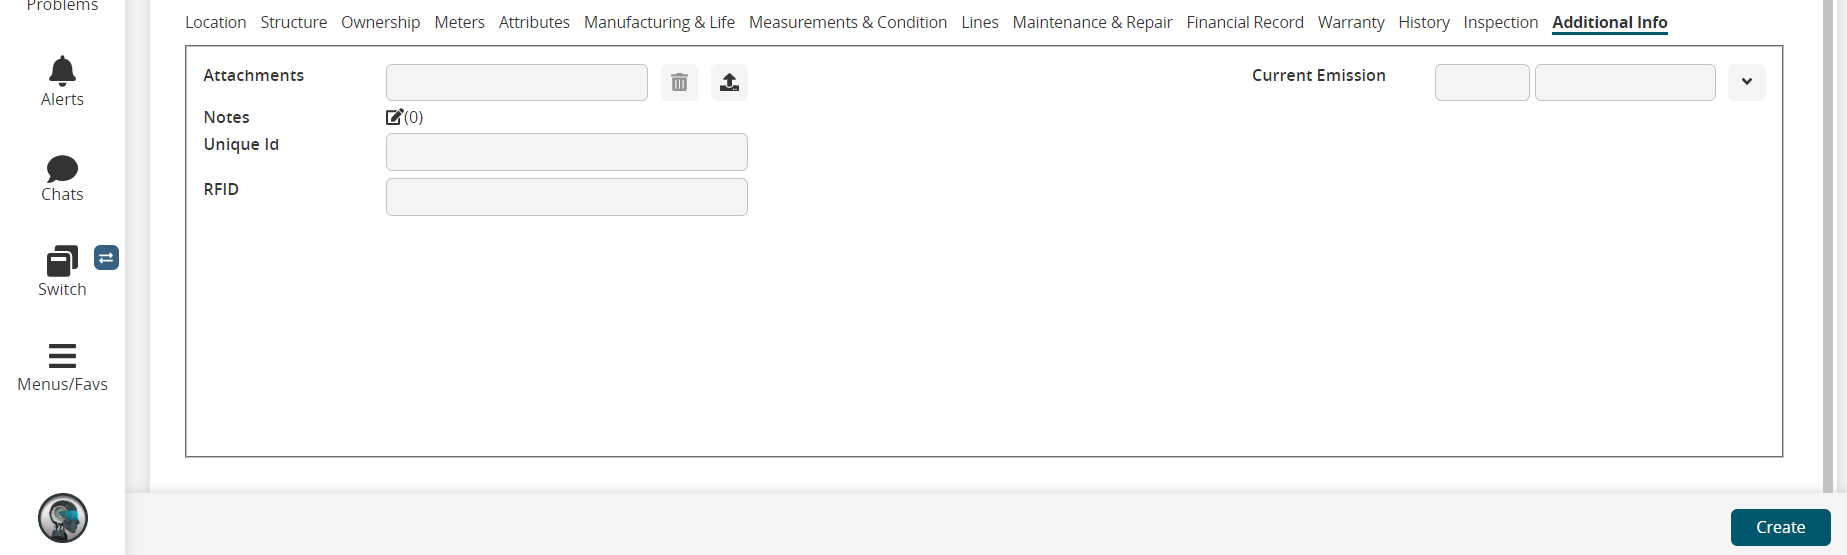
Complete the following fields as desired to add additional information.
Field
Description
Attachments
Click the upward arrow icon and upload any desired attachments. Also, click the delete icon to delete any attachments.
Notes
Click the pencil icon to add and view any notes.
Unique Id
Enter any Unique Id to identify that asset.
RFID
Enter any RFID if desired.
Current Emission
Enter any value of current emission and click the drop-down menu to select the unit of measurement.
Once the desired information has been entered on all tabs, click the Create button to create an asset.
A success message appears.
Searching Assets
Complete the following steps to search for assets:
Log in to the ONE system.
Click Menus/Favs > Asset Management > Search Assets.
In the NEO UI, users can click on the Menus/Favs icon on the left sidebar and type in the name of the screen in the menu search bar. For more information, see "Using the Menu Search Bar."
The Search Assets screen appears.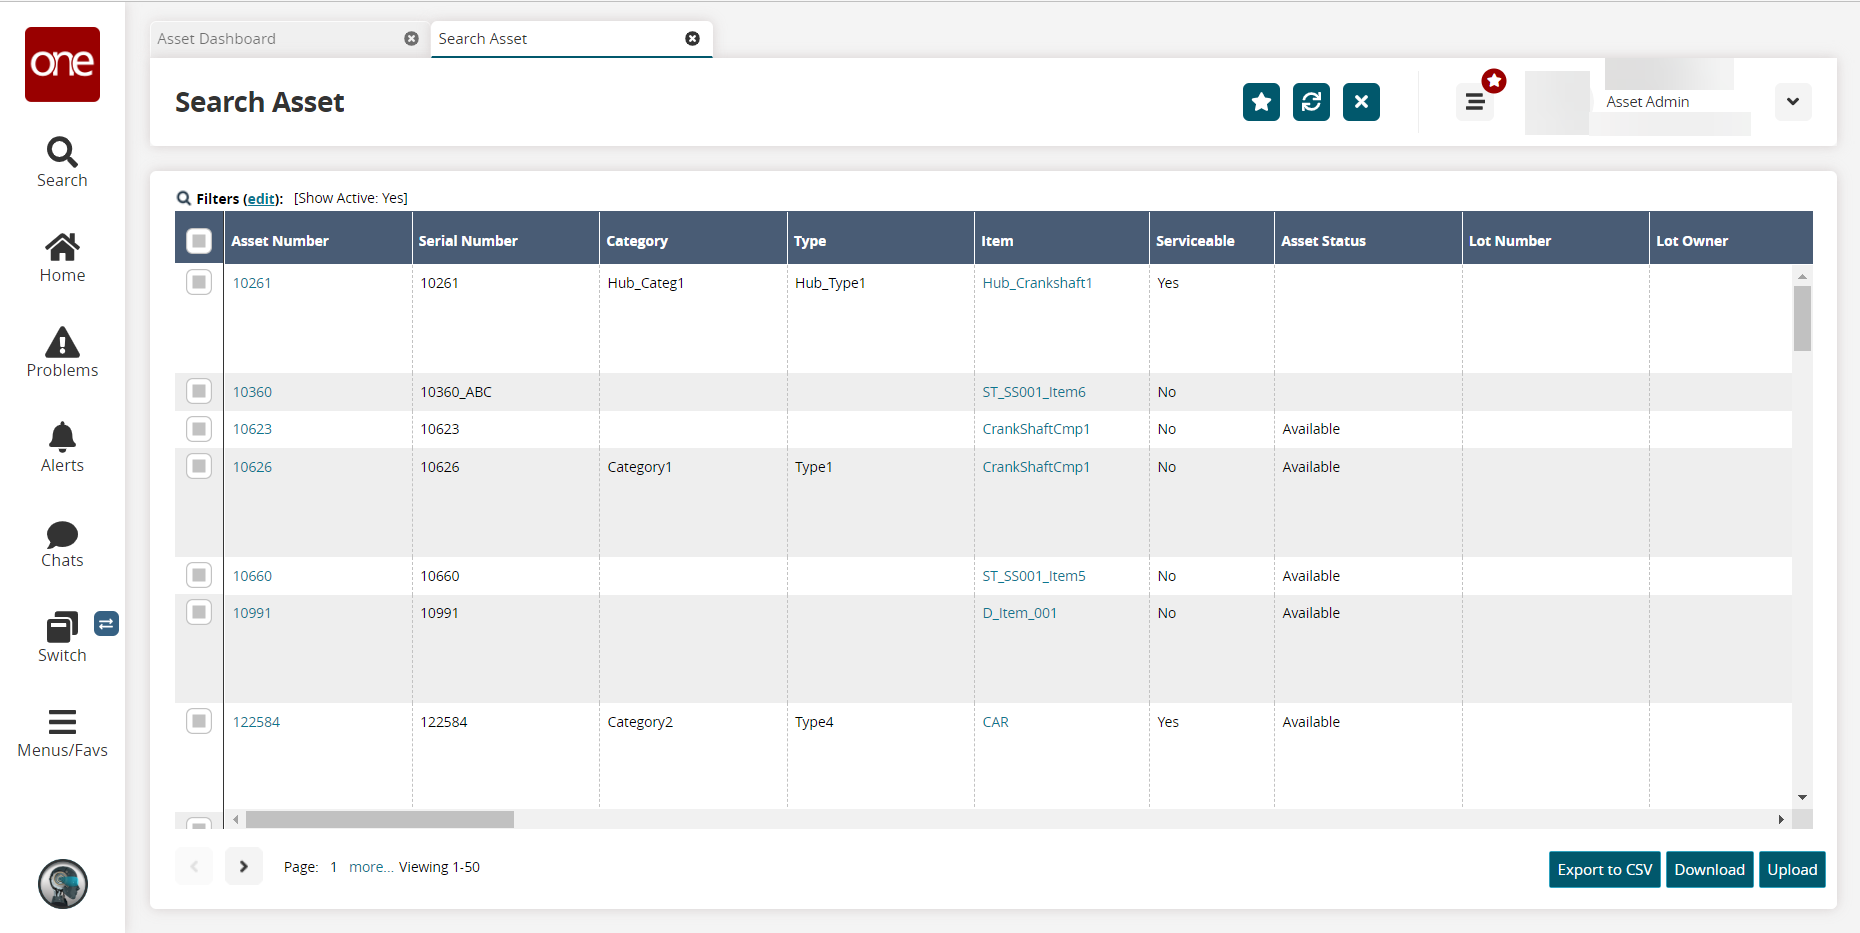
Click the Filters (edit) link to apply filter criteria to reduce the number of entries displayed.
The Filter menu appears.
Click the Add Filter link to add additional filter fields.
Fill out the following filter fields as desired to limit the asset search results.
Field
Description
Serial No
Click the search icon to select a singleton number.
Asset Status
Select the asset status from the drop-down list.
Show Active
Click the checkbox to show active assets only in the search results.
Current Owning Organization
Enter the owning organization. The field uses predictive text selection, so choices will display based on the characters you type.
Asset Type
Enter the asset type. The field uses predictive text selection, so choices will display based on the characters you type.
Managing Org
Enter the managing organization. The field uses predictive text selection, so choices will display based on the characters you type.
Owner Auxiliary Key
Enter the owner auxiliary key. The field uses predictive text selection, so choices will display based on the characters you type.
Asset Category
Enter the asset's category. The field uses predictive text selection, so choices will display based on the characters you type.
Assigned To Organization
Enter the organization the asset is assigned to. The field uses predictive text selection, so choices will display based on the characters you type.
Description
Enter a description.
Expiration Date
Click the calendar and clock icons to set the expiration dates.
Item
Enter the item associated with the asset. The field uses predictive text selection, so choices will display based on the characters you type.
Item-Based Singleton
Enter the item-based singleton. The field uses predictive text selection, so choices will display based on the characters you type.
Manufacturer Expiry Date
Click the calendar and clock icons to set the expiration dates.
Current Site
Enter the asset's current site. The field uses predictive text selection, so choices will display based on the characters you type.
Current Location
Enter the asset's current location. The field uses predictive text selection, so choices will display based on the characters you type.
Warranty Expiry Date
Use the calendar and clock tools to set the warranty expiry date.
My Items Only
Click the checkbox to only include items marked as My Items in the search results.
Owner Serial Number
Enter the owner serial number. The field uses predictive text selection, so choices will display based on the characters you type.
Click the Search link.
The search result screen appears.
Click the Export to CSV button to export the list into a spreadsheet.
Click the Download button to download the searched assets list.
Click the Upload button to upload an asset CSV file.