GLG: Assigning Vehicles to ELD Providers
Complete the following steps to assign a vehicle to an ELD provider:
Log in to the ONE system as a CarrierATransMgr user
Click Menu/Favs > Contract Management > ELD Authorization.
The ELD Authorization page appears. In the left-hand Explorer pane, ELD providers preconfigured by your Transportation Admin are displayed. If an ELD provider is bold, it has already been configured by the carrier and shows buttons to assign a vehicle. Non-bold ELD providers have not yet been configured.Select the ELD provider you wish to sync with the system. For this example, we are using the Azuga ELD provider.
The ELD provider information appears in the right pane.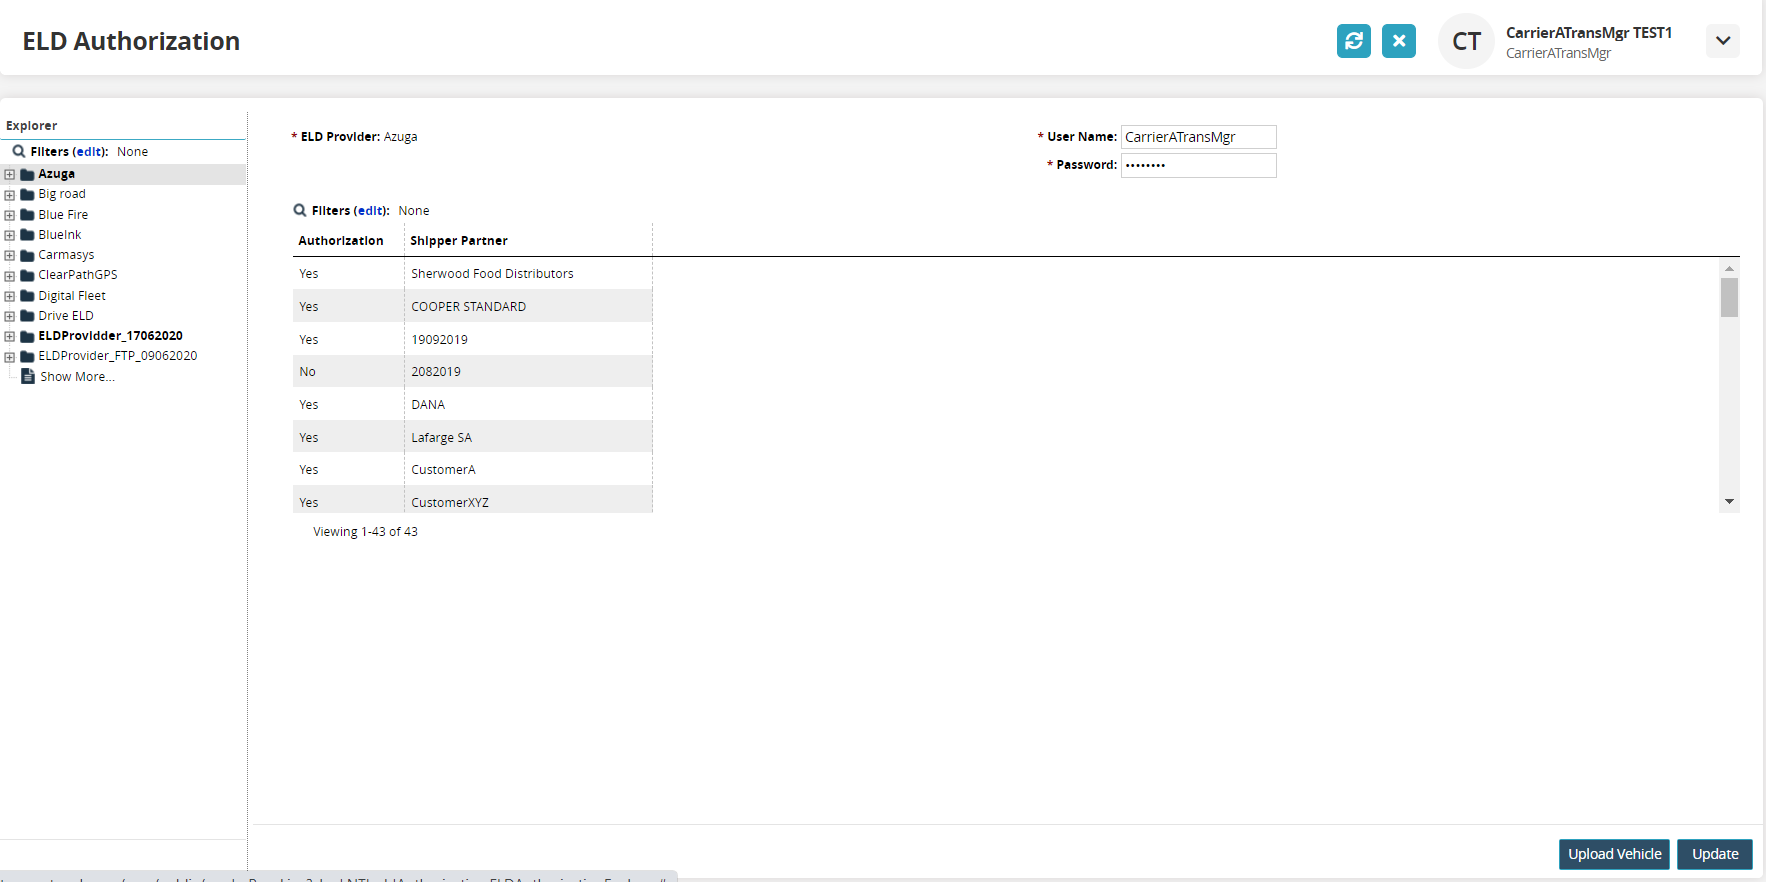
Input the * User Name, and * Password. Fields with an asterisk ( * ) are required.
Log-in credentials are always encrypted and not stored in plain text.Click Upload Vehicle.
The Carrier Asset page appears. The Upload popup window may display immediately, but users can also click on the New Upload button.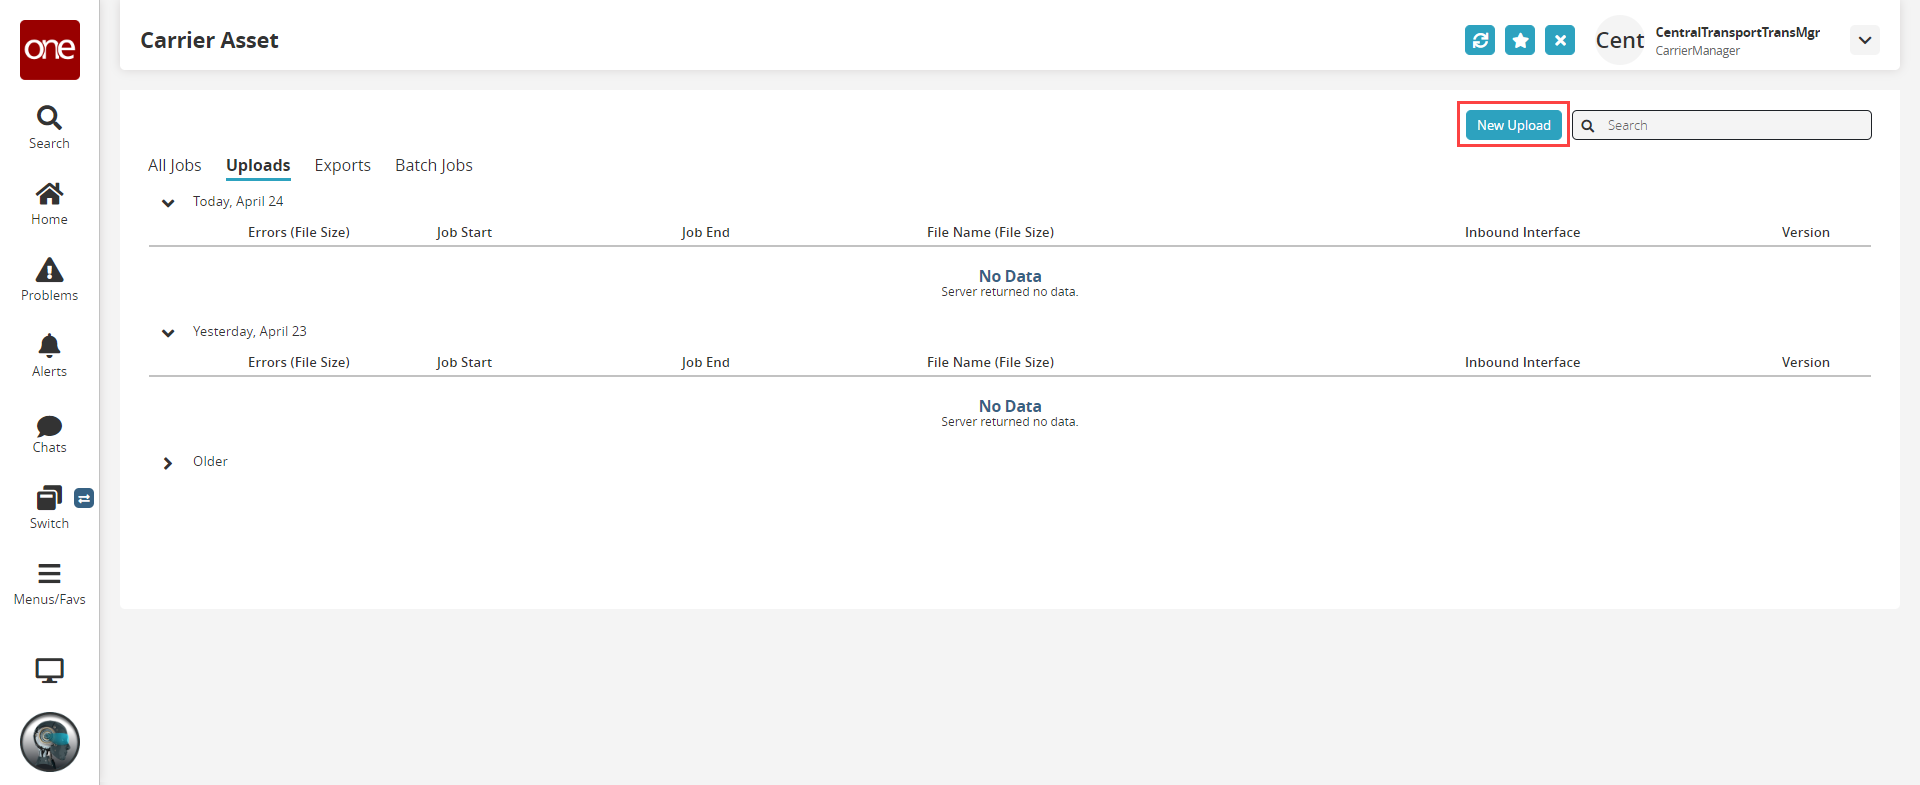
Click New Upload.
The Upload popup window appears.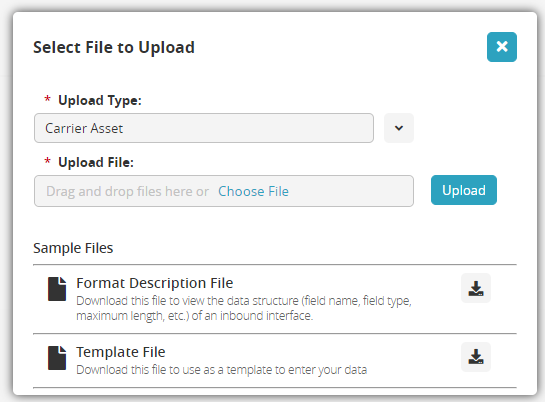
Ensure that the correct document type is selected in the * Upload Type field.
Click the Choose File link and select a file from the user's computer.
Click the Upload button.
The file displays on the Carrier Asset page.
Switch back to the ELD Authorization page.Click Update.
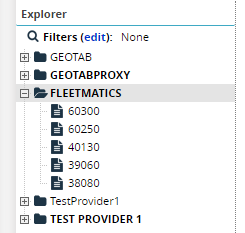
The ELD provider is now configured.Click the + sign to expand the ELD provider in the Explorer pane to see assets/vehicles running on that ELD network.
Click a vehicle.
The vehicle/asset information appears in the right pane.
Modify GPS ID if necessary.
Click Update Vehicle.
A green success bar displays.Under Vehicle Auth, select Yes or No for each shipping partner. This determines which shipping partners will have access to data from this vehicle.
Click Authorize Shipper.
A green success bar displays.