GLG: Creating or Modifying Telemetry Policies
Complete the following steps to modify the Telemetry policies at the site level:
Log in to the ONE system.
Click Menu/Favs > Transportation > Policies > Telemetry Policies.
The Telemetry Policies page appears. If no policies exist, the Create new event policy link displays at the bottom. If policies exist, and the user modifies them, the Save button displays.Click the customer in the left column.
The policy details appear.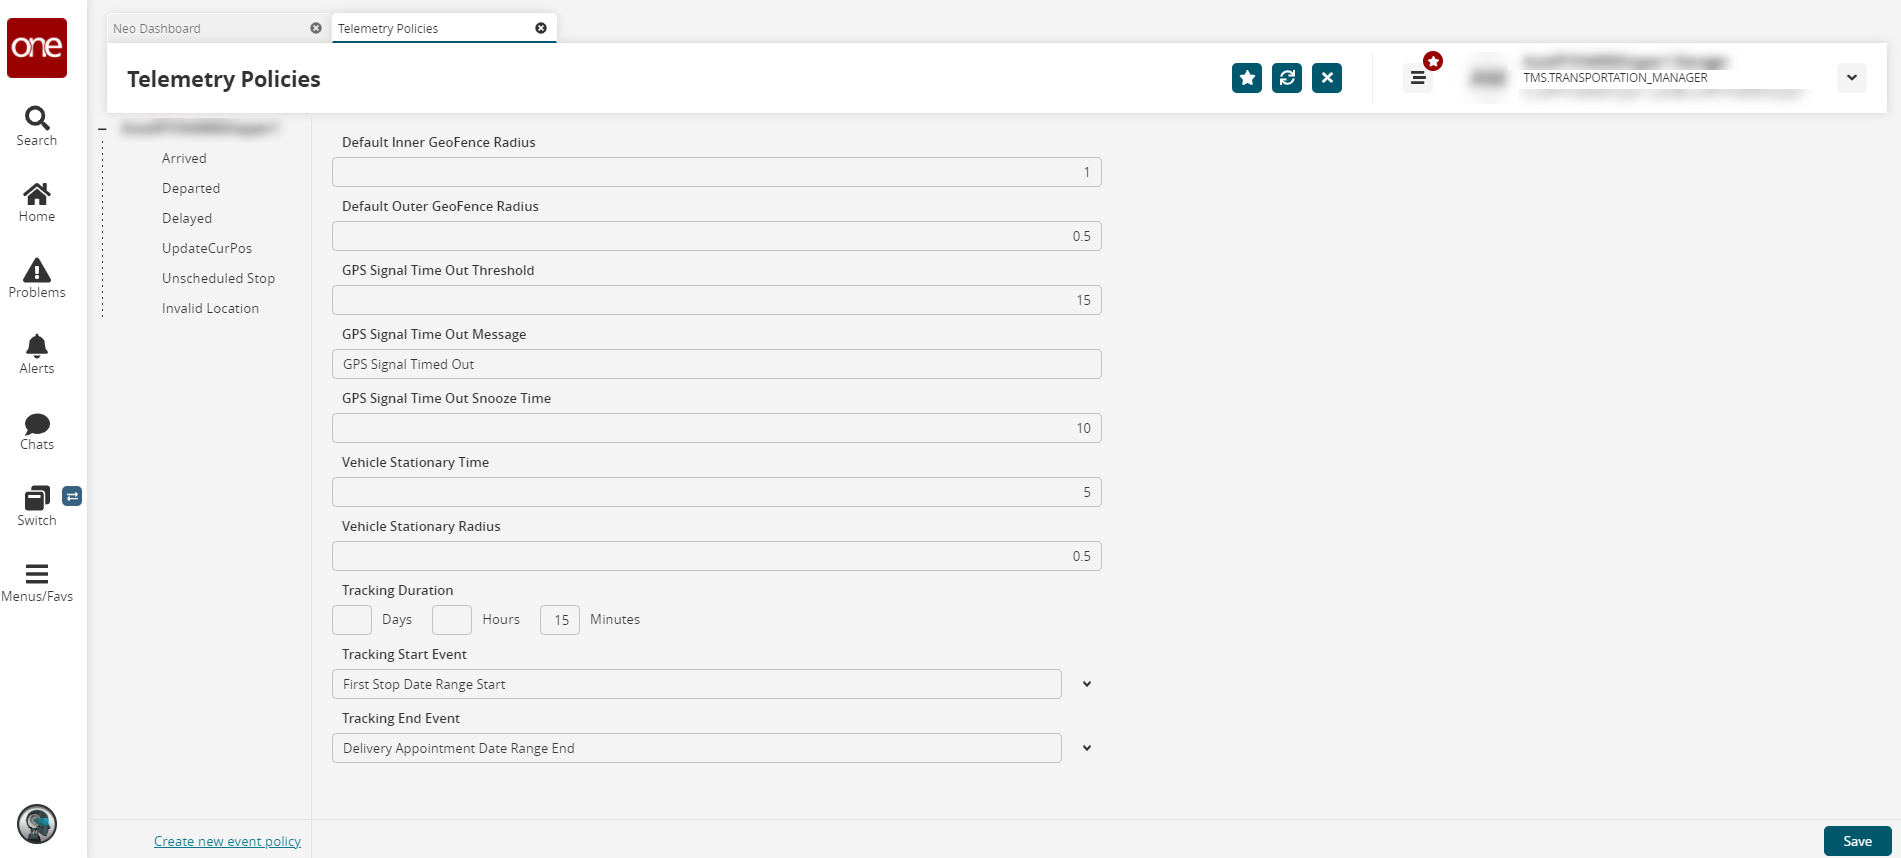
Fill out the following fields. Fields with an asterisk ( * ) are required.
Attribute
Description
Default Inner GeoFence Radius
Enter a value for the default inner geo-fence radius used to compute Arrival and Departure events.
Default Outer GeoFence Radius
Enter a value for the default outer geo-fence radius used to compute approaching events.
GPS Signal Time Out Threshold
Enter a value for the GPS time-out threshold.
GPS Signal Time Out Message
Enter the message to send when the GPS Signal Time Out value is reached.
GPS Signal Time Out Snooze Time
Enter a value for the timeout, in minutes, to set how long to silence the GPS Signal Time Out message once it has been sent.
Vehicle Stationary Time
Enter a value for time, in minutes, to wait before a vehicle is considered stationary (Default is 15 minutes).
Vehicle Stationary Radius
Enter a value for the distance from the last stationary point to indicate a vehicle has left (Default is 1 mile).
Tracking Duration
Enter a value for the duration an asset will be GPS tracked. Users can use the date field from the movement or a date field from a tracking event like Confirmed, Picked Up, and Received, among others.
Example:
From: 5 Hours from PickupDateRangeStart
To: DeliveryAppointmentDateTracking Start Event
Select an event from the dropdown menu that will start the system tracking.
Tracking End Event
Select an event from the dropdown menu that will end the system tracking.
Click the Create or Save button (depending on if you are creating a new policy or you are modifying an existing policy).
A green success bar displays.
Complete the following steps to create policies based on tracking events:
From the Telemetry Policies page, select a customer.
Click an event under the customer name.
In the screenshot below, we have selected Arrived as the event.Click the Create new event policy link at the bottom left of the screen.
The policy fields appear.
If policies already exist, they will display under the customer's name. A Create new event policy link displays if there are no tracking event policies. A Save button displays if there are existing policies.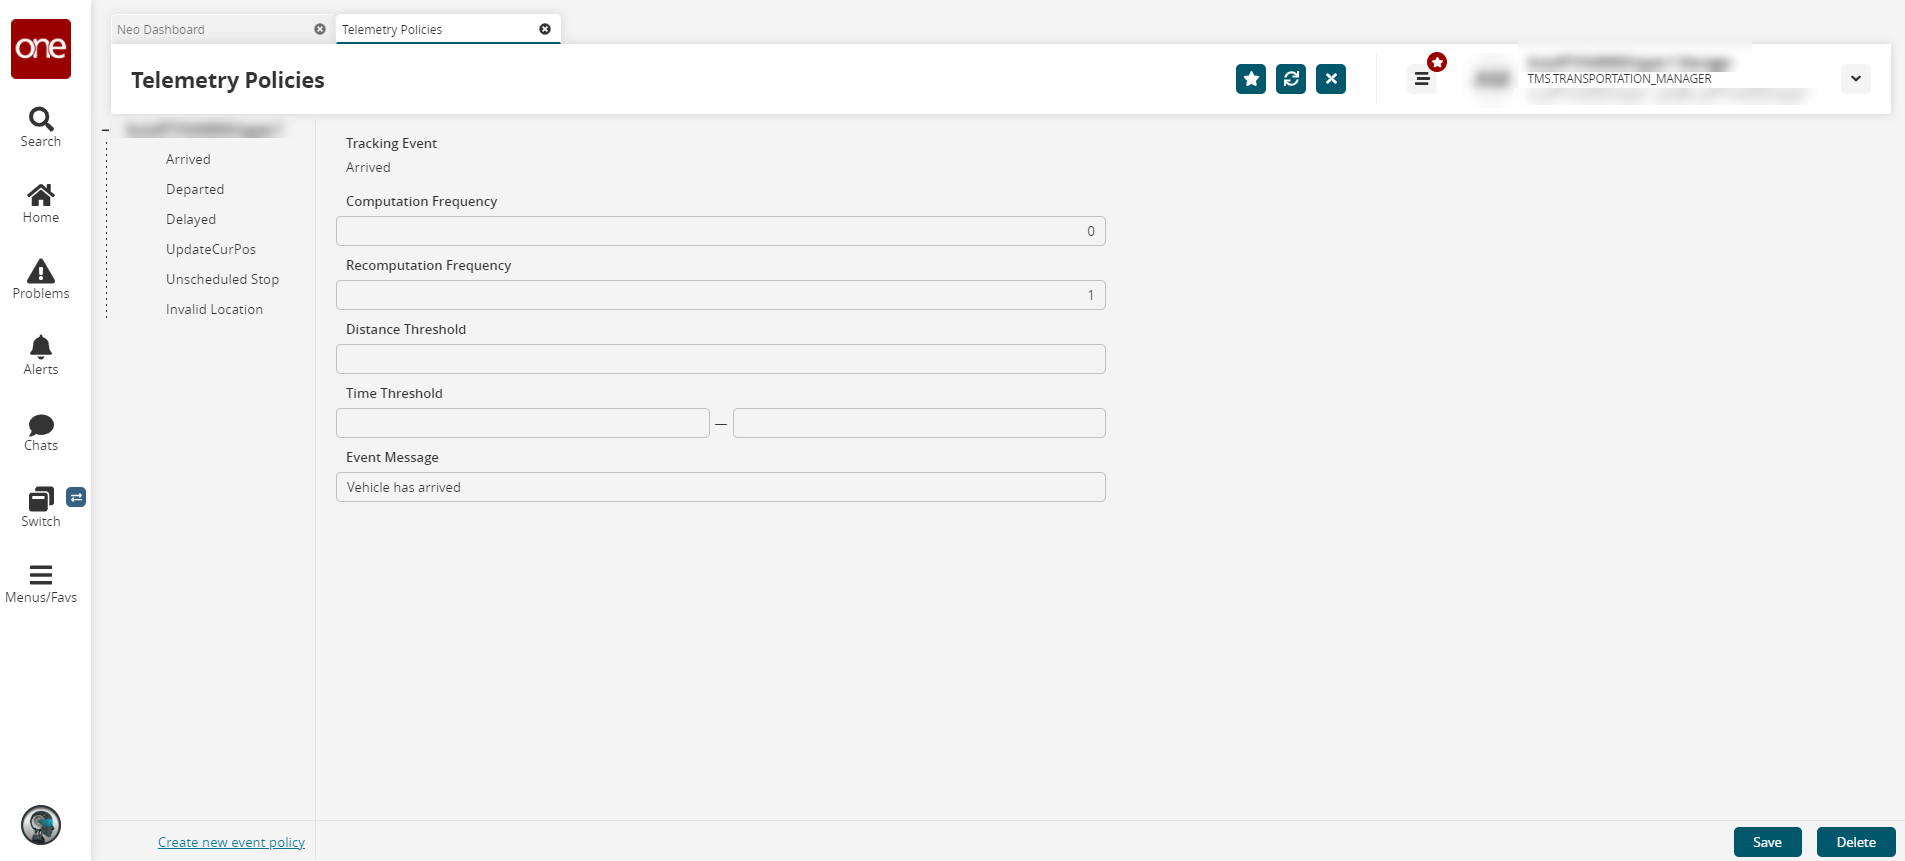
Fill out the following fields. Fields with an asterisk ( * ) are required.
Attribute
Description
Tracking Event
This field displays the event type selected from the left panel.
Computation Frequency
Enter a value in minutes for the frequency at which the event is computed.
Recomputation Frequency
Enter a value in minutes for the frequency used to recompute delay once an event like Delayed is triggered.
Distance Threshold
Enter a value in miles for the distance threshold used for event computation. For example:
For a Departed event, this is the distance the truck would have to travel from a site’s geo-fence to trigger the geo-fence.
For an Out of Route event, this is the distance the truck can deviate from the planned route
Time Threshold
Enter a value in minutes for the time threshold used in the context of event computation; this could be a range depending on the event. For example:
For an Arrived event, this will be used as a threshold for triggering the event.
For a Delayed at Stop event, this is the threshold beyond which a truck can stay at a planned stopover for the stop duration.
Event Message
Create a custom message when the event is triggered.
Click the Create or Save button.
A green success message displays.If desired, click the Delete button to delete a policy.