GLG: Assigning a Driver to a Movement
Users can dispatch a movement by assigning a user to the movement.
Complete the following steps to dispatch a movement and assign a dispatch user:
L og in to the ONE system.
Click Menu/Favs > Transportation > Confirmed. In the NEO UI, users can click on the Menus/Favs icon on the left sidebar and type in the name of the screen in the menu search bar. For more information, see "Using the Menu Search Bar."
The Confirmed screen displays.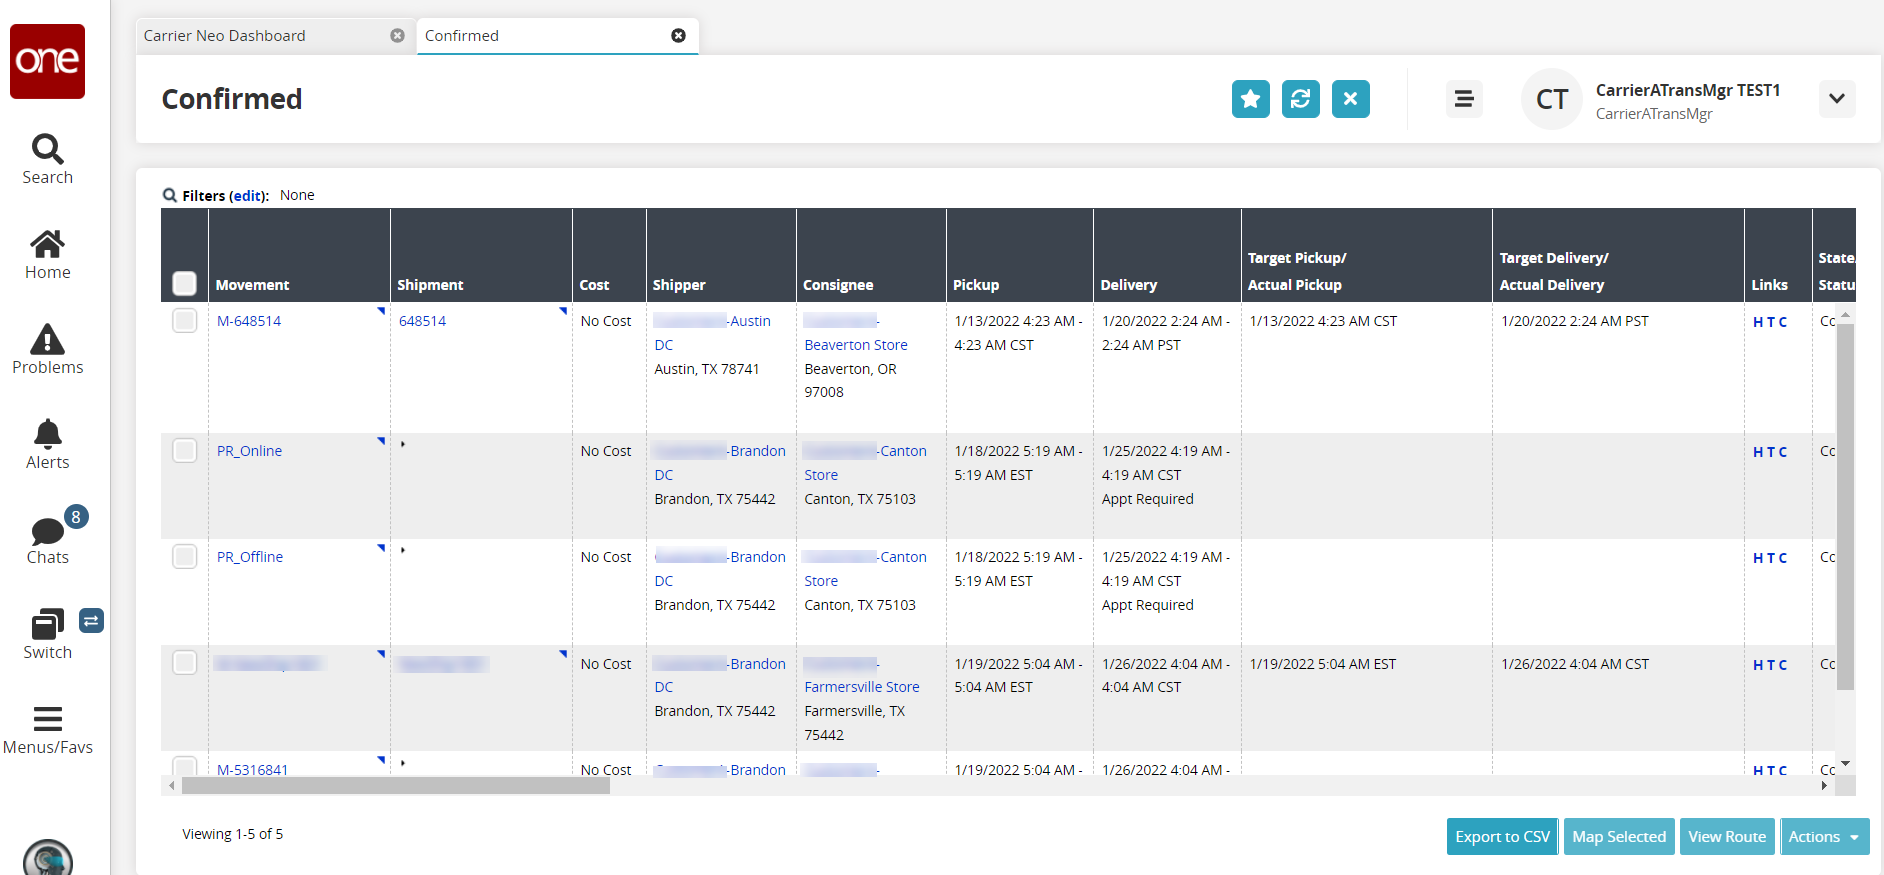
There are two ways to select the Dispatch Movement menu option.Click the contextual (triangle) menu next to the movement name (used when you want to perform an action on a single movement) or click the checkbox in front of the movement and then the Actions button menu (used when you want to perform the same action for multiple movements).
Select Dispatch Movement from the menu.
The Dispatch Movement popup window displays.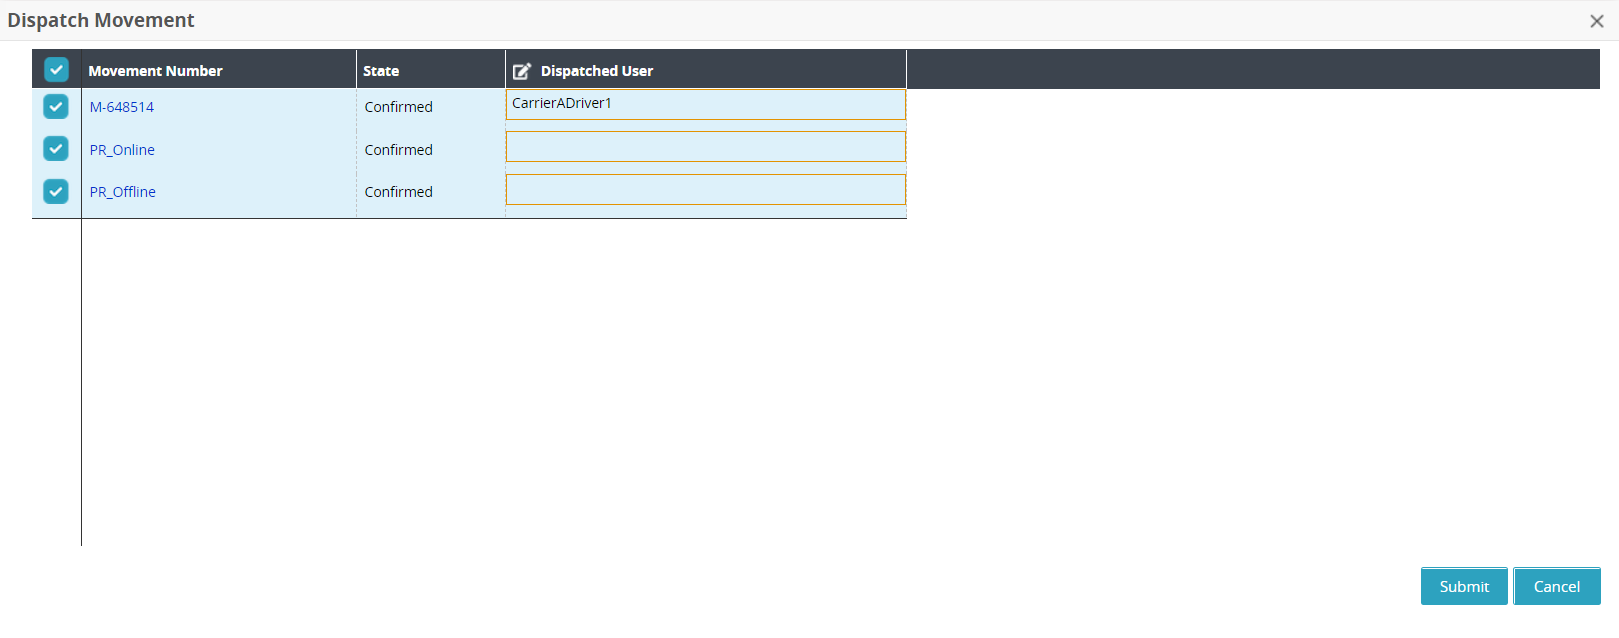
Type in the name in the Dispatched User field or use the picker tool.
In the example, we selected CarrierADriver1.To make bulk edits that allow you to dispatch multiple movements to the same driver, click the column editing icon and select Enable Bulk Edit.

A new column displays.
Click the copy icon (first icon).
A popup window displays.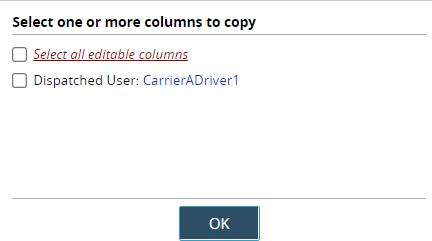
Check the appropriate box to select all columns or just limited columns.
In this case, check the box for Dispatched User: CarrierADriver1.Click the OK button.
Click the paste icon for each row that you want to dispatch to the same driver.
The driver is copied to the cell.Click the Submit button.
A green success bar displays on the popup.Click the Close and Refresh button.
The movement updates and sends a notification to the driver.