GLG: Setting the OTP on POD Policy
GLG 3.6.1 includes a process to add a one-time password (OTP) that includes a new field on the POD screen on the Driver Mobile App. Users add the custom field, OTP, and set the policy via transportation policies and carrier profiles to generate an alert containing the password that is sent to a HUB's receiving contact. The receiving contact subscribes to the alert with the OTP password and enters the password on the POD screen in the driver app when shipments are delivered (at the shipment or stop level). This information is then delivered via API back to the carrier in a new OTP column on the shipment details page.
The workflow process in the GLG NEO UI requires two steps:
Set the OPT transportation policy, Generate OTP On Pickup, and the Generate Delivery OTP flag in the Shipment Event Alert subscription in the RTVN system
Create a custom field for the driver app called (OTP or similar)
Prerequisite
Ensure that the Contact Type email and phone number for the HUB's receiving contact have been entered on the Contacts tab for the shipment.
Setting the OTP Transportation Policy
Complete the following steps to set the OTP as a transportation policy in RTVN:
Log in to the ONE RTVN system.
Click Menu/Favs > Transporation > Transportation Policies.
The Transportation Policies screen displays.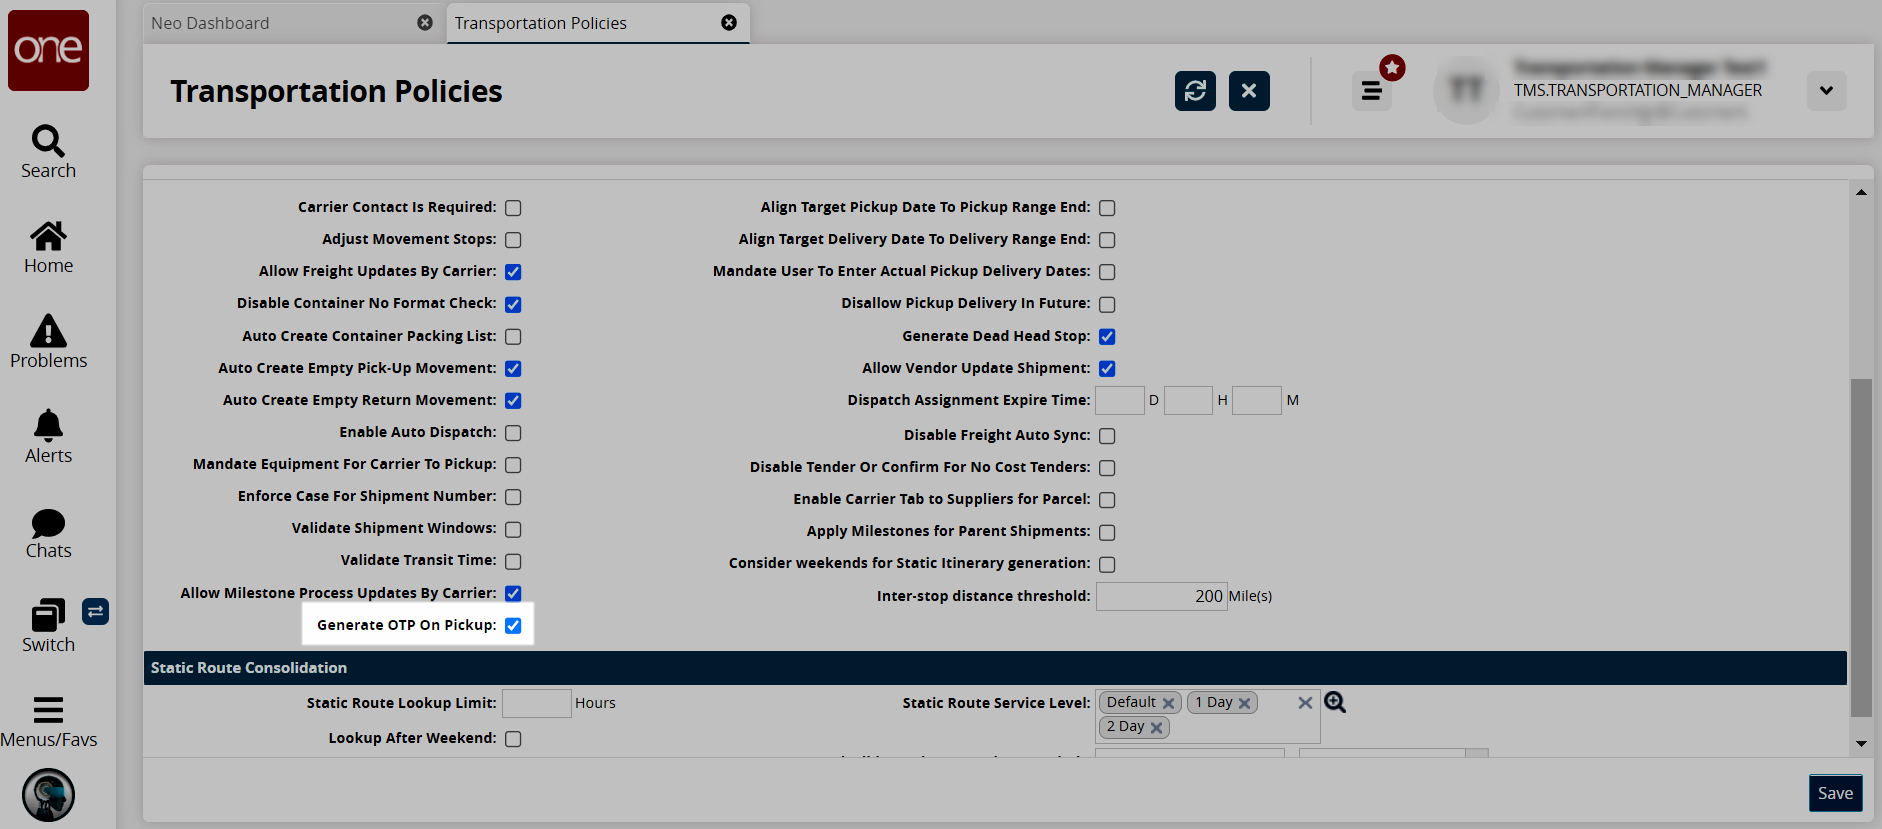
Click the checkbox for the Generate OTP On Pickup policy.
Click the Save button.
A green success message displays.
Adding OTP as a Custom Field
Complete the following steps to add OTP as a custom field to the POD screen. See the "GLG: Adding Custom Fields to the POD Screen" in the Online Help for instructions to add an OTP custom field for the Custom Fields for POD Required field on the Carrier Profiling page.
L og in to the ONE system.
Click Menu/Favs > Transportation > Policies > Carrier Profiling.
The Carrier Profiling screen displays.
In the Custom Fields on POD Required row, check the box under the Apply to Delivery column to include custom fields on the POD.
Error is the only available option in the Failure Type column.Click the Custom Fields link under the Check Value column.
The Add Custom fields popup displays.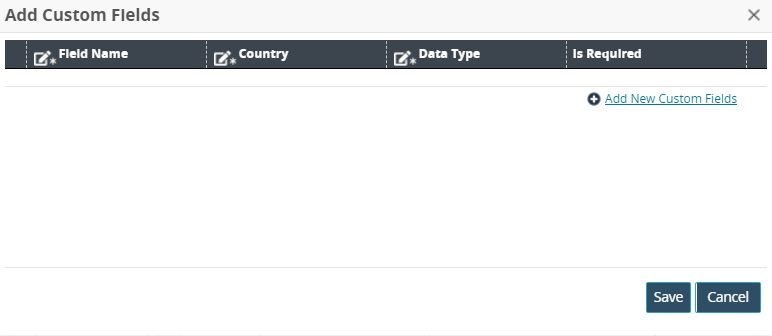
To add a new custom field, click the Add New Custom Fields link.
A new row displays.Enter a value for * Field Name. Fields with an asterisk ( * ) are required.
For this enhancement, enter OTP or a similar name.Enter a country code in the * Country field to apply this field only within certain countries.
Select a * Data Type from the dropdown list.
Check the box for Is Required, if desired.
Click the Save button.
Click the Create From UI button.
A green success message displays.