GLG: Uploading Proof of Delivery and BOL
Complete the following steps to upload proof of delivery and bill of lading (BOL) files:
Log in to ONE Network.
Click Menus/Favs > Transportation > Search Shipments.
The Search Shipments screen displays.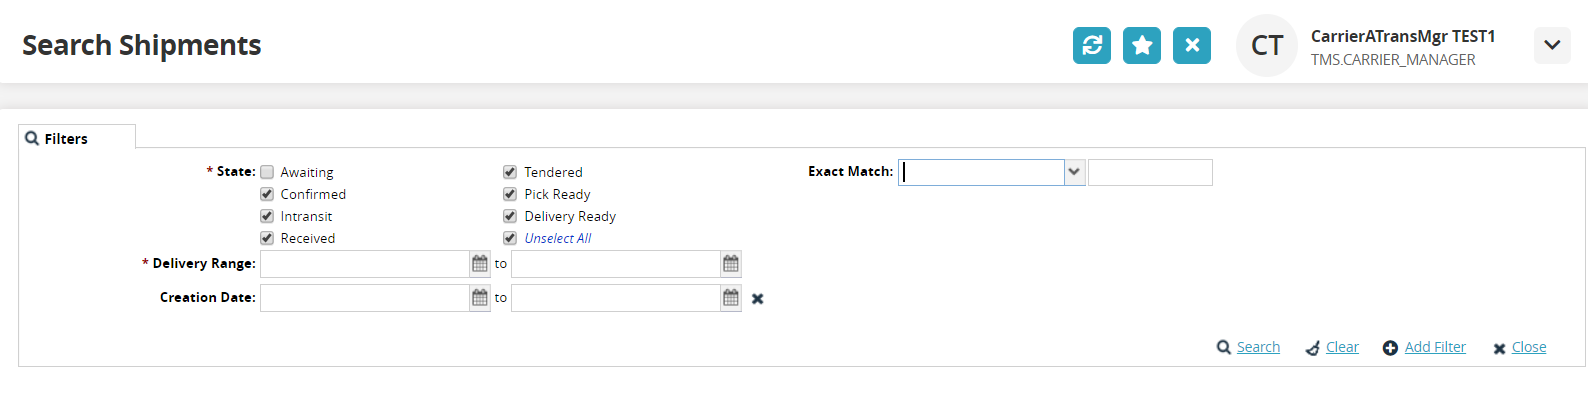
Fill out the following fields. Fields with an asterisk ( * ) are required.
Field
Description
* State
Click the checkbox for the state of the shipment.
* Delivery Range
Use the clock and calendar tools to select the beginning and end dates for the delivery range.
Shipment
Enter the shipment number.
Equipment
Select the value parameter from the drop-down list for the first field. Select the equipment type for the second field.
Creation Date
Use the calendar tool to select a date range for the creation date of the shipment.
Exact Match
Select movement or shipment from the drop-down list for the first field. Enter the exact movement/shipment number in the second field.
Click the Search link.
The data results screen displays. (A shipment detail screen displays below. Shipments and movements can be searched.)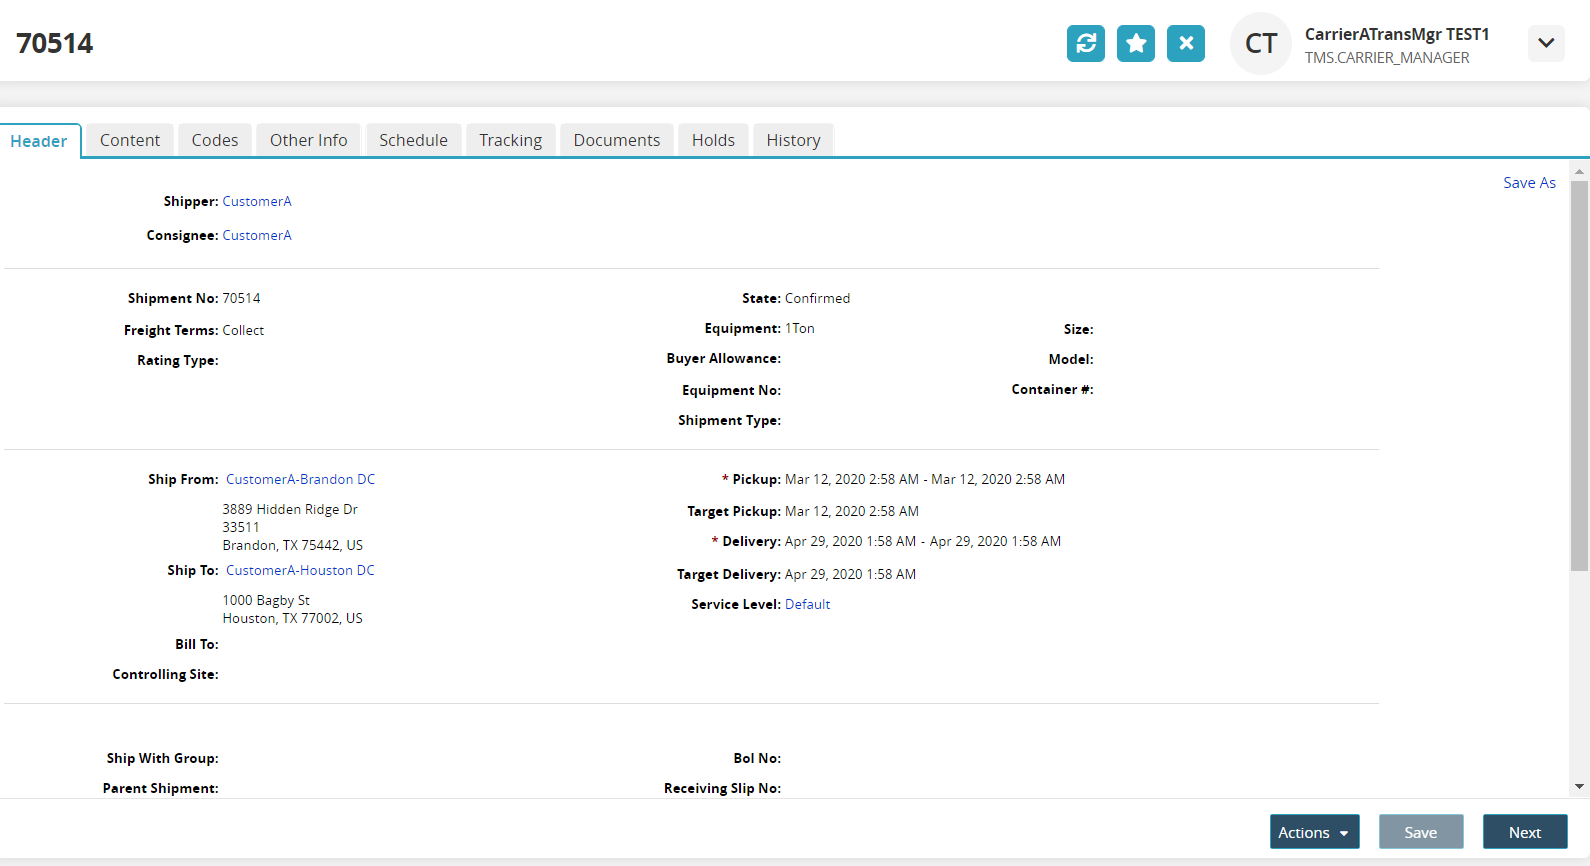
Click the Documents tab.
The Documents tab displays.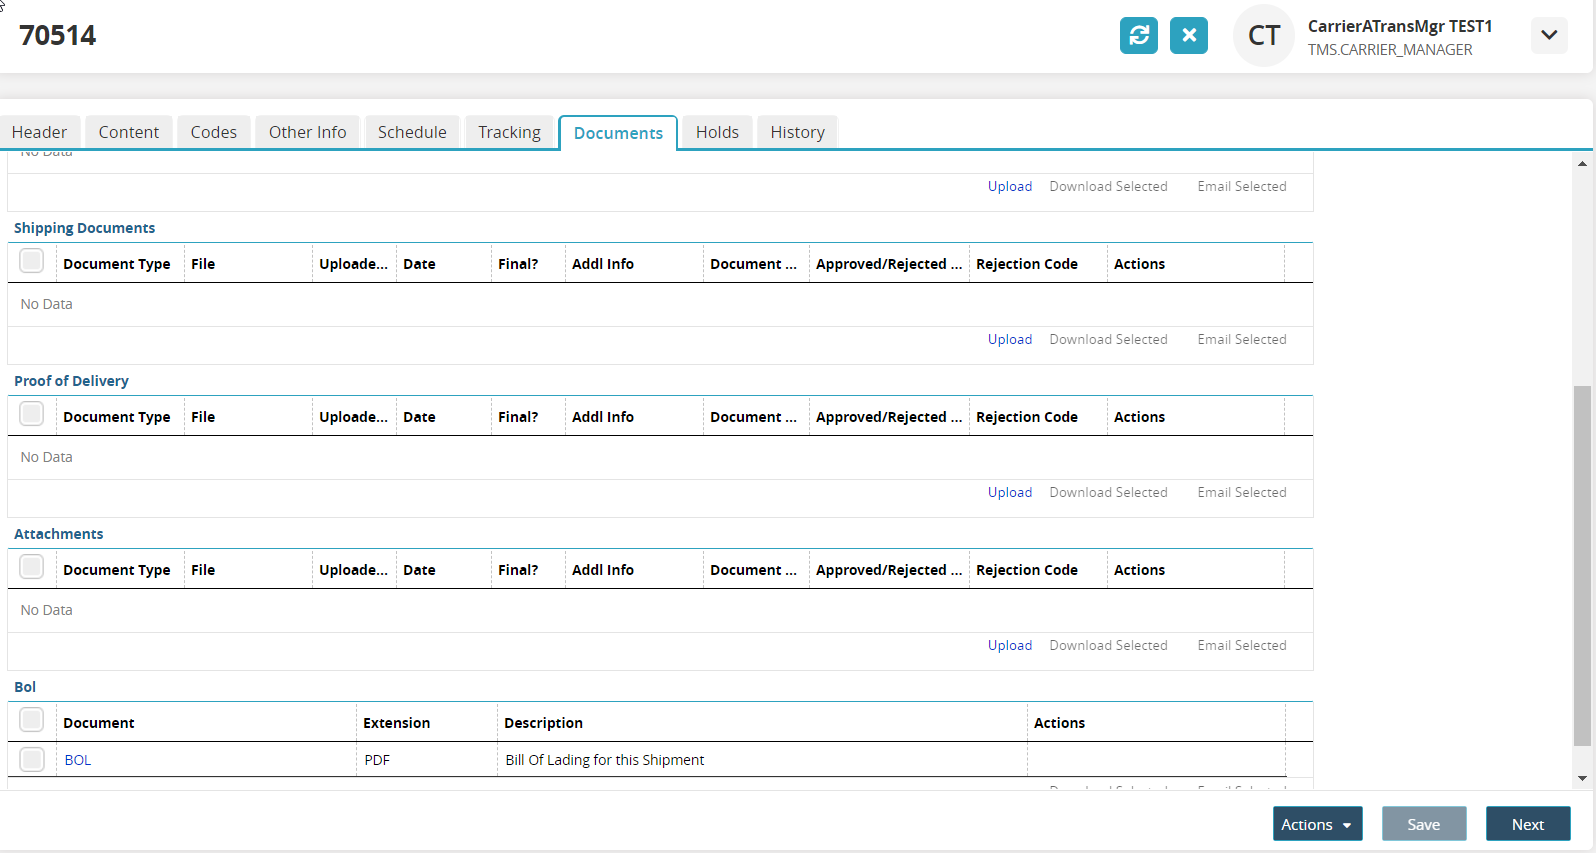
Scroll to the Proof of Delivery section and click the Upload link.
The Upload popup window displays.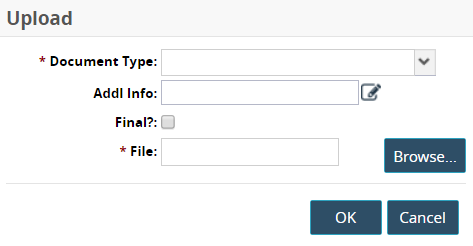
Use the dropdown menu to select the value for the * Document Type field.
Click the edit icon to complete the Addl Info field.
Check the box for the Final? field.
Click the Browse button to select a file from the user's computer.
Click the OK button.
The document type and file name display in the Proof of Delivery section.
The same steps are performed to upload a BOL file.