Generating Order Forecasts
The Buyer Supply Chain Planner/Admin roles can generate order forecasts. To generate an order forecast, users can run either the Replenishment Engine or the Advanced Replenishment Engine. The Replenishment Engine should be used when users will manually run the engine multiple times per day, or for instances where the forecast is required for only a current order. The Advanced Replenishment engine requires more detailed information to operate, and is used when users need to create order forecasts for a series of future orders. This section explains how to run the Advanced Replenishment Engine. The procedure for the Replenishment Engine is the same; however, there are fewer fields where users can enter information. Note – Follow these same steps for running either the Replenishment Engine or the Advanced Replenishment Engine. Prerequisites: Before running the replenishment engine, ensure that the following prerequisites are satisfied:
Set up Site Lanes
Set up Buffer Lanes
Set up Order Policy
Complete the following steps to generate an order forecast:
Log in to the ONE system.
Click Menus/Favs > Replenishment > Replenishment Engines > Run Adv Replenishment Engine.
The Run Adv Replenishment Engine screen displays.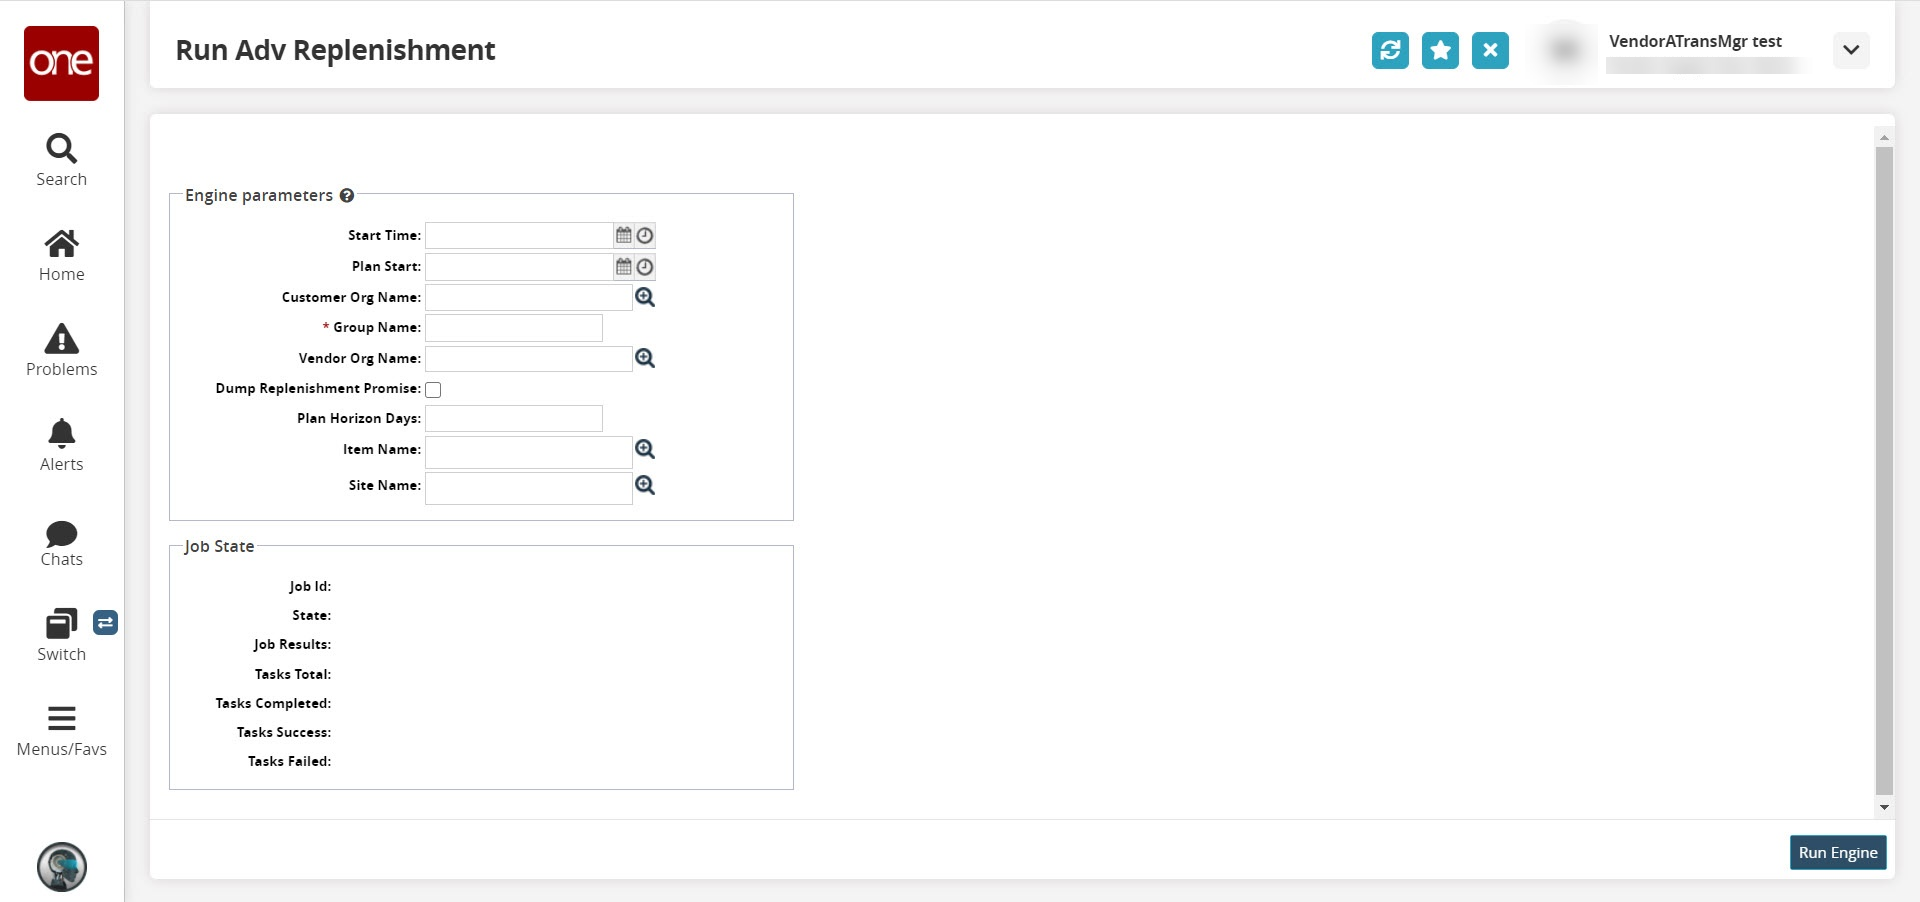
In Item Enterprise Name, Vendor Org Name, Item Name, and Site Name, select an option using either the auto-complete entry feature or the item picker as described in Using Auto-complete Entry and Pickers in the Getting Started user guide. Note – If the Vendor Org Name, Item Name or Site Name fields are left blank, the system runs the engine for all Vendors, Items, or Sites respectively.
Pick a Start Time using the calendar and clock icons located next to the Start Time field. Or you can type in a date and time if desired. Note – If you leave the field blank, the calculation is completed using today's date.
Pick a Plan Start time using the calendar and clock icons located next to the Plan Start field. Or you can type in a date and time if desired. Note – If you leave the field blank, the calculation is completed using today's date.
Enter a name in the Group Name field.
If you wish to dump the replenishment promise, select Dump Replenishment Promise. Dumping the replenishment promise saves the calculations the Replenishment Engine used in calculating the order forecast. It is used primarily for debugging purposes. Note – Leaving this field unchecked means the data is not stored.
Enter the number of Plan Horizon Days in the Plan Horizon Days field. Note – If left blank, the engine defaults to the planning horizon as defined in the master data.
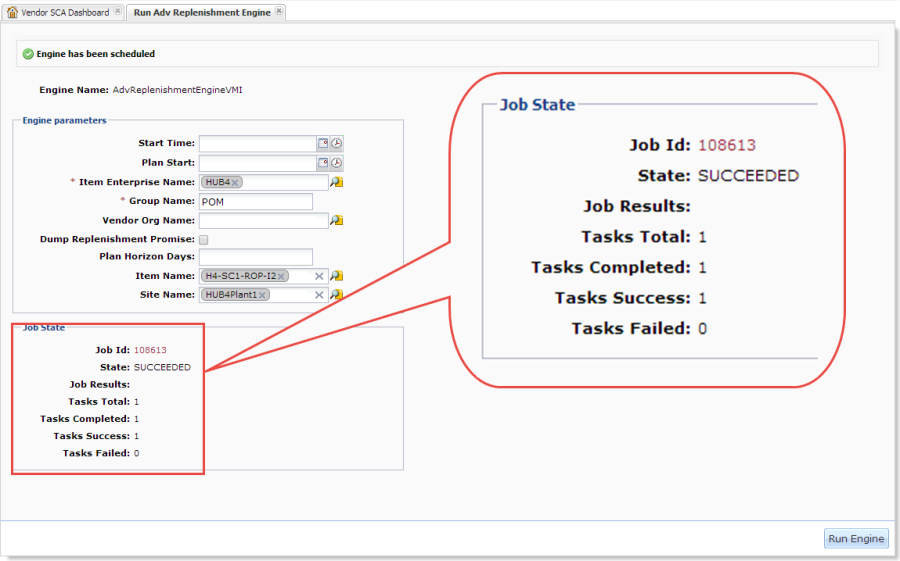
Click Run Engine.
The engine indicates that it is preparing to run.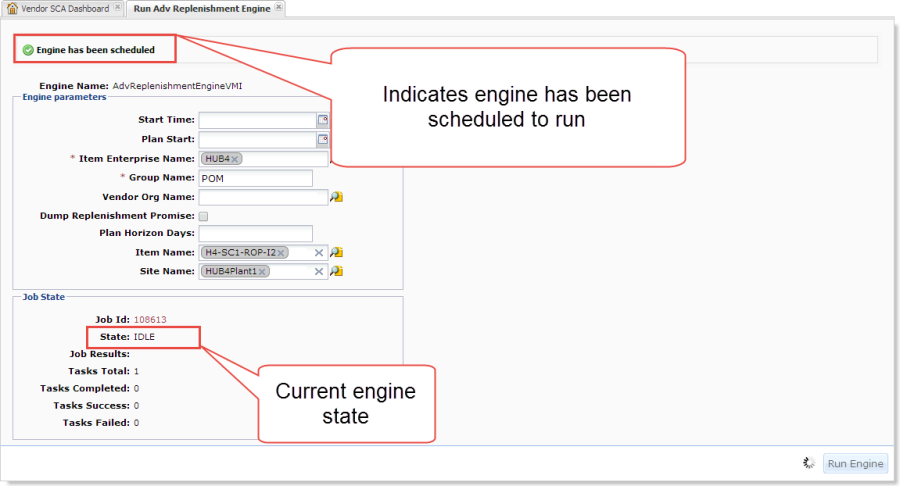
When the engine is finished running, the state changes to SUCCEEDED.