Item Forecast Book
Users can view existing logic for limiting the growth of the Exponential Smoothing family of forecasting algorithms to provide visibility when forecast adjustment happens. Changes to trend determinations take into account all forecast points, not just the first and last.
Complete the following steps to view the Item Forecast Book screen:
L og in to the ONE system.
Click Menus/Favs > Demand Planning > Item Forecast Book.
In the NEO UI, users can click on the Menus/Favs icon on the left sidebar and type in the name of the screen in the menu search bar. For more information, see "Using the Menu Search Bar."
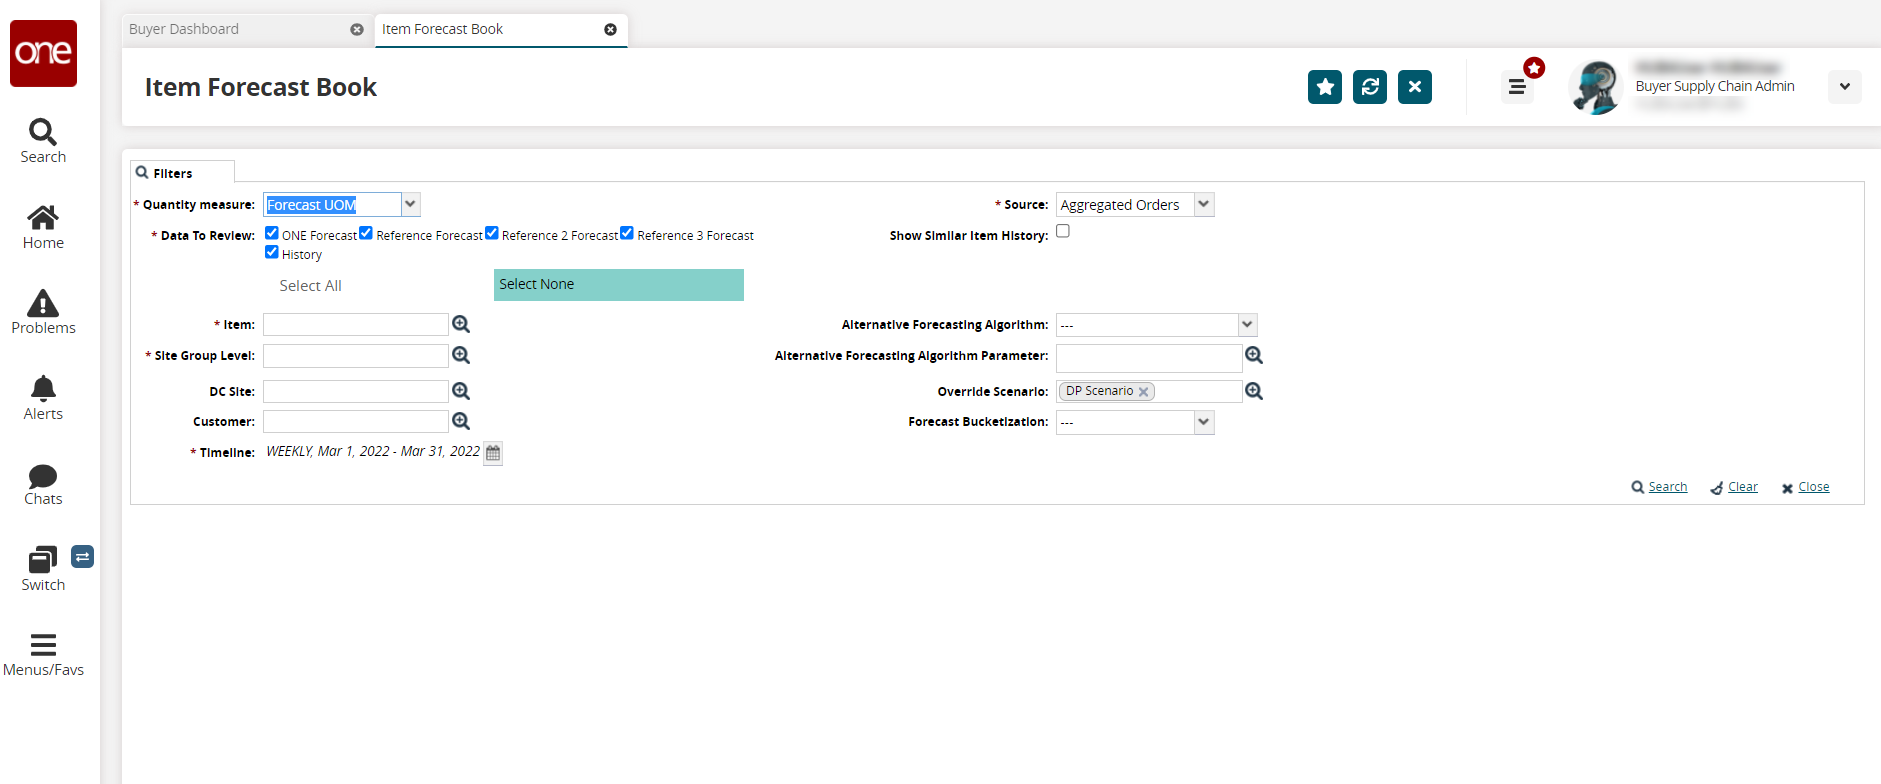
The Item Forecast Book screen filters display.
Fill out the following fields. Fields with an asterisk ( * ) are required.
Field
Description
* Quantity Measure
Select the quantity to measure from the dropdown menu.
* Data To Review
Check the boxes to select the data to review in the forecast.
* Item
Use the picker tool to select the item.
* Site Group Level
Use the picker tool to select the site group level.
DC Site
Use the picker tool to select a distribution center site.
Customer
Use the picker tool to select a customer.
* Timeline
Click the calendar tool.
A popup displays.Select the * Bucketization parameter from the dropdown menu.
Use the calendar tool to enter beginning and end dates for the * Date Range.
* Source
Select the source from the dropdown menu.
Show Similar Item History
Check the box if you want to show similar items' history.
Alternative Forecasting Algorithm
Select an alternative forecasting algorithm from the dropdown menu.
Alternative Forecasting Algorithm Parameter
Use the picker to select a parameter for the alternative forecasting algorithm.
Override Scenario
Use the picker tool to select an override scenario.
Forecast Bucketization
Select the bucketization from the dropdown menu.
Click the Search link.
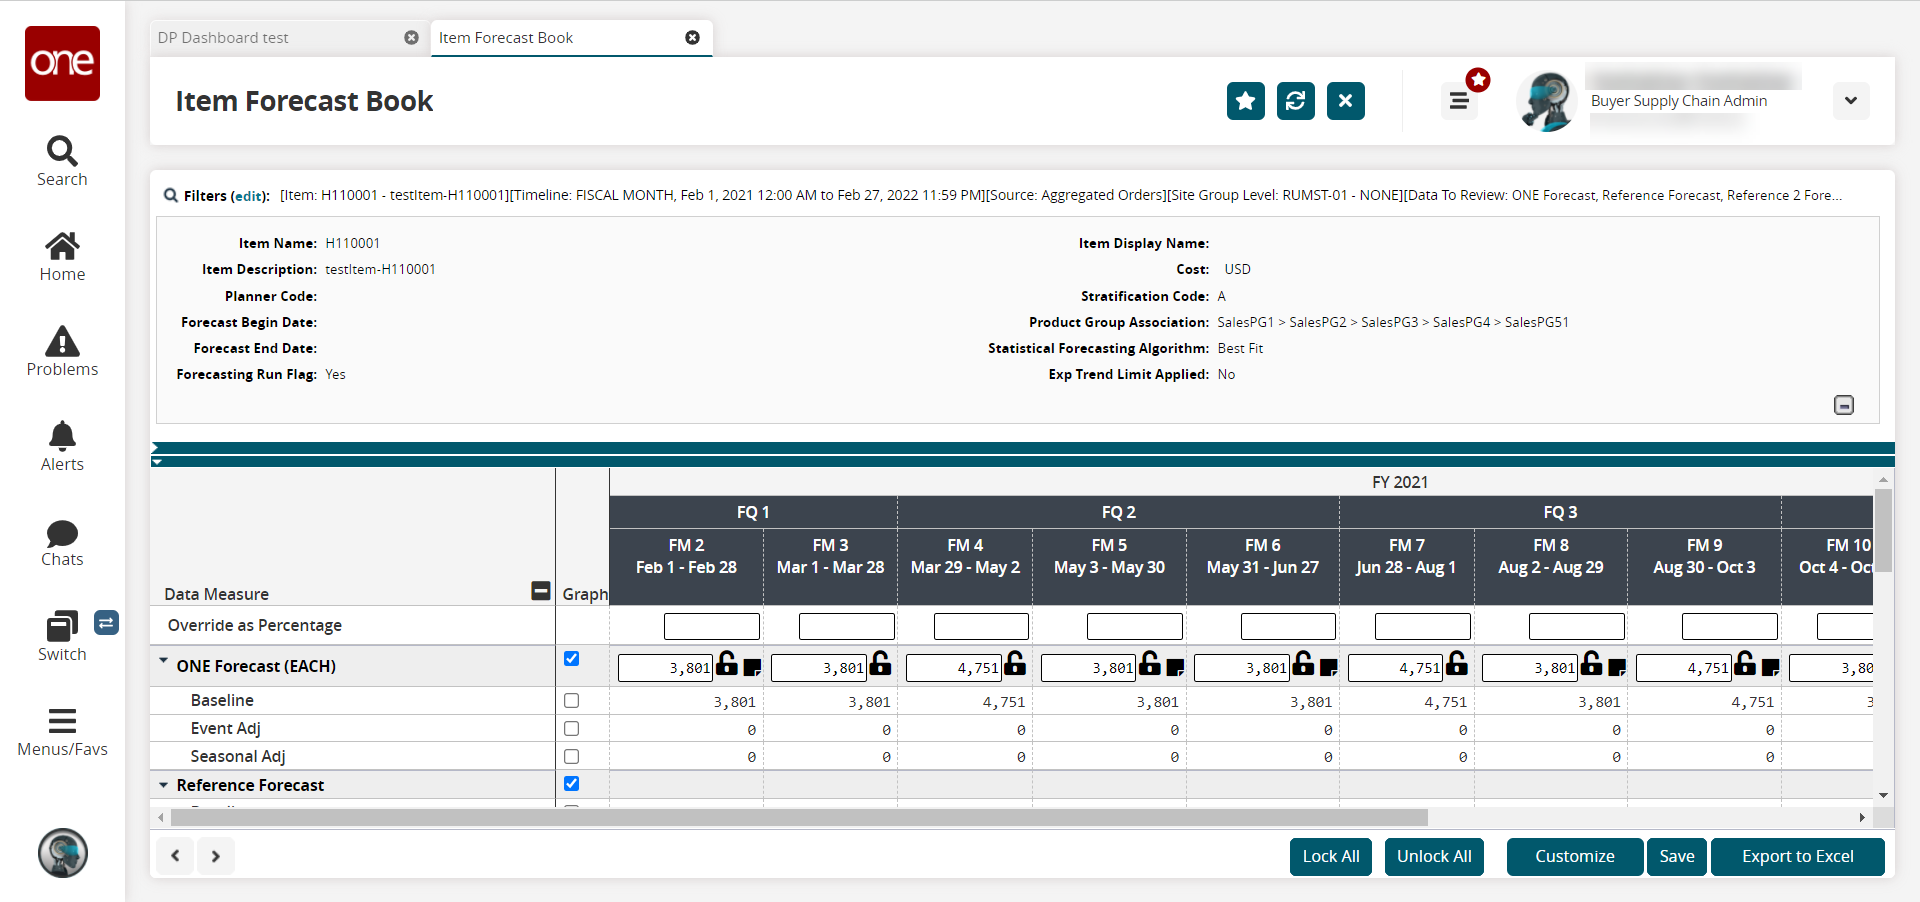
The data displays in a timeline view.
The Item Forecast Book report calculates adjustments in the Event Adj row when using Currency as the UOM.
Click the Lock All button to prevent any changes to lock all forecasts in this date range.
The lock icons close in the forecast fields.Click the Unlock All button to unlock all forecasts within the date range, allowing changes.
The lock icons open in the forecast fields.Click the Customize button to select the enterprise, organization, or user level.
Click the Save button to save this forecasting.
Click the Export to Excel button to save a file to your computer.