Working with Service Level Classification
Users can manage inventory planning parameters by item classification.
Complete the following steps to create service level classification:
Log in to the ONE system.
Click Menus/Favs > Inventory Planning > Configuration > Service Level Classification.
The Service Level Classification screen displays.Click the New Service Level Classification button.
The New Services Level Classification screen opens.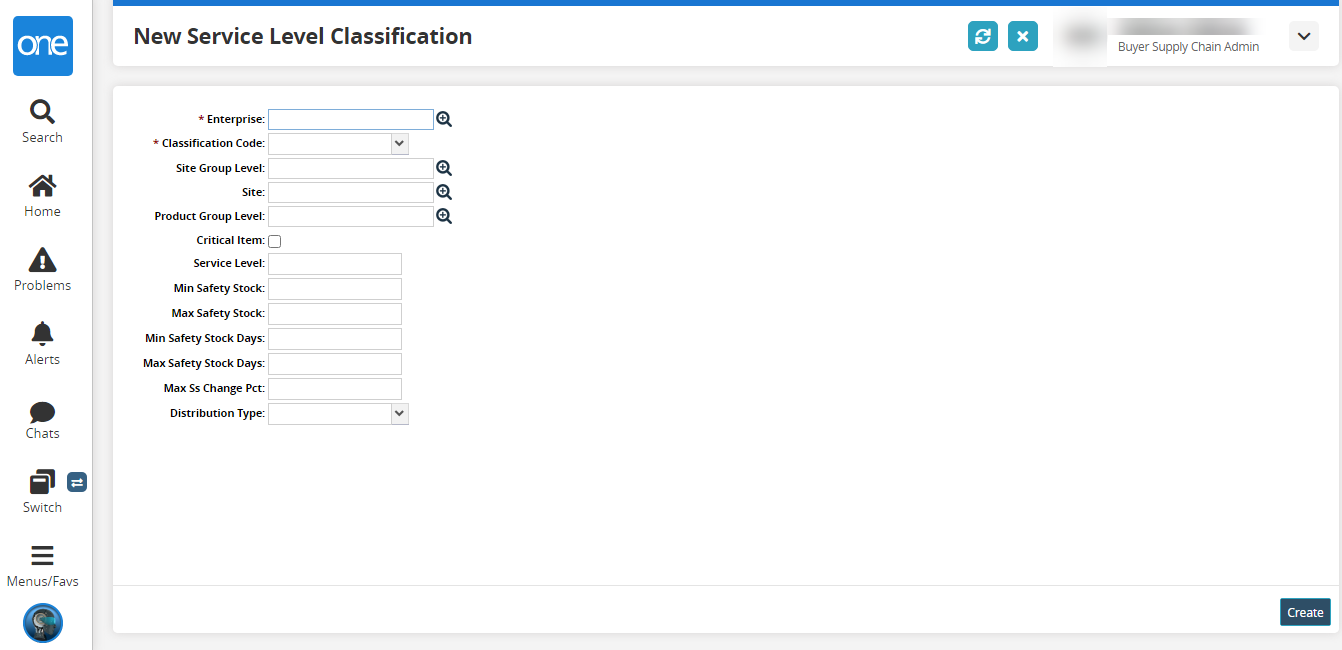
Fill out the following fields. Fields with an asterisk ( * ) are required.
Field
Description
*Enterprise
Click the picker tool icon to select the enterprise.
*Classification Code
Select the classification code from the dropdown list.
Site Group Level
Click the picker tool icon to select the site group level.
Site
Click the picker tool icon to select the site.
Product Group Level
Click the picker tool icon to select the product group level.
Critical Item
Select the checkbox to mark the item as critical.
Service Level
Enter the service level.
Min Safety Stock
Enter the minimum safety stock level.
Max Safety Stock
Enter the maximum safety stock level.
Min Safety Stock Days
Enter the minimum safety stock in days.
Max Safety Stock Days
Enter the maximum safety stock in days.
Max Ss Change Pct
Enter the maximum safety stock change percentage.
Distribution Type
Select the distribution type from the dropdown list.
Click the Create button.
The Service Level Classification is successfully created.