Item Life-cycle Tab
Users can add or update life-cycle details for items in the Item Master. The following instructions assume that users are already working with a new or existing item.
Complete the following steps to add or update life-cycle details:
Click the Life-cycle tab.
The Life-cycle tab displays.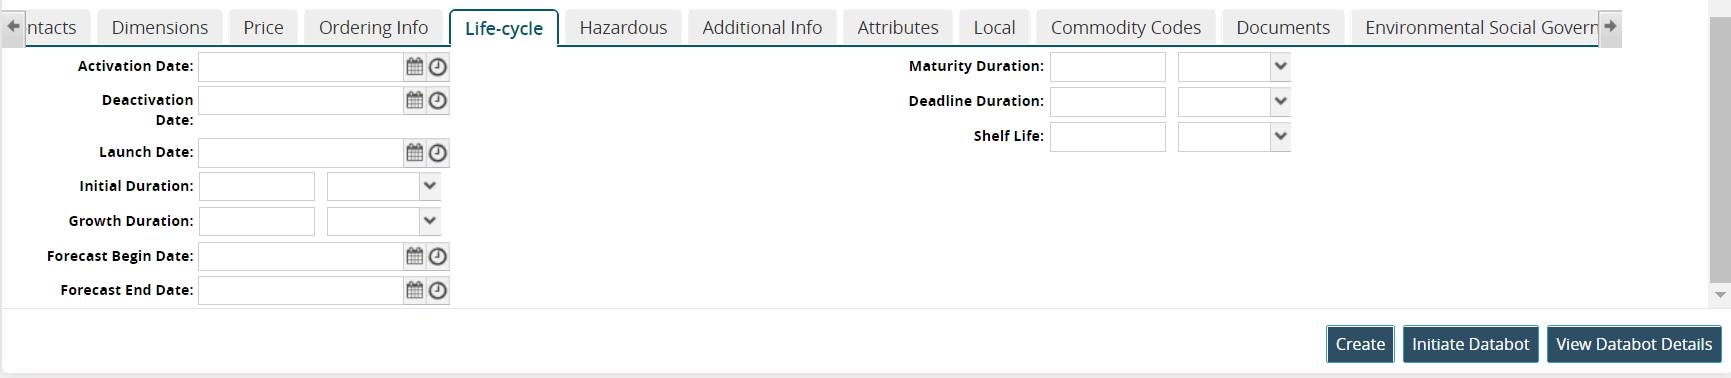
Enter values for fields described in the table below. Fields with an asterisk ( * ) are required.
Field
Description
Activation Date
Use the calendar and clock tools to select the activation date.
Deactivation Date
Use the calendar and clock tools to select the deactivation date.
Launch Date
Use the calendar and clock tools to select the launch date.
Initial Duration
Enter a numerical value, and select a time bucket from the dropdown list for the initial duration.
Growth Duration
Enter a numerical value, and select a time bucket from the dropdown list for the growth duration.
Forecast Begin Date
Use the calendar and clock tools to select the beginning date for forecasts.
Forecast End Date
Use the calendar and clock tools to select the end launch date for forecasts.
Maturation Duration
Enter a numerical value, and select a time bucket from the dropdown list for the maturation duration.
Deadline Duration
Enter a numerical value, and select a time bucket from the dropdown list for the deadline duration.
Shelf Life
Enter a numerical value, and select a time bucket from the dropdown list for the shelf life.
Please see individual sections in the Online Help for the other tabs.